
To help you quickly locate what you need in Exclaimer, this guide contains details on where to find some of Exclaimer's tools and features. Select an option for instructions on how to access it.
Menu quick reference
The table below contains a breakdown of which features each of Exclaimer's menus contains. For navigation instructions by feature, see the following sections of this article.
| Menu | ||||
|
Features
|
Menu sidebar Found at the side of each page
|
Help menu Found under the question mark icon in the header bar
|
Settings menu Found under the cogwheel icon in the header bar
|
Account menu Found under the initials icon in the header bar
|
| Home page | Signature Tester | Brand Kits | Account settings | |
| Signatures | Diagnostics | Integrations |
NOTE: Users on trial subscriptions do not have invoices, as no subscription has been purchased. Instead, trial users see a Purchase link. |
|
| Campaigns | Message capture | Sender Management | User Management | |
| Signature Tester | Mail Flow | User Activity Log | ||
| Analytics | Outlook signatures | |||
| Disclaimers | Exchange On-Premises | |||
| Meeting Branding | ||||


Tools
To access the Signatures Tester:
- From the menu sidebar, select Signatures Tester.
OR
From the header bar, select the question mark icon to open the Help menu, then select Signatures Tester.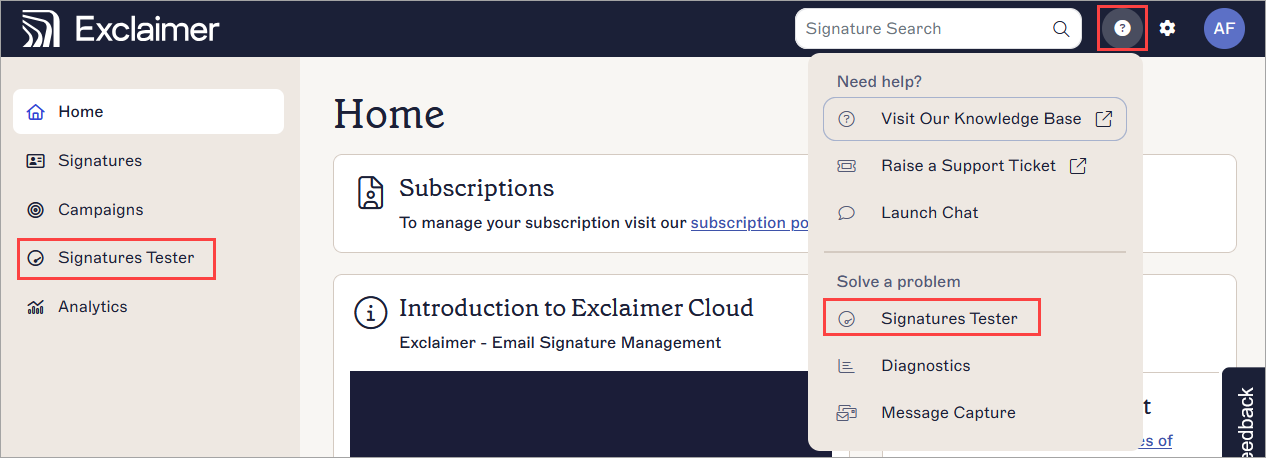 The Signatures Tester is found in the menu sidebar and the Help menu.
To access Diagnostic Logs:
- From the header bar, select the question mark icon to open the Help menu.
- Select Diagnostics.

Diagnostics is found in the Help menu.
To access Message Capture:
- From the header bar, select the question mark icon to open the Help menu.
- Select Message Capture.

Message Capture is found in the Help menu.
Settings
To access Brand Kits:
- From the header bar, select the cogwheel icon to open the Settings menu.
- Select Brand Kits.
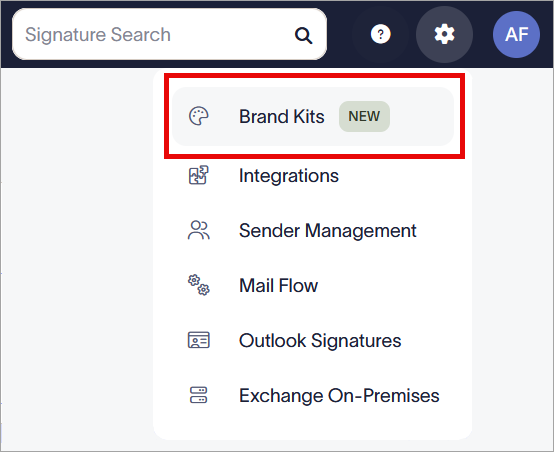
The Settings menu is found under the cogwheel icon.
To access Integrations for LinkedIn, Facebook, Salesforce, or Hubspot:
- From the header bar, select the cogwheel icon to open the Settings menu.
- Select Integrations.
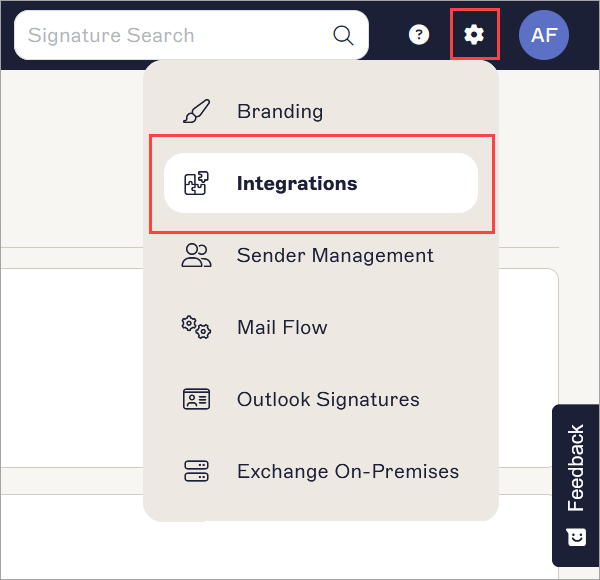
The Settings menu is found under the cogwheel icon.
Sender Management contains the following options:
- Authorize Azure AD or Enable Google access
- Synchronize data manually
- Synchronize disabled accounts
- User Details Upload
- User Details Editor links
- Enable Additional Attributes
- Enable or use User Photos
To access Sender Management settings:
- From the header bar, select the cogwheel icon to open the Settings menu.
- Select Sender Management.
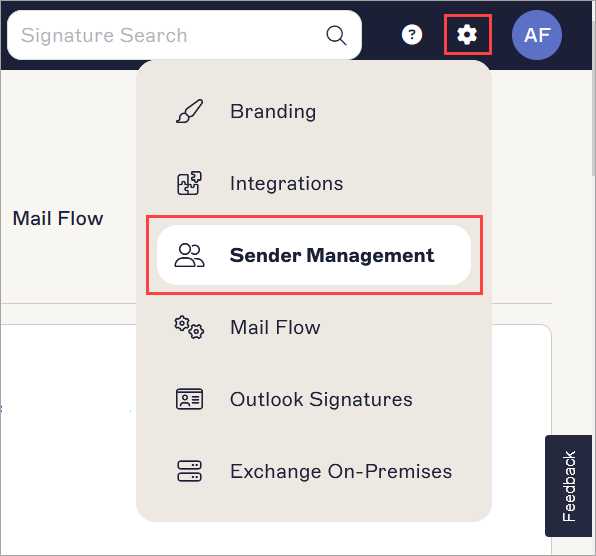
The Settings menu is found under the cogwheel icon.
Mail Flow contains the following options:
- Connect to Microsoft 365 or Google
- Mail Routing Domain
- Sent Items Update
- Send on Behalf
- Alias Addresses
- Apply Recipient Settings Client-Side
To access Mail Flow settings:
- From the header bar, select the cogwheel icon to open the Settings menu.
- Select Mail Flow.
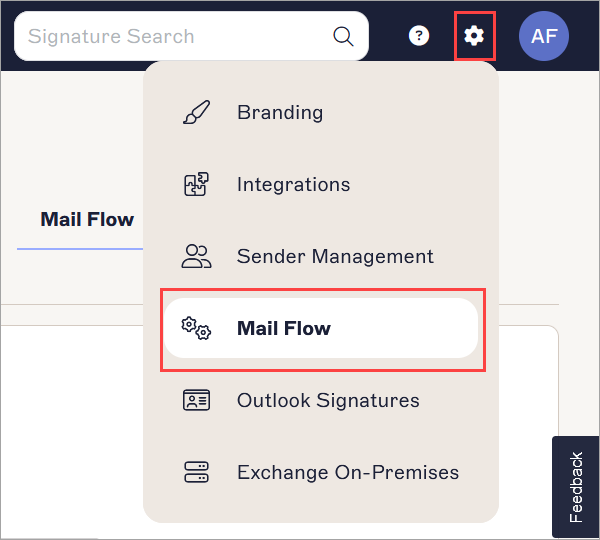
The Settings menu is found under the cogwheel icon.
Outlook/Gmail Signatures contains the following options:
- Enable signatures to be download for Outlook
- Outlook settings options
- Client-Side Downloads
- Gmail Synchronization
To access Outlook or Google settings:
- From the header bar, select the cogwheel icon to open the Settings menu.
- For Microsoft 365 subscriptions, select Outlook Signatures. For Google Workspace subscriptions, select Gmail Signatures.
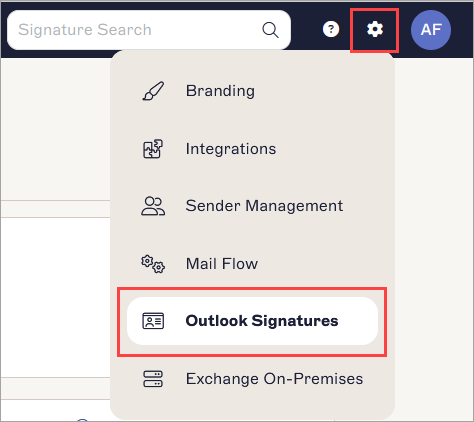
The Settings menu is found under the cogwheel icon.
To access On-Premise Settings:
- From the header bar, select the cogwheel icon to open the Settings menu.
- Select Exchange On-Premises.
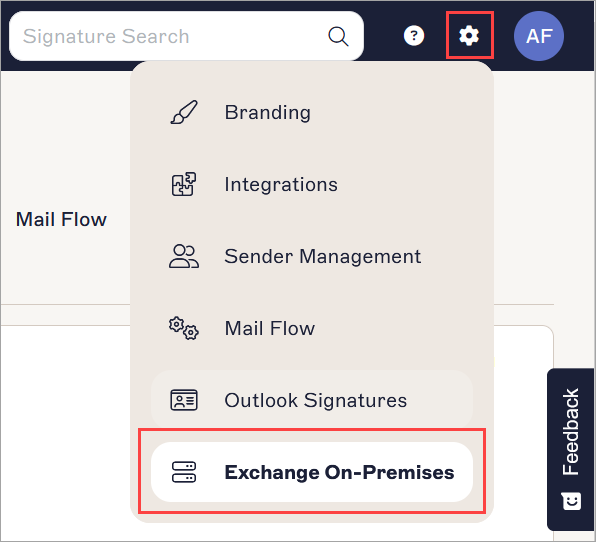
The Settings menu is found under the cogwheel icon.
Account features
Account contains the following options:
- Overview tab - view the subscription ID, add or remove a user, view subscription details, or cancel a subscription
- Buy Now tab - purchase an Exclaimer subscription
- Billing tab - change your card or Direct Debit details
- Account tab - change your name, email address, or telephone number
To access the Account settings:
- From the header bar, select the initials icon to open the Account menu, then select Account. This opens the Account details tab in the Exclaimer portal.
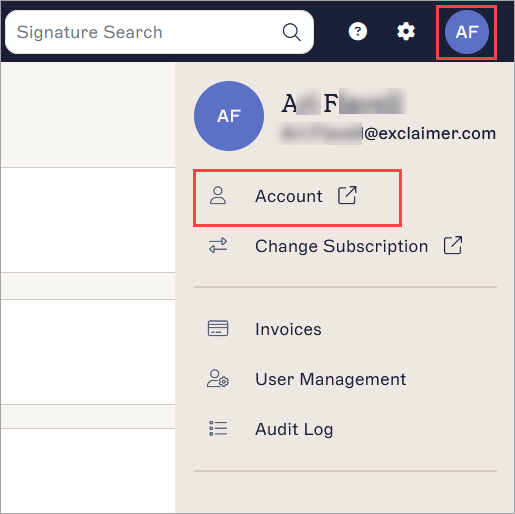
Select the initials to open the Account menu. The initials are of the user currently logged in.
- To locate your subscription ID, add or remove a user, view your subscription details, or cancel a subscription, select Overview.
- To access payment details for card or Direct Debit, select Billing.
- To purchase an Exclaimer subscription, select Buy Now.
To access invoices:
- From the header bar, open the Account menu by selecting the initials icon.
- Select Invoices.
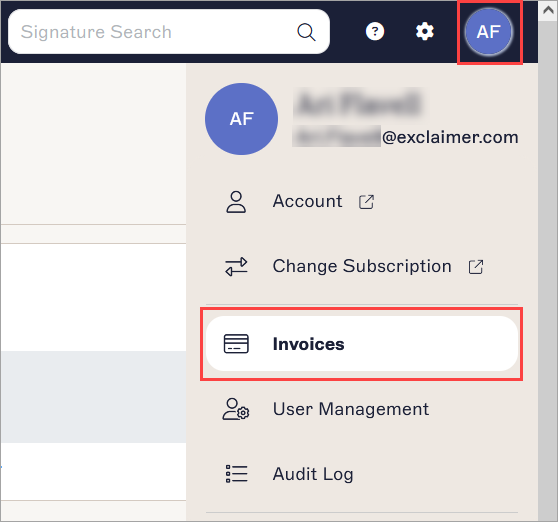
Select the initials to open the Account menu. The initials are of the user currently logged in.
To access settings for user roles:
- From the header bar, open the Account menu by selecting the initials icon.
- Select User Management.
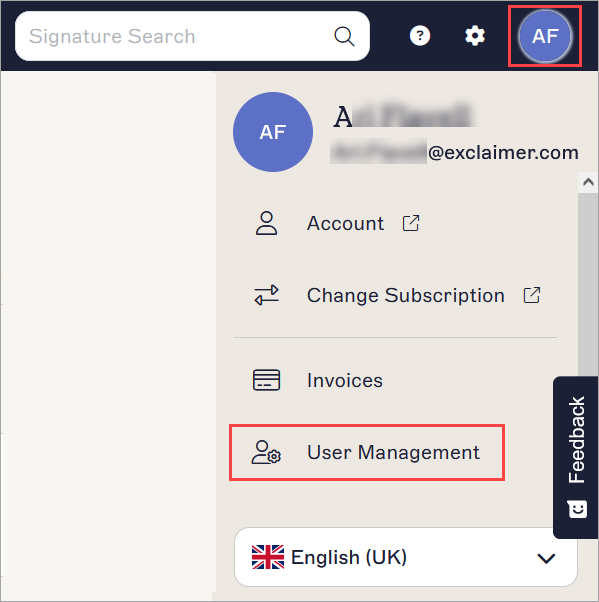
Select the initials to open the Account menu. The initials are of the user currently logged in.
To access the User Activity Log:
- From the header bar, open the Account menu by selecting the initials icon.
- Select User Activity Log.
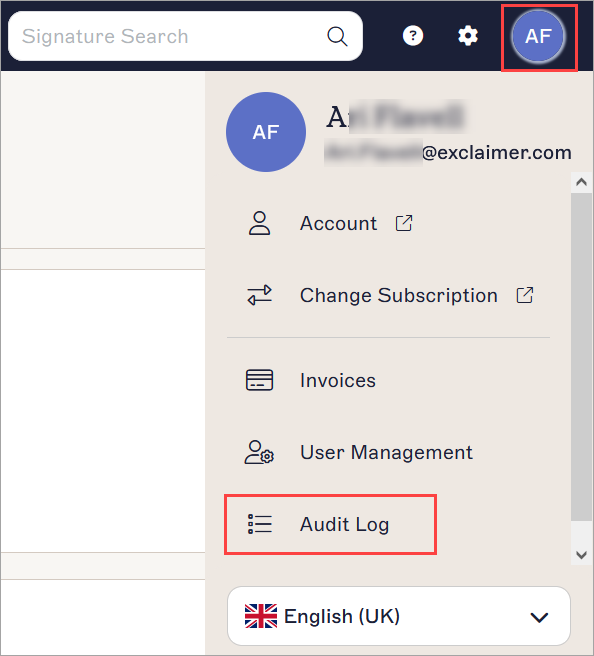
Select the initials to open the Account menu. The initials are of the user currently logged in.