
Description
This is also referred to as Server-Side signatures. This method ensures that signatures are applied to all email messages via Exclaimer's Cloud service, irrespective of which browser/device/email client is used.
Pre-requisites: You need to use your Google Workspace Super Admin credentials to configure the Exclaimer - Signatures for Google Workspace subscription. If you do not have these credentials, invite an admin to complete the process.
Tip! You can also use our interactive onboarding guide to follow these instructions.
How to access it
To access the Apply to email from all devices including mobiles option:
- From the menu sidebar, select Connect to Google.
- Complete the enabled and the synchronize process. This opens the Apply Signatures section. The relevant option is Apply to email from all devices including mobiles.
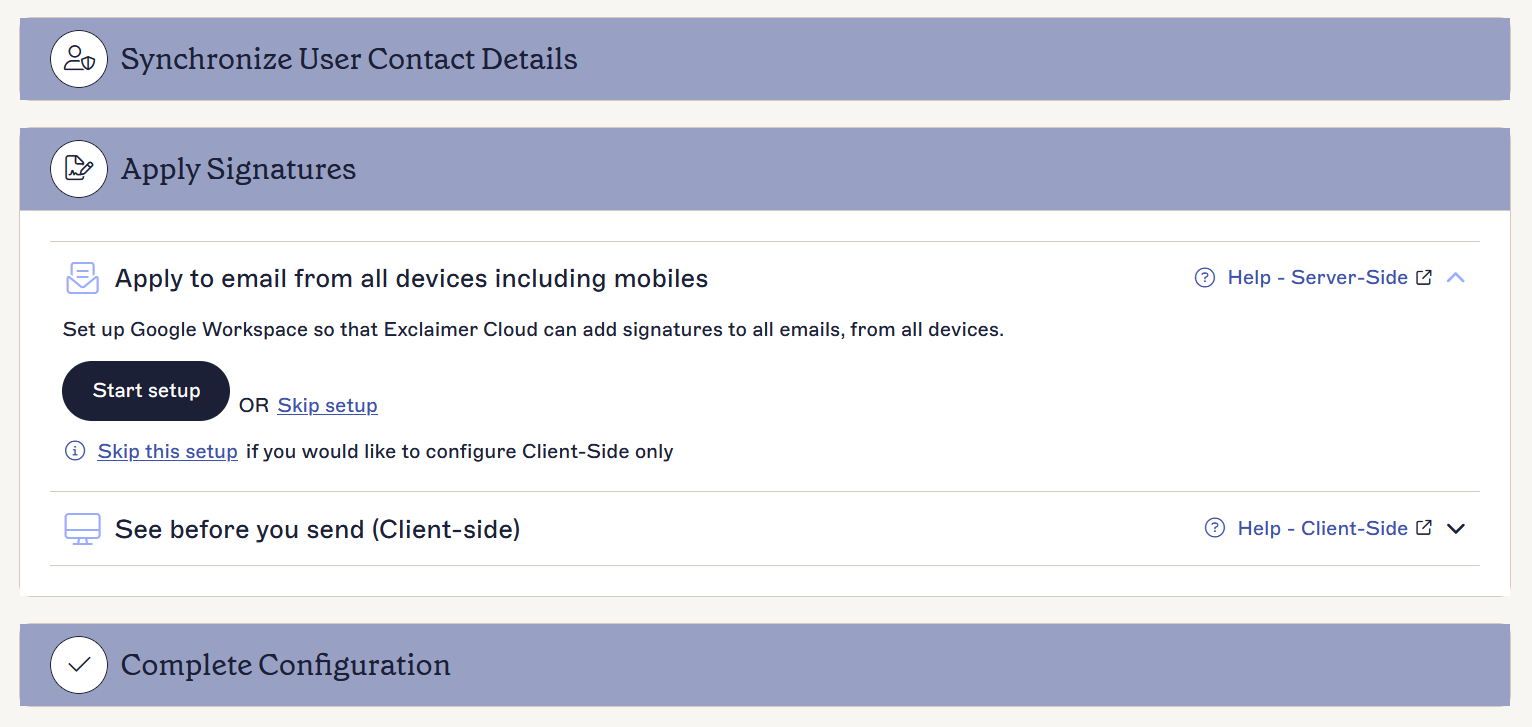
The Apply Signatures section.
Configuring for Server-Side signatures
NOTE: The dashboard will not be available if you have previously configured your subscription. To configure Server-Side signatures after the initial onboarding is complete, see Enable access to Google Workspace.
To configure for Server-Side signatures:
-
Select Start setup. If you don't want to configure Server-Side signatures, select Skip setup.
NOTE: If you change your mind and in future, you would like to configure Server-Side signatures, then you can do so within Manage signature rules, Enable tab (see the section Enabling Signatures for server-side). - Select the Configuration guide link to view the help page you can follow to configure Google Workspace to route emails to Exclaimer easily.
-
The Exclaimer Host name and Exclaimer Host IP addresses information displayed on your screen needs to be configured in the Google Workspace Admin Console. Copy and save the data for later.
NOTE:
- You can access the Google Workspace Admin console from here: https://admin.google.com
- Make sure you copy the Exclaimer Host name and Exclaimer Host IP addresses information as displayed on your screen - the screen displayed below (in this article) is just an example. -
Follow the steps outlined in the configuration guide to complete the required configuration in the Google Workspace Admin Console, then return to the wizard and continue with the steps outlined below.
- Select I have completed the setup in Google Workspace checkbox.
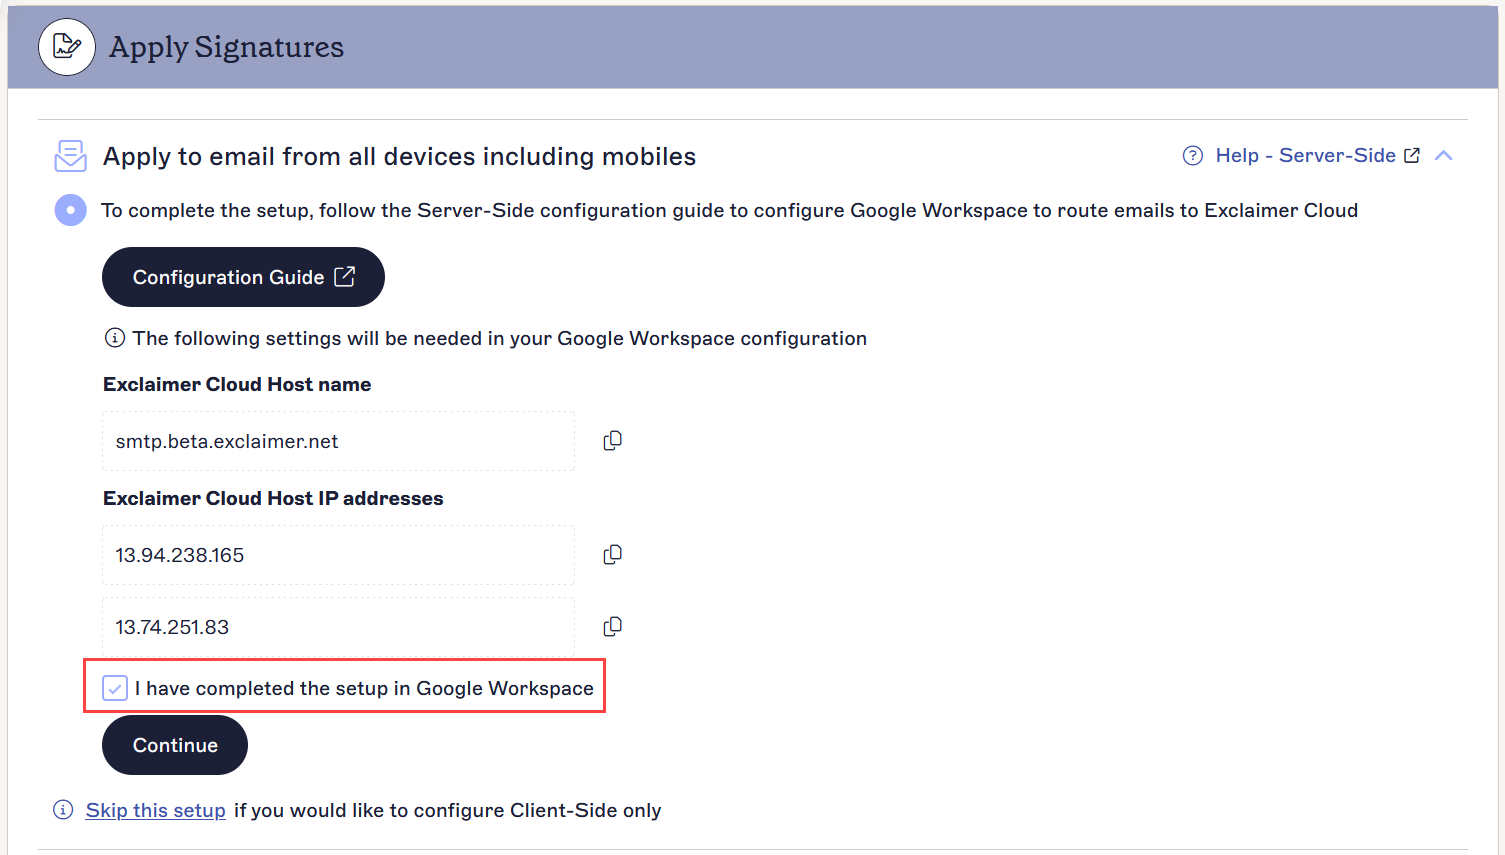
Select the checkbox.
- Select Continue to complete the Server-Side configuration.
- If you want to configure See before you send (Client-side), select Start setup, else select Skip setup to proceed to configure only Server-Side signatures.
- If no other configuration is required, select Complete setup to complete this configuration process.
- To complete the setup, it is mandatory to select at least one method on how you want to apply your email signatures (Server-Side or Client-Side).
- The setup process can take some time to complete; this is indicated by a spinner. Once it is successfully completed, a Syncing Complete message is displayed, highlighting that the user data syncing is now complete.
- To complete the setup, it is mandatory to select at least one method on how you want to apply your email signatures (Server-Side or Client-Side).
NOTE: You can add exceptions for Google Drive share notifications and Calendar reminders. To ensure that these messages are delivered correctly, it is necessary to stop them from getting routed to Exclaimer. For more information, see Google Drive share notifications and Calendar reminder emails not received.
Next Steps: You can start creating your first signature. Select Go to signatures.
Have you got a question? Please take a look at our Frequently Asked Questions page.
Have you got a question? Please take a look at our Frequently Asked Questions page.