
Description
When configuring your Exclaimer subscription for Google Workspace, you must authorize Exclaimer to read user data from your Google Workspace directory and synchronize that user data with Exclaimer. This data is used to populate the contact details in your signature and can be used to control which users get which signature.
Select an option below to view the related instructions:
If you install the Google App with unlicensed Super Admin credentials, the Exclaimer portal will fail to complete the verification process.
How to access it
To access the Enable Access to Google Workspace option during onboarding:
-
From the menu sidebar, select Connect.
NOTE: Connect is only available during the initial setup. Once you have successfully configured your Exclaimer - Signatures for Google Workspace subscription, this section will not be available. - Under Synchronize User Contact Details, locate the Install button.
The Connect to Google screen.
To access the Enable Access to Google Workspace option after onboarding:
- From the header bar, select the cogwheel icon to open the Settings menu, then select Sender Management.
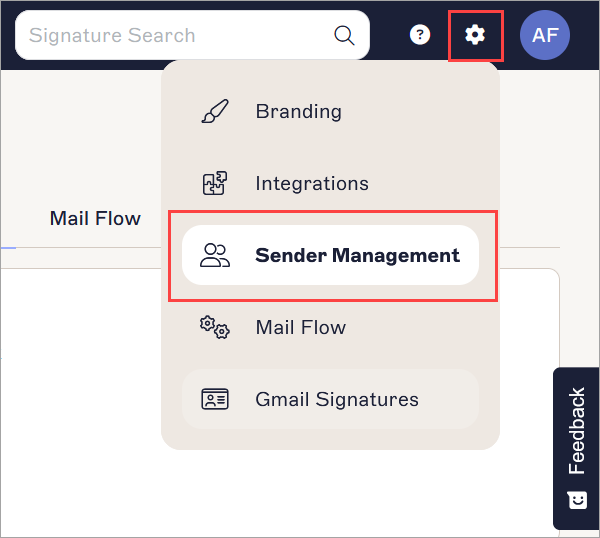
The Settings menu is found under the cogwheel icon.
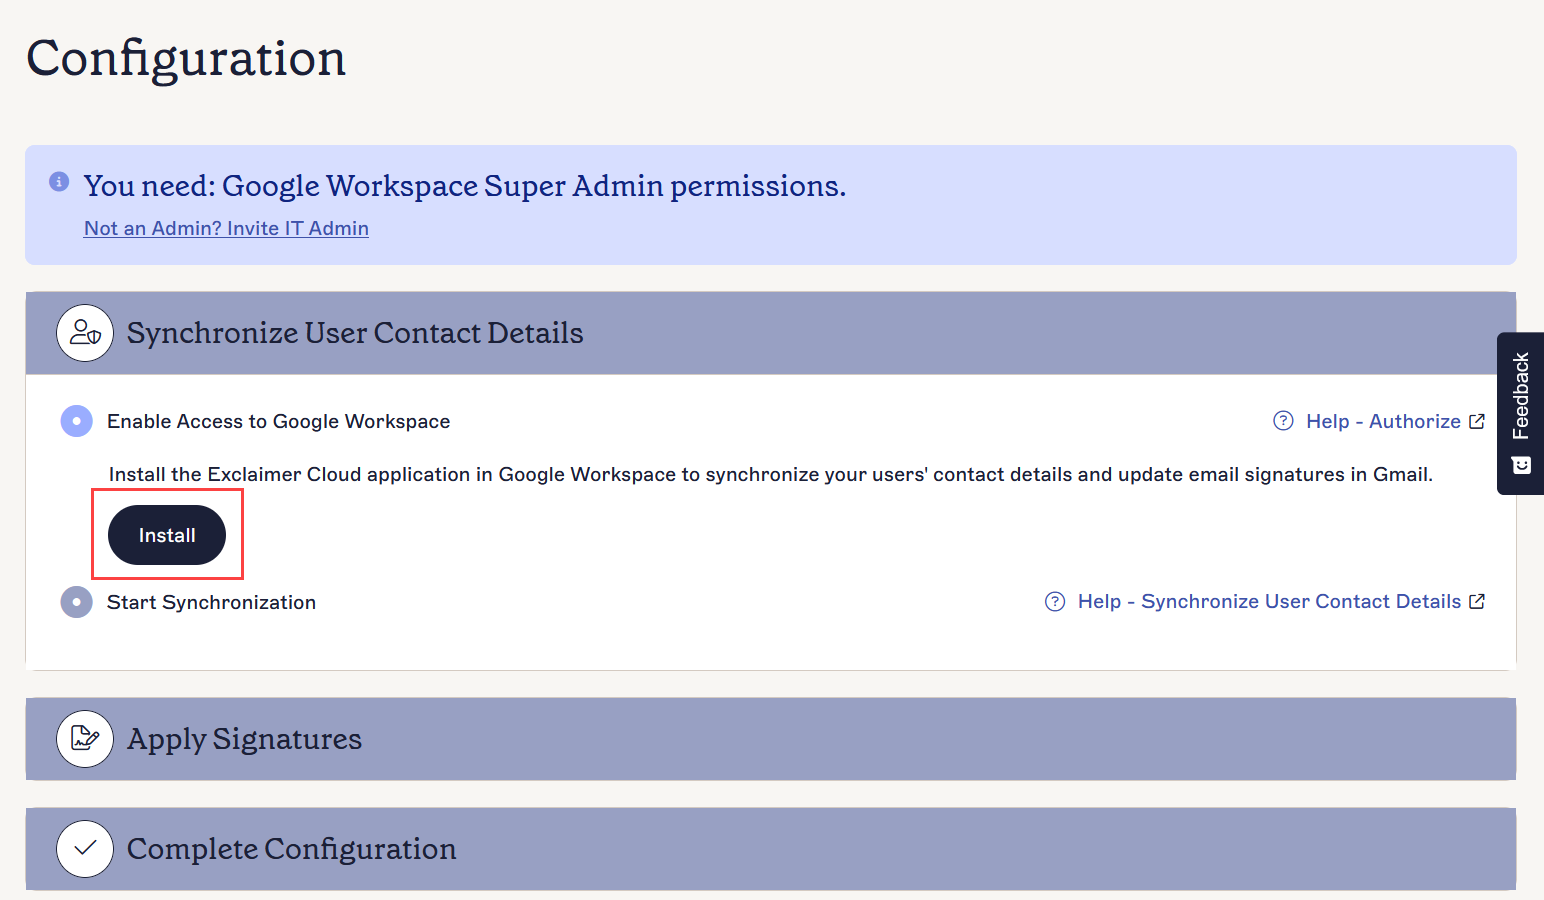
- Under Enable Access to Google Workspace, locate the Install button.

The Sender Management screen. The Install button is found in the Enable Access to Google Workspace section.
Enabling Access to Google Workspace
If you install the Google App with unlicensed Super Admin credentials, the Exclaimer portal will fail to complete the verification process.
To install Exclaimer in Google Workspace:
- Select Install.
Select the Install button.
- In the Sign in with Google window, choose an account that has Google Workspace Super Admin permissions.
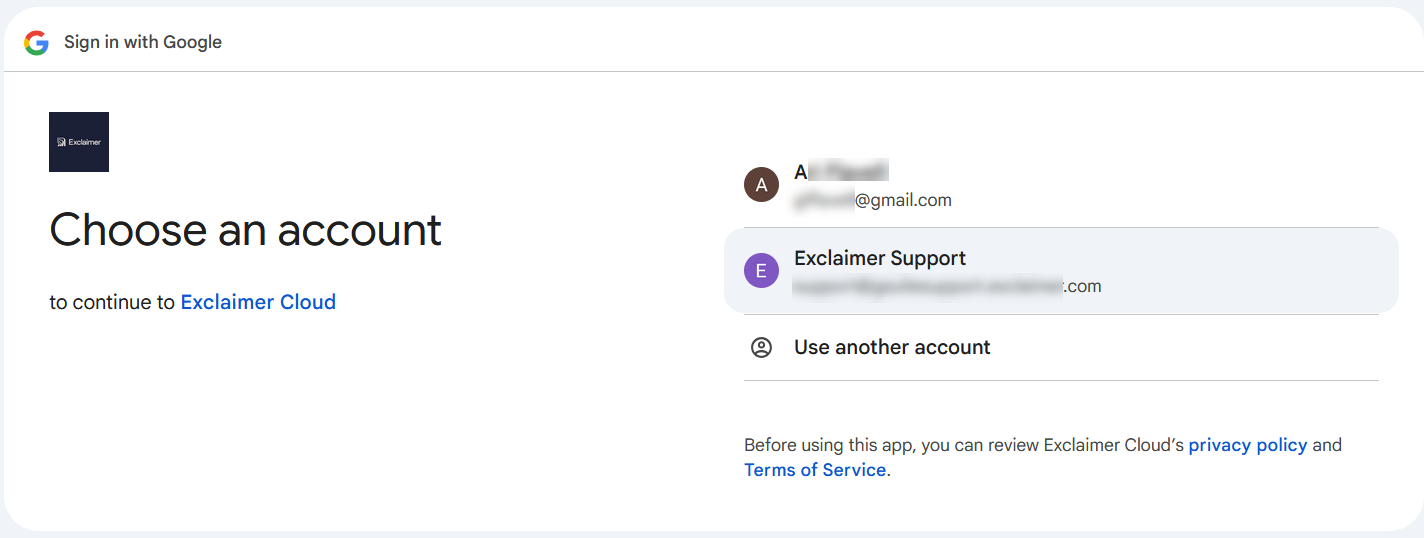
Choose your Super Admin account when signing in to Google.
- Select Continue to allow Google to connect with Exclaimer.

Select Continue.
- In the permissions prompt, select Allow to grant permission and verify the installation.
The wizard will check for any existing Exclaimer G Suite application installation.
Select Allow.
-
If no existing installation exists, the Google Workspace Marketplace screen for Exclaimer G Suite is displayed. Select Admin install.
WARNING! It is only possible to install Exclaimer using Admin Install. Do not select Individual install.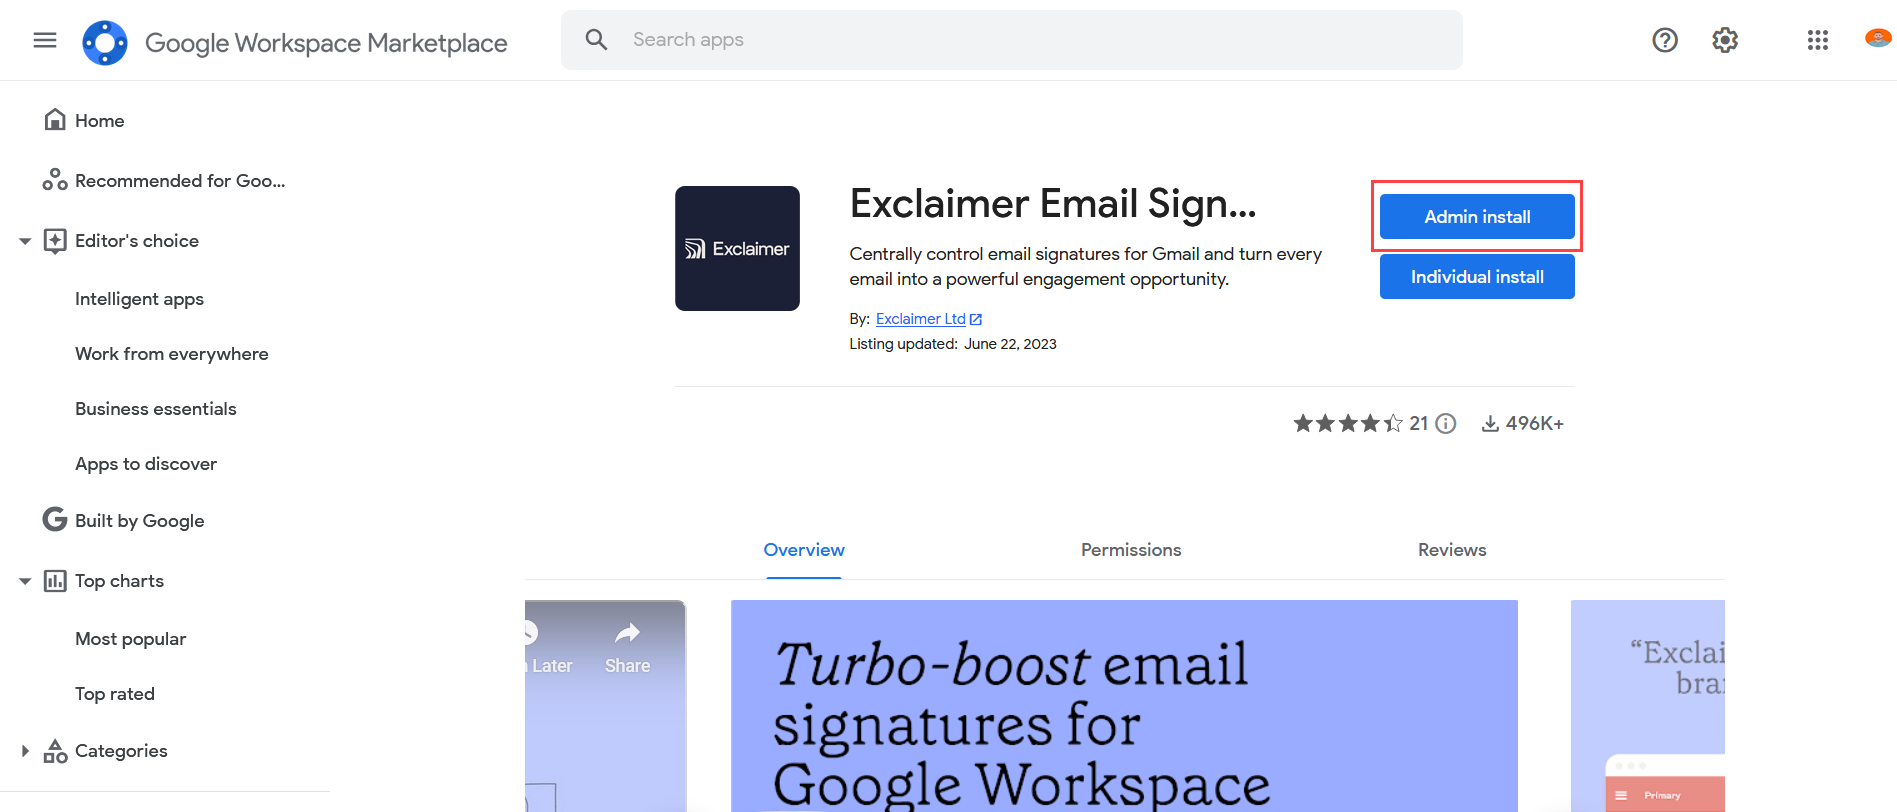
Select Admin install. Do NOT select Individual install.
-
In the Admin install window, select CONTINUE to accept the terms of service and proceed with installation.
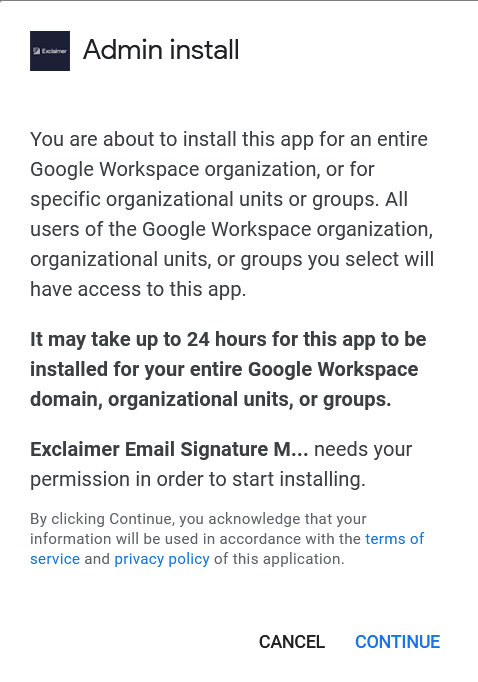
The Admin install window. Select CONTINUE.NOTE: It may take up to 24 hours for this app to be installed for your entire Google Workspace domain or organizational unit. - A list of access rights is displayed. This shows which aspects of your software are accessed by Exclaimer. Select the information icon (i) to view details of an access right.
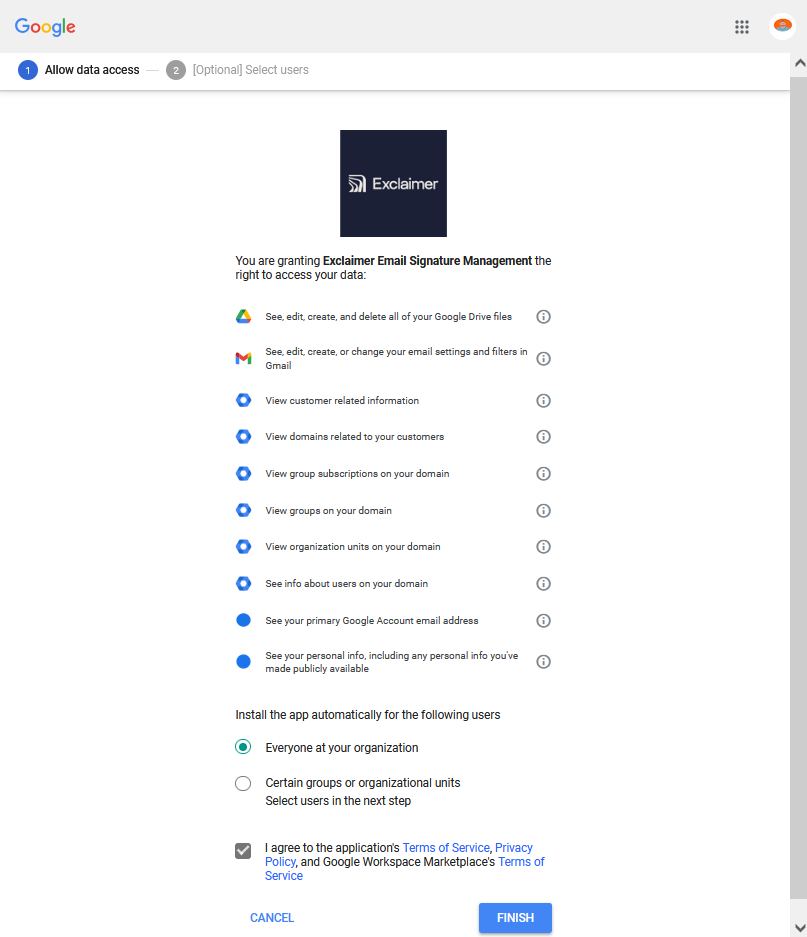
The list of access rights.
-
Under Install the app automatically for the following users, select Everyone at your organization.
WARNING! The Certain groups or organizational units option cannot be used for this installation. Do not select this option. - Select the checkbox to consent to the terms of service and privacy policy.
- Select FINISH. Your installation is now complete.
-
Select DONE to close the Success window. This returns you to the Synchronize User Contact Details section. The Application Successfully Installed message is displayed and synchronization is enabled.
NOTE: If you install the Google App with unlicensed Super Admin credentials, the Exclaimer portal will fail to complete the verification process.
How to access it
To access the Start sync option during the initial setup:
-
From the menu sidebar, select Connect to Google.
NOTE: Connect to Google is only available during the initial setup. Once you have successfully configured your Exclaimer - Signatures for Google Workspace subscription, this section will not be available. - Complete the Enable access process. This opens the Synchronize User Contact Details section. Locate the Start sync button.
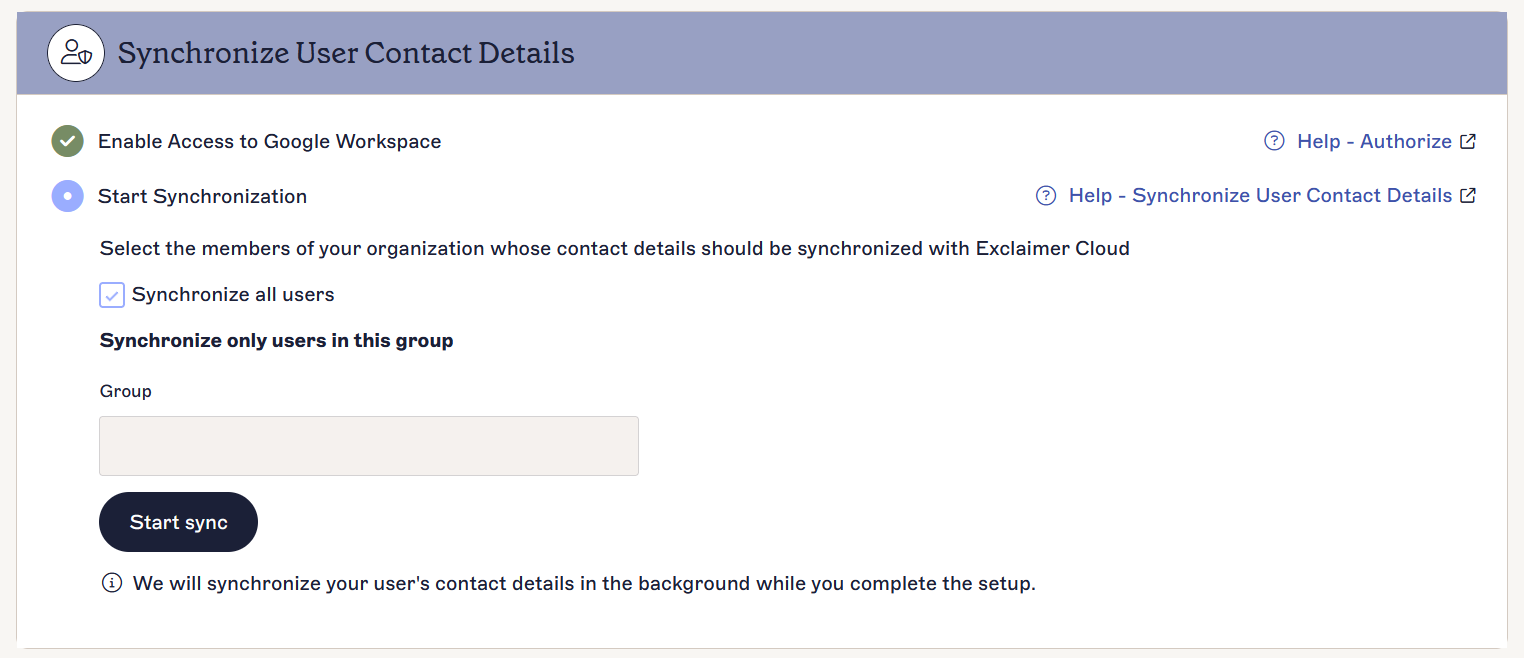
The Synchronize User Contact Details section.
To access the Start sync option after the initial setup:
- From the header bar, select the cogwheel icon to open the Settings menu, then select Sender Management.
The Settings menu is found under the cogwheel icon.
- Locate the Start Synchronization section.
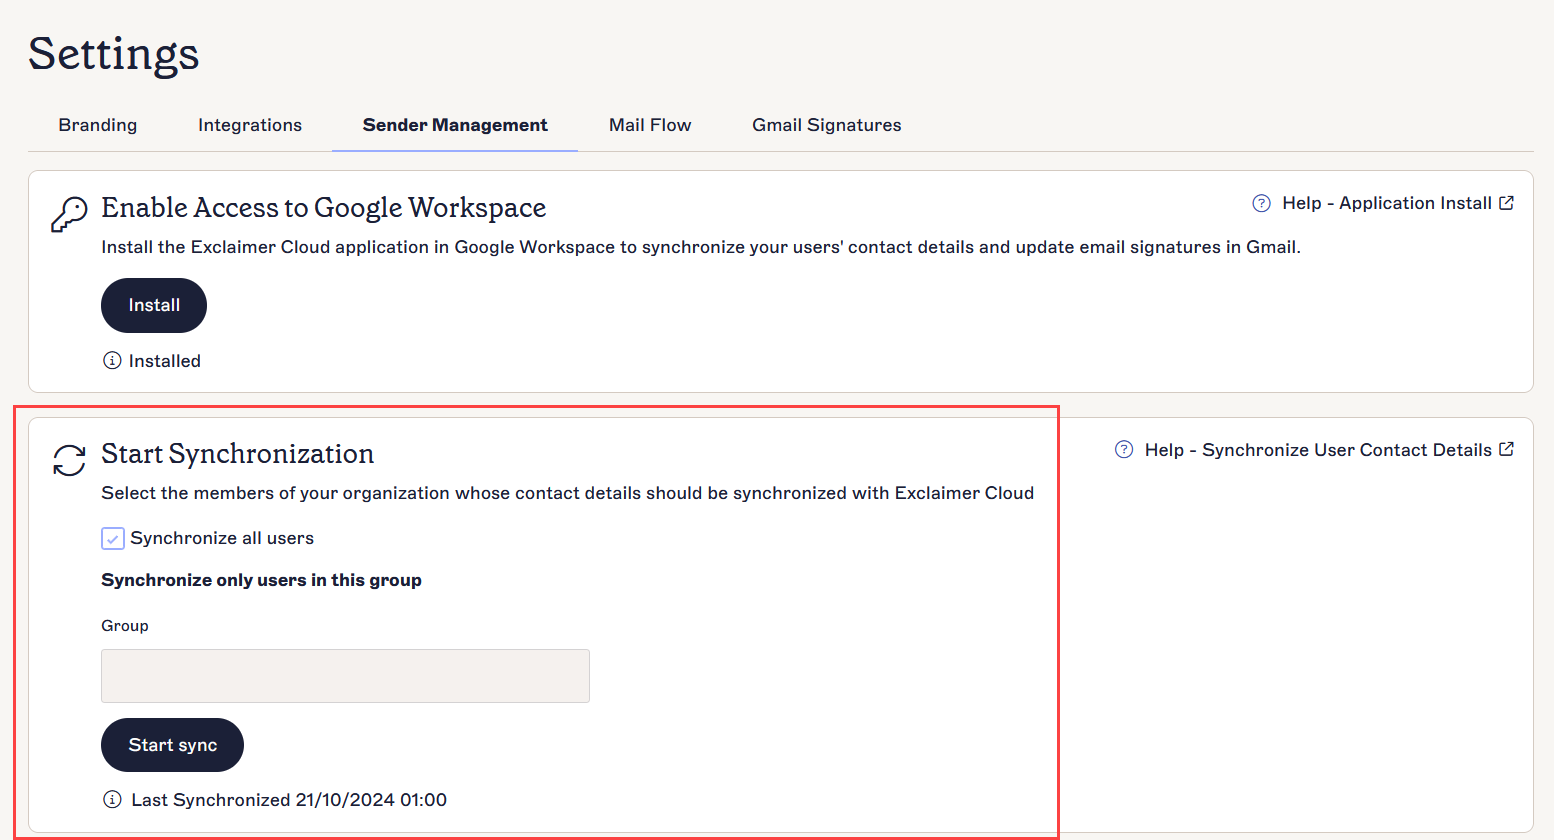
The Sender Management screen. The Start Synchronization section contains the relevant options.
Synchronizing user contact details
To synchronize user contact details:
-
EITHER:
Select the Synchronize all users checkbox to synchronize the contact details of all members of your organization with Exclaimer.
OR
In the Synchronize only users in this group, enter the name of a mail-enabled security group. Select a group from the predictive text list. Only users in this group will be synchronized.WARNING! Synchronizing a group will remove all existing user data for people outside this group. Only one group may be synchronized - add all relevant users to a group before starting a sync.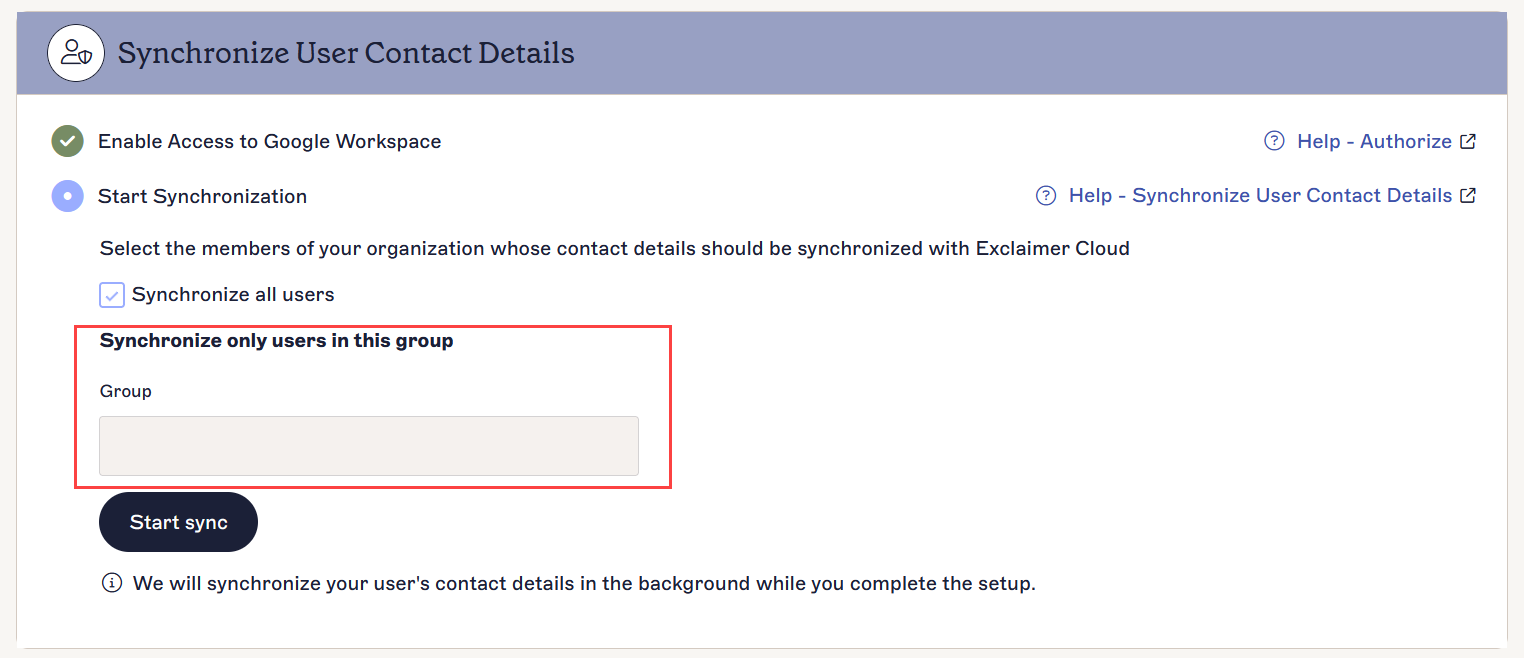
Enter a group name to enable the predictive text drop-down. Interface appearance may vary.
- Select Start Sync. The synchronization status is displayed in the Synchronize User Contact Details section and will be one of the following process messages:
In Progress - The synchronization is currently running.
Consent required - You have not completed the authorization process. Follow the steps to authorize your Exclaimer subscription for Google Workspace.
Failed - An unknown error has occurred. Submit a request to the Exclaimer Support team.
Once a sync has completed, the time and date of the most recent sync is displayed in place of a progress message. Allow up to three hours for a sync to complete.
Next Steps: For users configuration their subscription, once your synchronization is complete proceed to configuring your deployment type: Server-side or client-side.