
IMPORTANT! Sent Items Update Reauthorization
Exclaimer has updated Sent Items Update to use the Microsoft Graph API instead of Exchange Web Services (EWS), ahead of Microsoft’s retirement of EWS in Exchange Online.
If you used Sent Items Update before 17th August 2026, you will need to reauthorize the service for it to continue operating. Your existing authorization was granted for EWS and must be reconfigured and reconsented to support the Microsoft Graph API.
Without reauthorization, Sent Items Update will stop applying email signatures to your sent items. This change does not affect Exclaimer’s core signature deployment. Your server-side (mail flow) and client-side (Outlook) signature deployment will continue to operate as normal and requires no action.
Exclaimer has updated Sent Items Update to use the Microsoft Graph API instead of Exchange Web Services (EWS), ahead of Microsoft’s retirement of EWS in Exchange Online.
If you used Sent Items Update before 17th August 2026, you will need to reauthorize the service for it to continue operating. Your existing authorization was granted for EWS and must be reconfigured and reconsented to support the Microsoft Graph API.
Without reauthorization, Sent Items Update will stop applying email signatures to your sent items. This change does not affect Exclaimer’s core signature deployment. Your server-side (mail flow) and client-side (Outlook) signature deployment will continue to operate as normal and requires no action.
Description
The option within this section updates the emails in the user's Sent Items folder, allowing them to see the signature on their sent emails.
NOTES:
• This service is not guaranteed. To ensure it functions correctly, make sure that emails in the Sent Items folder are not moved or modified.
• This will only work with emails sent from Microsoft 365 mailboxes. If you are using Exchange On-Premises, this feature will not work.
• If the system can’t find the email in the sender’s Sent Items folder, it won’t be able to update it with the signature. It will try several times, but if it doesn’t succeed, it will time out. The only reliable way to ensure the signature always appears in the sent email is to apply it before the email is sent, Client-Side signatures.
• This service is not guaranteed. To ensure it functions correctly, make sure that emails in the Sent Items folder are not moved or modified.
• This will only work with emails sent from Microsoft 365 mailboxes. If you are using Exchange On-Premises, this feature will not work.
• If the system can’t find the email in the sender’s Sent Items folder, it won’t be able to update it with the signature. It will try several times, but if it doesn’t succeed, it will time out. The only reliable way to ensure the signature always appears in the sent email is to apply it before the email is sent, Client-Side signatures.
How to access it
To access the Sent Items Update option:
- From the header bar, select the cogwheel icon, then select Mail Flow.
- Navigate to the Sent Items Update section.
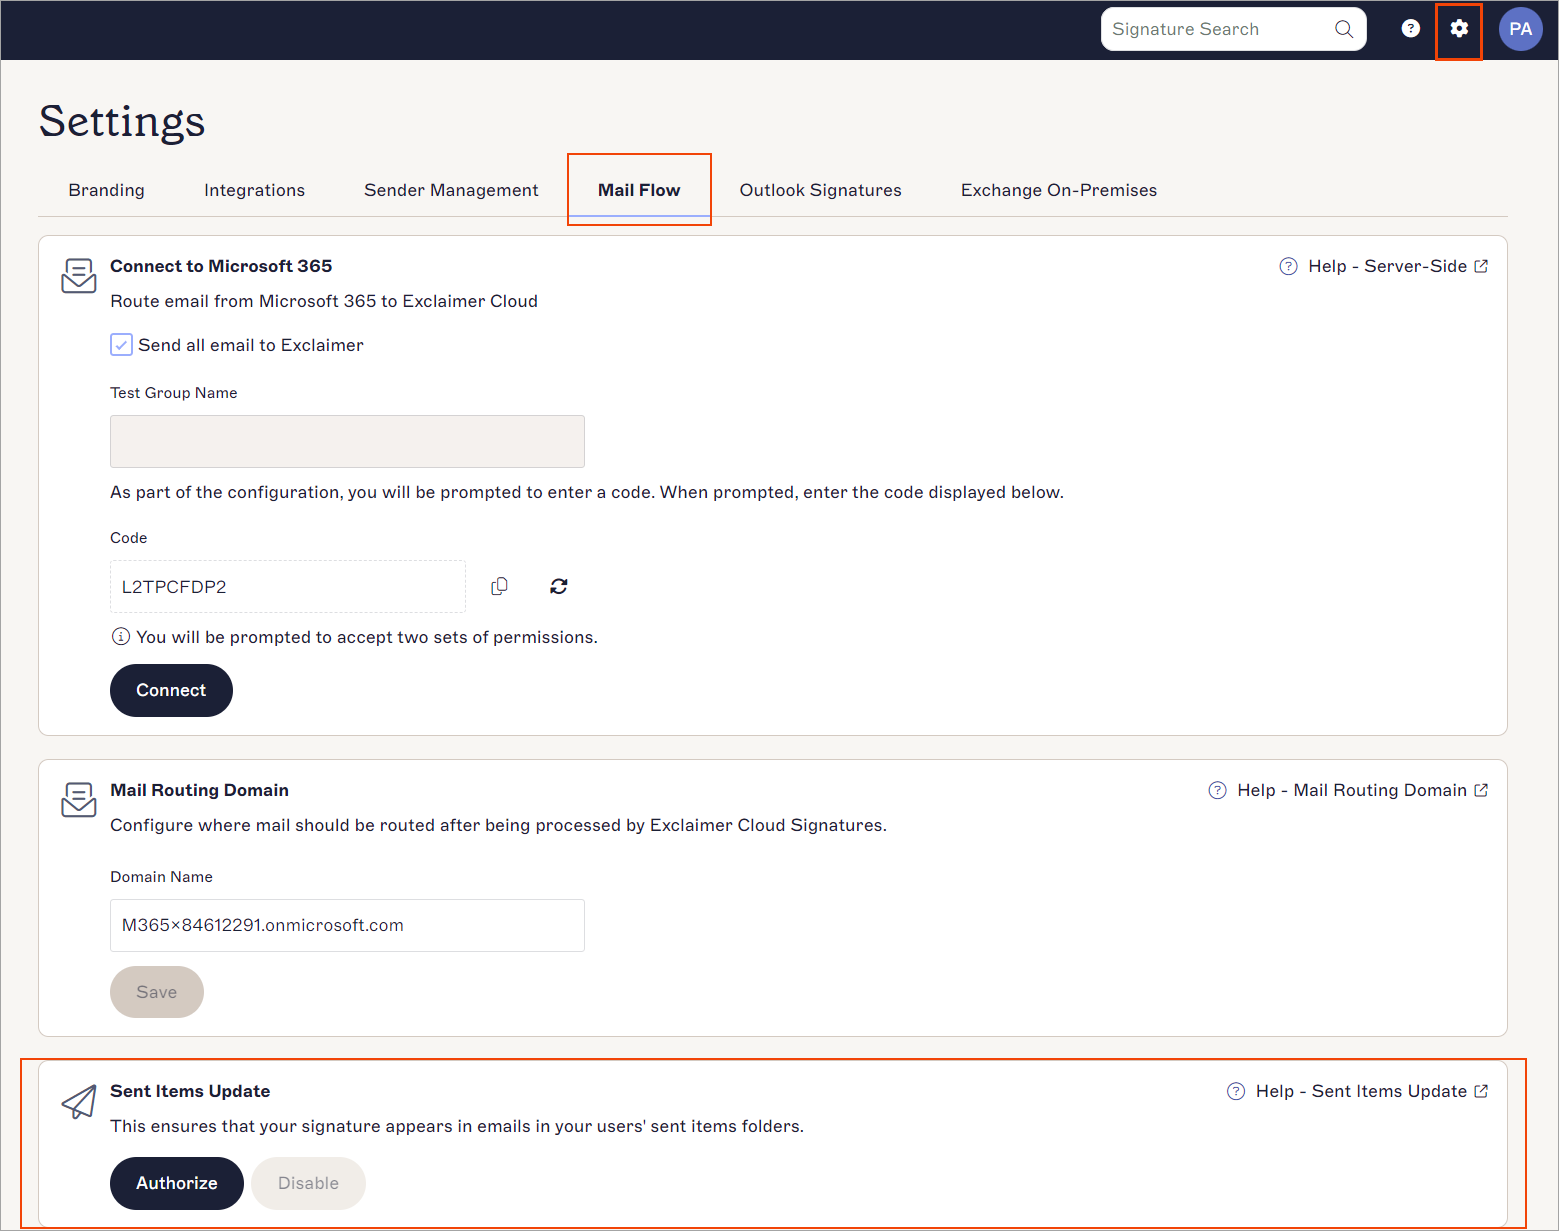
The Sent Items Update section.
Authorizing Sent Items Update
To authorize Exclaimer to ensure the signature appears in the recipient's Sent Items folder:
-
Select Authorize.
• The text Revoked displayed under Authorize implies that the tenant has removed the app via the Admin portal in Azure.
• The text Authorized displayed under Authorize implies that the app is approved and the feature is enabled.CAUTION! If you select Authorize, then every user within the tenant who has access to use signatures within Exclaimer will be able to see their signatures (in the emails) in their Sent Items folder. - You are prompted to sign in to Microsoft 365 as a Global Administrator (be sure that you are entering the credentials for the correct Microsoft 365 tenant).
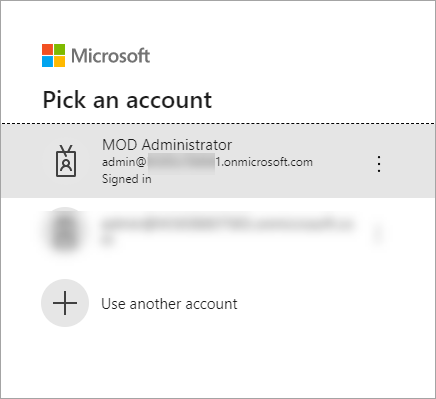
Sign in to your Microsoft 365 account as a Global Administrator.
Once signed in, you are prompted to accept a permissions request with a list of permissions that Exclaimer will have when the Sent Items Update feature is enabled.
These permissions are required so that Exclaimer can access sent items for users and modify these messages with a new, updated signature. - Select Accept.
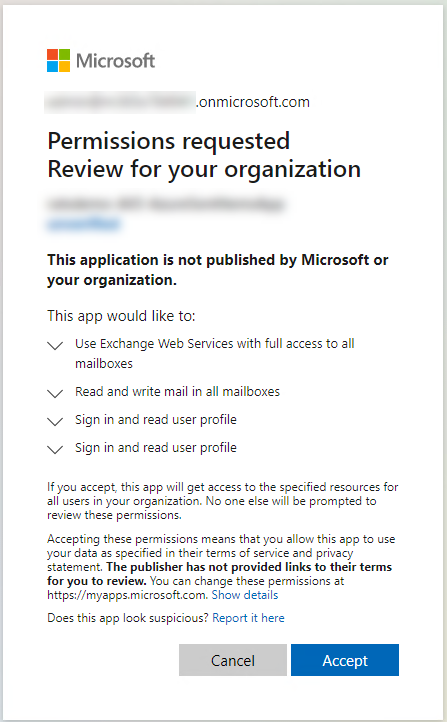
Select Accept for the Permissions request.
The Authorization Successful message is displayed.
The Disable option becomes available, confirming this feature is active.
When a user sends an email and checks the message in their Sent Items folder, they will see the message with their Exclaimer signature applied.