
Scenario
You wish to add holiday-themed content to your email signatures, and apply those signatures only during holiday periods. For example, sending signatures with a Christmas banner during December, Eid greetings on festival days, or Pride coloring during June.
Resolution
To send seasonal content in your signature, you can customise how signatures are sent in the following ways:
- Applying a Date/Time trigger to the signature rules.
- Using Server-Side Advanced Rules to attach the signature when trigger text is detected.
- Using the Exclaimer Outlook Add-In to choose a festive signature manually for Client-Side deployment.
- To send both your usual signatures and extra holiday content, adding a limited-time Campaign to your emails.
- To apply holiday branding, or to create holiday-specific visuals such as images, colors, or fonts to replace the signature's usual look, creating and applying a Brand Kit.
Select an option below to view the related instructions:
You can create a festive signature to only apply on the dates you specify. If it is not currently those dates, this signature cannot be applied to any emails.
To create and apply a holiday signature:
- Log in to your Exclaimer account and select Signatures from the menu sidebar.
-
If you are creating a new signature, select Create Signature. If you are modifying an existing signature, find your signature and select Edit Design.
NOTE: When creating a new signature, you can use a blank signature canvas, start with a table, or select a customizable template from our collection. Make your choice when prompted to proceed to the Signature Designer.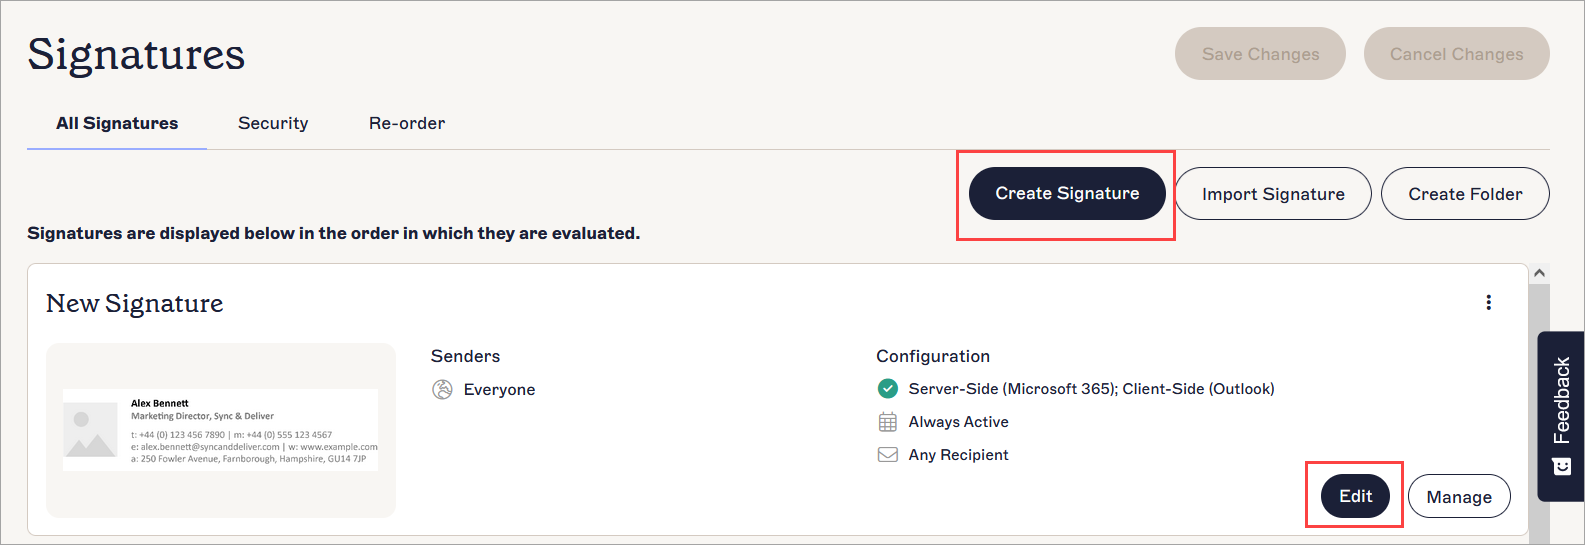
Select either Create Signature or Edit to add content to a template.
- Add your holiday content to the signature by dragging and dropping elements from the Toolbox onto the canvas. For example, to add a banner image, drag the Banner element onto the canvas and upload or link to your banner. For more information, see our articles on using each of the signature elements in the Edit Signature Design section of this knowledge base.
- Select Save Changes when you have finished designing your signature.
- In the Save Complete window, select Edit Rules. This opens the Manage screen for the signature.
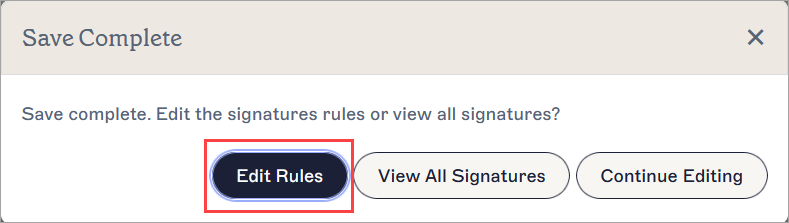
Select Edit Rules to go to the Manage screen.
- Select the Date/Time tab.
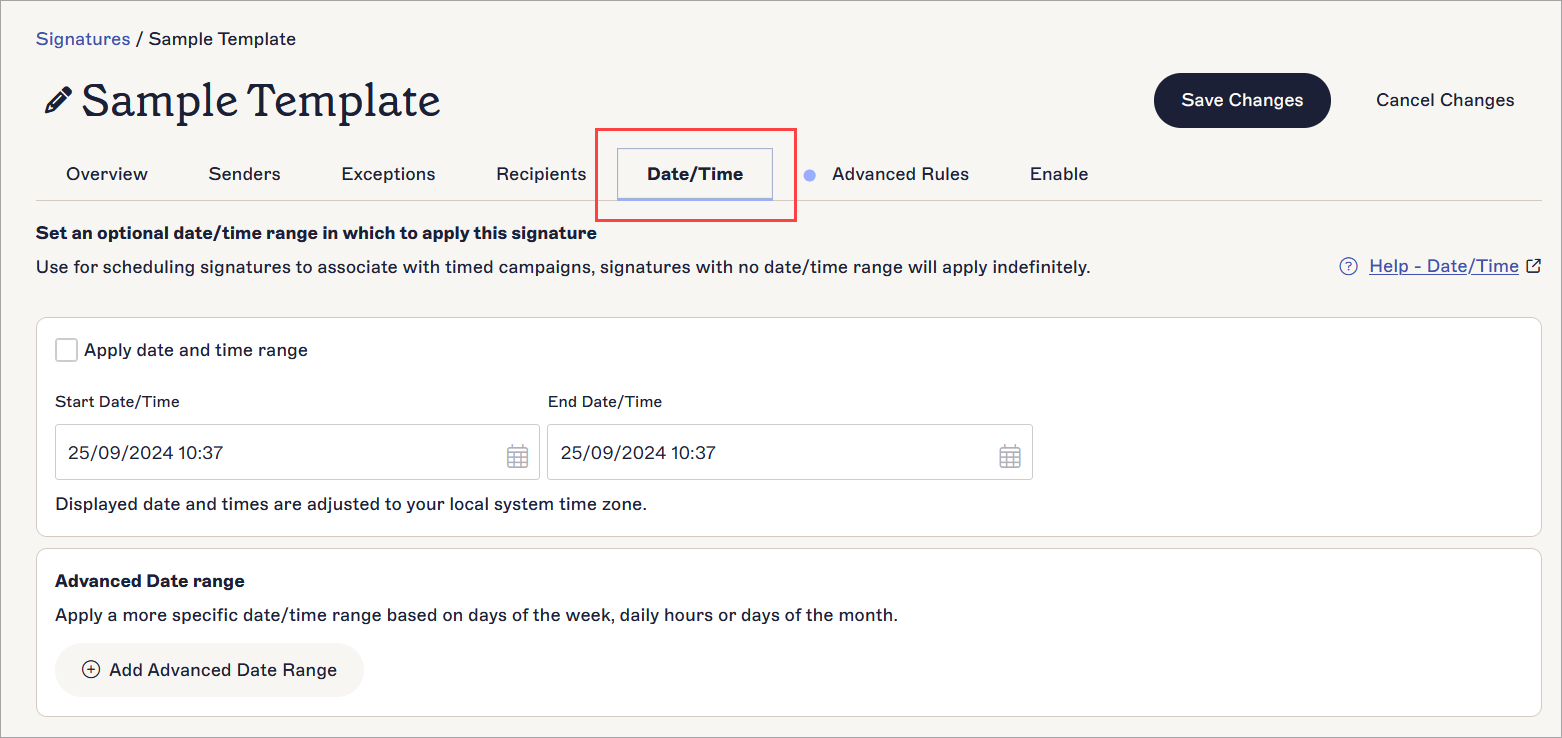
Select the Date/Time tab.
- Select the Apply date and time range checkbox.
- In the Start Date/Time and End Date/Time fields, enter your dates and times or select the calendar icon to open the calendar picker. These dates are when your signature will be applied.
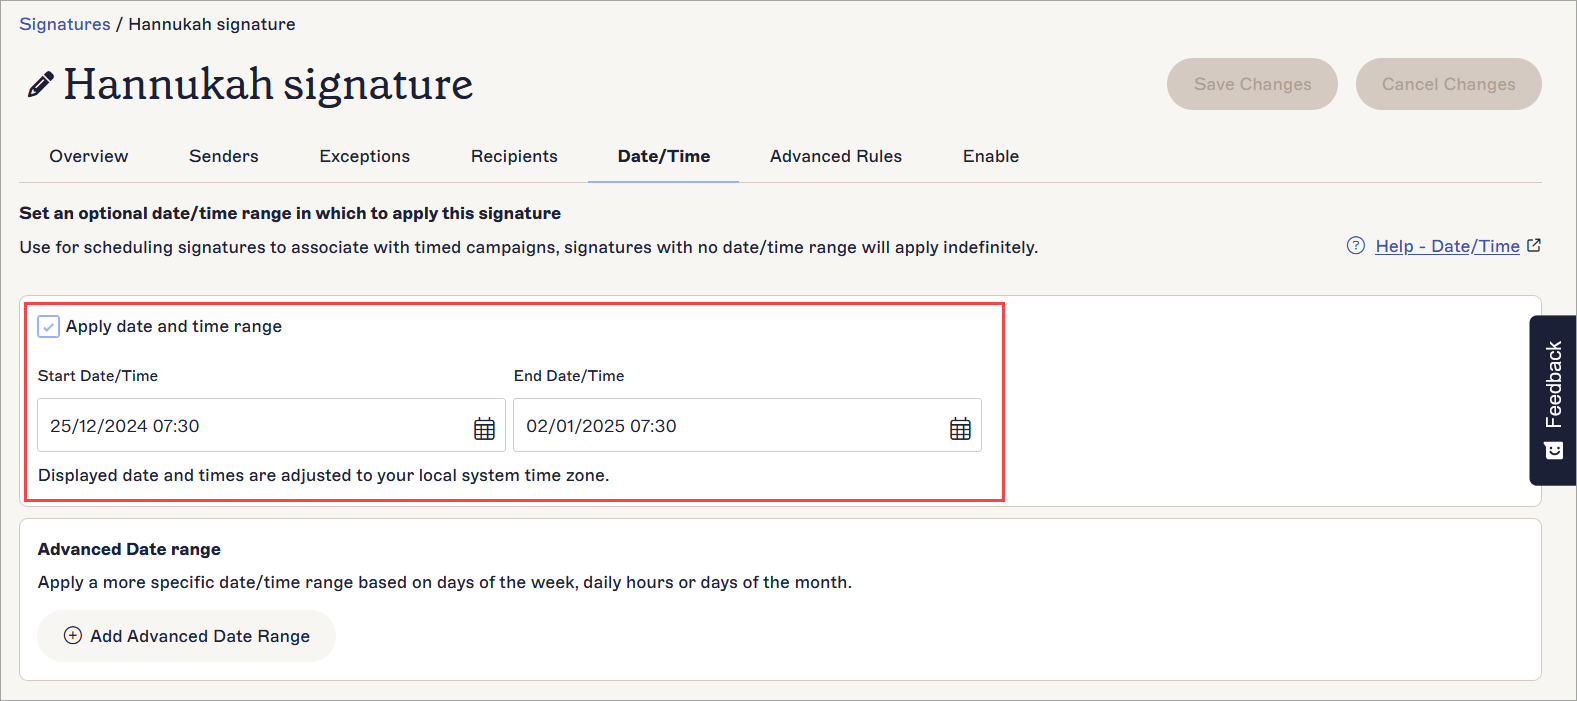
The Start Date/Time and End Date/Time fields are enabled when you select the Apply date and time range checkbox.
-
For users on the Exclaimer Pro plan, you can apply a more detailed set of date and time conditions using the Advanced Date range feature. Select Add Advanced Date range to add conditions for applying your signature. For more information on using Advanced conditions, see Signature Date/Time.
NOTE: The Advanced Date range feature is only available on Pro plans. For more information, see Exclaimer pricing plans.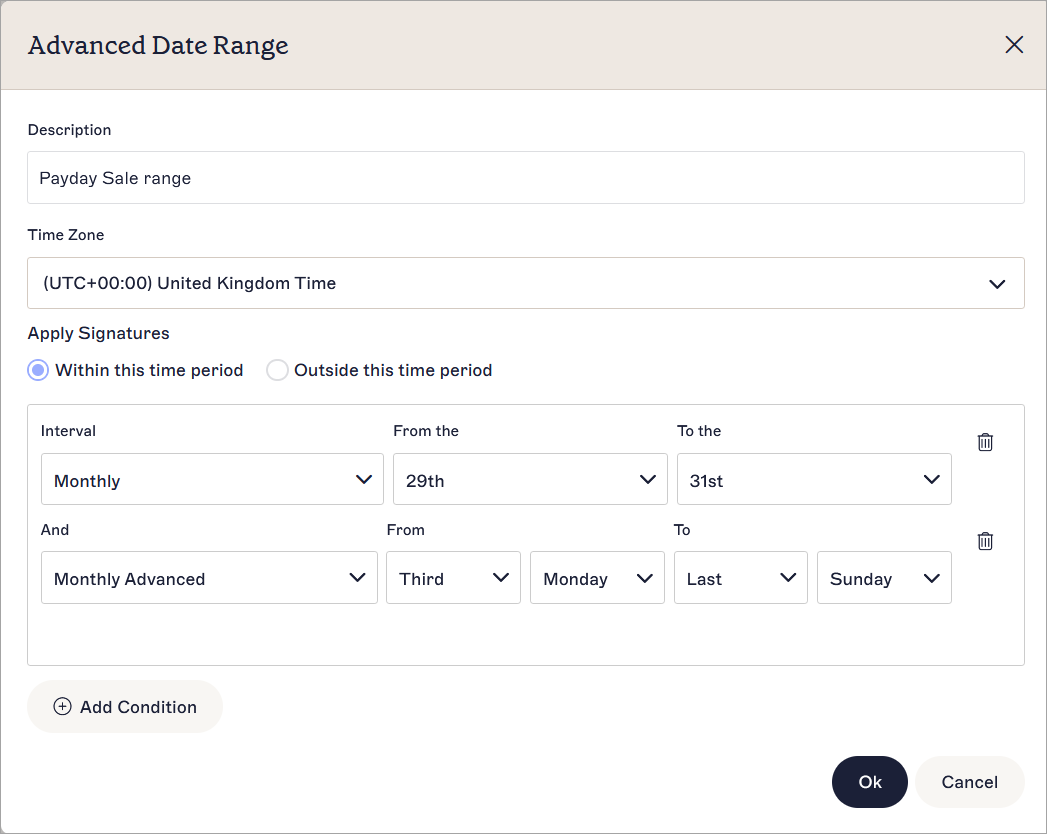
The Advanced Date Range window showing an example of advanced conditions.
- [Optional] Complete the signature rules configuration to include any Senders, Exceptions, Recipients, or Date/Time rules you wish to apply.
- Select the Enable tab.
-
Select the Apply to emails from all devices, including Mobiles checkbox to enable the signature for Server-Side deployment, and/or select the See before you send in Outlook (Windows, Web and Mac OS) and Apple Mail (Microsoft) or See before you send in Gmail (Google) checkbox to enable the signature for Client-Side deployment. For more information, see our resources on enabling signatures for Google Workspace subscriptions or enabling signatures for Microsoft subscriptions.
WARNING! A signature cannot be used until it is enabled for at least one type of deployment. - In the unsaved changes banner, select Save to save your configuration.
-
Return to the list of signatures by selecting Signatures from the menu sidebar, then select the Re-order tab. If your signature is within a folder, first open the folder.
NOTE: Users with the Editor role can only use the Re-order feature within folders to which they have been granted access. For More information on roles and permissions, see User Management.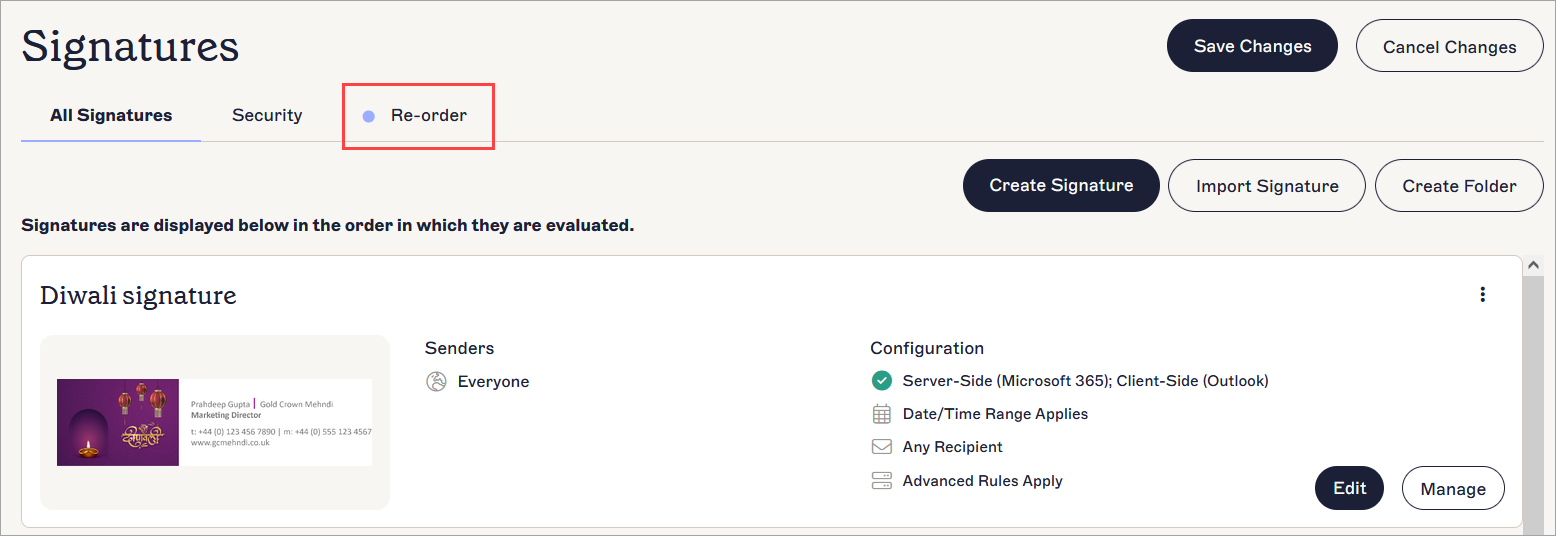
Select the Re-order tab.
- Drag and drop your holiday signature to the top of the list.
- In the unsaved changes banner, select Save. Your holiday signature will now be applied on your selected dates.
To create and apply a holiday signature:
This solution is not suitable for Client-Side deployment.
- Log in to your Exclaimer account and select Signatures from the menu sidebar.
-
If you are creating a new signature, select Create Signature. If you are modifying an existing signature, find your signature and select Edit Design.
NOTE: When creating a new signature, you can use a blank signature canvas, start with a table, or select a customizable template from our collection. Make your choice when prompted to proceed to the Signature Designer.
Select either Create Signature or Edit to add content to a template.
- Add your holiday content to the signature by dragging and dropping elements from the Toolbox onto the canvas. For example, to add a banner image, drag the Banner element onto the canvas and upload or link to your banner. For more information, see our articles on using each of the signature elements in the Edit Signature Design section of this knowledge base.
- Select Save Changes when you have finished designing your signature.
- In the Save Complete window, select Edit Rules. This opens the Manage screen for the signature.
Select Edit Rules to go to the Manage screen.
- Select the Advanced Rules tab.

Select the Advanced Rules tab.
- Select the Only add this signature if the email subject contains checkbox.
- Enter your trigger text in the This Text entry field. When you send an email during the holiday period, enter this text in the email subject line to trigger Exclaimer to attach the holiday signature.
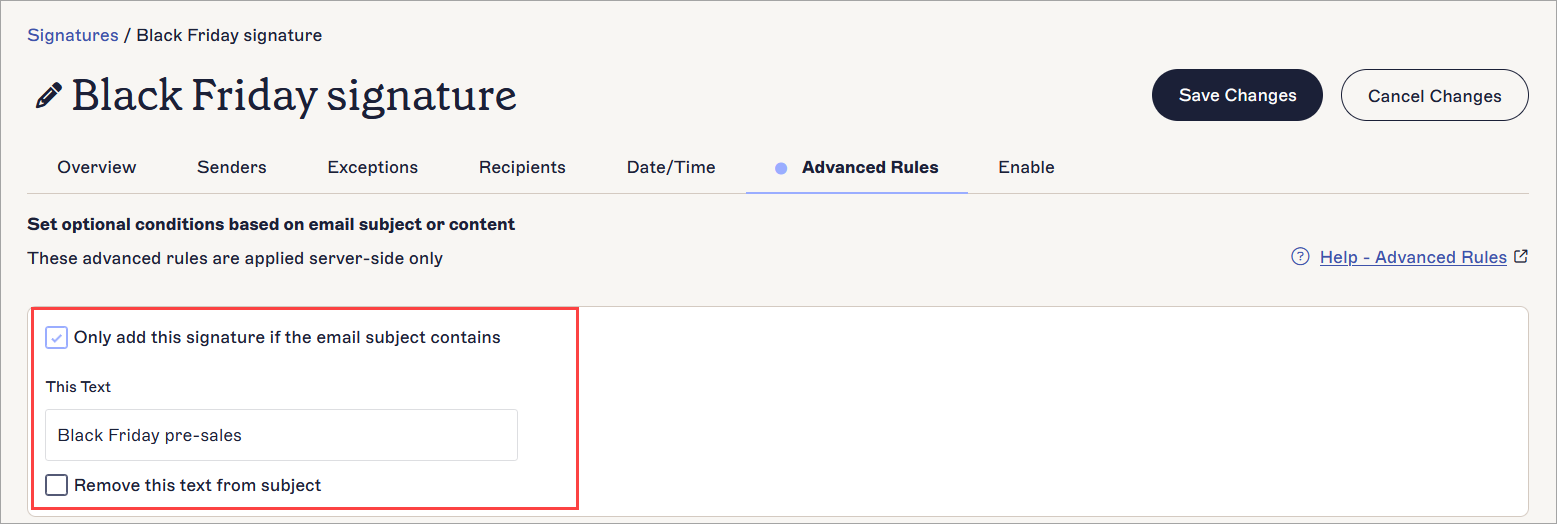
The This Text entry field is enabled once you select the checkbox.
- [Optional] Select the Remove this text from subject checkbox to trigger Exclaimer to remove the trigger text from the email subject line during processing.
- [Optional] Complete the signature rules configuration to include any Senders, Exceptions, Recipients, or Date/Time rules you wish to apply.
- Select the Enable tab.
- Select the Apply to emails from all devices, including Mobiles checkbox to enable the signature for Server-Side configuration.
- In the unsaved changes banner, select Save to save your configuration.
-
Return to the list of signatures by selecting Signatures from the menu sidebar, then select the Re-order tab. If your signature is within a folder, first open the folder.
NOTE: Users with the Editor role can only use the Re-order feature within folders to which they have been granted access. For More information on roles and permissions, see User Management.
Select the Re-order tab.
- Drag and drop your holiday signature to the top of the list.
- In the unsaved changes banner, select Save. Your holiday signature will now be applied when you enter your holiday trigger text in the email subject.
You can choose a festive signature manually in Client-Side deployment by creating a new signature and selecting it using the Exclaimer Outlook Add-In.
To create and apply a holiday signature:
- Log in to your Exclaimer account and select Signatures from the menu sidebar.
-
If you are creating a new signature, select Create Signature. If you are modifying an existing signature, find your signature and select Edit Design.
NOTE: When creating a new signature, you can use a blank signature canvas, start with a table, or select a customizable template from our collection. Make your choice when prompted to proceed to the Signature Designer.
Select either Create Signature or Edit to add content to a template.
- Add your holiday content to the signature by dragging and dropping elements from the Toolbox onto the canvas. For example, to add a banner image, drag the Banner element onto the canvas and upload or link to your banner. For more information, see our articles on using each of the signature elements in the Edit Signature Design section of this knowledge base.
- Select Save Changes when you have finished designing your signature.
- Run a manual data synchronization.
-
Open Outlook and create a new email, then open the Exclaimer Outlook Add-In.
NOTE: How to open the Add-In may vary depending on your Outlook instance. For full instructions, see Using the Exclaimer Outlook Add-In. - Select your festive signature from the available signatures in the Add-In pane.
Campaigns are banner images that are added to the end of a signature template. Your signatures are sent as normal, and the Campaign is applied as an extra only on the chosen dates.
To create and apply a holiday Campaign:
- Log into your Exclaimer account and select Campaigns from the menu sidebar.
- Select Create Campaign. This opens the New Campaign screen.
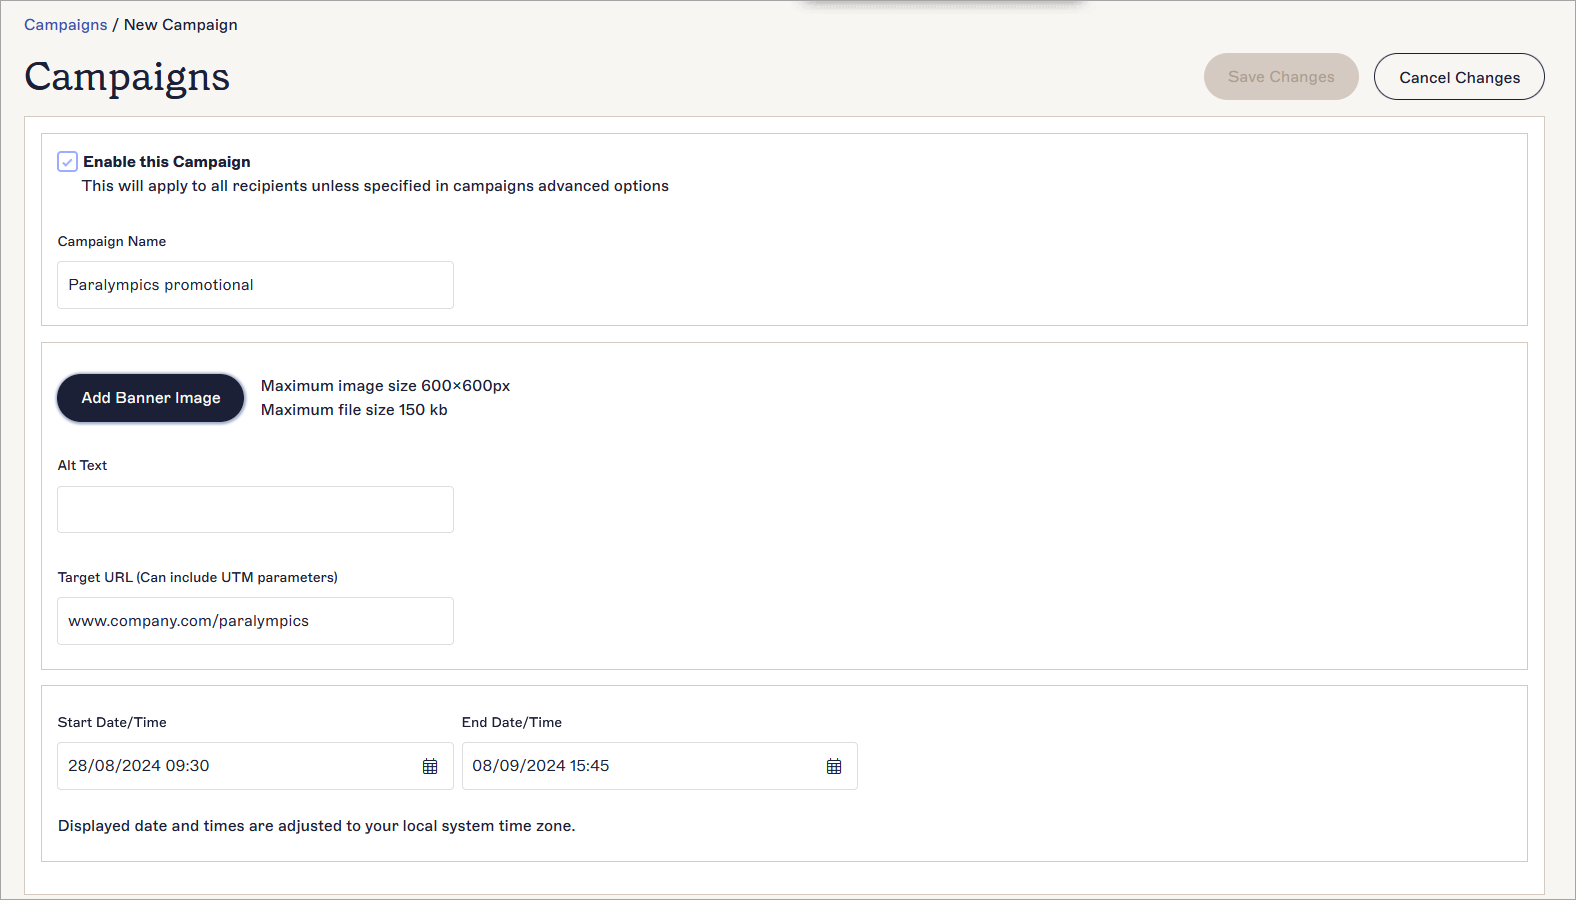
An example of entering data in a new Campaign.
- Select the Enable this Campaign checkbox.
- In Campaign Name, enter a name for your Campaign.
- Select Add Banner Image and choose your holiday banner image from your device.
- [Optional] In Alt Text, add any text to display if the image cannot, or to describe the image on screen readers.
- In Target URL, add a URL to connect to the image in a hyperlink.
- Use the Start Date/Time and End Date/Time entry fields to enter your dates and times, or select the calendar icon to open the calendar picker. These are the dates on which your Campaign will be applied.
- Select Save Changes. Your Campaign will now be applied during the selected dates.
- [Optional] From the Campaigns screen, select the cogwheel icon to open the Advanced Options screen, where you can apply any Senders, Exceptions, Recipients, or Advanced Rules configurations. For more information, see How to configure and apply a Campaign.
Brand Kits are applied to existing signatures. Only the content affected by your optional Brand Kit assets (images, colors, and/or fonts) is changed when you apply a Brand Kit. All other content in your signature stays the same. When you stop a Brand Kit from applying after the holiday is over, your signature returns to its usual look.
We recommend! Create a Brand Kit for your signature's normal look to make switching between regular branding and holiday branding easier. Select the relevant Brand Kit from the drop-down in the Signature Designer to choose the look of your signature in a single click.
To create and apply a holiday Brand Kit:
- Log in to your Exclaimer account and select the cogwheel icon from the header bar to open the Settings menu.
- Select Brand Kits. This opens the Brand Kits screen.
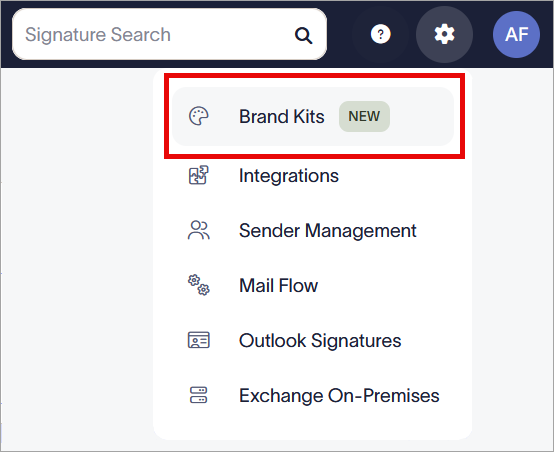
The Settings menu is found under the cogwheel icon.
- Select Create Brand Kit.
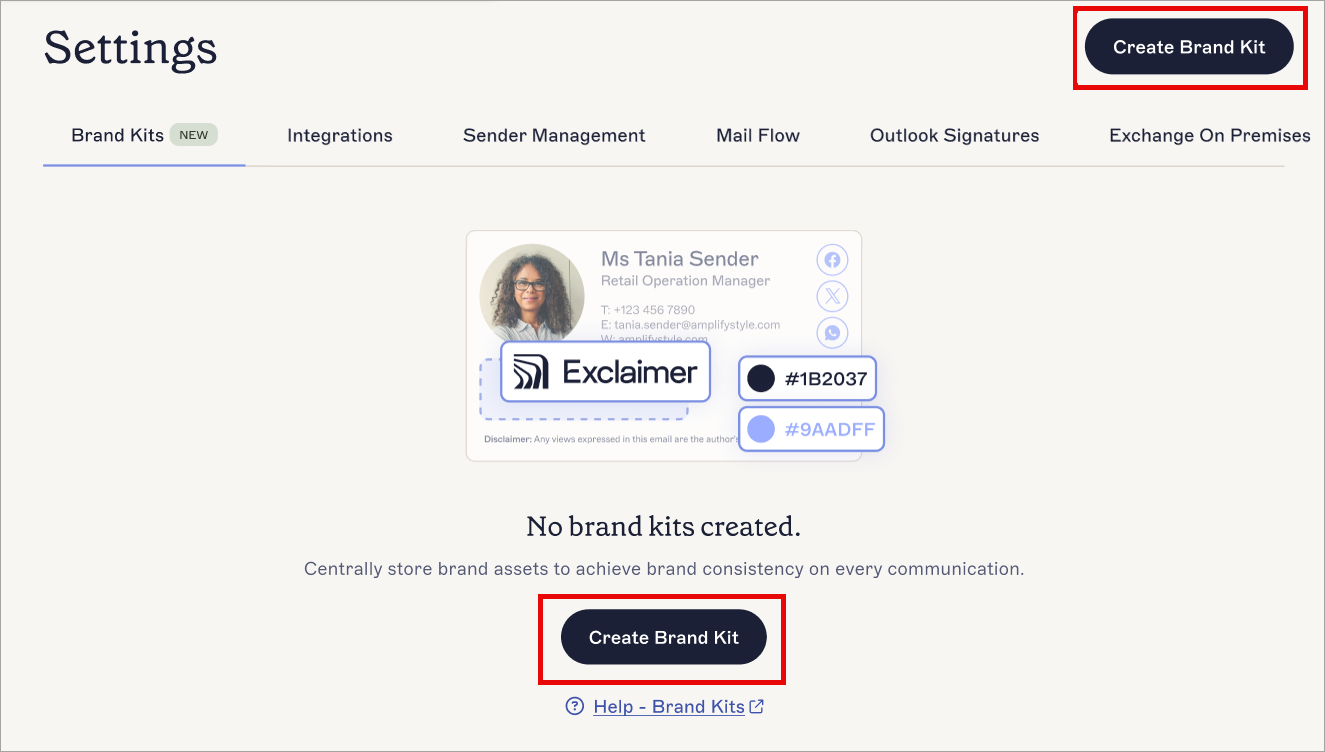
Select Create Brand Kit.
- In Brand Kit Name, enter a name for your new Brand Kit.
- Use the brand assets to upload images and set colors or fonts for your holiday theme. All assets are optional. Any image assets you do not upload an image for will not display an image in your signature. If you do not specify colors or fonts, your signature will use the defaults. For more information on how to set brand assets, see Brand Kits.
- In the unsaved changes banner, select Save.
- Select Signatures from the menu sidebar.
- Open your signature in the Signature Designer.
- From the Brand Kits section, select the drop-down and choose your new Brand Kit from the list.
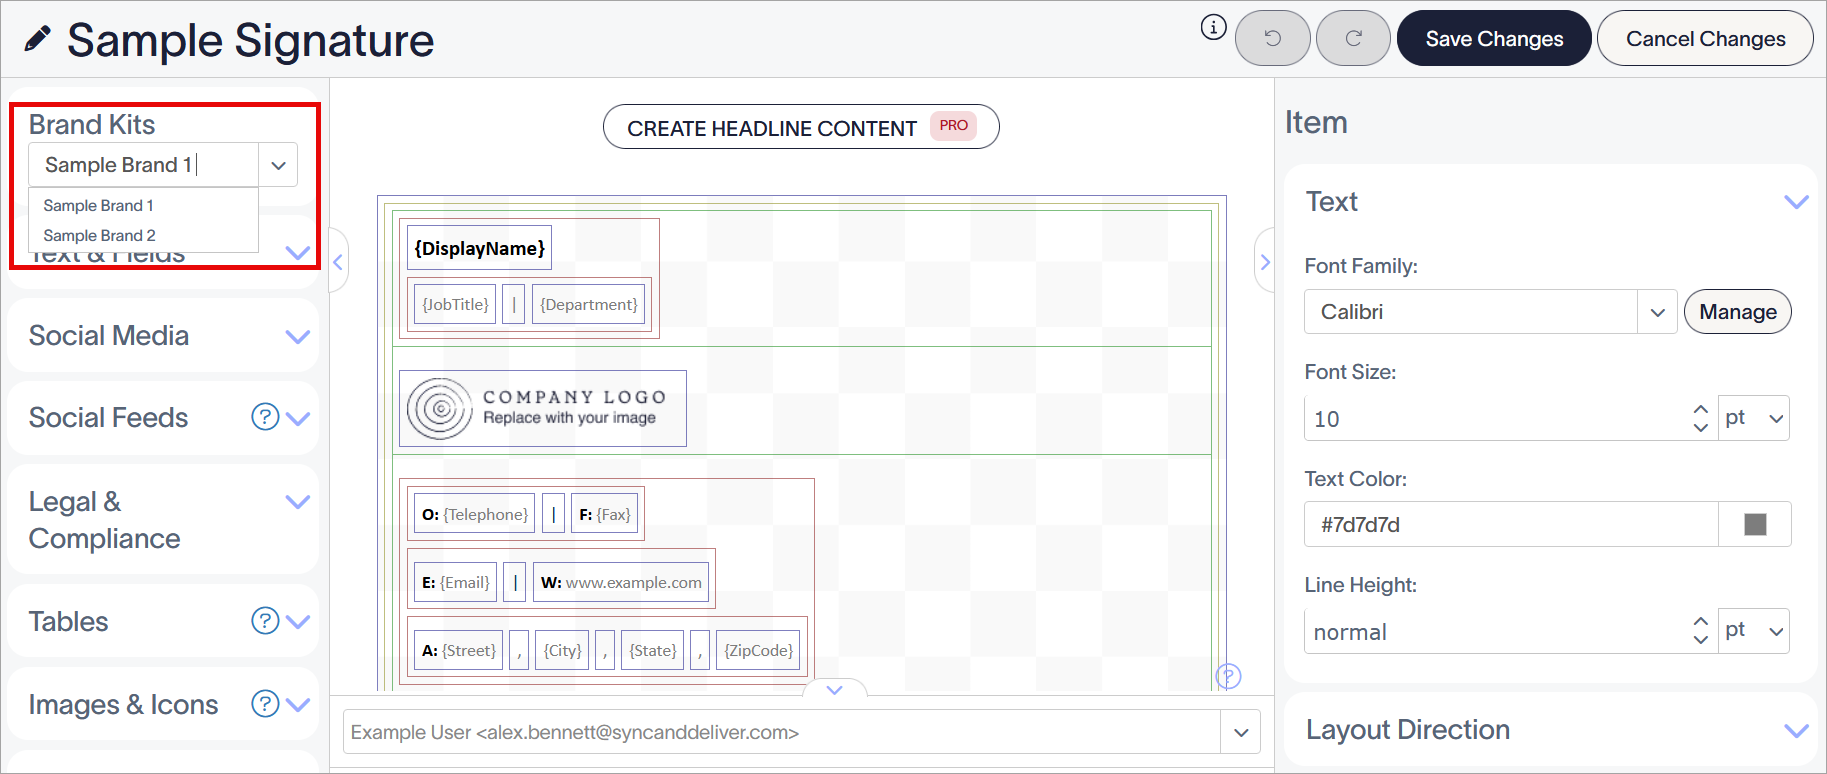
Select your Brand Kit from the drop-down. The first available Brand Kit is applied by default.
- Ensure any images you want to use with your branded assets are set as Brand Kit images. To do this, select the image element on the canvas, then in the Properties pane, select the Brand Kit image radio button from the Image Source section. Choose from Logo, Icon, or Banner to select which of your branded images to use.
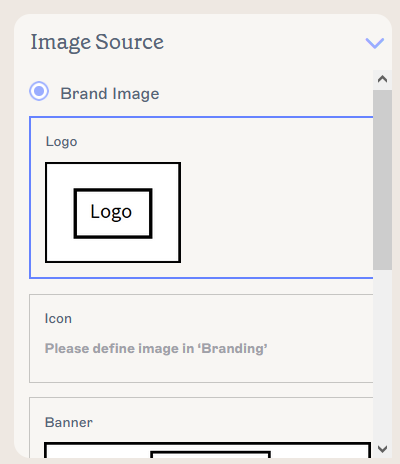
Select an asset type to switch the asset in use.
-
Ensure any text you want to use with your branded fonts is set to Brand Fonts. To do this, select the element on the canvas, then in the Properties pane, select Brand Font 1 or Brand Font 2 from the Font Family drop-down in the Text section.
NOTE: For a full list of elements that can use Brand Fonts, see the Using Fonts section of How to Use Brand Kit content in a signature.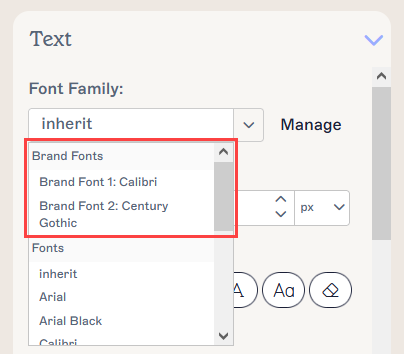
Your branded asset content appears in the Brand Fonts section of the drop-down. -
Ensure any elements you want to use your branded colors are set to Brand Colors. To do this, select the element on the canvas, then in the Properties pane, select Brand Color 1 or Brand Color 2 from any color picker property, such as Background, Border, or Text. Any element that can be colored can use branded colors.
NOTE: For a full list of elements that can use Brand Colors, see the Using Colors section of How to Use Brand Kit content in a signature.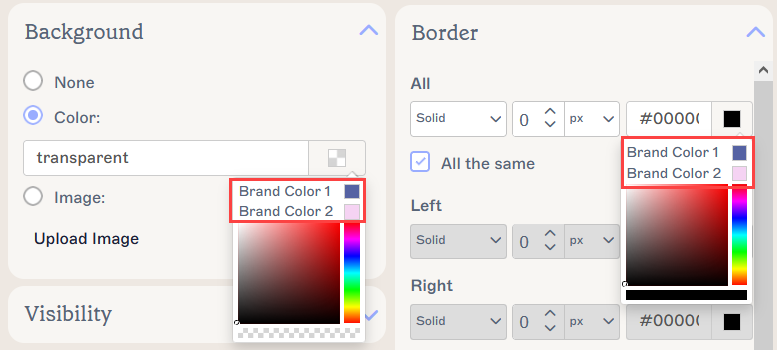
Two examples of Brand Kit colors appearing in the colour picker, for Background and for Border properties. The color picker may appear differently depending on which color property you edit. -
Select Save Changes. Your signature is now using the holiday branding that you chose when creating your Brand Kit.
NOTE: We recommend running a manual synchronization to sync any changes to Client-Side signatures to the Outlook Add-In.