
Scenario
You are populating a Microsoft 365 attribute with a linked image. However, when you add the attribute to a signature template, the image does not appear in the signature designer or when the email is sent.
Reason
An image may not appear in an attribute for the following reasons:
- The hosted URL for the image is not public-facing.
- The attribute used hasn't been synchronized to Exclaimer or, if using a custom attribute, is not enabled.
- The signature is rendered as a bitmap image.
Resolution
Select an option below to view the related instructions:
Test the link outside the attribute using the Image/Logo element in the Signature Designer.
To test a linked image's visibility:
- Add an Image/Logo element to your template. This opens the Image/Logo window. This is for testing reasons and will be removed later. You do not have to change your template design.
- Select the New linked image radio button.
- Enter the link to where the image is stored in the Linked Image URL field.
If the image appears in the preview, then the link is public-facing. If it does not appear, it may be private.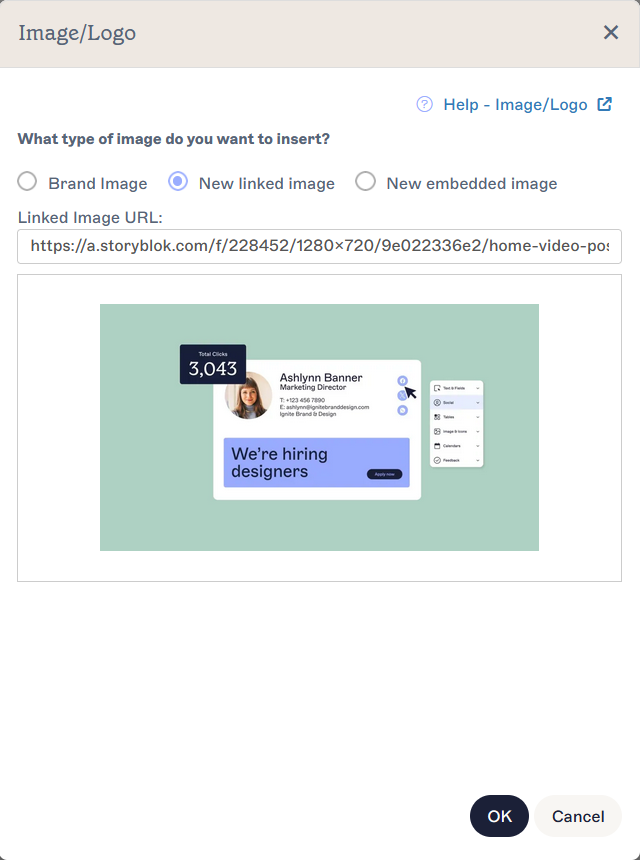
The Image/Logo window showing an image that works in preview.
- If your image is hosted on Dropbox, ensure your link is set to Anyone with this link can view when adding the image to your attribute. For more information, see How to host images using Dropbox.
- If your image is hosted on Google Drive, ensure your link is set to Anyone with the link under General access when adding the image to your attribute. For more information, see How to host images using Google Drive.
- If your image is stored elsewhere, check the privacy settings on the image file or server. These may vary based on the web storage you are using.
- Select Cancel to remove the Image/Logo element.
Exclaimer synchronizes data with Microsoft 365 automatically, but when you make changes, you can perform a manual synchronization to update synced data sooner.
To perform a manual data sync:
- Navigate to the Sender Management page.
- In the Start synchronization section, select Start sync. For more information, see Synchronize user data.
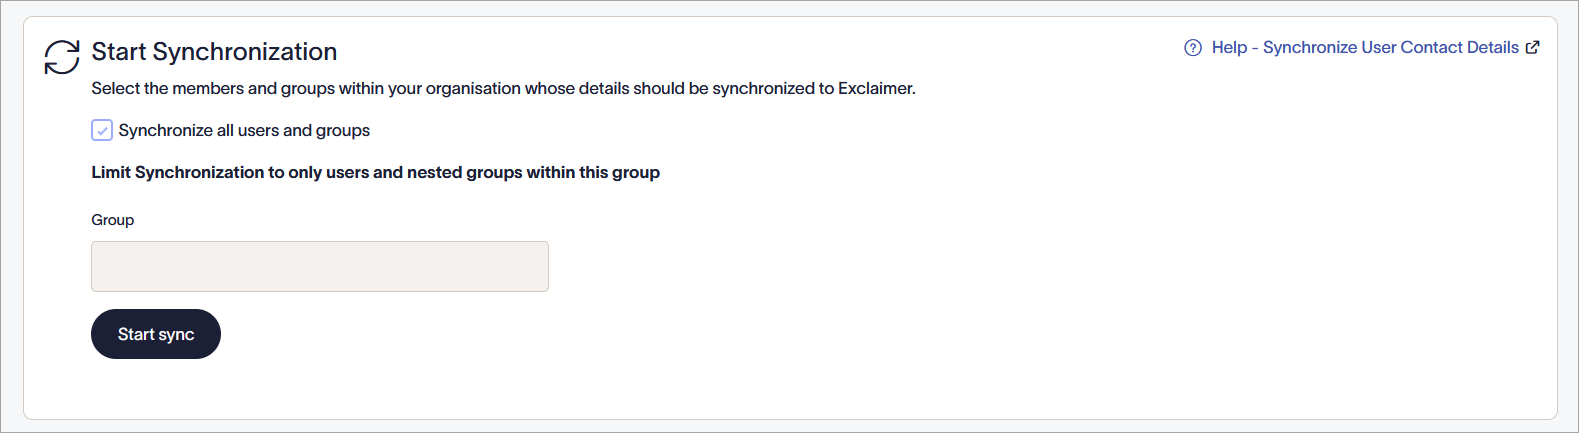
The Start Synchronization section.
If using custom attributes, check that the Synchronize Additional User Attributes setting is switched on.
To enable custom attributes from Microsoft 365:
- Navigate to the Sender Management page.
- In the Synchronize Additional User Attributes section, ensure that the radio button for Azure AD Attributes or Custom Attributes is selected, depending on the attribute you are using. For more information on configuring Microsoft 365 custom attributes for Exclaimer, see Synchronize Additional User Attributes.

The Synchronize Additional User Attributes section.
If your signature is rendering as a bitmap, the linked image within the attribute will not work as bitmap mode embeds images by design. Signatures are rendered as bitmaps automatically if using custom fonts or background images.
If using custom fonts, you can avoid rendering as a bitmap by replacing them with a font stack.
If using a background image, you can avoid rendering as a bitmap by replacing with a background color.
To check whether your signature is rendering as a bitmap:
- Open your signature in the Signature Designer.
- Select the outermost border to select the whole template. For more information on using borders to select items in a signature, see Colored borders, grouping, and inherit properties in the Signature Designer.
- In the Properties pane, expand the Render section.
- Confirm whether the Render Mode is set to Normal or Bitmap.
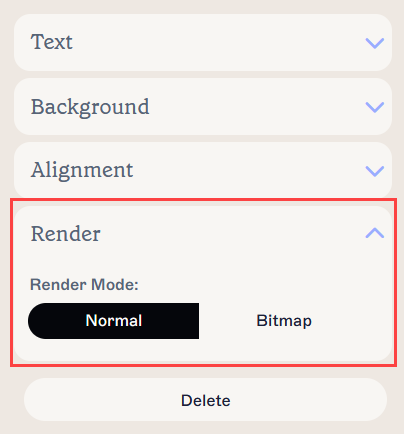
The Render Mode setting in the Render properties.
- If you are not using custom fonts or background images, select Normal to change the Render Mode.