
Scenario
When an email is sent from a shared mailbox, a signature is not added to the received email message.
Reason
By default, shared mailbox accounts are either disabled or their logins are deactivated. This prevents the Exclaimer service from aggregating these accounts, which results in dynamic signatures not being applied to these mailboxes.
Resolution
Select an option below to view the troubleshooting steps:
To enable the Send on Behalf option:
This only applies if the mailbox is using send-on-behalf permission in Exchange.
- From the header bar, select the cogwheel icon, then select Mail Flow.
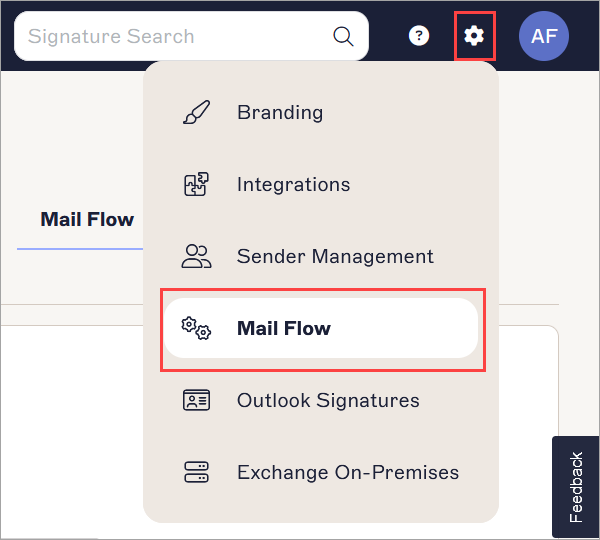
The Settings menu is found under the cogwheel icon.
- Navigate to the Send on Behalf section.
-
Enable the Send on Behalf option.

Enable the Send on Behalf option.To verify the Exchange Admin permissions:
- Sign in to the Exchange admin center as an Administrator.
The Exchange admin center is displayed.
- From the menu sidebar, select Recipient then select Mailbox.
- Select the mailbox you wish to view the delegated permissions.
- In the details pane, select the Delegation tab. Verify if the user has Send as or Send as behalf permissions set on the shared mailbox.
For more information, see https://learn.microsoft.com/en-us/microsoft-365/admin/add-users/give-mailbox-permissions-to-another-user?view=o365-worldwide#send-email-on-behalf-of-another-user
- Select the Send on Behalf permission to allow users to send emails from the shared mailbox on behalf of their personal account.
- Sign in to the Exchange admin center as an Administrator.
To list your shared mailbox:
- Select Signatures from the menu sidebar.
- From the All Signatures tab, locate your signature and select Manage Rules.
- Select the Senders tab. List your shared mailbox.
For more information, see Signature Senders.
If you have configured server-side signatures, then we recommend you to check the mail flow settings.
To check the mail flow rule:
- Sign in to the Exchange admin center as an Administrator.
The Exchange admin center is displayed.
- From the menu sidebar, select Mail flow then select Rules.
- Verify if the Identify messages to send to Exclaimer Cloud rule is present.
If the rule is not present, re-run the Connect to Microsoft 365 wizard to recreate the rule. - Select the Identify messages to send to Exclaimer Cloud rule to open the properties window.
-
Check if the rule is displaying as Enabled in the Status.
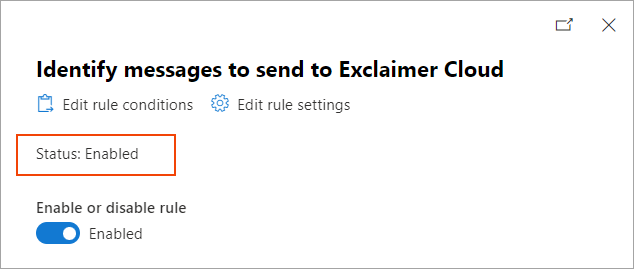
Check if the rule is displaying as Enabled in the Status.To enable the rule, use the Enable or disable rule toggle switch to set the rule to Enabled.
- Check the priority of the Identify messages to send to Exclaimer Cloud rule. It should be higher than any other third-party rules.
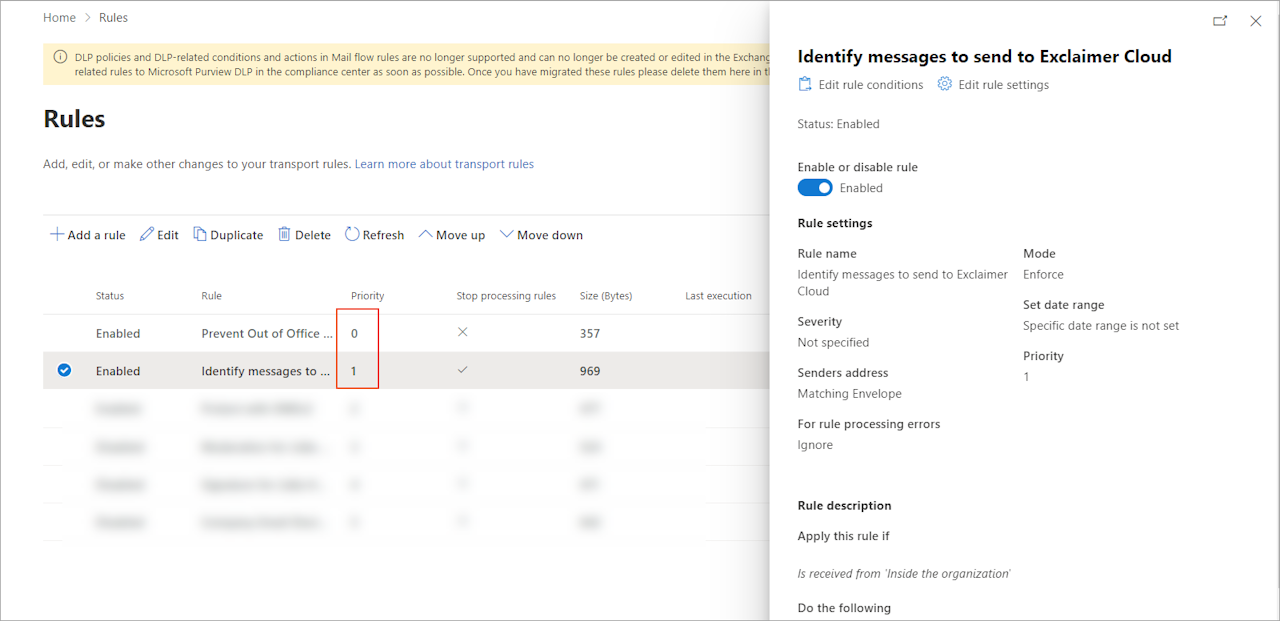
Check the priority of the Identify messages to send to Exclaimer Cloud rule. It should be higher than any other third-party rules.
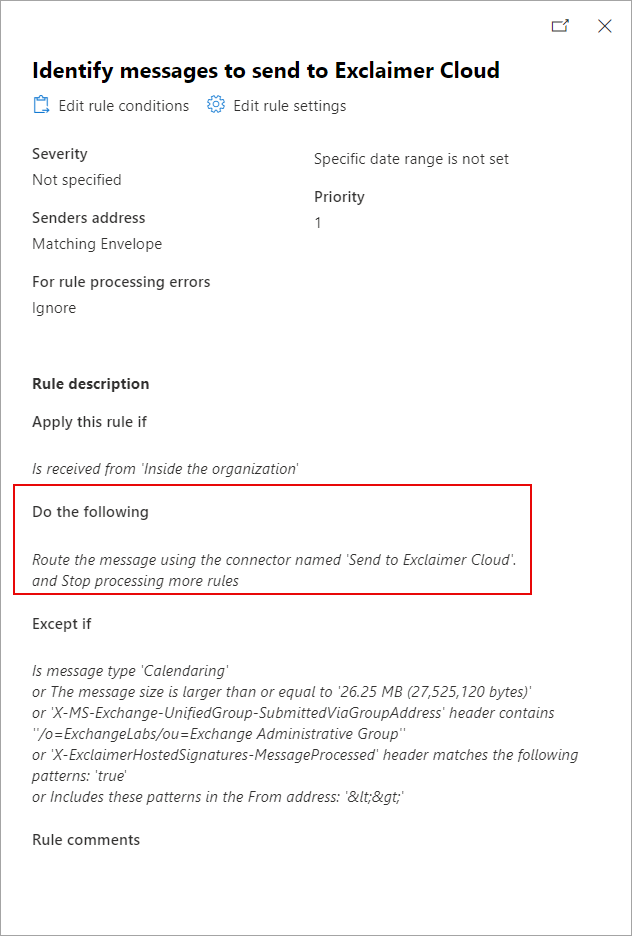
- Check the Rule description section of the Identify messages to send to Exclaimer Cloud rule.
-
Check:
For Apply this rule if, the default condition, Is received from 'Inside the organization' is set.
If Is received from a member of group condition is also present, then ensure that all users who need server-side signatures are a member of the specified group.
NOTE: Always check the group members within the Exchange admin center. This will help rule out duplicate group names and synchronization issues. If there are any other conditions applied to the rule, then make sure they are appropriate for emails to receive server-side signatures.
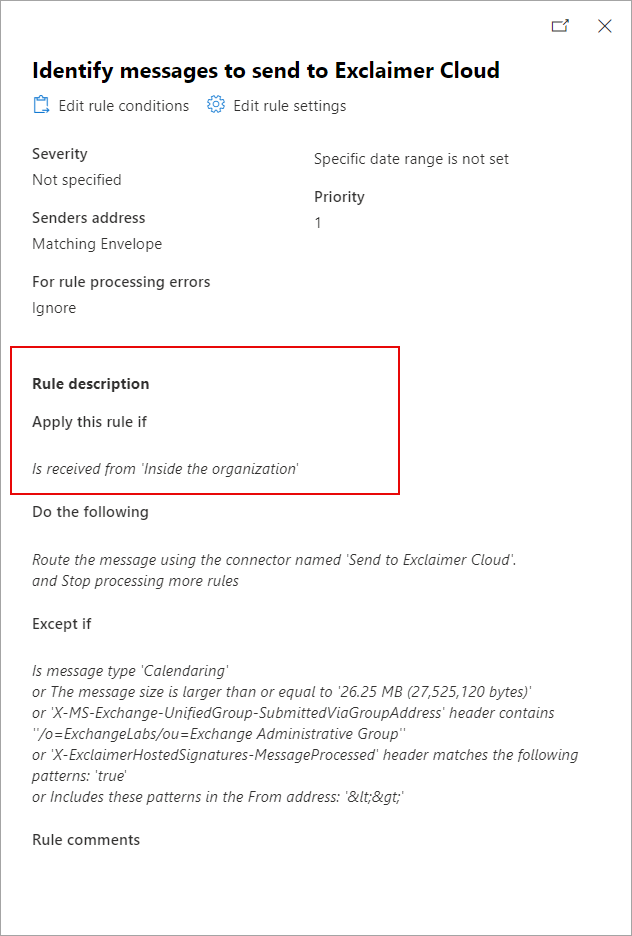
Check the Rule description section.
-
Check Do the following, displays
Route the message using the connector named 'Send to Exclaimer Cloud' and Stop processing more rules.
We recommend: The Stop processing more rules option should be enabled.
For more information on this, see Is 'Stop processing more rules' required for the Exclaimer mail flow rule?
Check Do the following exceptions.
-
Check Except if, displays the default exceptions:
Is message type 'Calendaring'or The message size is larger than or equal to 'XX MB'
or 'X-MS-Exchange-UnifiedGroup-SubmittedViaGroupAddress' header contains ''/o=ExchangeLabs/ou=Exchange Administrative Group''
or 'X-ExclaimerHostedSignatures-MessageProcessed' header matches the following patterns: 'true'
or Includes these patterns in the From address: '<>'
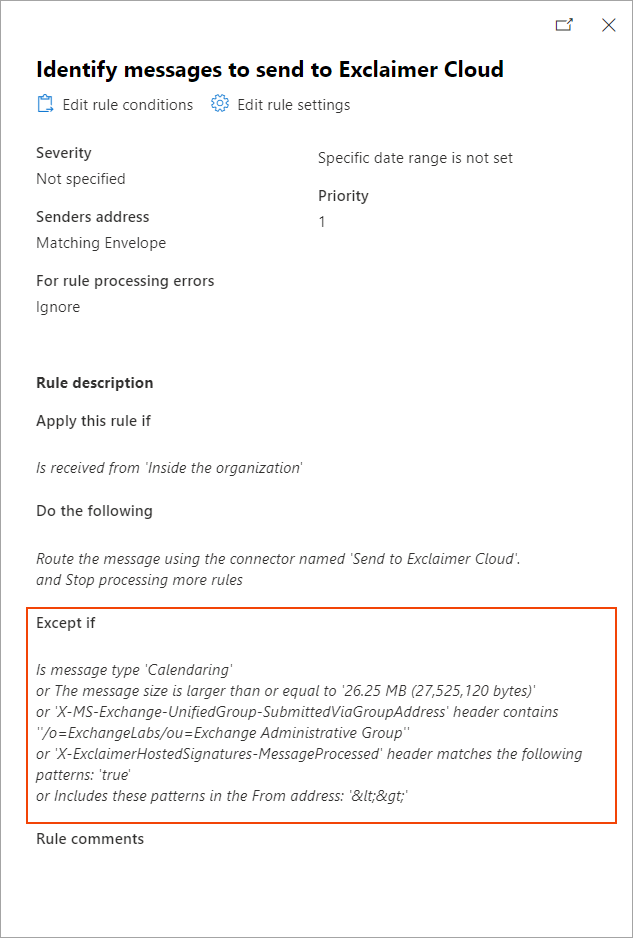
Check Except if exceptions.
NOTE: If any additional exceptions have been added to the rule, then make sure they do not exclude emails that should receive server-side signatures.
By default, these accounts are disabled, or their logins have been disabled. This means that the Exclaimer service will not aggregate these; therefore, dynamic signatures are not applied to these mailboxes.
This occurs when the 'Synchronize Disabled Accounts' feature has not been enabled for your tenant.
To generate signatures, Exclaimer aggregates data from the Active Directory, however:
- If the feature is disabled, then disabled mailboxes are not synchronized during Exclaimer's data sync.
- If the feature is enabled, all users with a primary SMTP address are synced, even if they are disabled.
To synchronize disabled accounts:
- Log into your Exclaimer account and launch your subscription.
- From the header bar, select the cogwheel icon to open the Settings menu.
- Select Sender Management.
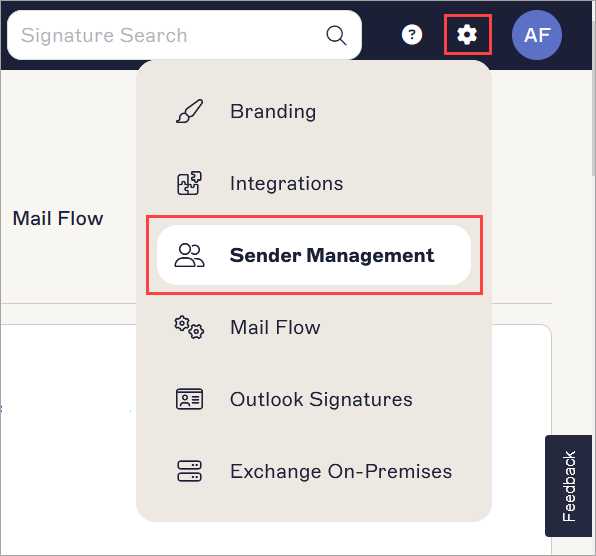
Select Sender Management.
- From the Synchronize Disabled Accounts section, select the Synchronize Disabled Accounts option to synchronize disabled accounts in Microsoft 365.
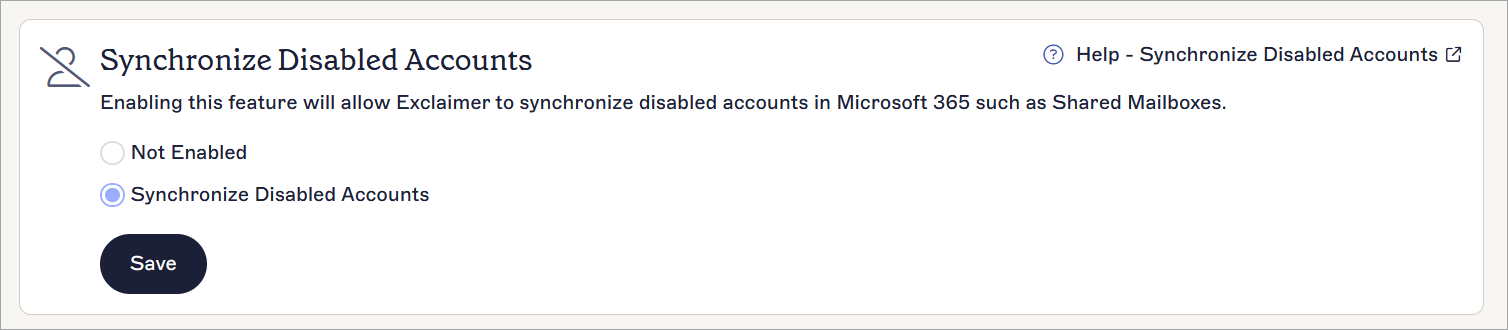
The Synchronize Disabled Accounts option is selected.
- Select Save to save the changes made.