
Description
Sender rules are conditions that allow you to control whether a signature should be applied or not applied to an email based on the sender. The signature is either applied to all senders, or specified senders. When managing a signature, the Senders tab is where you apply rules to set users as senders of that signature, such as users with specific domains or user attributes, individually chosen users, or groups.
How to access it
To access the Senders tab:
- Log in to your Exclaimer subscription and select Signatures from the menu sidebar.
- Locate your signature and select Manage Rules.
This opens the Manage screen.
- Select the Senders tab.

The Senders tab contains options to control who can send your signature.
Defining which sender this signature applies to
To define specific senders for your signature, use the configuration options in the Senders tab.
If multiple options are configured, each sender condition will be added to the list of applicable senders, acting like a logical OR operator. All applicable sender rules will be applied.
Select an option below to view the related instructions:
To apply the same signature to all users within your organization:
- Select the Everyone in my organisation radio button.

When Everyone in my organisation is selected, no other sender rules apply.
When this button is selected, the other Sender options are disabled. - To access specific sender options, select the Specific senders or groups in my organization radio button.
This option applies the signature to members of a group that you have configured using your Microsoft or Google Directory.
To apply the signature to a group:
- Select
 Add Group to enable the drop-down list.
-
Under Members of this group, enter the group name. The predictive text field displays names as you type.
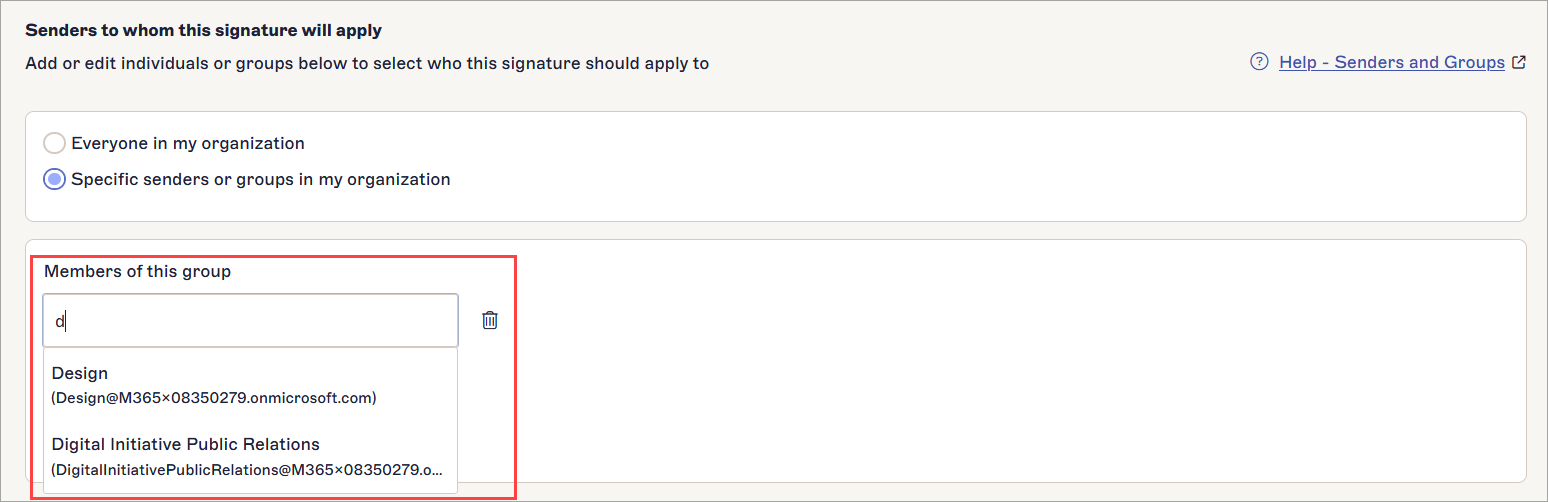
Enter your text.NOTE: Only the contact details of mail-enabled security groups and distribution groups synced with Exclaimer are available to select. For information on creating groups, see How to create a mail-enabled security group. - To add another group, select Add Group. To delete a group, select the bin icon
 .
.
- In the unsaved changes banner, select Save to apply your rules, or select Cancel to revert all changes.
This option applies the signature to only manually selected users or domains. Using an @ domain applies the signature to all users with that domain in their email address.
To apply the signature to a specific sender, email address or @ domain:
- Select Add Sender to enable the drop-down list.
-
Enter the specific sender name, email address or domain. The predictive text field displays names as you type.
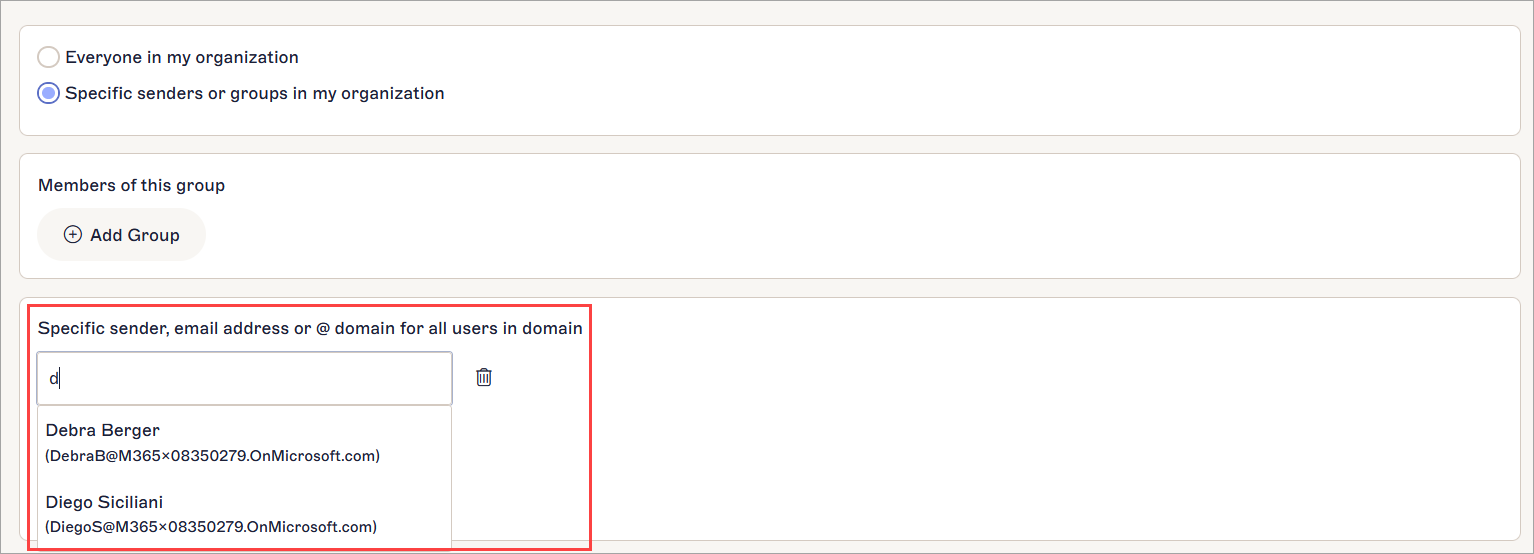
Enter your text.Tip! You can also use wildcard (*) when entering an email address or domain name. Wildcard represents any available characters attached to the complete text. Exclaimer allows for any amount of characters to be substituted for wildcard.
Some examples using wildcard are:
*@greenorg.net - this would include any email addresses that are followed by '@greenorg.net'.
@exclaimer.* - this would include any domains attached to Exclaimer email addresses.
@*.de - this would include any domains that are followed by .de. - To add another sender, select Add Sender. To delete a sender, select the bin icon .
- In the unsaved changes banner, select Save to apply your rules, or select Cancel to revert all changes.
This option applies the signature to senders based on user attributes that are assigned to your users in the Microsoft or Google directory.
To apply the signature to senders with specific user attributes:
- Select Add Advanced Query.
This opens the Advanced Query window.
The Advanced Query window.
- In Query Description, enter your text to name your query. This description appears in your Senders tab to identify the Advanced Queries you have set.
- Under Start with, select either:
No-one to start the query with no users and add matched users
or
Everyone to start the query with all users and remove matched users.
- From the Then drop-down, select either Add or Remove to choose whether you are including users that match your conditions or excluding them.
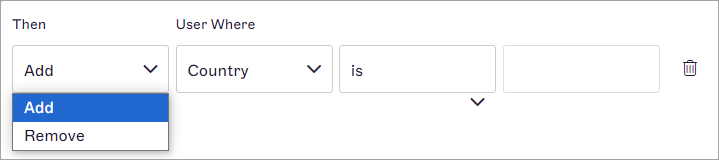
The Then drop-down chooses whether to add users or remove users who match the attribute data query.
- From the User Where drop-down, select a user attribute field to check the data for.
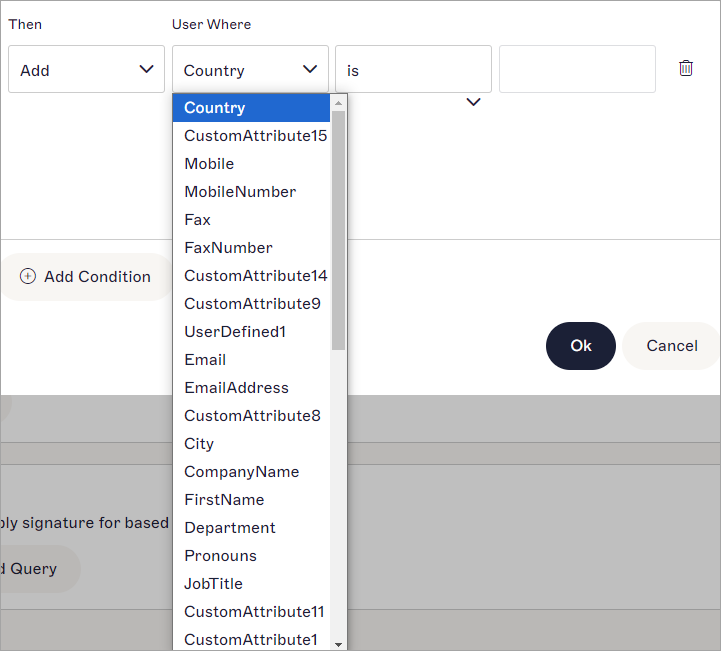
The User Where drop-down contains the user attributes to query.
- From the conditions drop-down, select one of the following options to set how your attribute data is checked:
is - the attribute data must completely match the following text.
contains - the attribute data must have the following text somewhere within it.
starts with - the attribute data must begin with the following text.
ends with - the attribute data must end with the following text.
is not - the attribute data must not be the same as the following text.
does not contain - the attribute data must not have the following text anywhere within it.
does not start with - the attribute data must not begin with the following text.
does not end with - the attribute data must not end with the following text.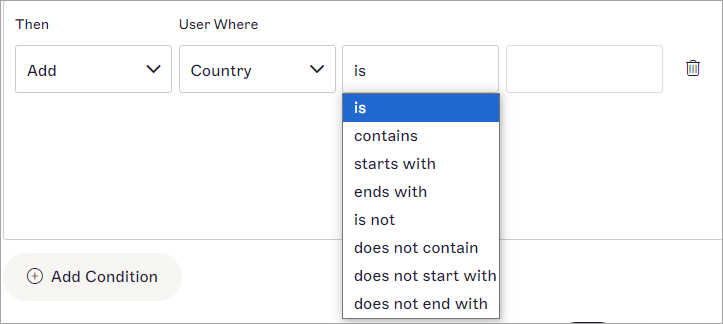
This drop-down contains options to set how your attribute data is checked.
-
In the blank text box, enter your text. This field is not case sensitive.
NOTE: Your query uses the options and text to search for users that match the criteria and either set or eliminate them as senders.
Some examples of queries are:- Start with: No-one, Then: Add > User Where: JobTitle > includes > Sales will add only users with the term Sales anywhere in their job title as senders.
- Start with: Everyone, Then: Remove > User Where: EmailAddress > ends with > example.com will add everyone as a sender except for any users whose email address ends with example.com.
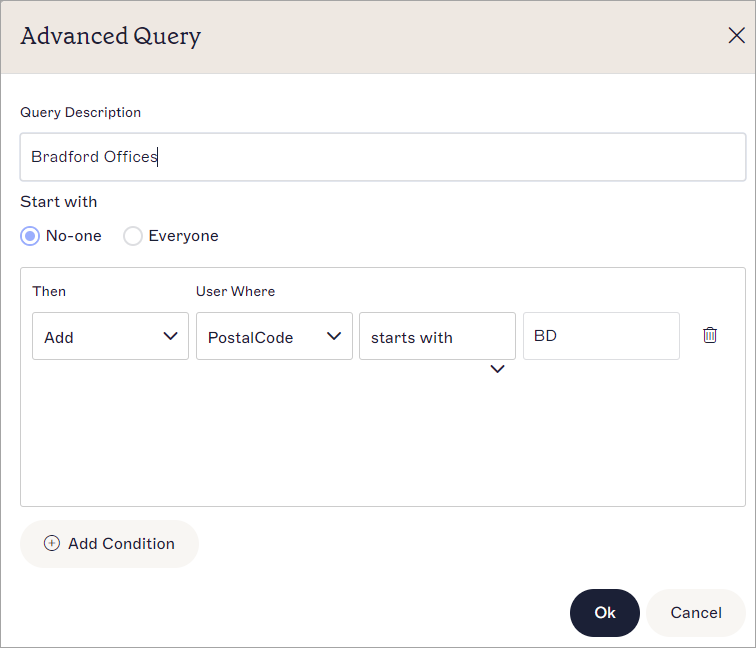
A completed query. As an example, this query adds only users whose postcode starts with BD.
-
To add another query row, select Add Condition. You can have a maximum of ten conditions.
NOTE: Stacked conditions will be processed in order. If conditions are conflicting, the condition that is higher in the list will take priority. - To remove a query row, select the bin icon .
-
Select OK to save your query and return to the Senders tab. Your query is displayed with its Query Description.
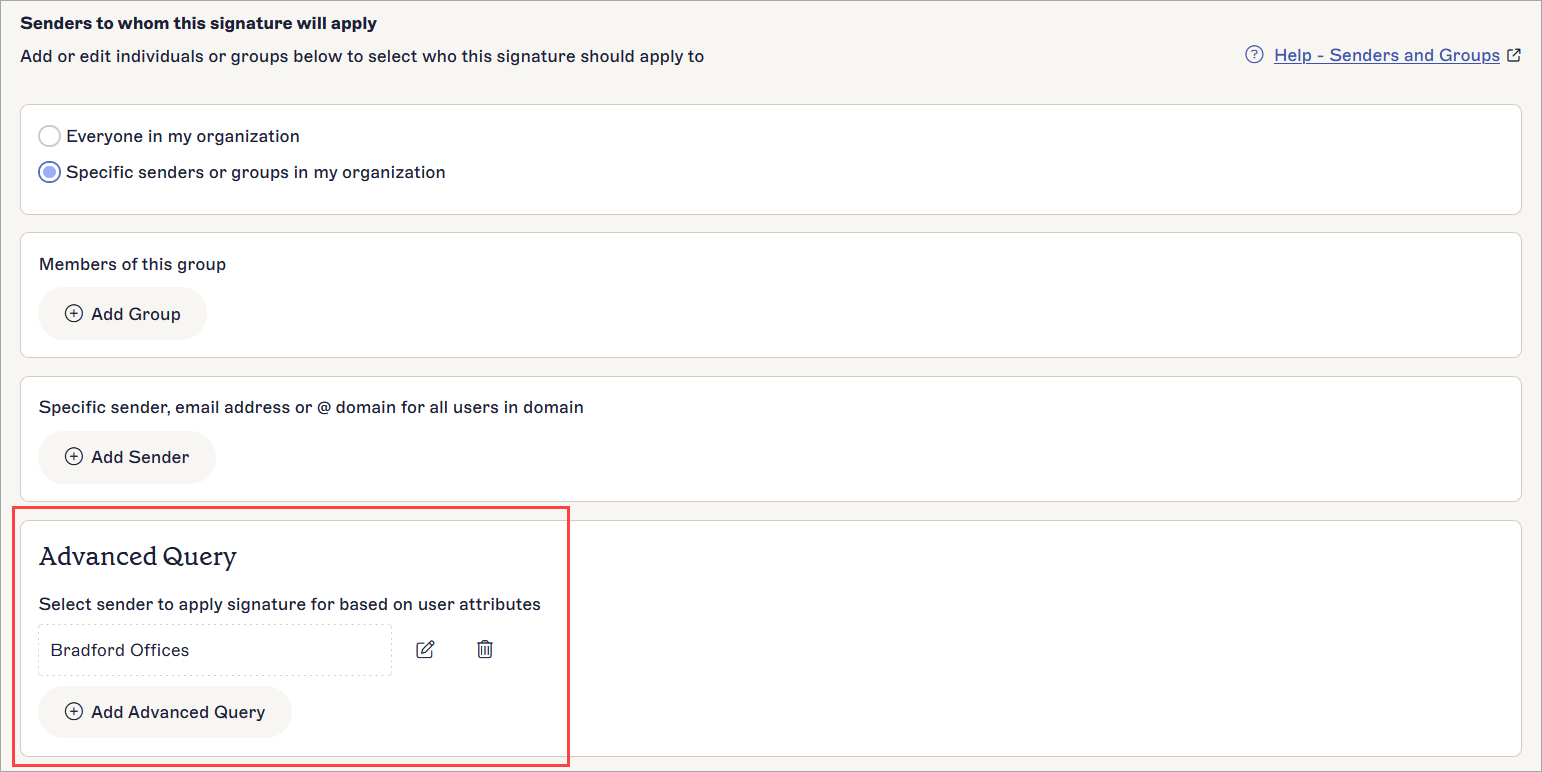
An active Advanced Query.NOTE: Select the pencil icon to edit the advanced query. Select the bin icon to delete the advanced query.
 - In the unsaved changes banner, select Save to apply your rules, or select Cancel to revert all changes.
Sender rules are processed after the configuration (Server-Side and client-side) and Recipient type (Internal, External, or All).
If sender rules are set for a folder and for an individual signature, the folder rules are evaluated first. If the folder rules cannot be processed, then the signature rules are not evaluated.