
Scenario
You want to create a signature and apply it to users based on user attributes within Microsoft Entra ID (formerly Azure AD) or Google Directory. For example, all users within a given department or who are based at a certain office.
Resolution
You can use Advanced Queries in the Sender Rules for a signature to define specific sender attributes from Entra ID or Google Directory. The signature is only applied to senders who have the selected attributes. You can add up to 10 specified conditions that a sender's attributes must or must not have.
- Log in your Exclaimer account and from the menu sidebar, select Signatures.
- From the All Signatures tab, locate your signature and select Manage Rules.
This opens the Manage screen.
- Select the Senders tab.

The Senders tab contains options to control who can send your signature.
- Select the Specific senders or groups in my organization radio button. This enables the sender rules options.

The specific sender options are disabled until you select the radio button.
- Select
 Add Advanced Query.
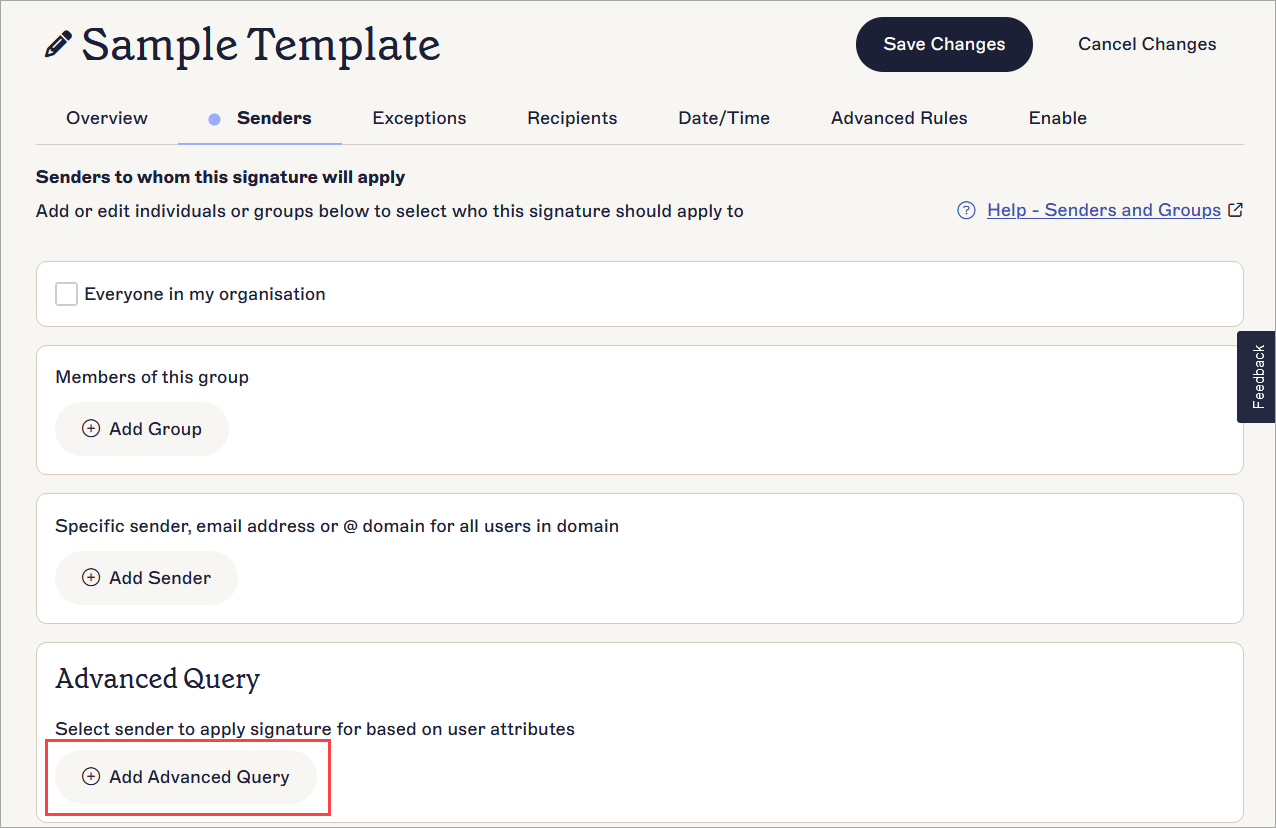
Select Add Advanced Query.
This opens the Advanced Query window.
The Advanced Query window.
- In Query Description, enter your text to name your query. This description appears in your Senders tab to identify the Advanced Queries you have set.
- Under Start with, select either:
No-one to start the query with no users and add matched users
or
Everyone to start the query with all users and remove matched users.
- From the Then drop-down, select either Add or Remove to choose whether you are including users that match your conditions or excluding them.
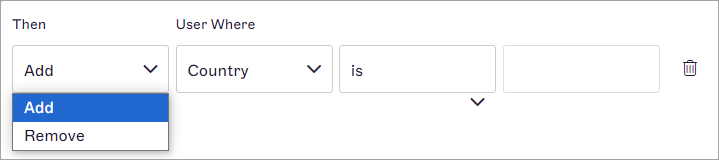
The Then drop-down chooses whether to add users or remove users who match the attribute data query.
- From the User Where drop-down, select a user attribute field to check the data for.
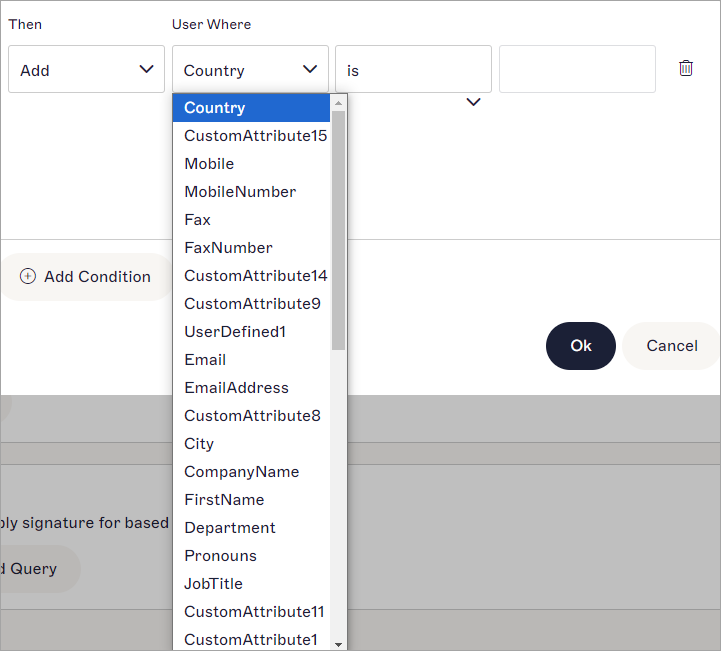
The User Where drop-down contains the user attributes to query.
- From the conditions drop-down, select one of the following options to set how your attribute data is checked:
is - the attribute data must completely match the following text.
contains - the attribute data must have the following text somewhere within it.
starts with - the attribute data must begin with the following text.
ends with - the attribute data must end with the following text.
is not - the attribute data must not be the same as the following text.
does not contain - the attribute data must not have the following text anywhere within it.
does not start with - the attribute data must not begin with the following text.
does not end with - the attribute data must not end with the following text.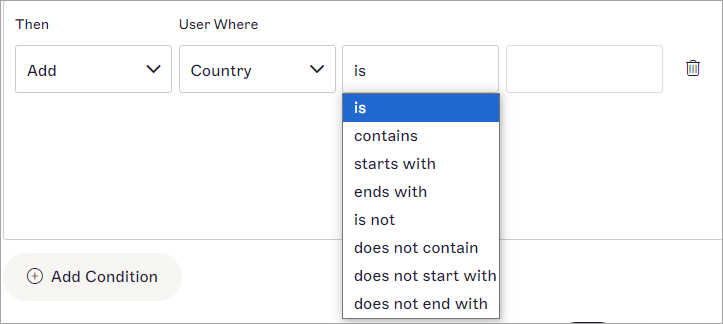
This drop-down contains options to set how your attribute data is checked.
-
In the blank text box, enter your text. This field is not case sensitive.
NOTE: Your query uses the options and text to search for users that match the criteria and either set or eliminate them as senders.
Some examples of queries are:
Start with: No-one, Then: Add > User Where: JobTitle > includes > Sales will add only users with the term Sales anywhere in their job title as senders.
Start with: Everyone, Then: Remove > User Where: EmailAddress > ends with > example.com will add everyone as a sender except for any users whose email address ends with example.com.
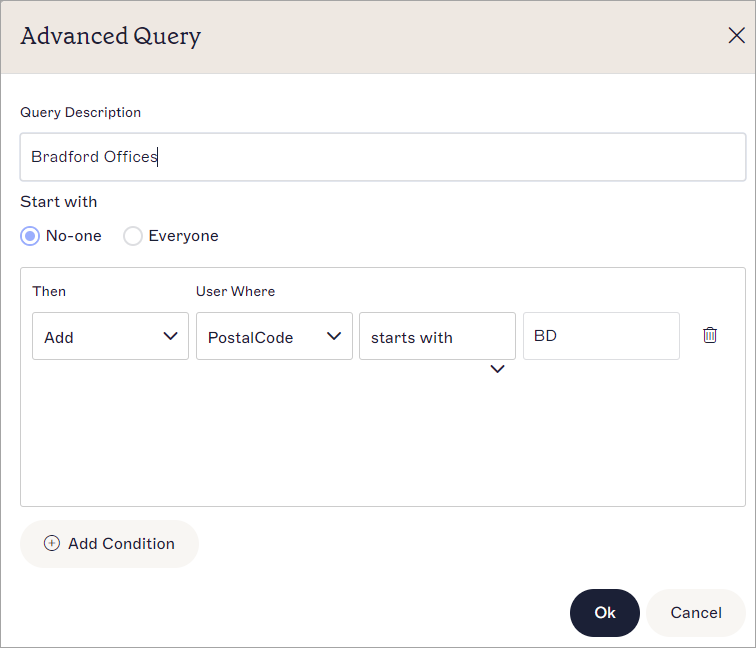
A completed query. As an example, this query adds only users whose postcode starts with BD. -
To add another query row, select Add Condition. You can have a maximum of ten conditions.
NOTE: Stacked conditions will be processed in order. If conditions are conflicting, the condition that is higher in the list will take priority. - To remove a query row, select the bin icon
 .
.
-
Select OK to save your query and return to the Senders tab. Your query is displayed with its Query Description.
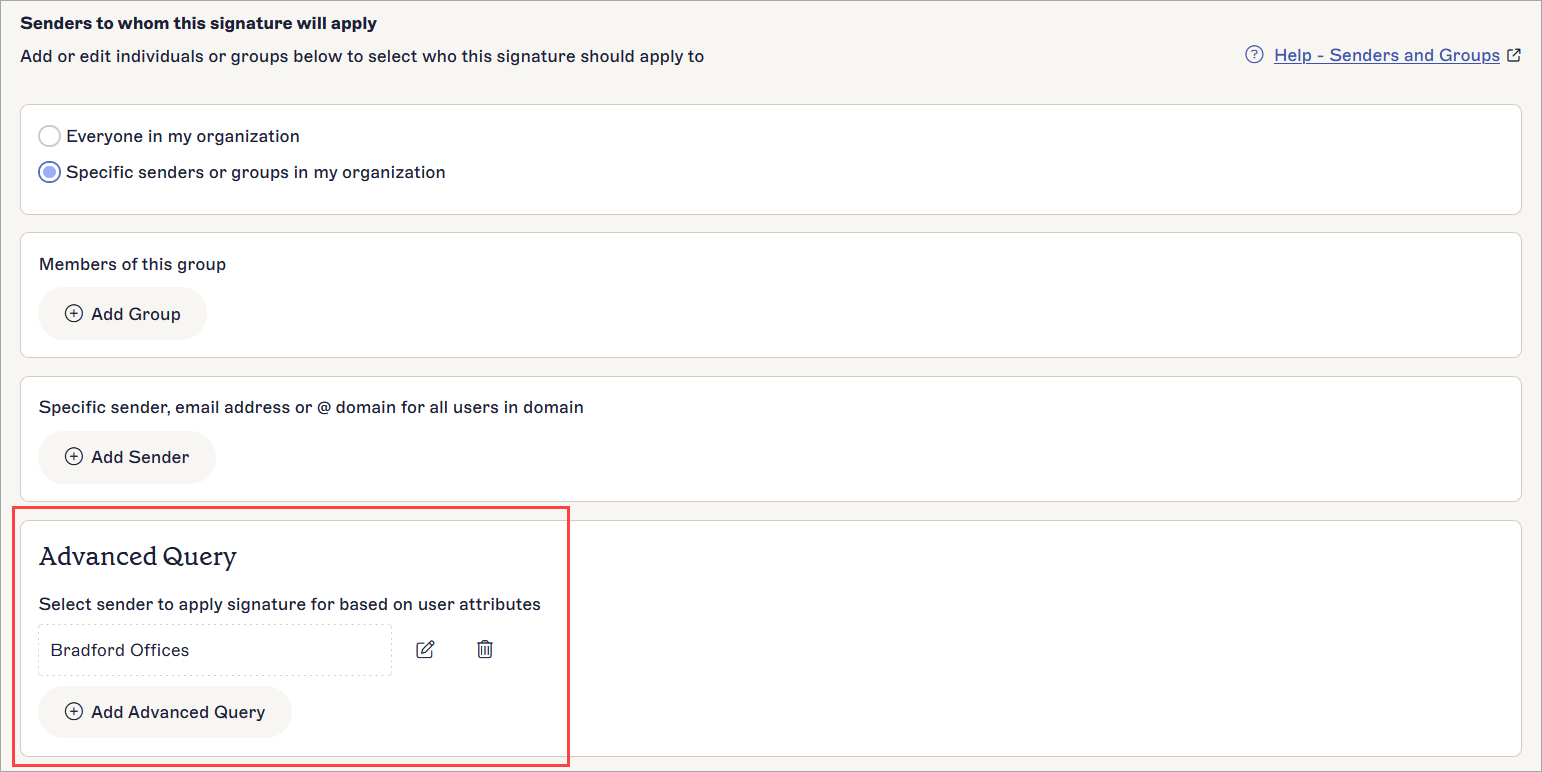
An active Advanced Query.NOTE: Select the pencil icon to edit the advanced query. Select the bin icon to delete the advanced query.
 - In the unsaved changes banner, select Save. When you send an email with this signature, it will only be applied to users with the user attributes that match the rules you set up in the condition(s) for your Advanced Query.