
Scenario
You have already configured Exclaimer for Server-Side signatures, but you need to reconfigure the connectors and mail flow rule.
Resolution
To reconfigure the connectors and mail flow rules with Exclaimer, you need to re-run the Microsoft 365 connector setup. You can do this as part of a troubleshooting session or if you've removed certain settings from Exchange Online and need to reconfigure them.
- Re-run the connector setup at a time that minimizes the potential disruption to mail flow. The wizard typically takes less than 10 minutes to run. However, you should allow up to an hour for the changes to fully replicate in Microsoft 365.
- If you have made changes to the Identify messages to send to Exclaimer Cloud rule in the Exchange admin center, you will need to manually reapply them after the setup has been completed.
To update mail flow settings:
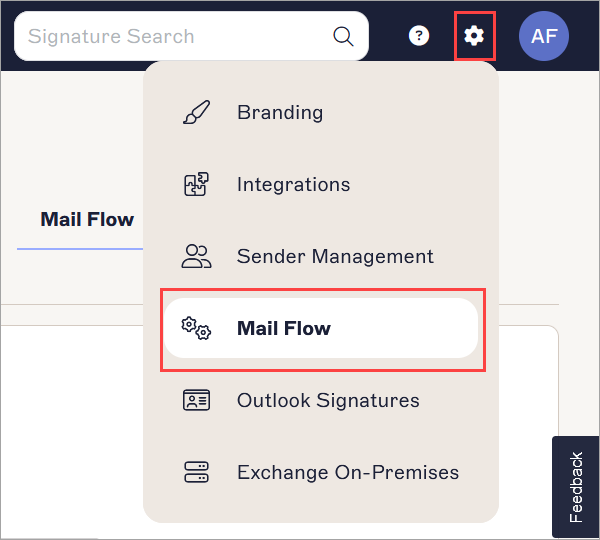
- Log into the Exclaimer portal (portal.exclaimer.com) and Launch your subscription.
- From the header bar, select the cogwheel icon, then select Mail Flow.
-
Navigate to the Connect to Microsoft 365 section.
REQUIRED! You need to use your Microsoft 365 Global Administrator credentials to re-run the connector setup. -
EITHER:
Select Send all email to Exclaimer to send all your company emails to Exclaimer to process.
OR
In Test Group Name enter the name of the (mail-enabled) group whose user emails need to be processed by Exclaimer.NOTES:
- The Autocomplete feature will complete the group name for you (from the list of all groups selected during the AD sync); if required, you can edit it.
- If you specify a group name that does not already exist in your Microsoft 365 tenancy, the group will be automatically created for you as a mail-enabled security group. However, you will need to add members to this group on Microsoft 365 once the setup of Exclaimer is complete.
- Please select only mail-enabled security groups if you want to select an existing group. For more information, see How to create a mail-enabled security group.
- Exclaimer stores the setting, including the group name used (if applicable), from when the connector setup wizard was last run. If the group option was selected, and the group has since been changed or removed manually on the Identify messages to send to Exclaimer Cloud mail flow rule in Exchange Online, then make sure you make the required change here too. - Select Connect.
-
Log in as a Global Administrator. Select the required Microsoft account.
NOTE: The credentials for any current Global Administrator can be used. You don't need to use the credentials that were used when first configuring Exclaimer.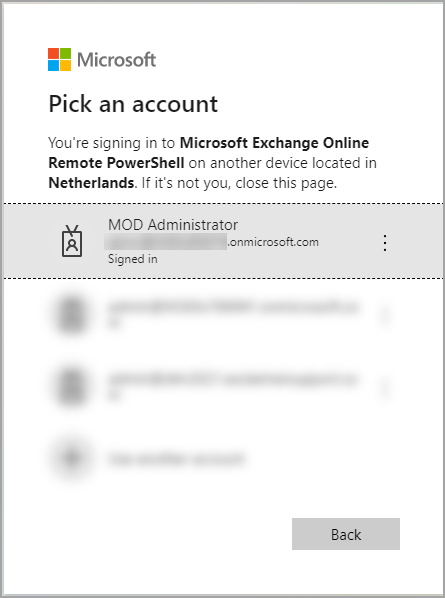
-
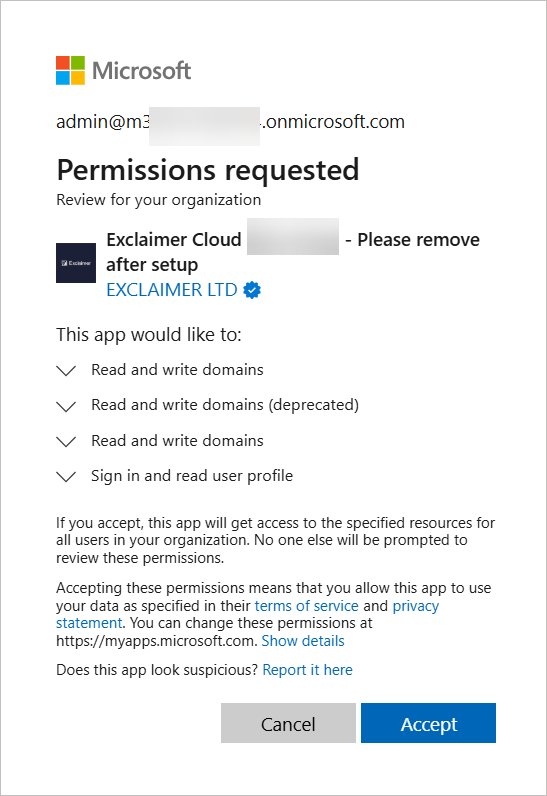
This opens the Permissions requested window. Select Accept. For more information on permissions used, see Exclaimer Microsoft 365 application permissions.
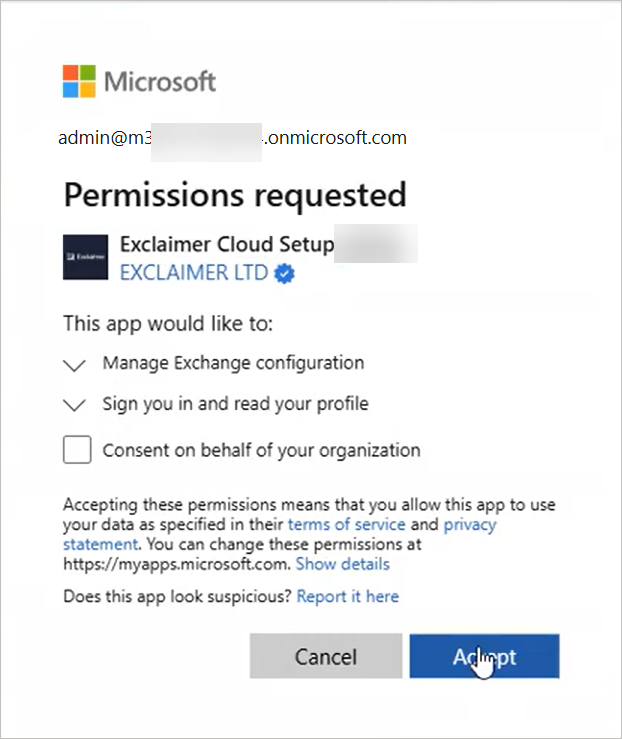
Another set of Permissions requested window is displayed. For more information on permissions used, see Exclaimer Microsoft 365 application permissions.
- Select Accept.
The process to re-run connectors and transport rules to route emails from Microsoft 365 to Exclaimer will now start. This process can take some time to complete, which is indicated by a spinner.
If you have any questions about re-running the connector setup or have any issues during the process, please Submit a request, and our Support Team will be happy to reach out and assist you.