
Scenario
You wish to migrate your Exclaimer subscription to a new Microsoft 365 tenant.
Resolution
Select the options below to view the instructions to migrate an Exclaimer subscription to a new Microsoft 365 tenant:
Step 1: Remove the Exclaimer SMTP domain from your previous tenant
To remove the Exclaimer SMTP domain from your previous tenant:
NOTES:
• Uninstall Server-Side signatures from your Microsoft 365 tenant before you remove the Exclaimer SMTP domain.
• If you are transitioning from another company while the previous tenant remains active, please note that this may cause mail flow issues.
• Uninstall Server-Side signatures from your Microsoft 365 tenant before you remove the Exclaimer SMTP domain.
• If you are transitioning from another company while the previous tenant remains active, please note that this may cause mail flow issues.
- Log into Microsoft 365 admin center using the Global Administrator credentials for the ORIGINAL tenant.
- From the menu sidebar, select Settings, then select Domains. You will see a list of all your domains.
- Remove the entry for your ORIGINAL domain.
To remove the original domain:
- From the Domains list, select the required domain (this will be in the form <unique tenant ID>.smtp.exclaimer.cloud) or <unique tenant ID>.excl.cloud).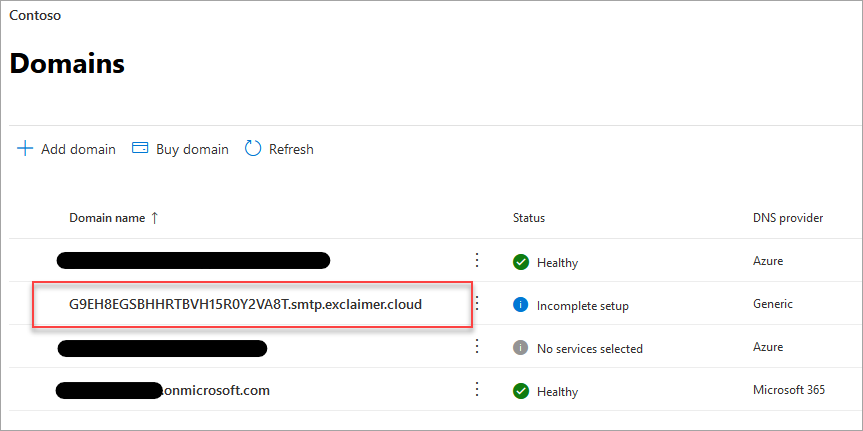
Example screen showing a domain selected.
- Select Remove.
- Follow any additional prompts, then select Close.
Step 2: Migrate the Cloud tenant
To migrate the Cloud tenant:
- Log into the Exclaimer portal and launch your subscription.
- From the header bar, select the cogwheel icon, then select Sender Management.
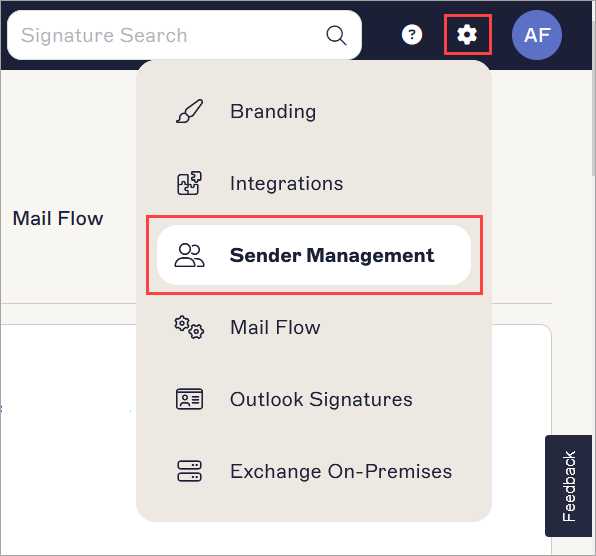
Select Sender Management.
- Navigate to the Enable Azure AD Access section.
For more information, see Enable Azure AD Access.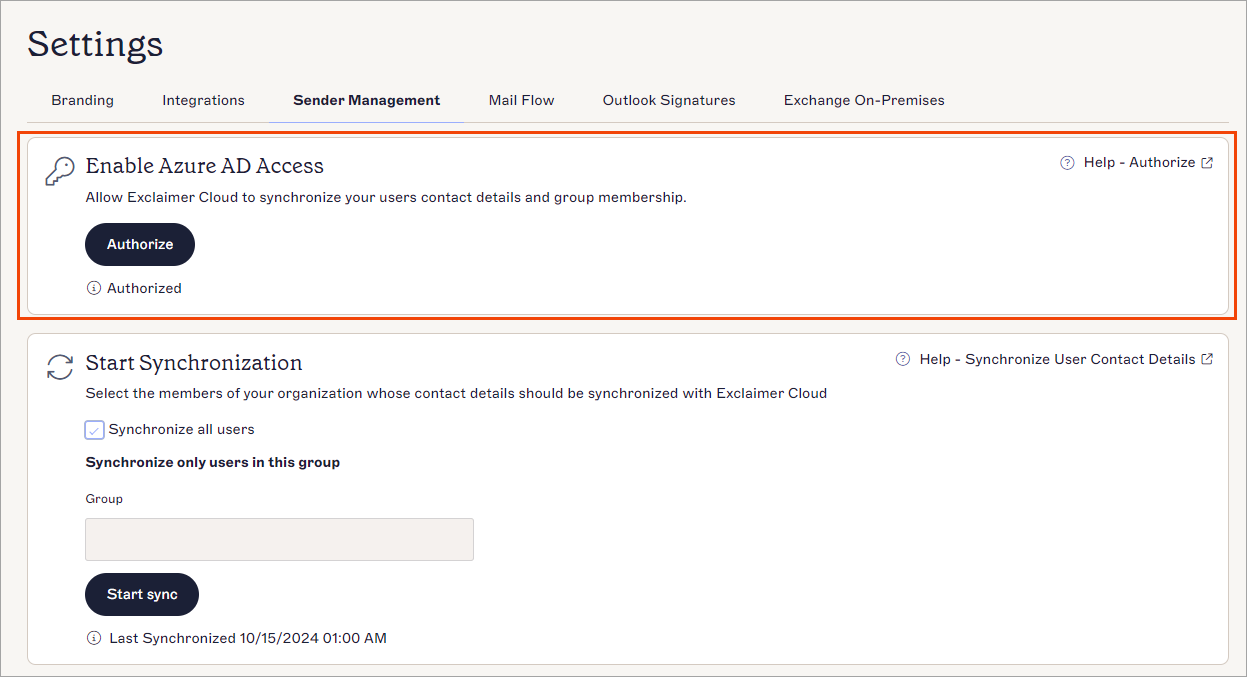
The Enable Azure AD Access section.
- Select Authorize.
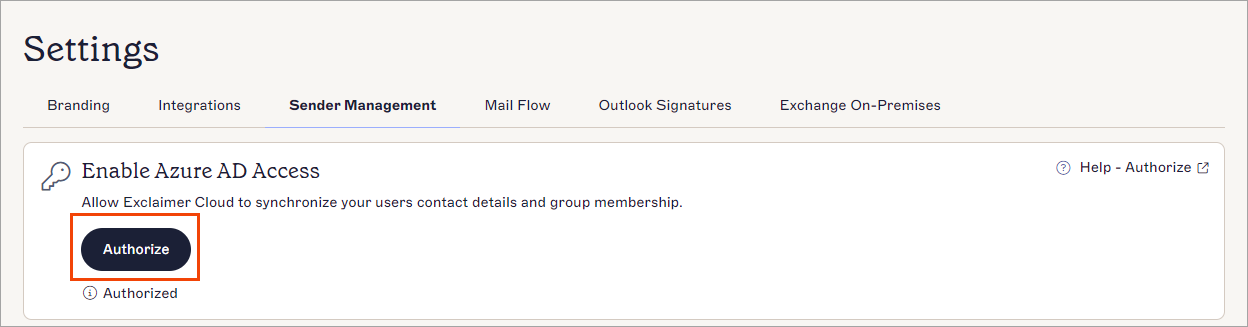
Select Authorize to begin the authorization.
- You are prompted to sign in to Microsoft 365 as a Global Administrator. Enter credentials for your new tenant.
- You are prompted to accept a permissions request for the Exclaimer to read your Entra ID (formerly Azure AD) data. Select Accept.
The Authorization Successful message is displayed.
The Authorization Successful message.
Now, you need to synchronize the data.
- Navigate to the Start Synchronization section. For more information, see how to Synchronize user data.
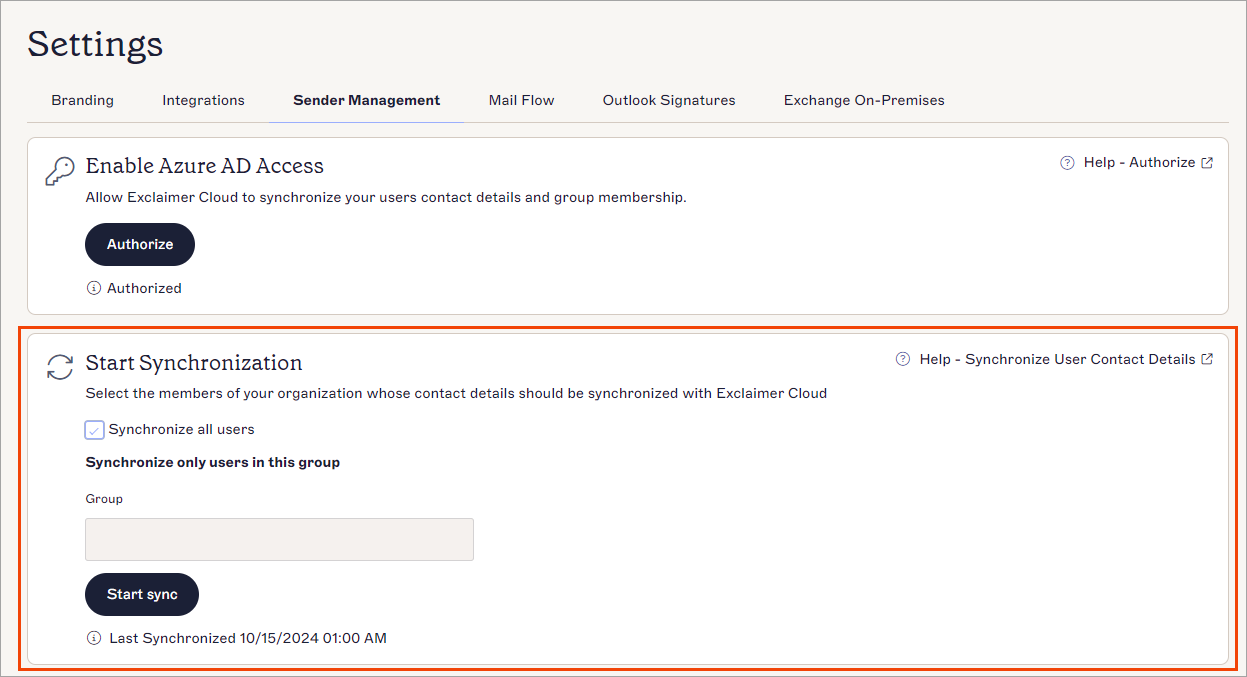
The Start Synchronization section.
- Select Start sync to start synchronizing the data.
The synchronization process will continue in the background while you proceed with the setup.
A confirmation message is displayed, along with the date and time when the sync is completed.
- Re-run the connector setup for the NEW tenant.
Remove any Azure Apps from the previous tenant
To remove Azure apps from the previous tenant:
For more information, see how you can remove the Exclaimer Azure App.