
Scenario
You send emails from a shared mailbox and wish to apply Client-Side signatures, so that you can see the signature while composing the email.
This may help you stop a personal signature from being applied, or it may be useful for organizations that only use Client-Side signatures.
Resolution
The solution depends on whether you use the Exclaimer Outlook Add-in or the Exclaimer Signature Update Agent.
• If your shared mailbox's user accounts are set to Sign-in blocked, then Exclaimer will not synchronize the details for the shared mailbox by default. Enable Synchronize Disabled Accounts to synchronize these shared mailbox accounts.
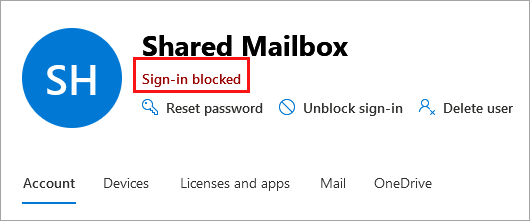
A mailbox set to Sign-in blocked.
• Ensure that the shared mailbox is included in the Senders list for the signature you want to apply.
• Ensure that the signature is enabled for Client-Side deployment.
The Outlook Add-in can take up to 60 minutes to reflect settings and rules changes.
Select an option below to view the related instructions:
To ensure the Outlook Add-in applies the correct signature when sending emails from a shared mailbox in Classic Outlook/New Outlook:
Sign in to Outlook using your personal mailbox account.
-
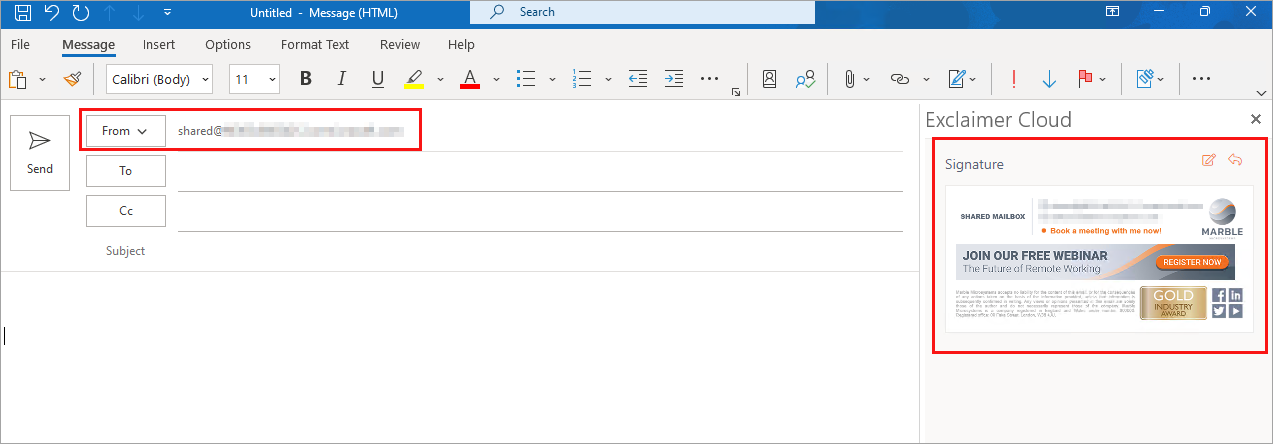
Select New Mail to compose an email. Create your email, then change the From address to the shared mailbox.
TIP! The exact location of the From address may vary between Outlook versions. If you do not see the From address, open the Options menu, select the ellipses (...), then select From.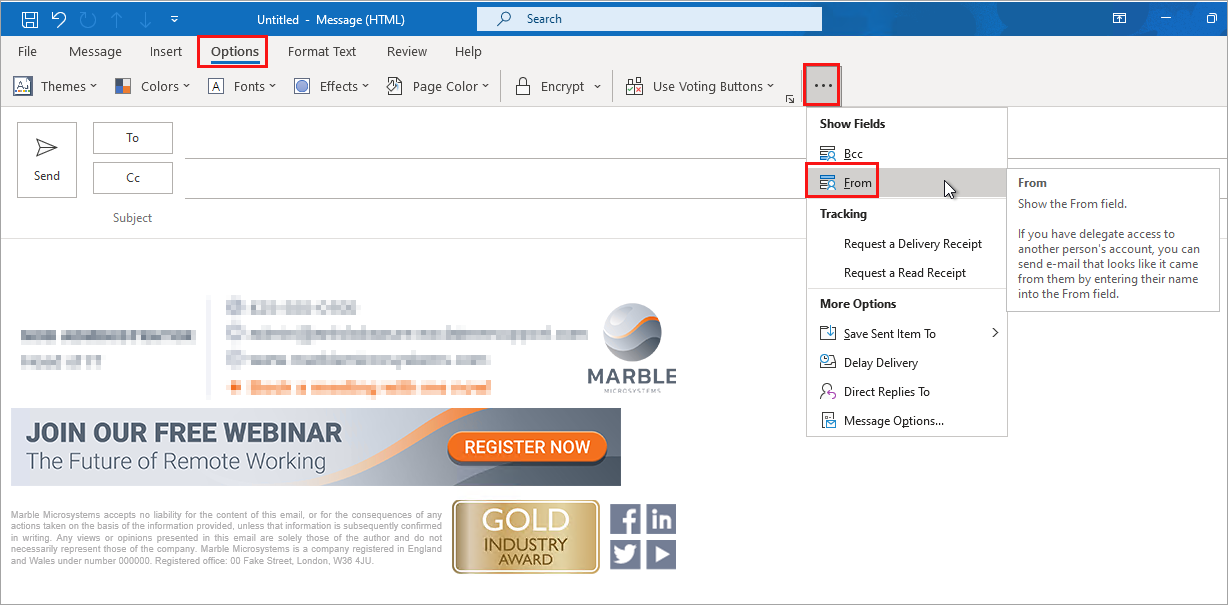
The From address may be found in the ellipsis menu within the Options menu.
- Open the Exclaimer Outlook Add-in by selecting the Exclaimer icon from the Message ribbon. For more information on accessing the Add-in, see Using the Exclaimer Outlook Add-In.
- Select a signature for the shared mailbox from the Add-In pane.
The Exclaimer Outlook Add-In pane displays all the available signatures.
This inserts the selected signature into the body of the email.
To ensure the Outlook Add-in applies the correct signature when sending, replying to, or forwarding emails from a shared mailbox in Outlook on the web, follow the steps below.
Send an email from a shared mailbox
To ensure the Outlook Add-in has full functionality when sending emails from a shared mailbox in Outlook on the web:
Sign in to Outlook Web App (OWA) using your personal mailbox account.
Select New Mail to compose an email.
-
Select the From field next to the Send button.
TIP! If the From field is not visible, select Options, then enable Show From.
If the From field is not available, select Options, then enable Show From.
-
Select the shared mailbox email address from the list.
TIP! If the shared mailbox is not listed, select Other email addresses... then enter the shared mailbox email address manually.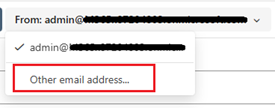
If the Shared mailbox is not listed, then from the From drop-down list, select Other email address...
Once you send an email from the shared mailbox, the address will remain available in the From drop-down list.
The Outlook Add-in will automatically insert the default signature for the shared mailbox.
Reply to or forward an email from a shared mailbox
Before replying or forwarding emails, make sure you have sent at least one email from the shared mailbox (see the steps above). This ensures the shared mailbox appears in the From drop-down list.
To reply to or forward emails from a shared mailbox while ensuring the correct signature is applied:
-
Verify the shared mailbox appears in the mailbox list on the left side of Outlook.
If the shared mailbox is not listed:
Select the ellipsis ... next to your mailbox name.
Select Add Shared Folder or Mailbox.
Enter the shared mailbox email address and attach the mailbox.
-
Ensure the From field is always visible:
Go to Settings, select Mail, then select Compose and Reply.
Enable Always show From.
Select Save.
You can now reply to or forward emails from the shared mailbox, and the Outlook Add-in will automatically insert the required signature.
The Exclaimer Signature Update Agent downloads Client-Side signatures based on how the mailboxes have been configured in Microsoft Outlook.
If the shared mailbox is added as an additional account in the Outlook profile, the Update Agent prompts the user to sign in for the shared mailbox; it will then download any signatures assigned to that mailbox in addition to the primary mailbox in the profile. Proceed to To apply signatures for shared mailboxes added as additional mailboxes below.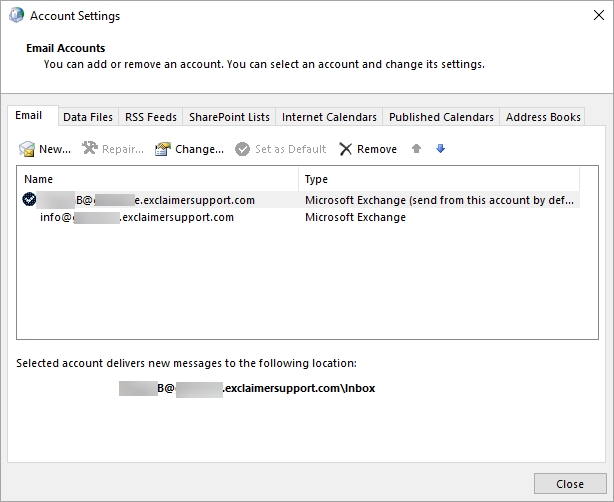
The Account Settings window shows the listed profiles.
If the shared mailbox is automatically added to Outlook via full permissions, or if the mailbox is added as an additional mailbox within the Exchange Account Settings window, the Update Agent will not download the signatures for the additional mailboxes. Proceed to To configure the Exclaimer Signature Update Agent to download signatures for additional mailboxes (per machine) below, then continue to To apply signatures for shared mailboxes added as additional mailboxes.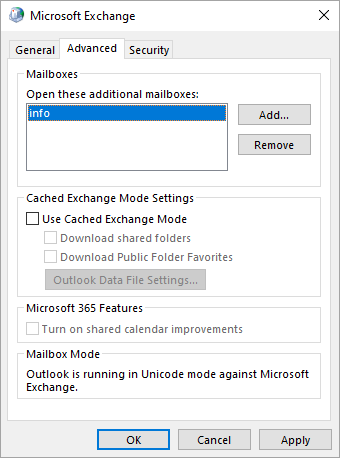
The Exchange Account Settings window shows additional mailboxes.
To configure the Exclaimer Signature Update Agent to download signatures for additional mailboxes (per machine):
-
Navigate to the installation directory for the Exclaimer Signature Update Agent via one of the following paths:
Per-user MSI installation:%localappdata%\Programs\Exclaimer Ltd\Cloud Signature Update Agent
Per-machine MSI installation:Program Files (x86)\Exclaimer Ltd\Cloud Signature Update Agent
Click Once installation:%localappdata%\AppData\Local\Apps\2.0\Exclaimer Ltd\Cloud Signature Update Agent
- Locate the file Exclaimer.CloudSignatureAgent.exe.config and open the file in Notepad.
- Set the value of IncludeAdditionalMailboxes to True.
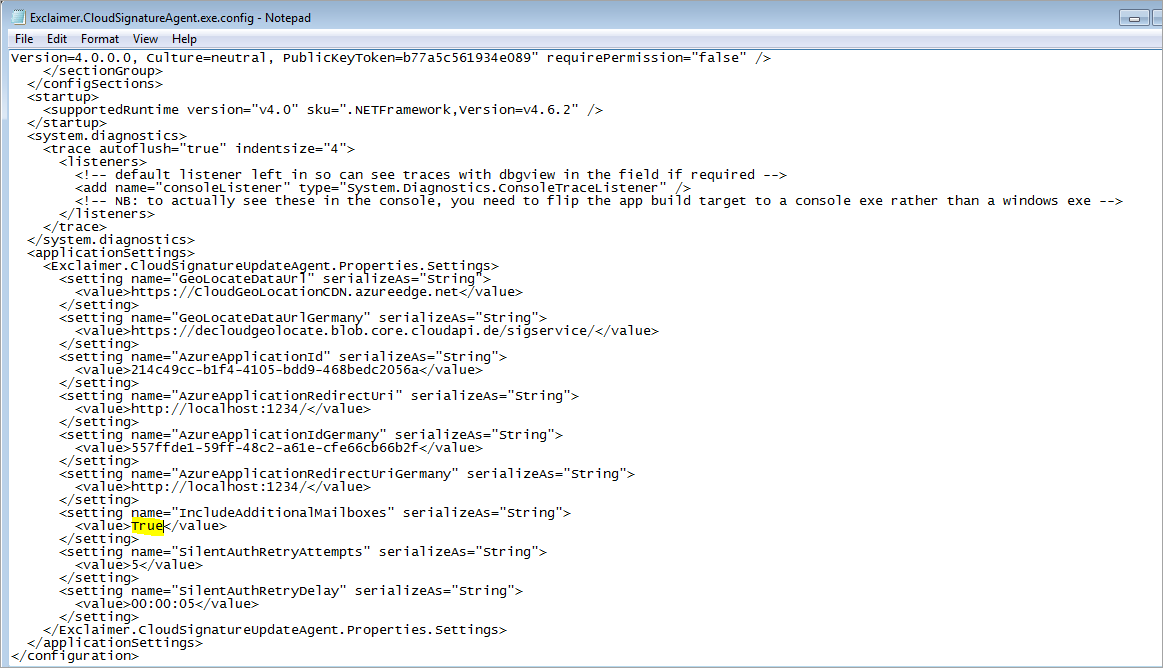
Enter True to set the value.
- Save the changes to the file and close the Notepad.
-
Re-run the Exclaimer Signature Update Agent from the Start menu to download the additional user signatures.
NOTE: Users will be prompted for credentials for each additional mailbox - enter the user's individual credentials to authenticate.
To apply signatures for shared mailboxes added as additional mailboxes:
-
Create your email, then change the From address to the shared mailbox.
NOTE: The exact location of the From address may vary between Outlook versions. If you do not see the From address, open the Options menu, select the ellipses (...), then select From.
The From address may be found in the ellipsis menu within the Options menu.This allows the second signature to be downloaded and made available; but the sender will need to manually select the signature from the signatures drop-down menu.
- To manually select a different signature, use the signatures drop-down menu on the toolbar.
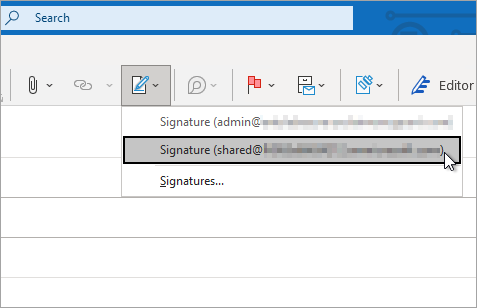
Select the signatures icon to open the drop-down of available signatures in Outlook.