
Scenario
You are using Exclaimer and wish to include specific user data in your signature, such as adding qualifications or pronouns. However, the available {Fields} attributes do not have any fields that match the data you need.
Resolution
To use custom fields, you can add data for any user account to a custom attribute using Active Directory, Microsoft 365, Microsoft Entra ID (formerly Azure AD), Google Workspace, or by uploading a CSV with Exclaimer's User Details Upload feature. This adds a new field with your custom data that is then available for use in your signatures for any user.
Select an option below to view the related instructions:
To add a custom attribute to Exclaimer:
- Open the Active Directory Users and Computers.
- Navigate to View and select Enable Advanced Features.
- Locate the user account within the organizational units.
-
Double-click the user to open the account's properties, then select the Attribute Editor tab.
NOTE: You will need to enable advanced features to see the Attribute Editor in Active Directory Users and Computers found in View > Advanced Features. - Locate an extensionAttribute attribute with a Value column entry of not set. Double click not set to bring up the String Attribute Editor, and enter your custom field data. Select OK to commit your data to the attribute.
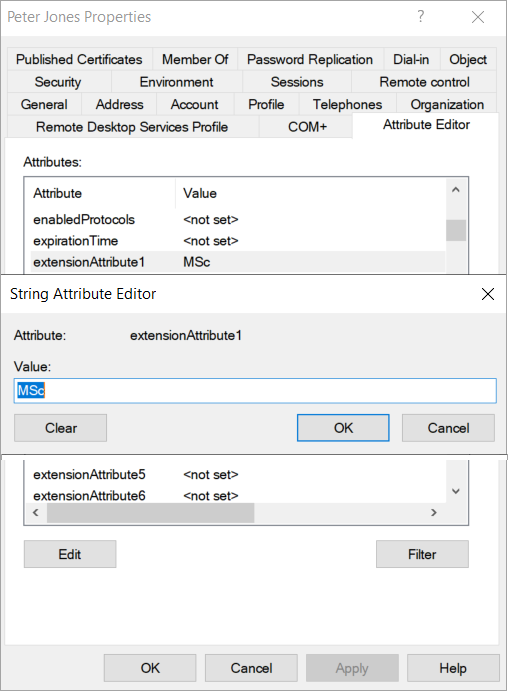
Enter a new Value for the atribute to name it.
- In Exclaimer, use the Enable Additional Attributes feature found in Manage User Data to synchronize your custom attributes.
For more information, see Enable Additional Attributes.
-
In Microsoft Entra Connect (formerly Azure AD Connect), enable the feature called Directory Extensions and select the required attributes.
For more information, see Enable and configure Directory Extensions in Microsoft Entra Connect.WARNING! You must complete the processes in Steps 6 and 7 fully to ensure your attributes become available. Failing to configure Enable Additional Attributes and the Entra Directory Extensions means your attributes will not appear. -
Add a {Fields} element to your template in the Signature Designer. Your custom fields are now available to select from the list of fields.
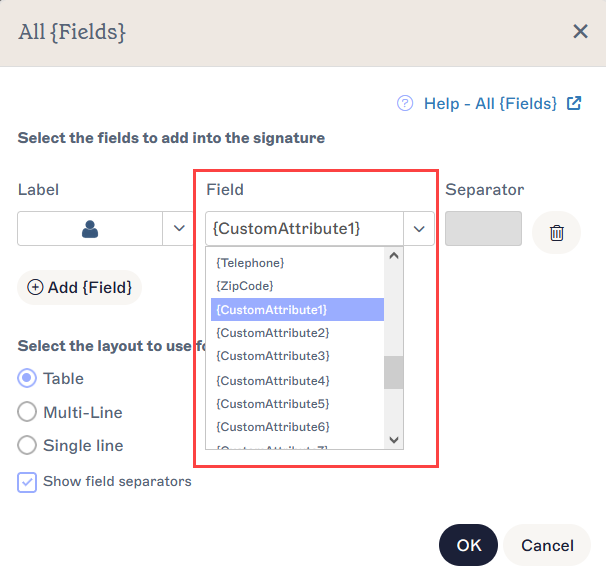
Select your custom field from the Field drop-down.Tip! For more information on adding field-based elements in the Signature Designer, see our knowledgebase articles on working with the All {Fields}, Contact {Fields}, Personal {Fields}, and Address {Fields} elements.NOTE: There are 15 Extension Attributes per AD account. To create new custom attributes, see How to create extra custom AD attributes.
To add a custom attribute to Exclaimer:
- Log in to the Exchange Online admin portal (https://admin.exchange.microsoft.com) as an Administrator.
The Exchange admin center is displayed.
- From the menu sidebar, select Recipients, then select Mailboxes.
- Select a mailbox. This opens the mailbox details pane.
- Select the Others tab, then select Custom attributes.
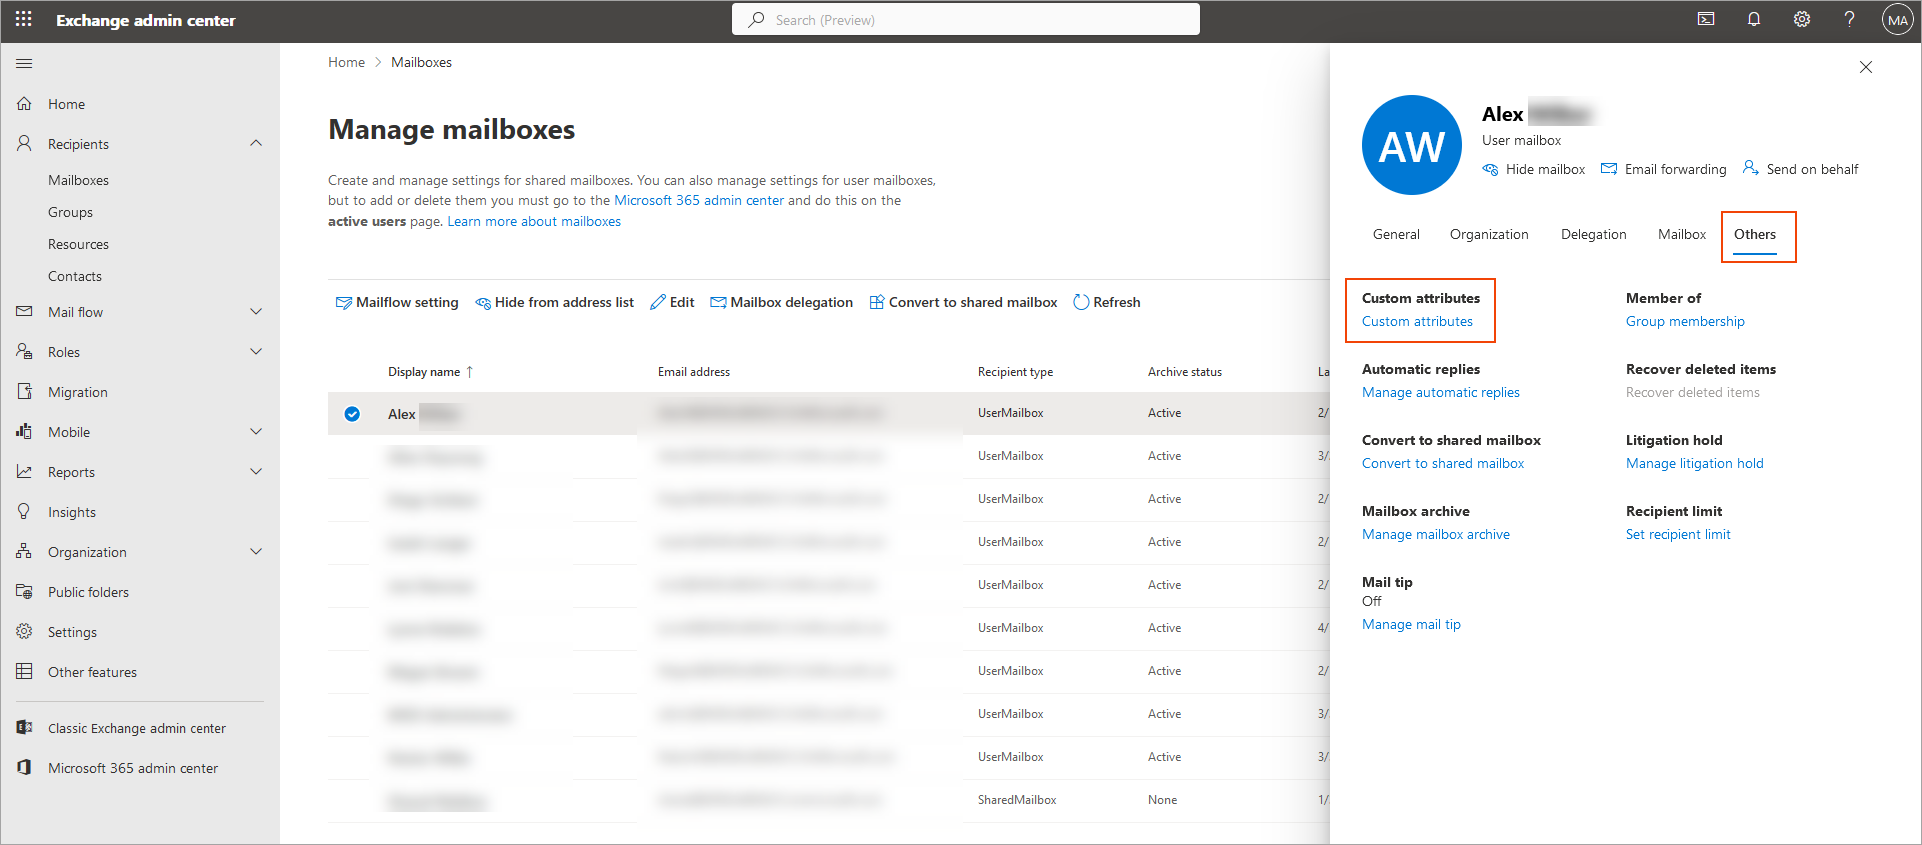
Custom Attributes is found in the Others tab in the mailbox details pane.
The Manage custom attributes window is displayed.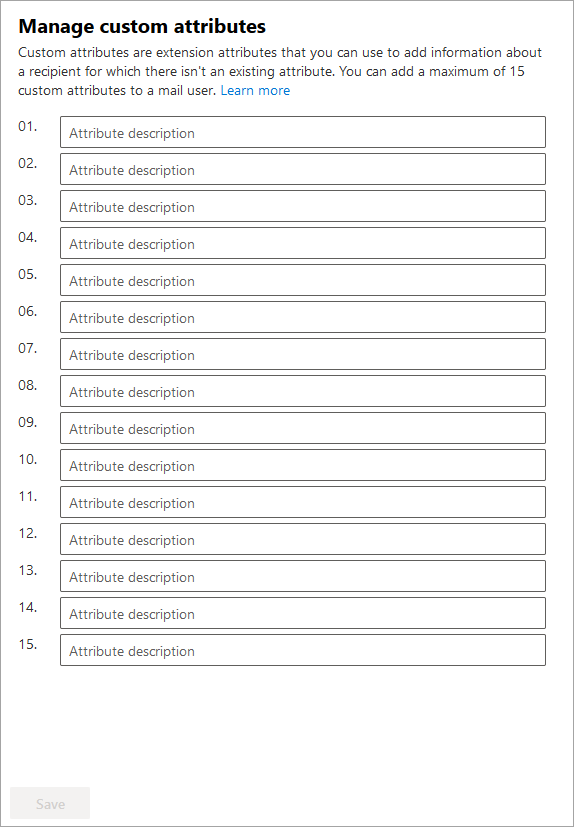
The Manage custom attributes window.
- Enter your data in one of the 15 custom attributes fields, then select Save.
-
Add a {Fields} element to your template in the Signature Designer. Your custom fields are now available to select from the list of fields.
Select your custom field from the Field drop-down.
Tip! For more information on adding field-based elements in the Signature Designer, see our knowledgebase articles on working with the All {Fields}, Contact {Fields}, Personal {Fields}, and Address {Fields} elements.NOTE: Extension attributes 1-15 will always show as CustomAttribute in Exclaimer.
Other fields from On-Premise AD will be called AAD.<FieldName>.
To add a custom attribute to Exclaimer:
- Log in to the Google Admin Console using Google Admin credentials.
- In the Menu, select Directory, then select Users.
- Open the More options drop-down in the Users section, then select Manage custom attributes.
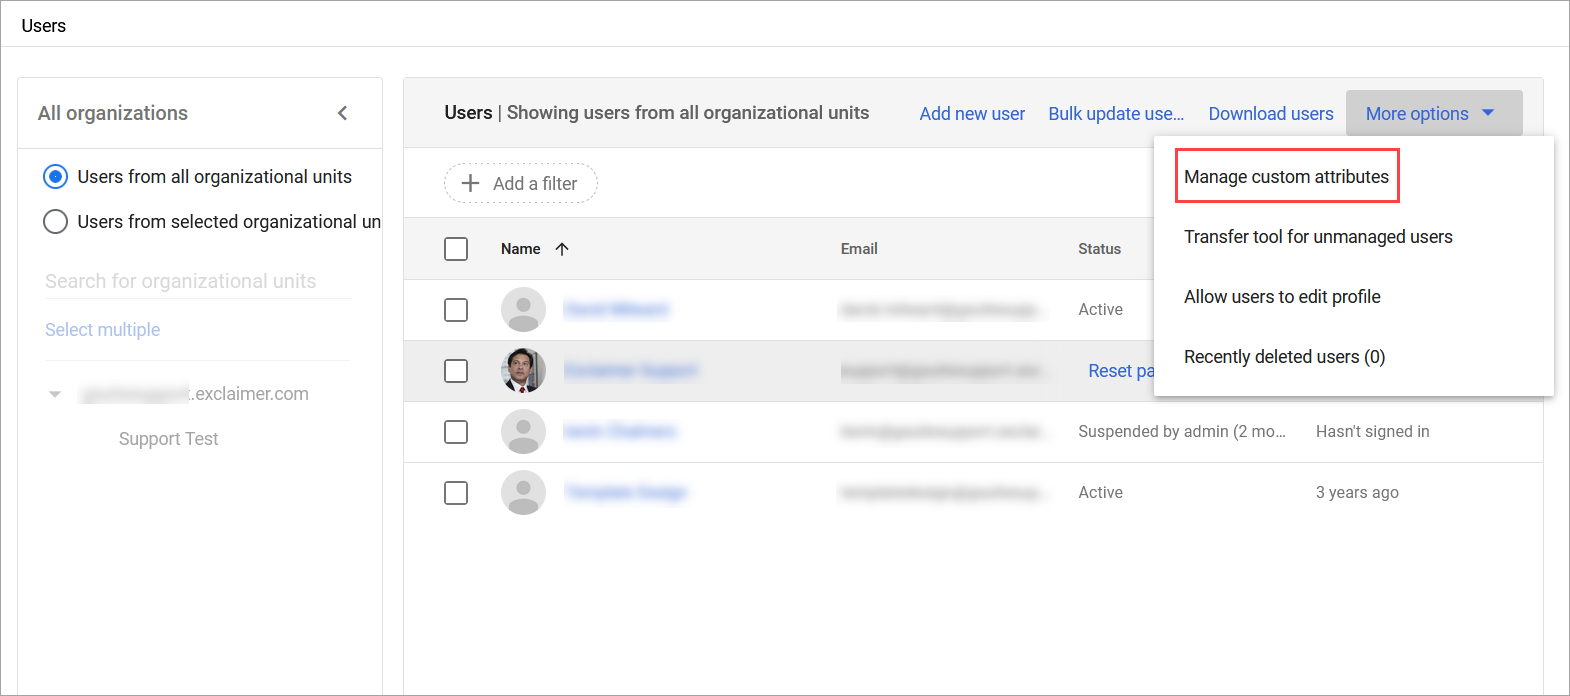
Select the arrow icon to expand the More options drop-down.
- Select ADD CUSTOM ATTRIBUTE. This opens the Add custom fields window.
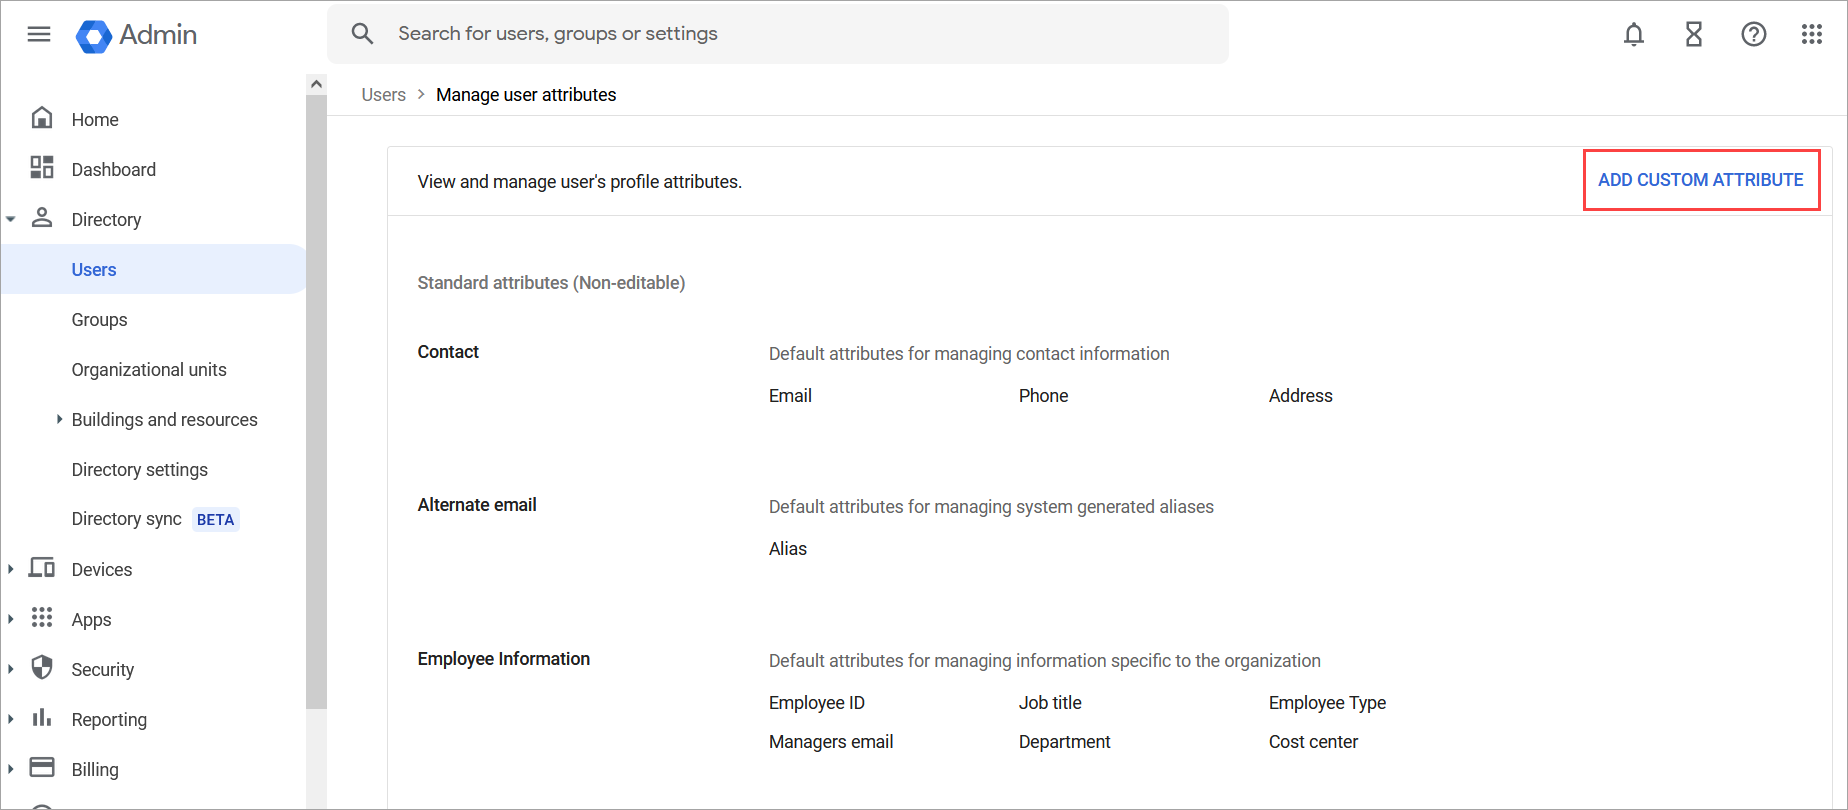
ADD CUSTOM ATTRIBUTE is found in the section header.
- Enter an attribute Category name, such as Custom attributes. Your new attributes will be stored in this category on user accounts.
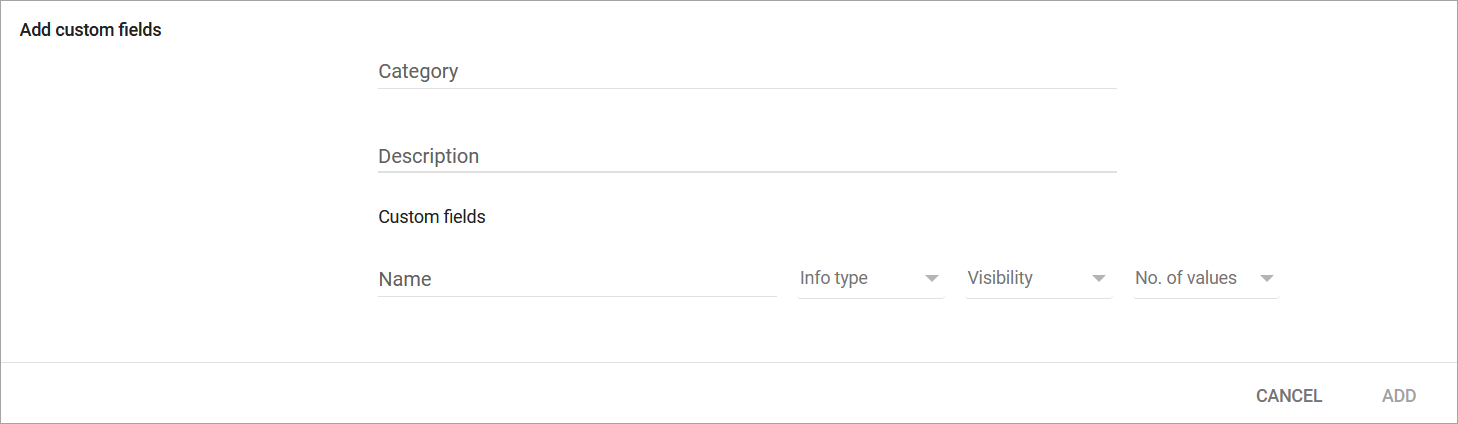
The Add custom fields window contains the entry fields for Category and attribute information.
- You can enter a category description in the Description field.
-
Enter a name for your attribute in the Name field.
NOTE: Only alphanumeric text, hyphens, and underscores can be used in your attribute name.This is to avoid data conflict when integrating Google attributes with Exclaimer via our API process.
-
In the Info type drop-down, set the format of the data for your field. The available info types are: Text, Whole Number, Yes or No, Decimal Number, Phone, Email, or Date.
NOTE: Info type cannot be changed once the attribute is created.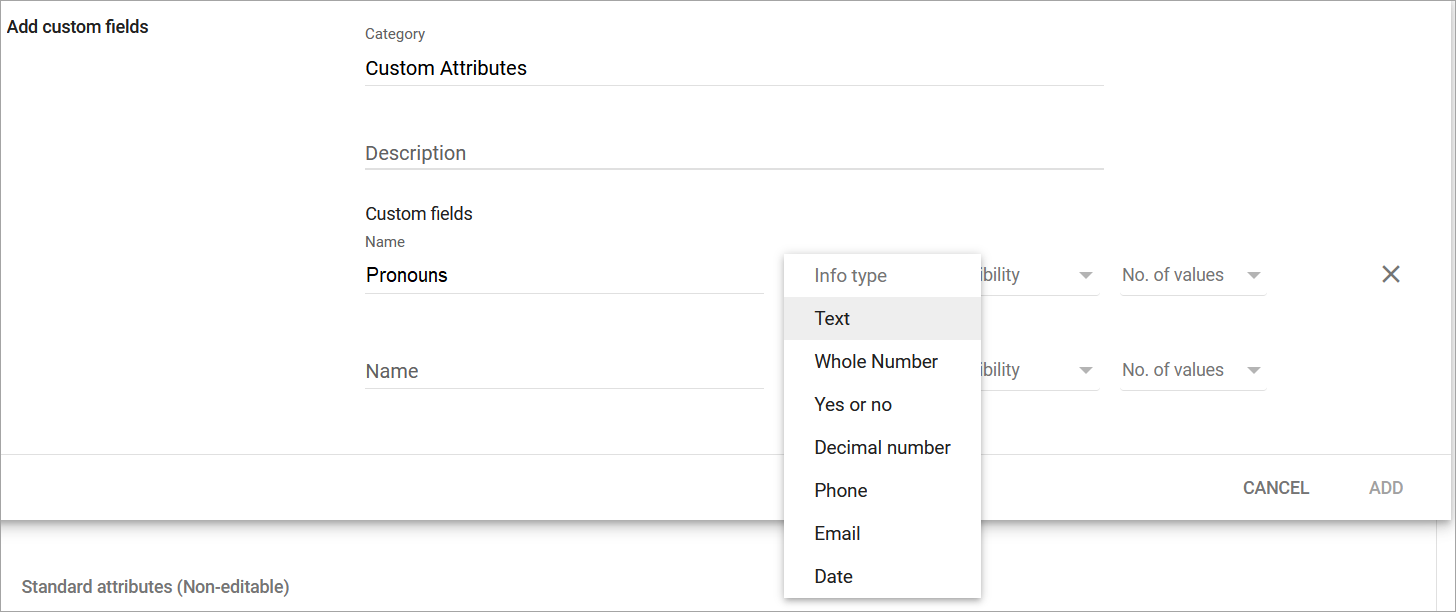
Choose whether your custom data takes the form of text, numbers, Yes or No, decimals, a phone number, an email address, or a date.
- In the Visibility drop-down, set the visibility of the field to Visible to organization.
-
In the No. of values drop-down, set the value to Single Value.
NOTE: No. of values cannot be changed once the attribute is created. -
Select ADD to save your attributes. The new attributes and attribute category are shown on the Manage user attributes page.
NOTE: Google workspace supports a maximum of 1500 attributes across all apps.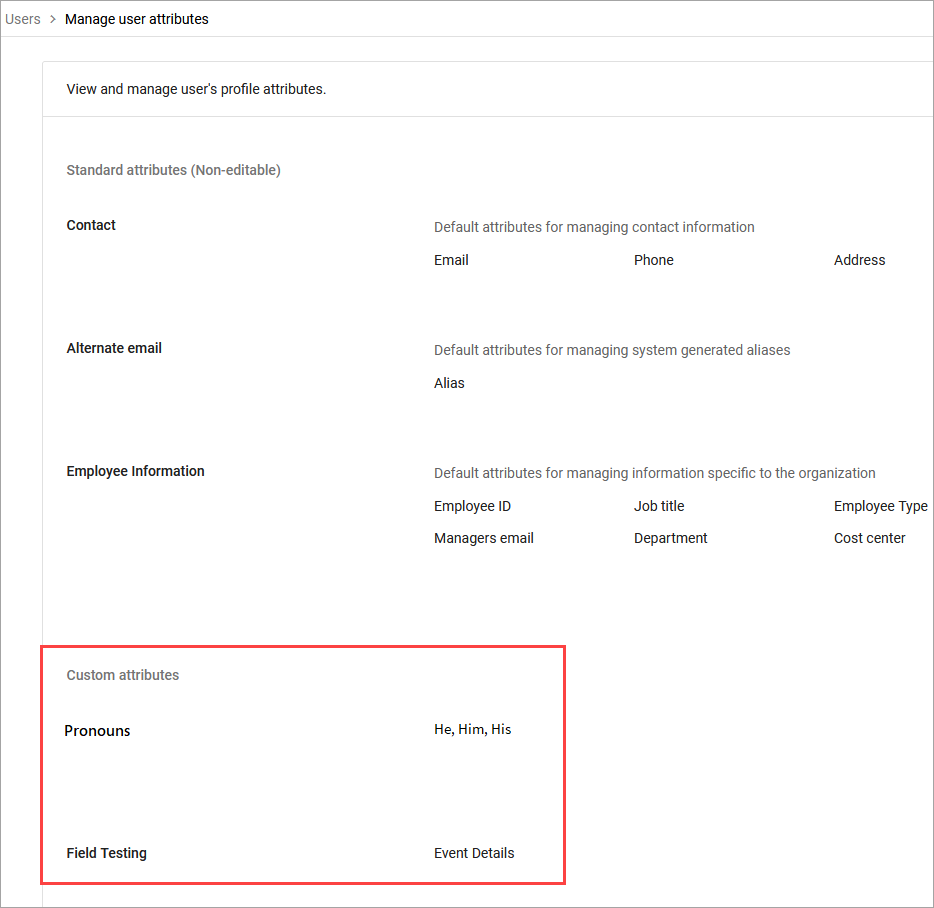
The Custom attributes section displays the attributes you created and their data.
- Return to the Users page and select a user in the list to open the user account page.
- Expand User information.
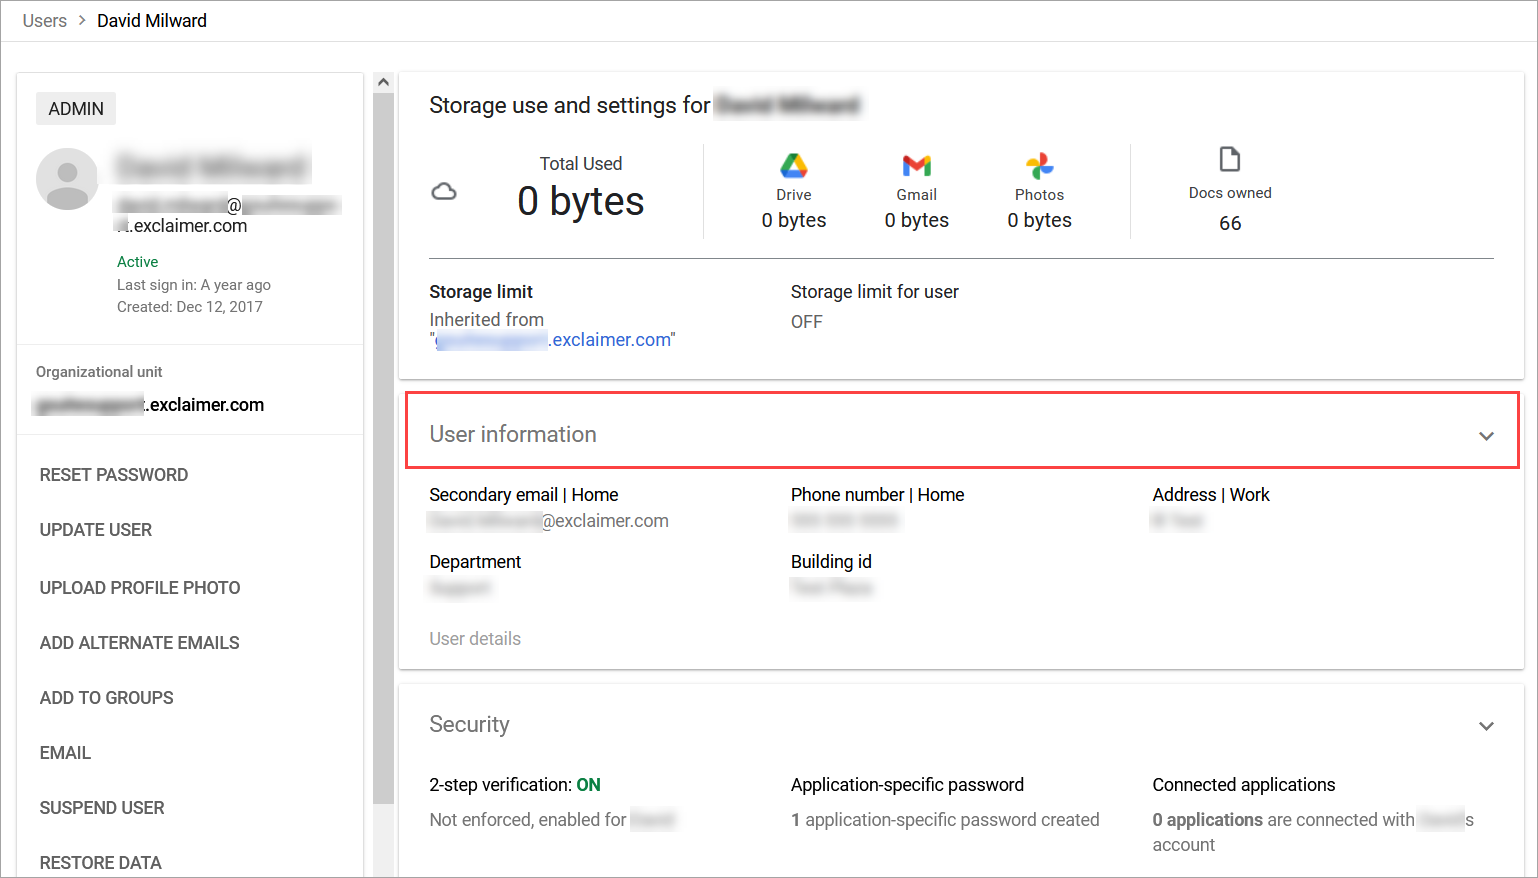
Select the arrow in the User Information header to expand the drop-down.
- Locate a custom attribute under your custom Category name and select the pencil icon to enter your data.
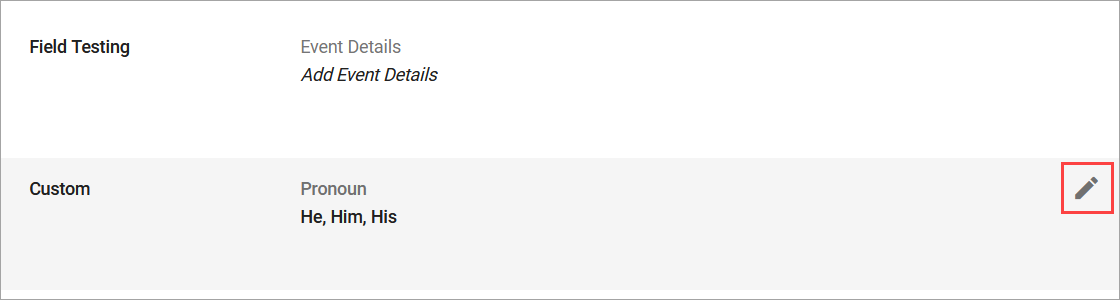
Select the pencil icon then enter your data for the attribute.
- Select Save.
- Once the data is synchronized, add a {Fields} element to your template in the Signature Designer. Your custom fields are now available to select from the list of fields.
Select your custom field from the Field drop-down.
This method allows an Exclaimer admin to upload a CSV file containing the new attribute. For more information, see User Details Upload.
- From the header bar, select the cogwheel icon to open the Settings menu, then select Sender Management.
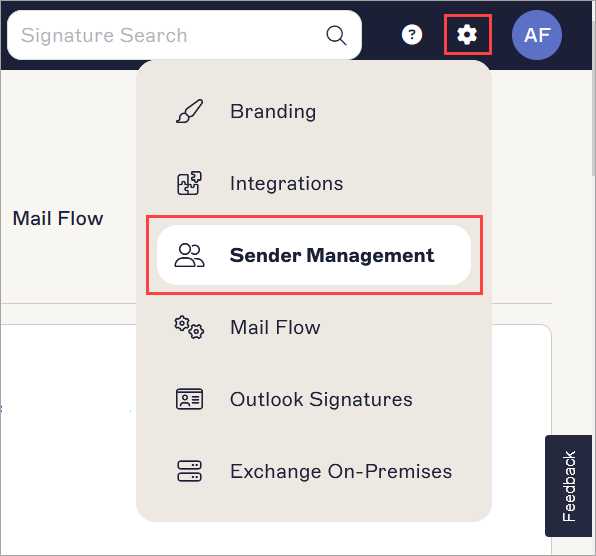
The Settings menu is found under the cogwheel icon.
- Locate the User Details Upload section and select Export Existing to export a CSV file of your existing users and their current override data.

The User Details Upload section is found on the Sender Management page. You may need to scroll.
- Open the CSV file in an appropriate program, such as Microsoft Excel.
-
In the first empty column, enter text in the topmost cell to act as a column header. This will be the name of your field for storing the data.
NOTE: Headers must start with a letter. Full stops (.) and underscores (_) are the only special charcters permitted; all other characters must be alphanumeric.
Any mismatched header names will be treated as new columns.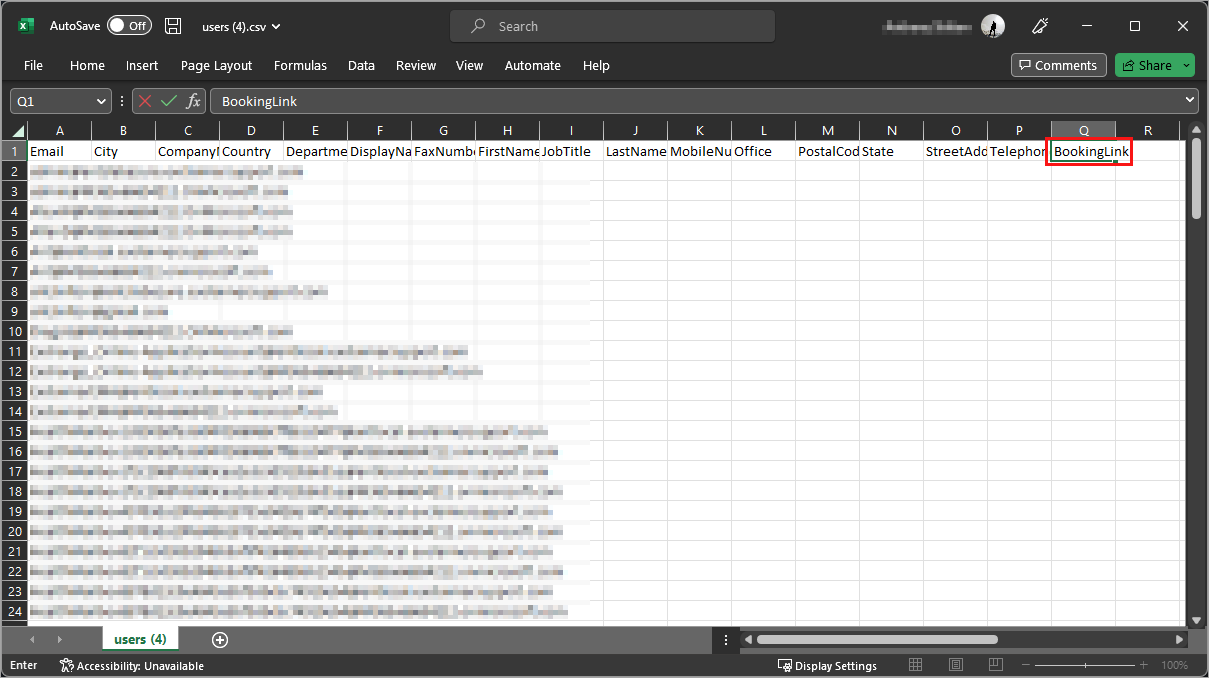
A CSV opened in Microsoft Excel. A new column header has been added for, as an example, booking links.
- Populate the cells in the coloumn with the custom data for each user as required.
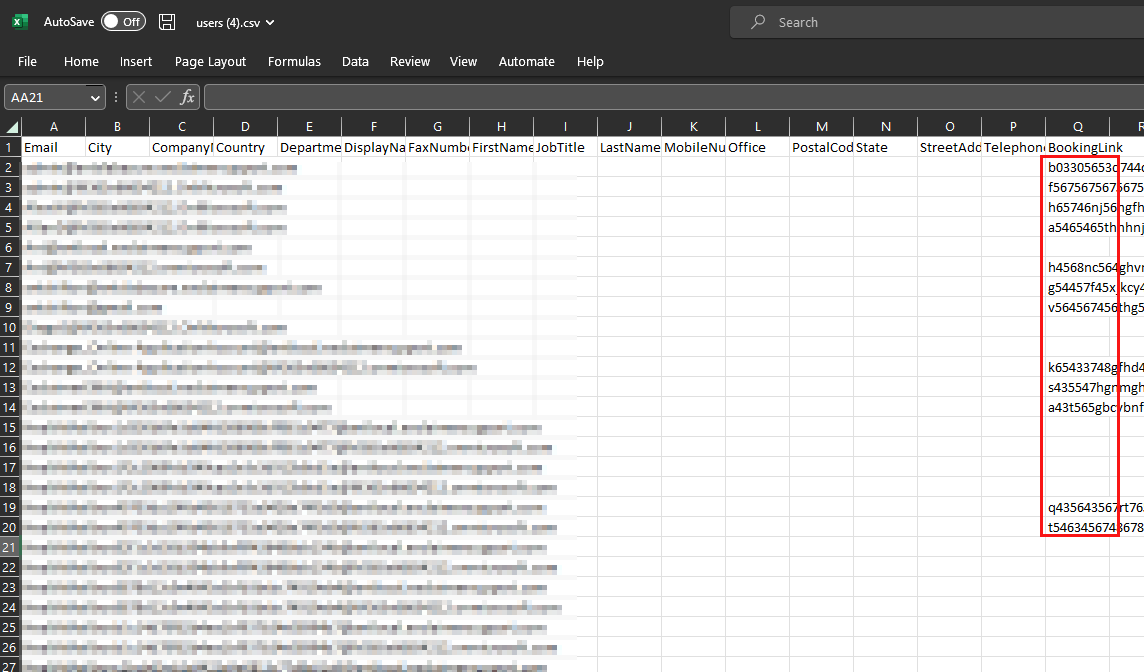
Add the custom data for your new attribute'c solumn for each applicable user row.
- Save the CSV file.
- Return to the Sender Management page in Exclaimer. Under User Details Upload, select Update Existing, then select and open the updated CSV file to import the data.

The Update Existing button is found in the User Details Upload section.
-
Add a {Fields} element to your template in the Signature Designer. Your custom fields are now available to select from the list of fields.
Select your custom field from the Field drop-down.Tip! For more information on adding field-based elements in the Signature Designer, see our knowledgebase articles on working with the All {Fields}, Contact {Fields}, Personal {Fields}, and Address {Fields} elements.
You can add your new custom attributes to your signature using any of the {Fields} elements: Address {Fields}, Contact {Fields}, Personal {Fields}, and All {Fields}. See our knowledgebase resources on Editing Signature Design for more information on adding elements to your signature template.