
Description
In some scenarios, you might want to make additional attributes in your local Active Directory (AD) available for Exclaimer to pick up for use in your signatures.
NOTE: If you have already completed Exclaimer's Additional AD Attributes configuration, the attributes will be available as fields in the signature designer. But, if you have not yet completed the Additional AD Attributes configuration, you will need to do so.
Running the Microsoft Entra Connect tool
To configure the Directory Extensions:
Required! You will need to use your Microsoft 365 Global Administrator credentials to complete the following steps.
- Open the Microsoft Entra Connect, select Tasks to display a list of all available tasks.
- From the Additional tasks list, select Customize Synchronization Options.
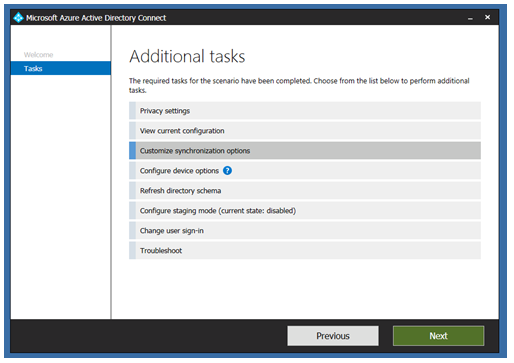
- Select Next.
- When prompted, log in with your Office 365 Global Administrator account.
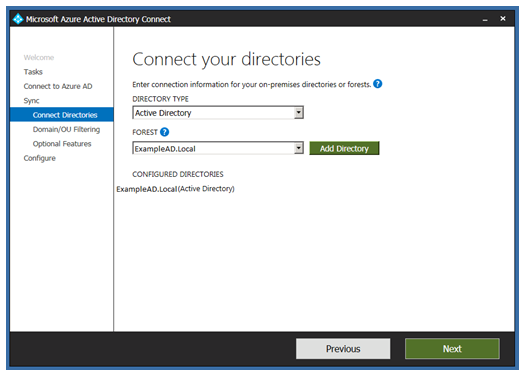
- You will see the options to select the applicable directory. Ensure these are correct, then select Next.
- You will see the Domain and OU filtering options. As required, you can select options to synchronize only the selected domains or OUs, or all AD domains and OUs.
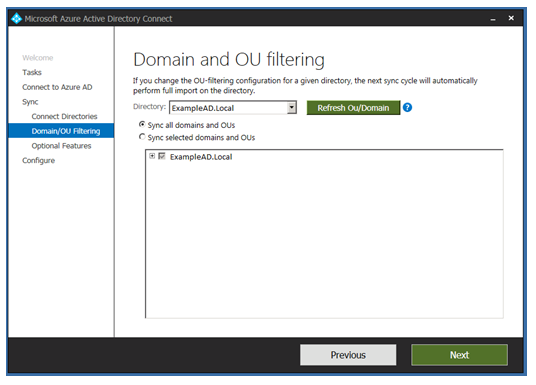
- Select Next to display Optional features.
- Ensure that the Direct extension attribute sync option is selected:
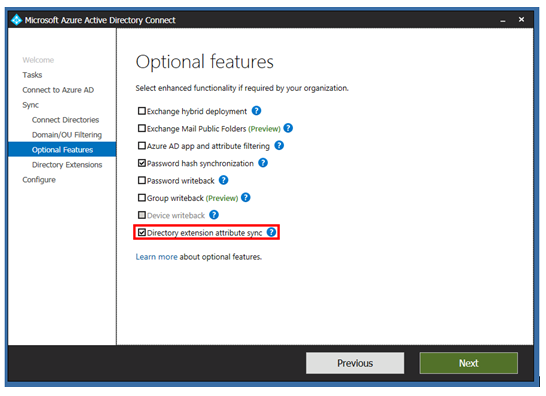
-
Select Next to display the Directory extensions.
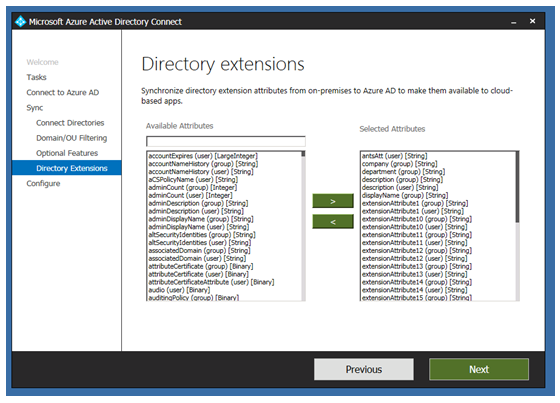
Select which attributes to add for synchronization into Entra Connect and where they can then be synchronized with Exclaimer.
NOTE:
When you select the option Synchronize selected additional attributes from local AD via Microsoft Entra ID, all of the selected single-value Directory Extensions in your Entra Sync will be synchronized to Exclaimer.
• Exclaimer can use these attributes after synchronization: (User) [String].
• Exclaimer cannot synchronize attributes that are ‘multi value’ fields (such as Description).
For more information, see Which fields are multi-value and cannot be synced to Exclaimer? - Once you have selected all the required attributes, click Next.
The Ready to configure page is displayed:
- Click Configure to start the configuration.
By default, the tick-box to start synchronization is selected, so Entra Connect should synchronize immediately.
- Once the configuration is completed, the Configuration complete page is displayed:
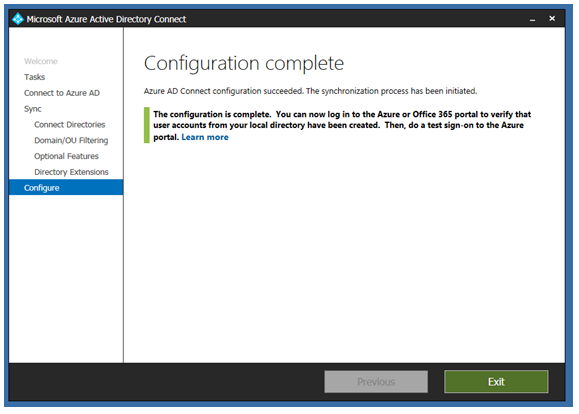
- Click Exit.
- Log in to the Exclaimer portal (portal.exclaimer.com) and perform a manual data synchronization to ensure that the data is synchronized with Exclaimer.
NOTES:
• Empty or Null fields are not synchronized.
• A maximum of 100 AD fields can be synchronized (this includes ‘default’ fields, such as Display name, first name, surname, and so on)
• Attributes created by PowerShell are not synchronized.
• Empty or Null fields are not synchronized.
• A maximum of 100 AD fields can be synchronized (this includes ‘default’ fields, such as Display name, first name, surname, and so on)
• Attributes created by PowerShell are not synchronized.