
Description
Once you have successfully completed your sign-in process, you can easily create an Exclaimer subscription.
How to access it?
To access the new subscription option:
-
Log into the Exclaimer portal and navigate to the Overview tab.
- From the Overview tab (in the dashboard), select Add another? (next to the Subscriptions section).
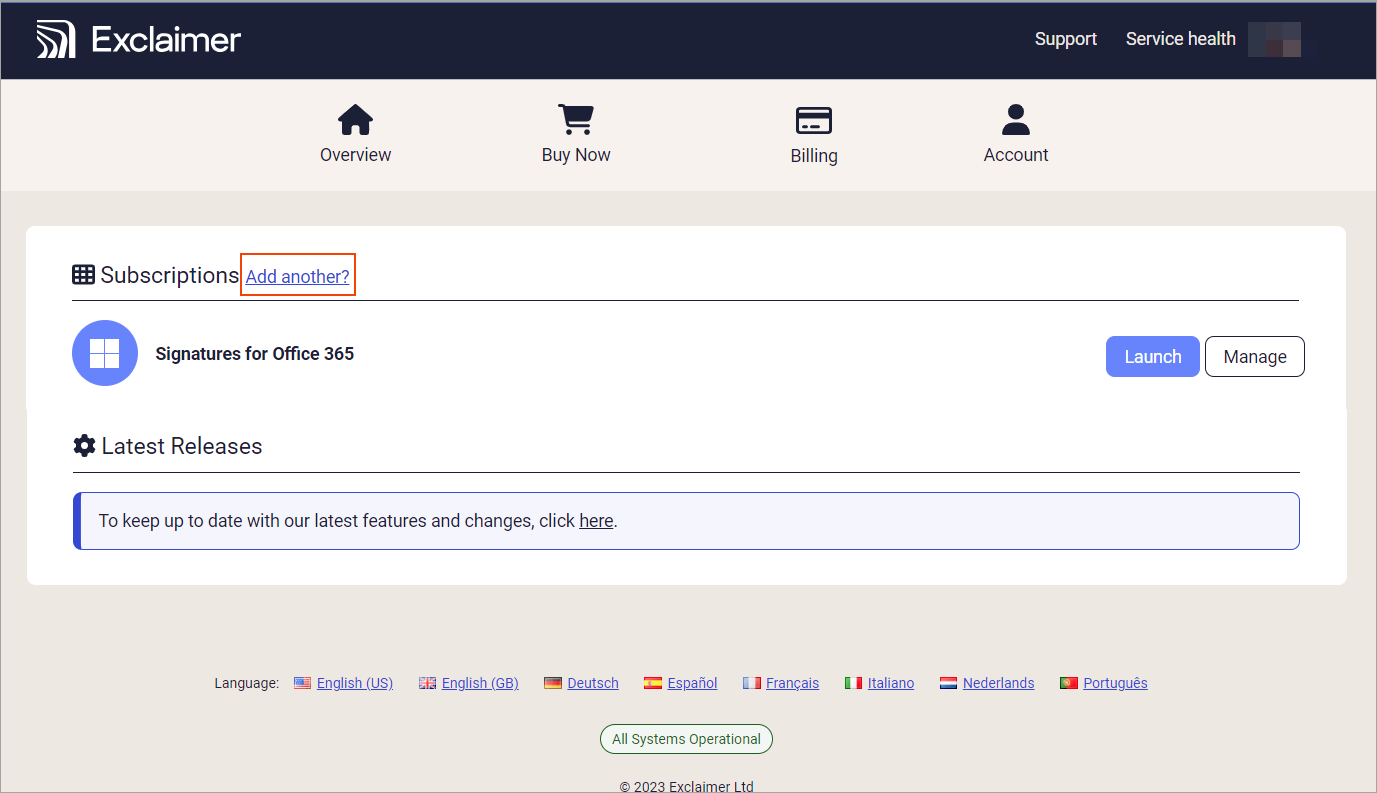
Select the Add another? option.
A page listing all possible reasons for creating a new subscription is displayed. Select the required reason.
- In this scenario, I have a large enterprise organization or multiple Active Directory user databases option is selected.
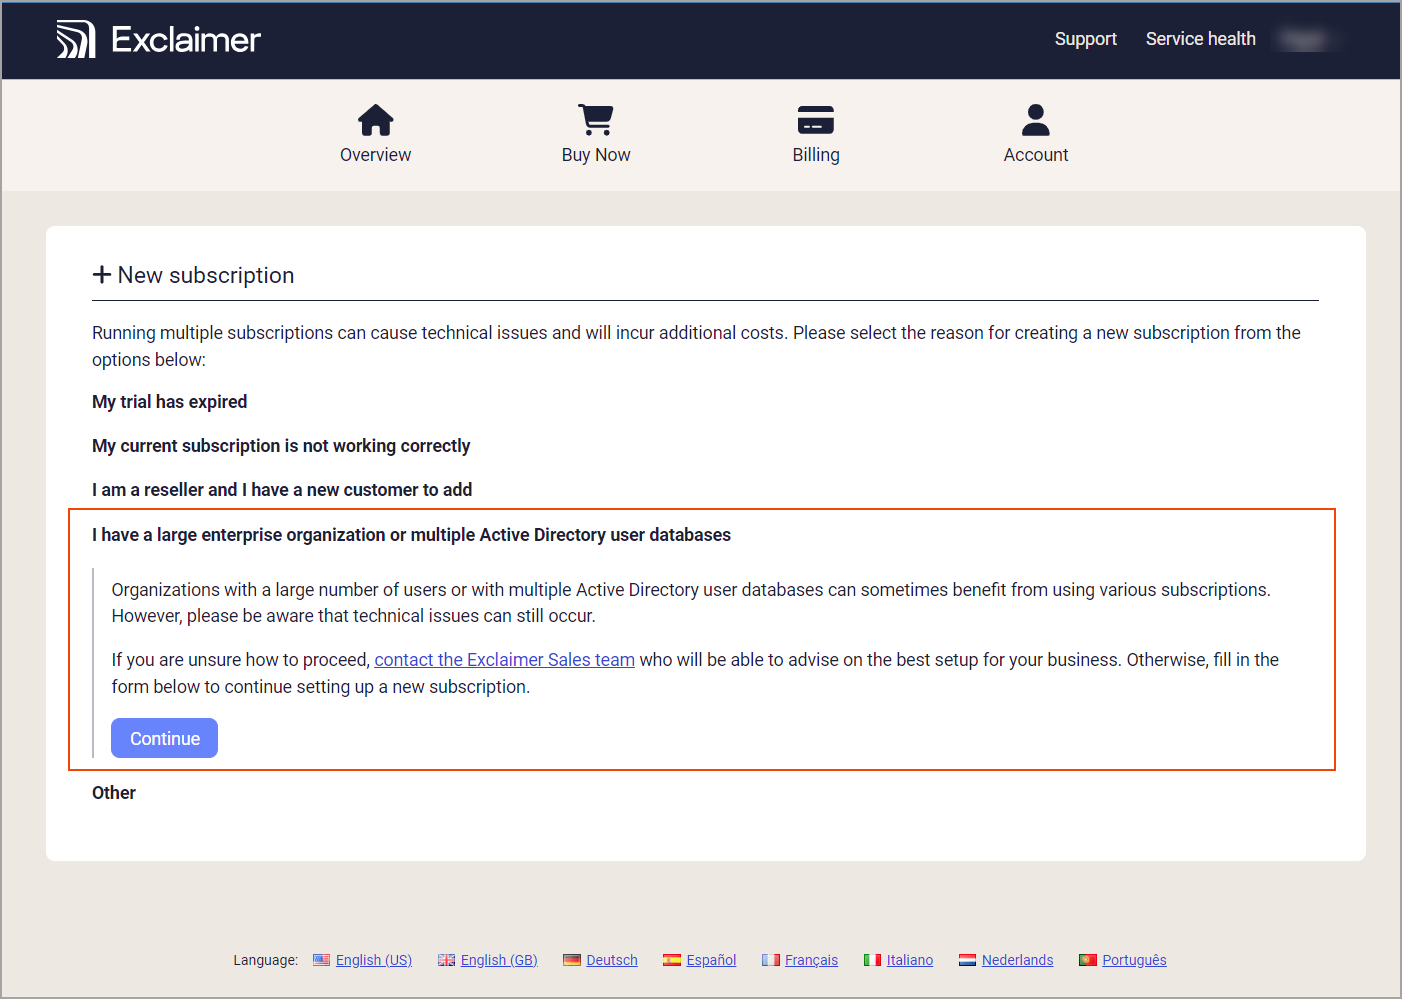
Select a reason. In this example, I have a large enterprise organization or multiple Active Directory user databases option is selected.
- Select Continue to proceed.
The New subscription page is displayed.
Creating a new subscription
To create a new subscription:
From the New subscription page,
-
Select which service provides your email.
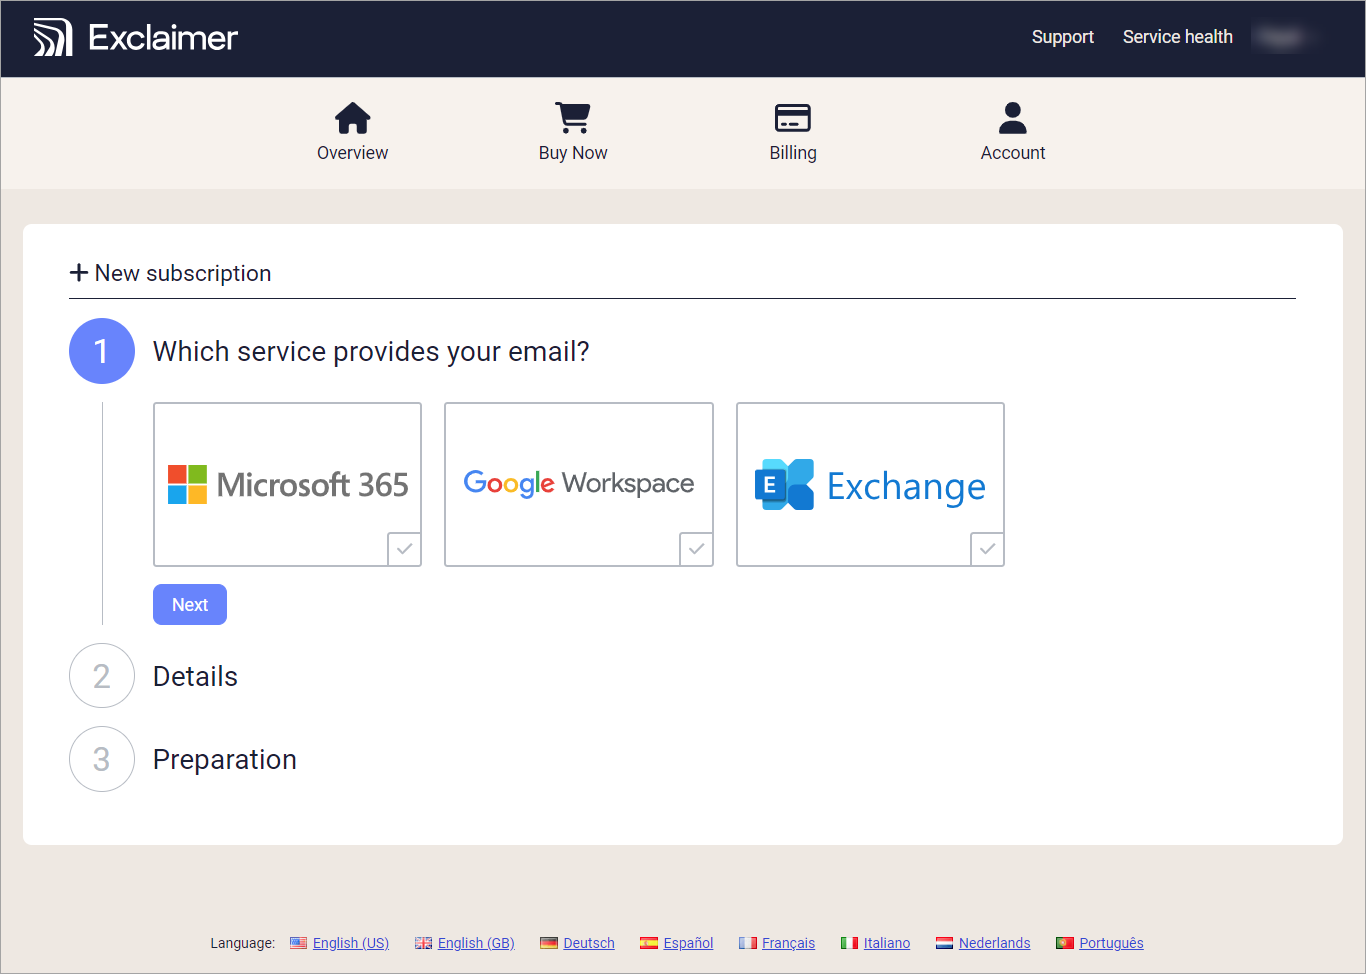
Select the service provider.
- Select Next to continue.
You are prompted to enter how many users in your organization will use this Exclaimer subscription (the minimum license is for ten users).
- Select the region in which your tenancy is hosted.
- Select the terms and conditions, then click Next.
Your subscription is now being prepared.
Once the preparation is complete, a confirmation is displayed.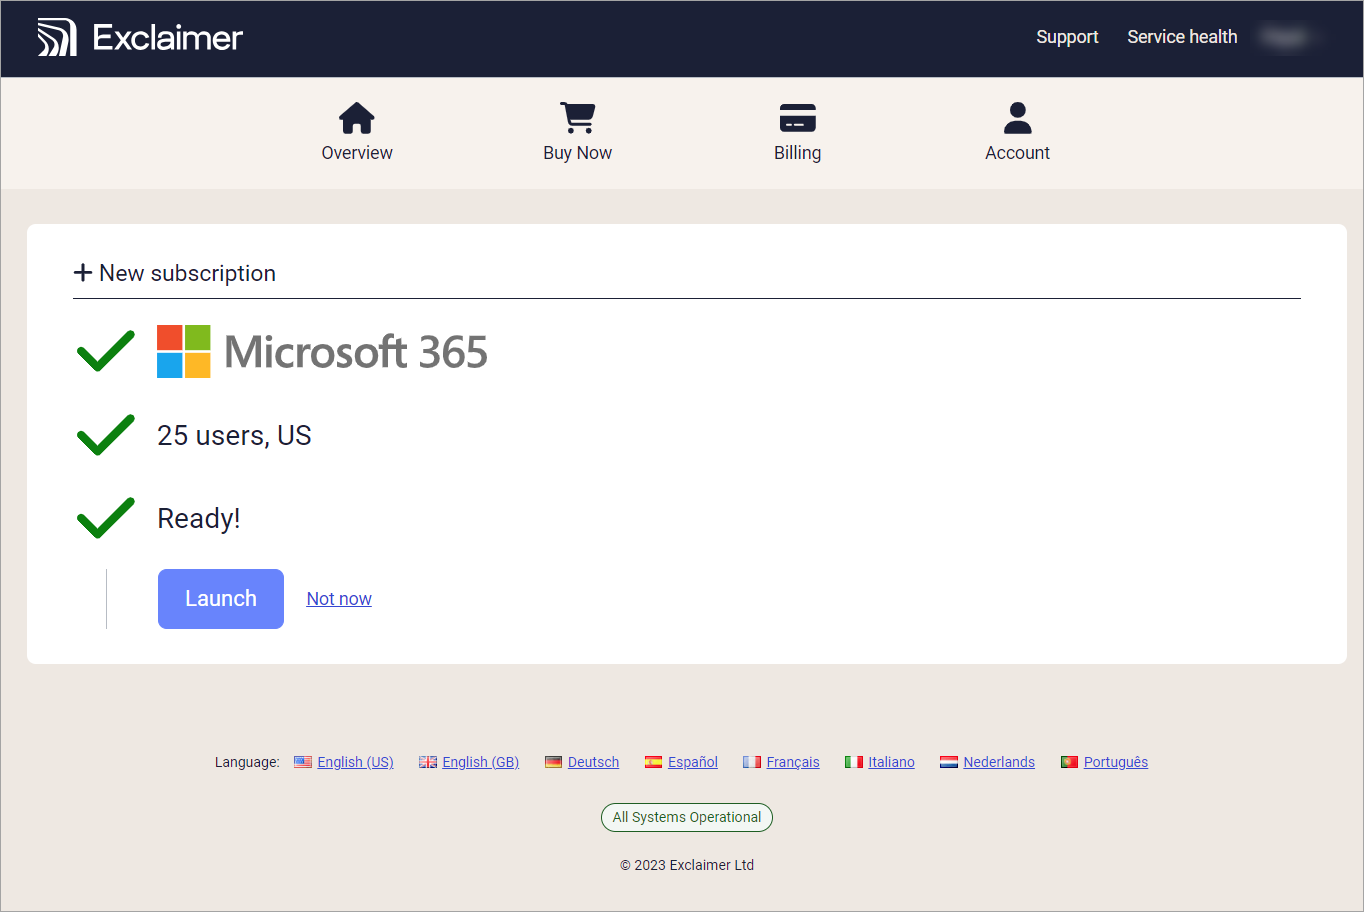
Example screen for a Microsoft 365 subscription.
Next Steps: Select Launch to configure a connection with your email service: Microsoft 365, Google Workspace, Exchange on-Premises.