
Description
Client-Side signatures mean that signatures are synchronized to the users' computers for use in Microsoft Outlook. When messages are sent from Outlook, they are sent directly via Microsoft 365 and are not routed to Exclaimer for processing.
Exclaimer uses the Outlook Add-in feature for configuring Client-Side signatures. This is an application that can be centrally deployed to Microsoft Outlook and allows any user to add email signatures created within Exclaimer while composing the email. For more information, see how to use the Exclaimer Cloud Outlook Add-in.
You need to use your Microsoft 365 Global Administrator credentials to configure your Exclaimer - Signatures for Microsoft 365 subscription. If you do not have these credentials, invite an admin to complete the process.
Your Global Administrator account must have the Global Administrator role assigned directly, and not through a group or Privileged Identity Management. For more information, see the Troubleshooting section of this article.
How to access it
To access the new onboarding for Client-Side configuration:
- Log into your Exclaimer account and launch your subscription.
-
From the menu sidebar, select Connect.
NOTE:
After account creation, the Home page displays an onboarding checklist to support successful onboarding. You can either follow the steps in the checklist or select Connect from the menu sidebar.
Select Connect from the menu sidebar.
Configuring Client-Side signatures
To configure Client-Side signatures:
- Select Connect.
- Sign in using your Microsoft Global Administrator credentials.
- You are prompted to accept a permissions request for Exclaimer to read your Entra ID (formerly Azure AD) data. Select Accept.
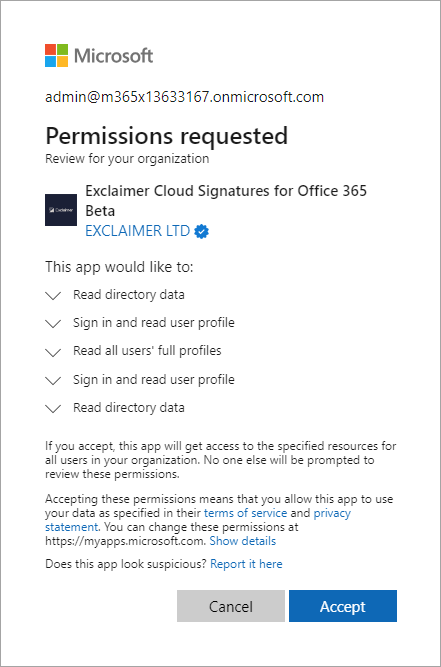
Permissions request for Exclaimer to read Azure AD data.
- Select which members of your organization you wish to set up Exclaimer signatures for:
- Select Full (Recommended) to allow all users and groups within your organization to have Exclaimer signatures.
- Select Limited to specify a group within your organization. This will allow only users and groups that are members of this specific group to have Exclaimer signatures. For more information on creating groups, see How to create a mail-enabled security group.
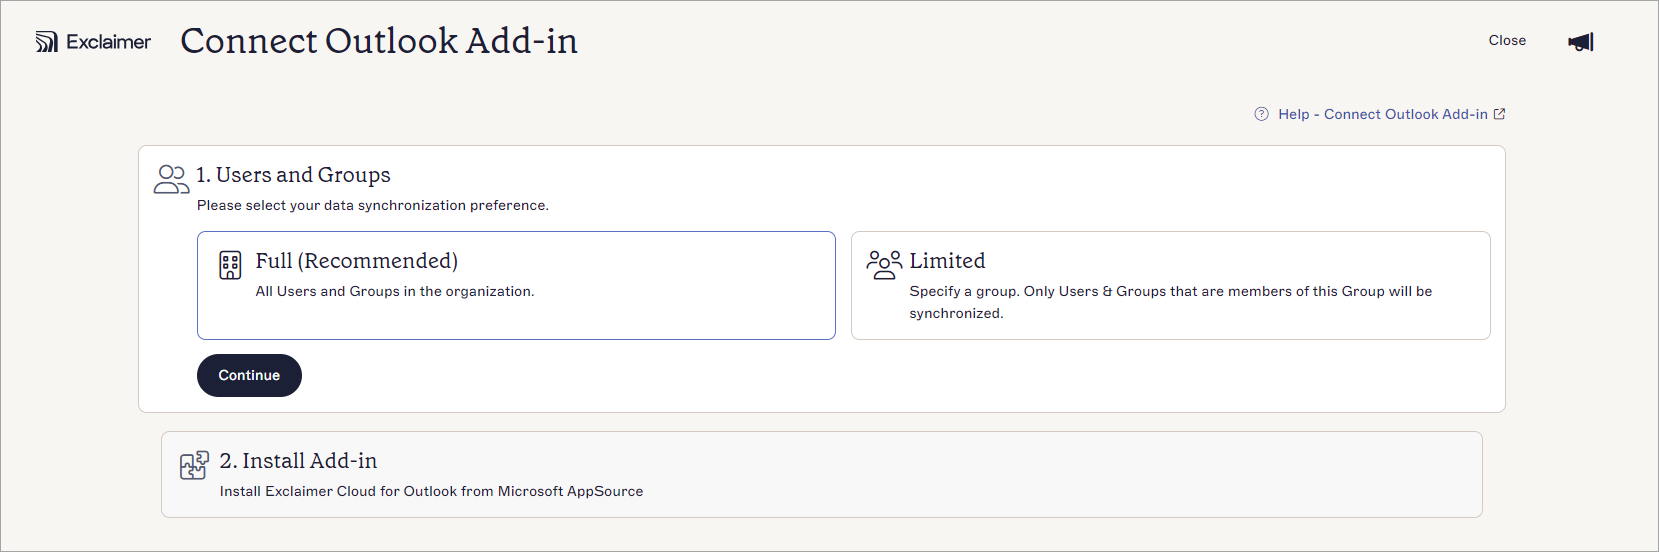
Select which members of your organization you wish to synchronize with Exclaimer.
- Select Full (Recommended) to allow all users and groups within your organization to have Exclaimer signatures.
- Select Continue.
-
Select Launch AppSource to install Exclaimer for Outlook from the Microsoft AppSource.
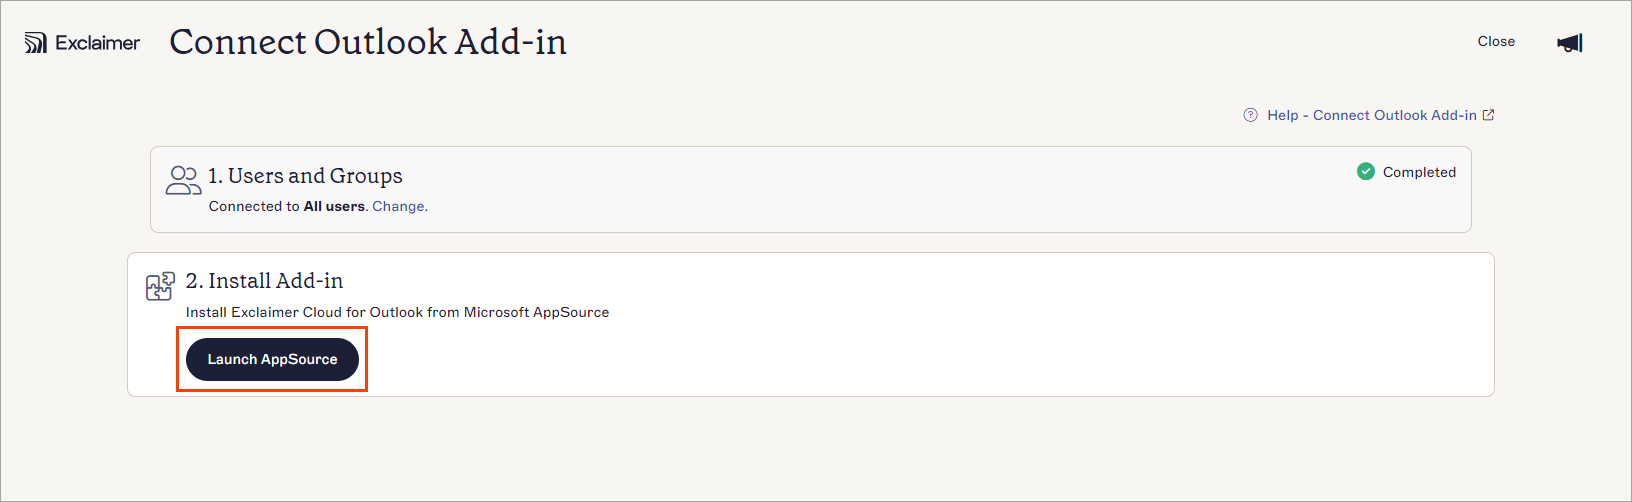
Select Launch AppSource.
The Microsoft AppSource screen is displayed.We recommend: Sign out of any Microsoft 365 accounts that are not a Global Administrator account for the organization you are trying to deploy the Add-in for. This will help prevent any issues with the installation process of picking up cached credentials and potentially causing a failure. - Select Get it now.
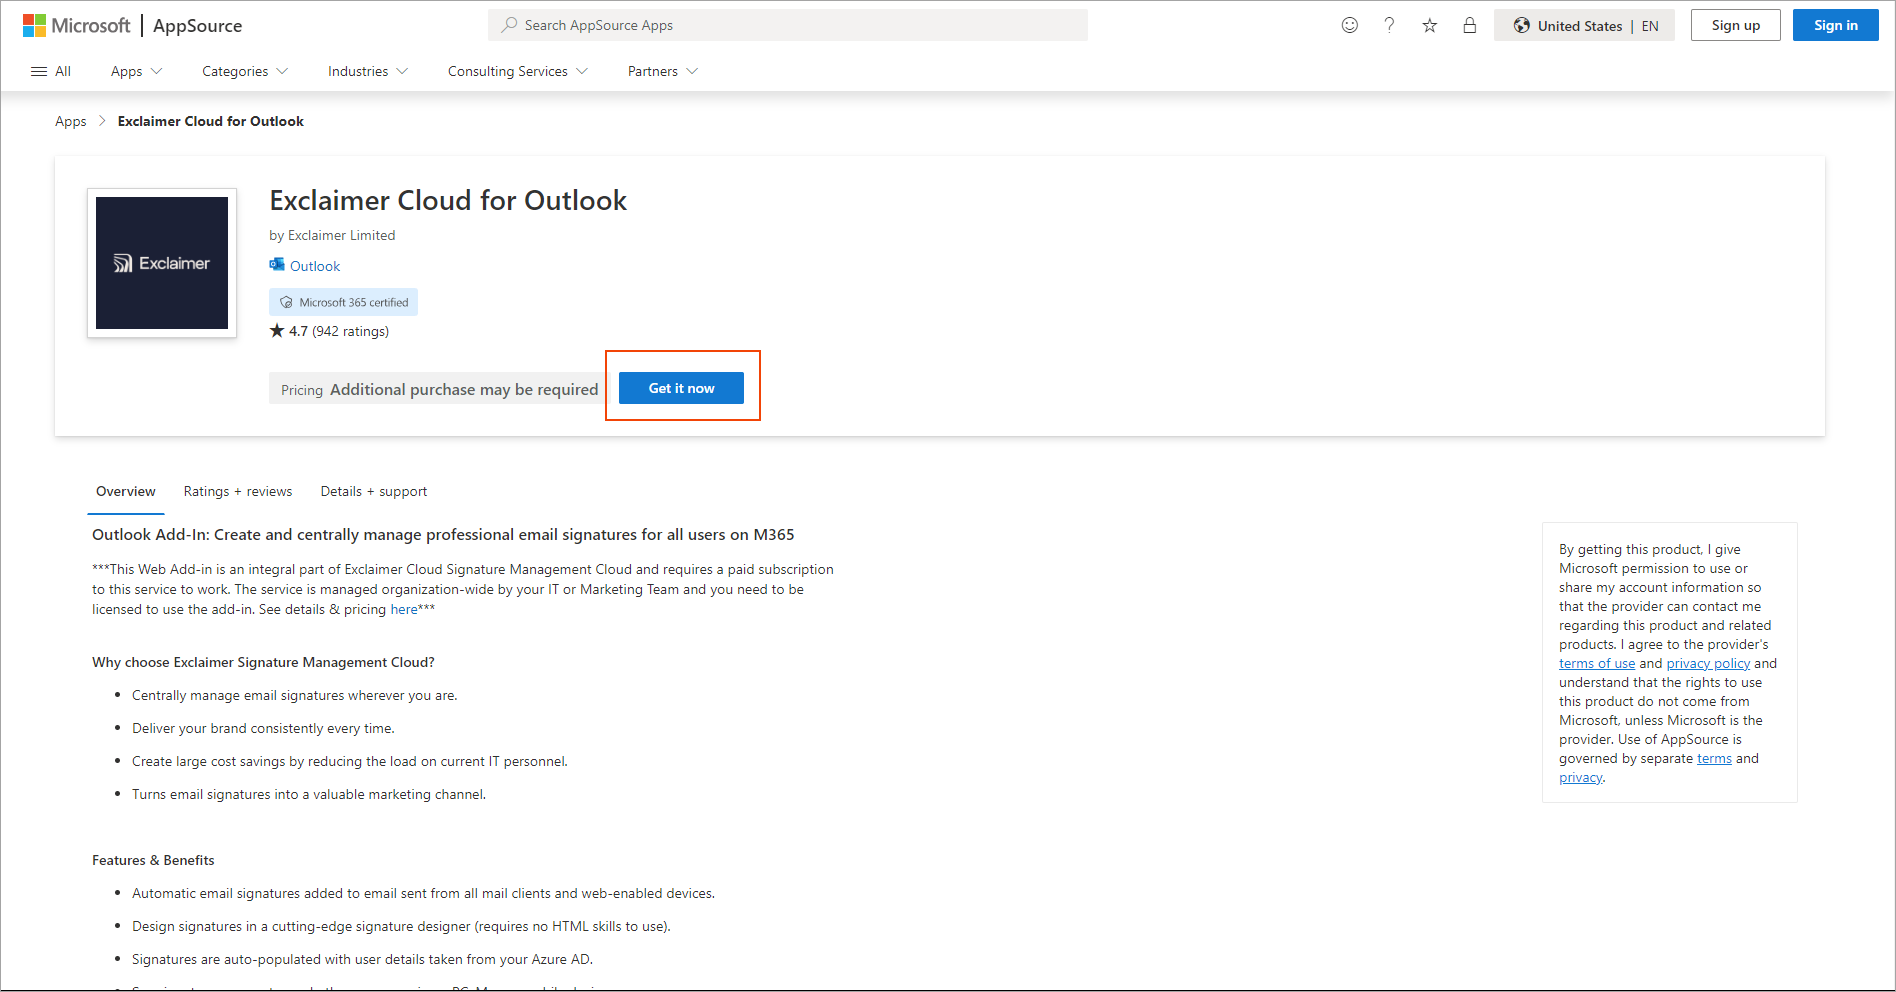
Select Get it now.
The Sign in to Microsoft AppSource window is displayed.
- Enter your email address in the Work, school or Microsoft account field.
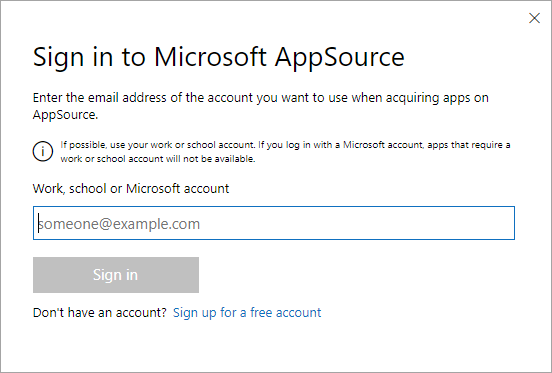
Enter Admin email address.
- In the The Confirm your details to continue window, select Get it now.

Select Get it now.
-
In the Deploy New App window, select which assigned users should have access to the Exclaimer Outlook Add-in:
-
Just me: Select to assign only yourself, in your organization, access to the Exclaimer Outlook Add-in.
-
Entire organization: Select to assign everyone in your organization access to the Exclaimer Outlook Add-in.
- Specific users/groups: Select to assign specific users or groups within your organization access to the Exclaimer Outlook Add-in. Enter a specific user or group name; this is a predictive text field, so it will display any matching users or groups as you start to type.
NOTE: You cannot use nested groups.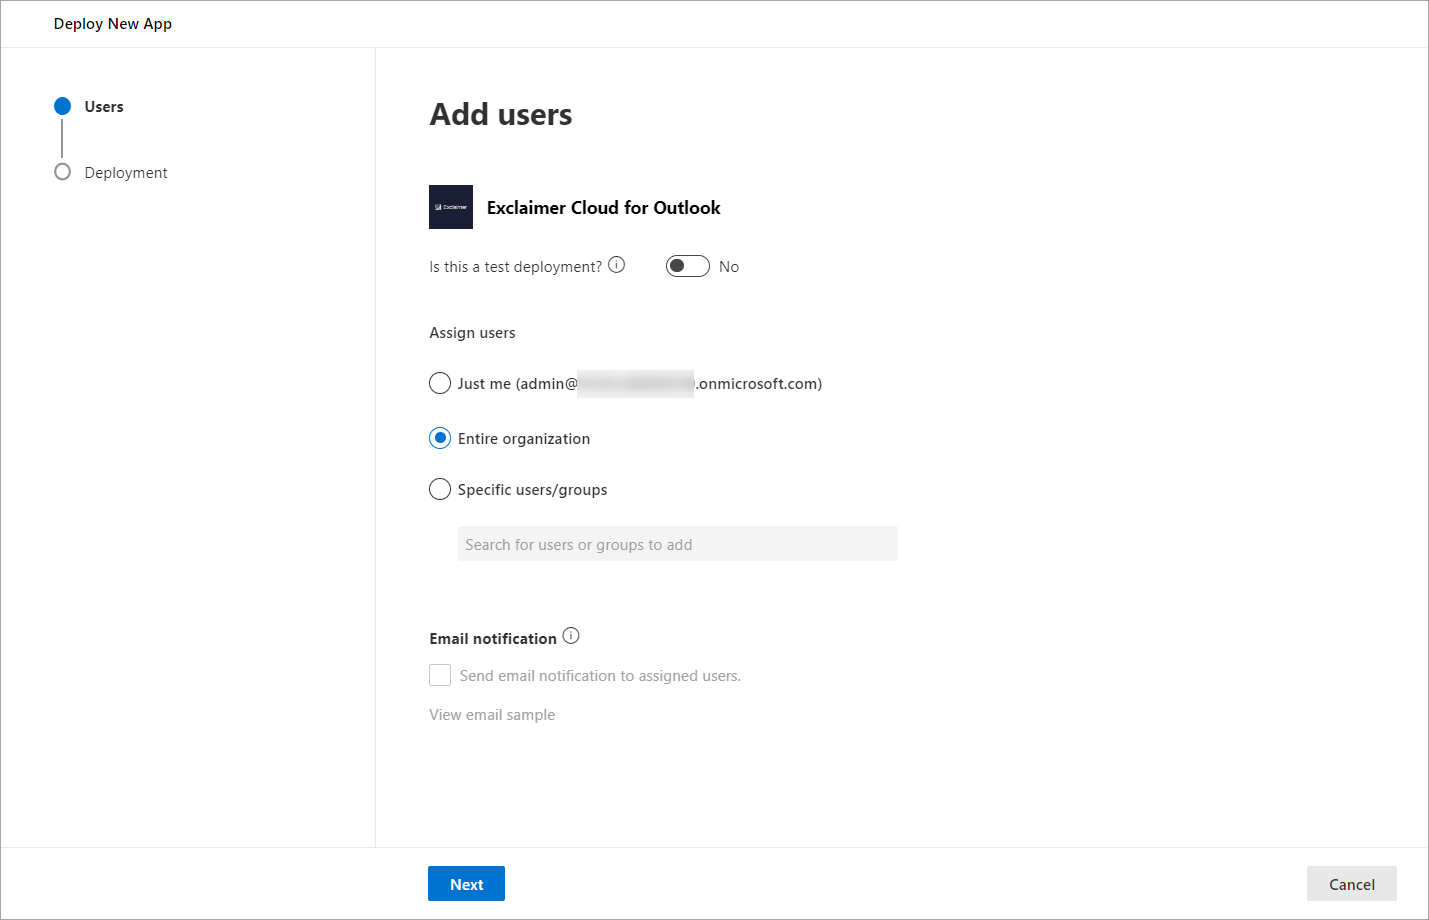
Example showing Entire organization option selected.
-
Just me: Select to assign only yourself, in your organization, access to the Exclaimer Outlook Add-in.
- Select Next to proceed.
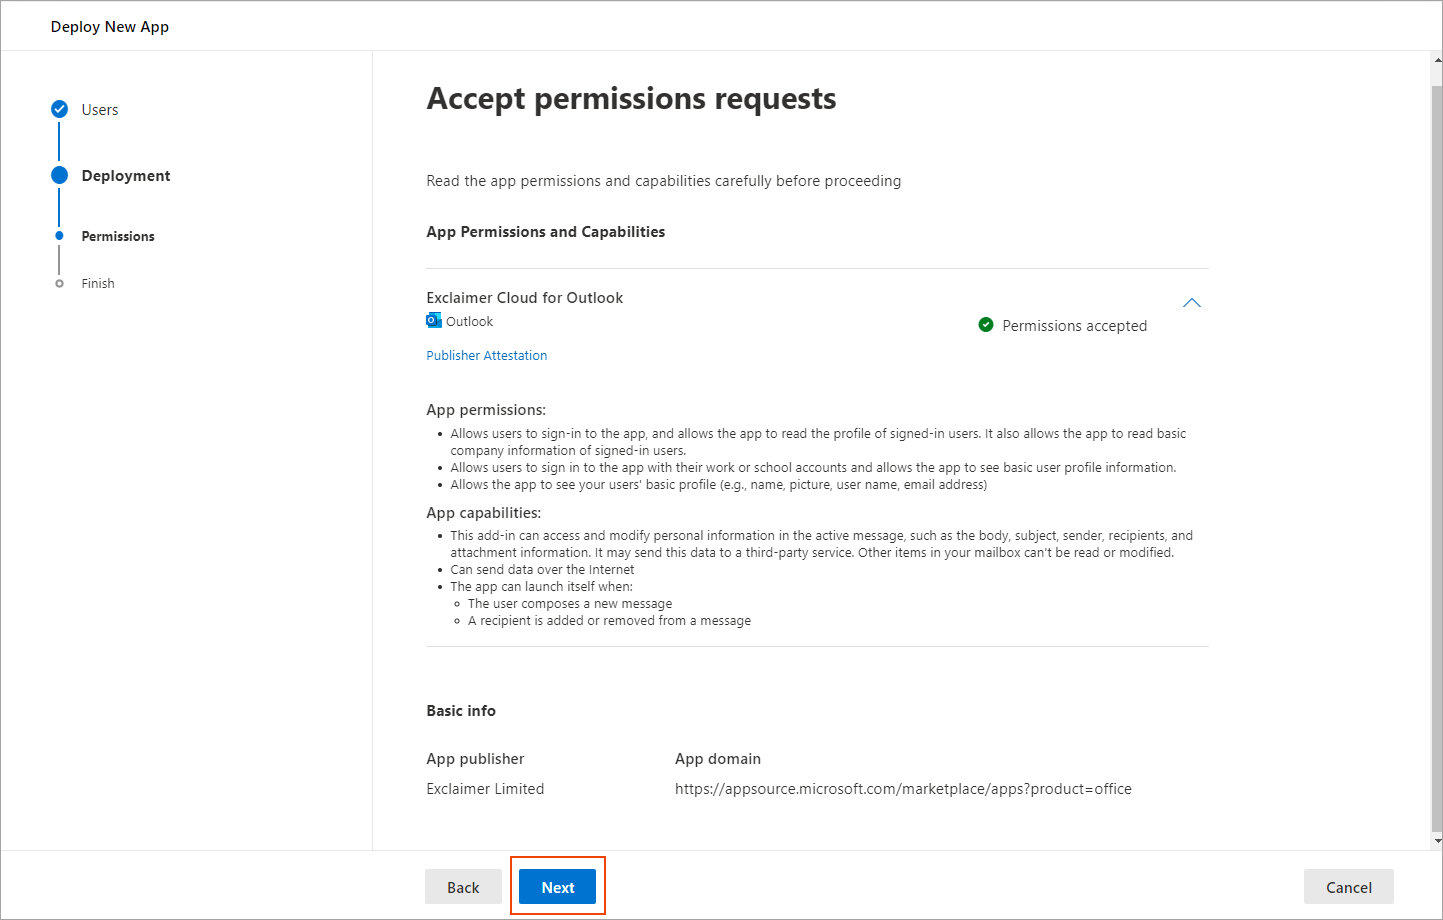
- Select Accept permissions.

Select Accept permissions.
- Sign in to Microsoft 365 as a Global Administrator.
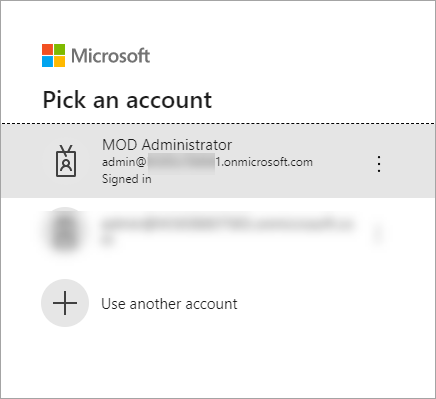
Login as Global Administrator.
- Once signed in, you are prompted to accept a permissions request for Exclaimer - Signatures for Outlook. This will allow the Add-in to verify that the user is authorized to download the signatures. Select Accept.
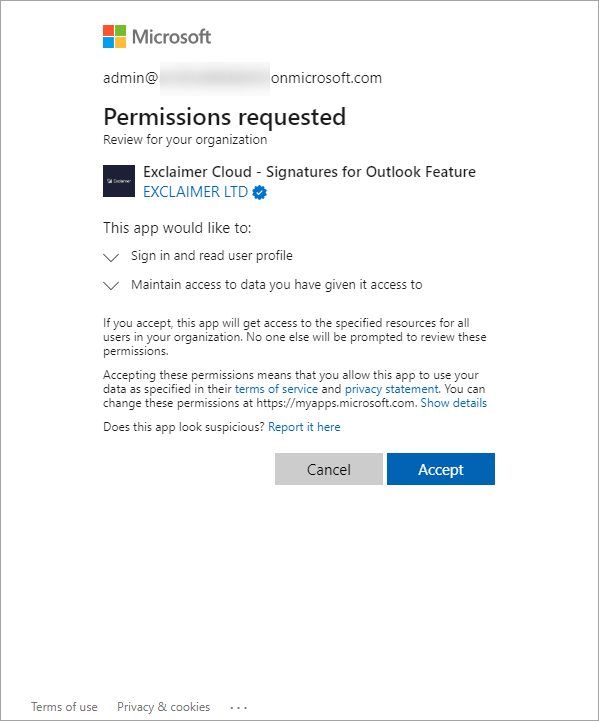
Permissions request for Exclaimer - Signatures for Outlook.
- Select Next to proceed.
Select Next.
- Review your selected settings for the deployment.
When you have reviewed and are happy with the options selected, select Finish deployment to complete the deployment process.
When the deployment process is complete, a completion message is displayed.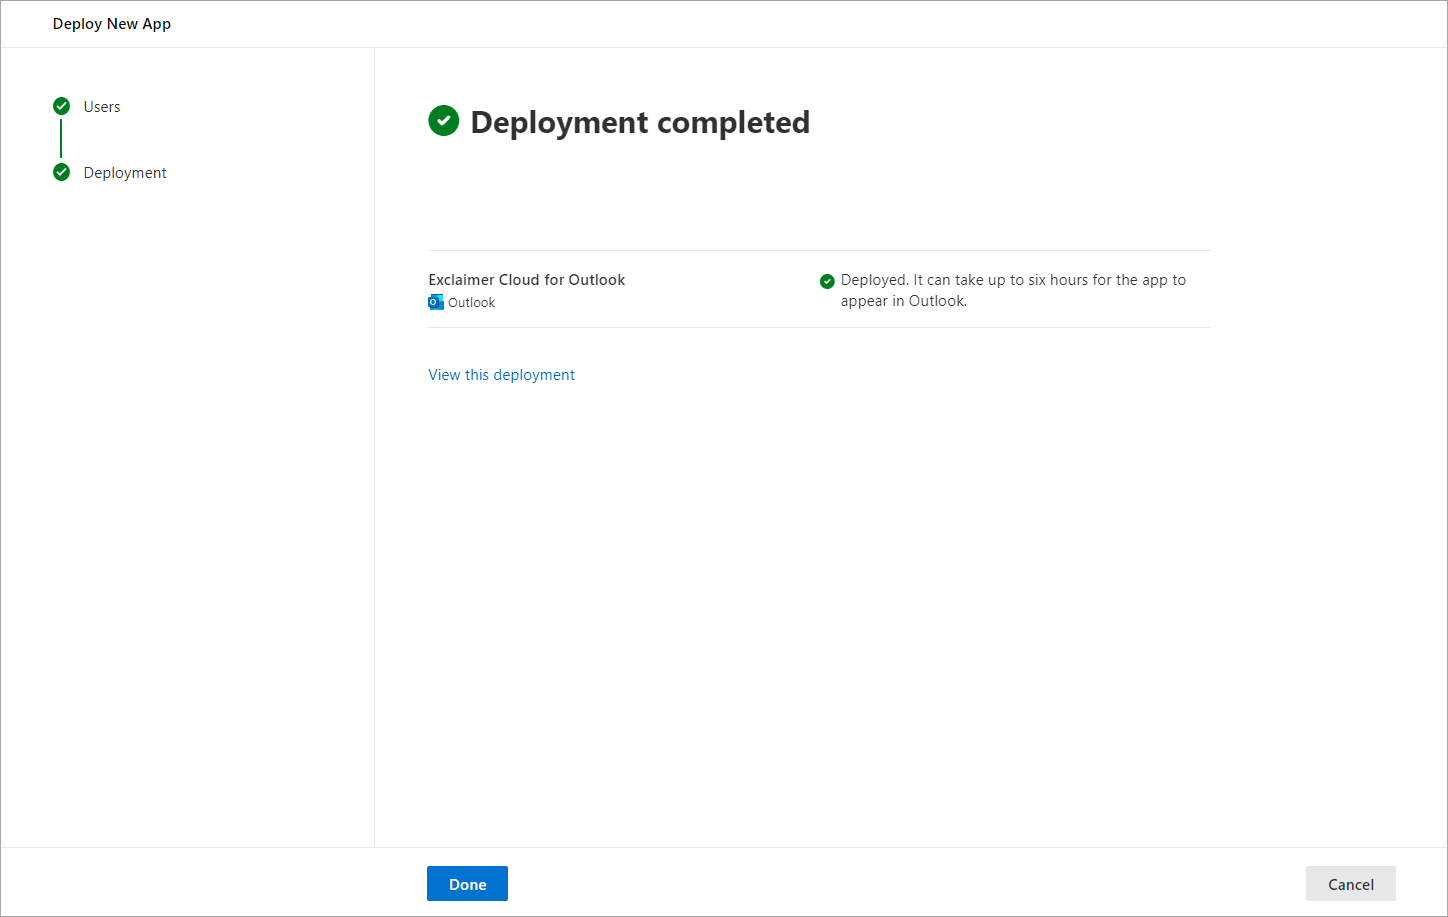
Deployment complete.
-
Select Done to proceed.
The Integrated apps screen is displayed, listing the Exclaimer for Outlook app.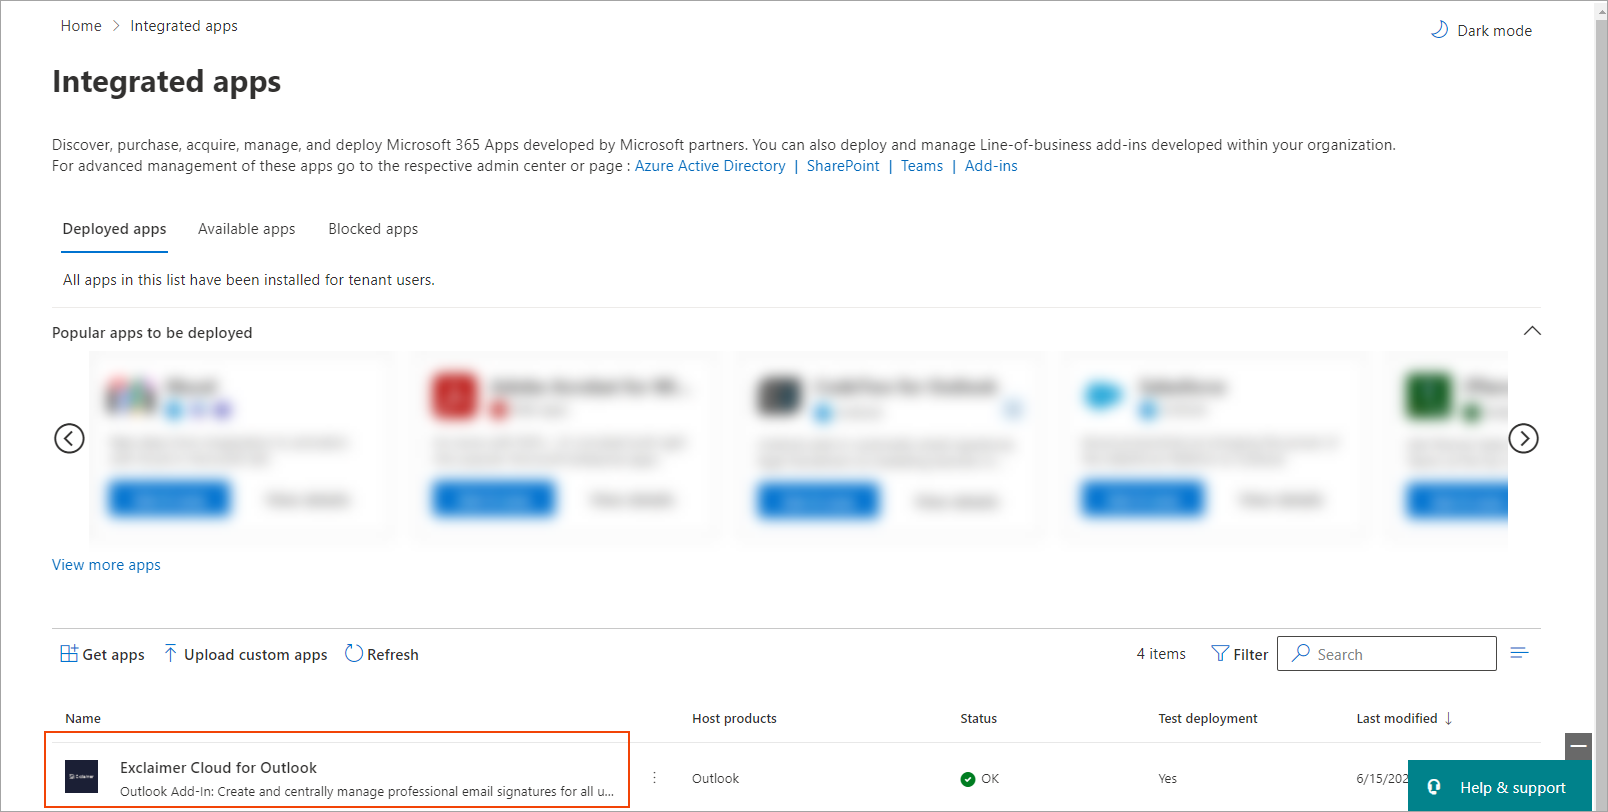
Integrated apps showing Exclaimer for Outlook configured.NOTE: It may take some time for the Exclaimer for Outlook app to appear within the Integrated Apps list. Select Refresh to refresh the list.After a successful onboarding, the dashboard status of the Client-Side configuration changes to Connected.

Client-Side dashboard status: Connected.
NOTE: The Add-in can take up to 72 hours to deploy. We recommend rolling it out to the entire organization or the correct group before the go-live date. - Select Re-install to make changes to the onboarding settings.
If your Microsoft 365 Global Administrator account has the Global Administrator role assigned through a group or PIM (Product Information Management), your configuration may fail. The role must be assigned as Direct. You can check how the role is assigned in Entra ID (formerly Azure AD) and reassign it correctly if necessary.
To check and reassign the role in Entra ID:
- Log in to Entra ID (formerly Azure AD) at https://entra.microsoft.com/
- Navigate to the account and select the account name.
- From the menu sidebar, select Assigned roles.
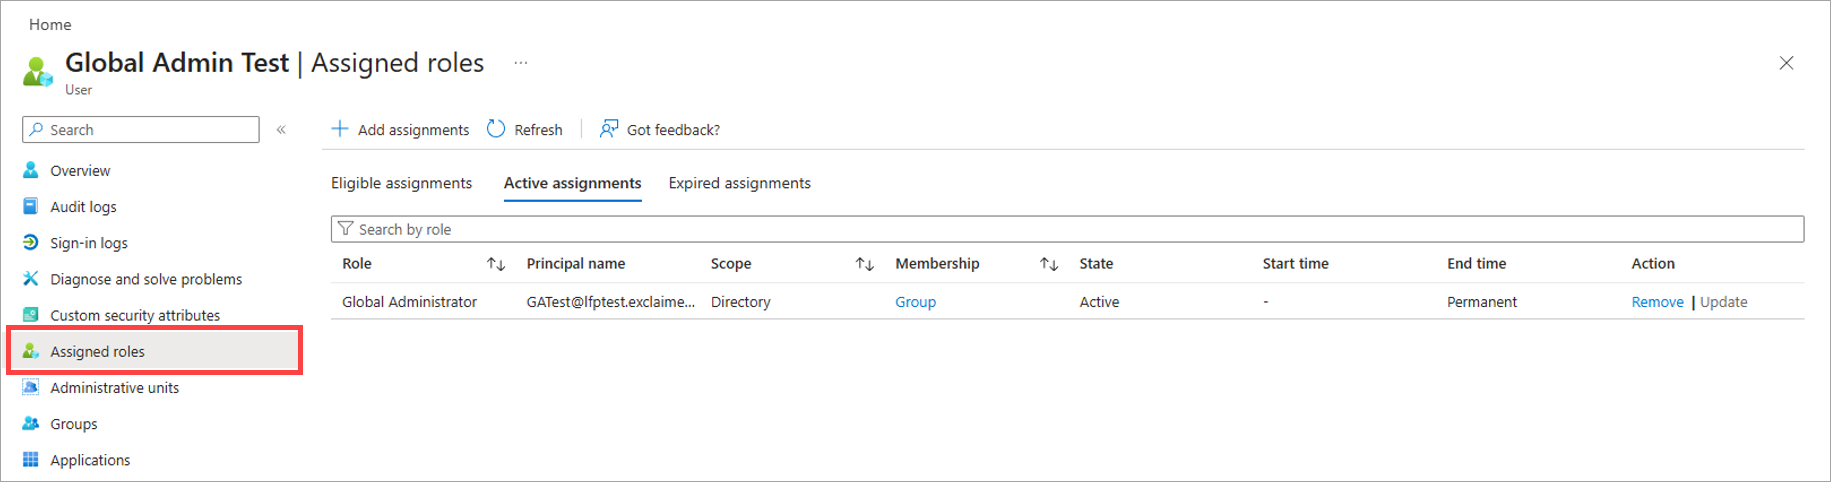
Select Assigned roles.
- In the Active assignments list, locate the Global Administrator role and check the value in the Membership column. This must show Direct. If it shows Group, you need to reassign the role.
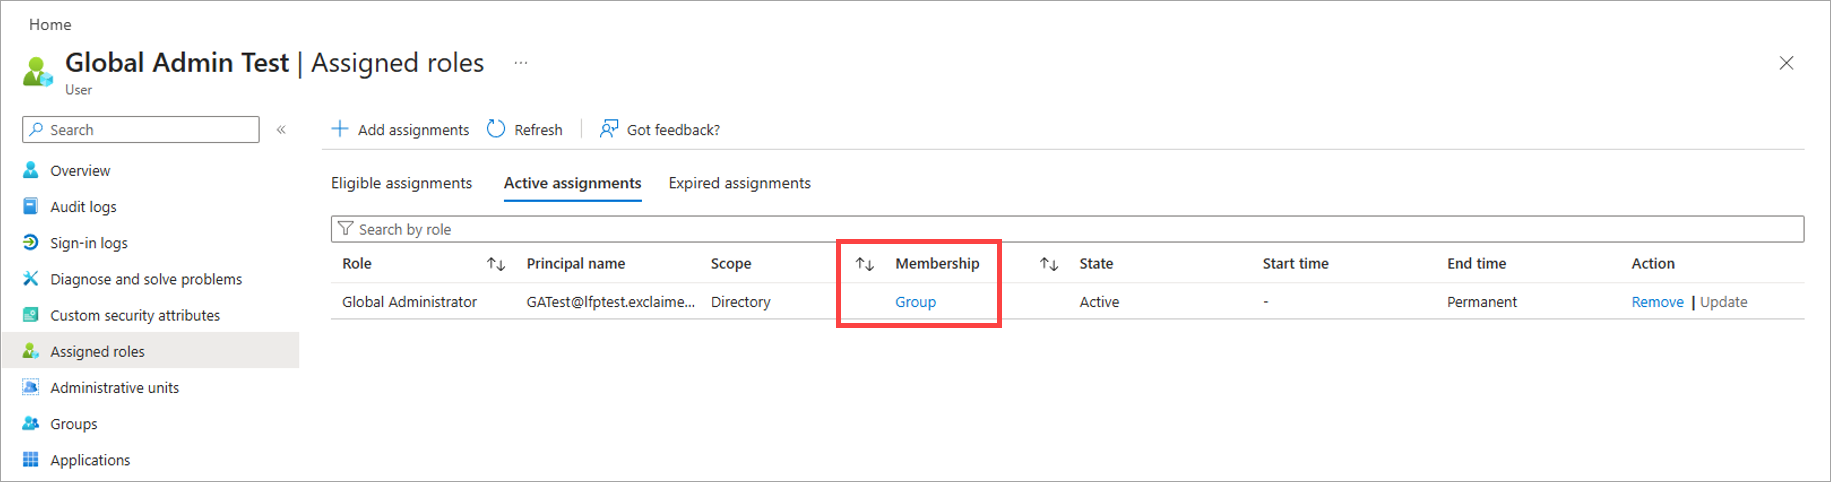
An example of the Membership value showing Group.
- To reassign the role, remove the current assignment by selecting Remove in the Action column.
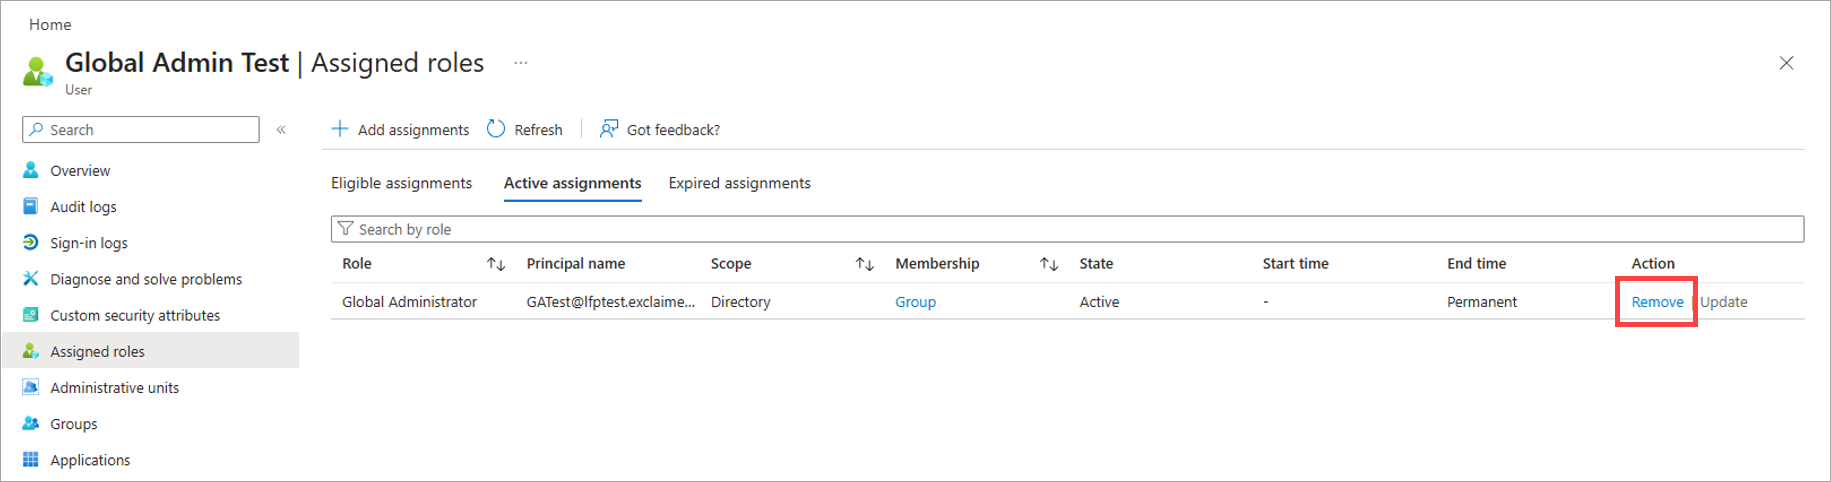
Select Remove to delete the Group assignment.
- Select +Add assignments from the header row.
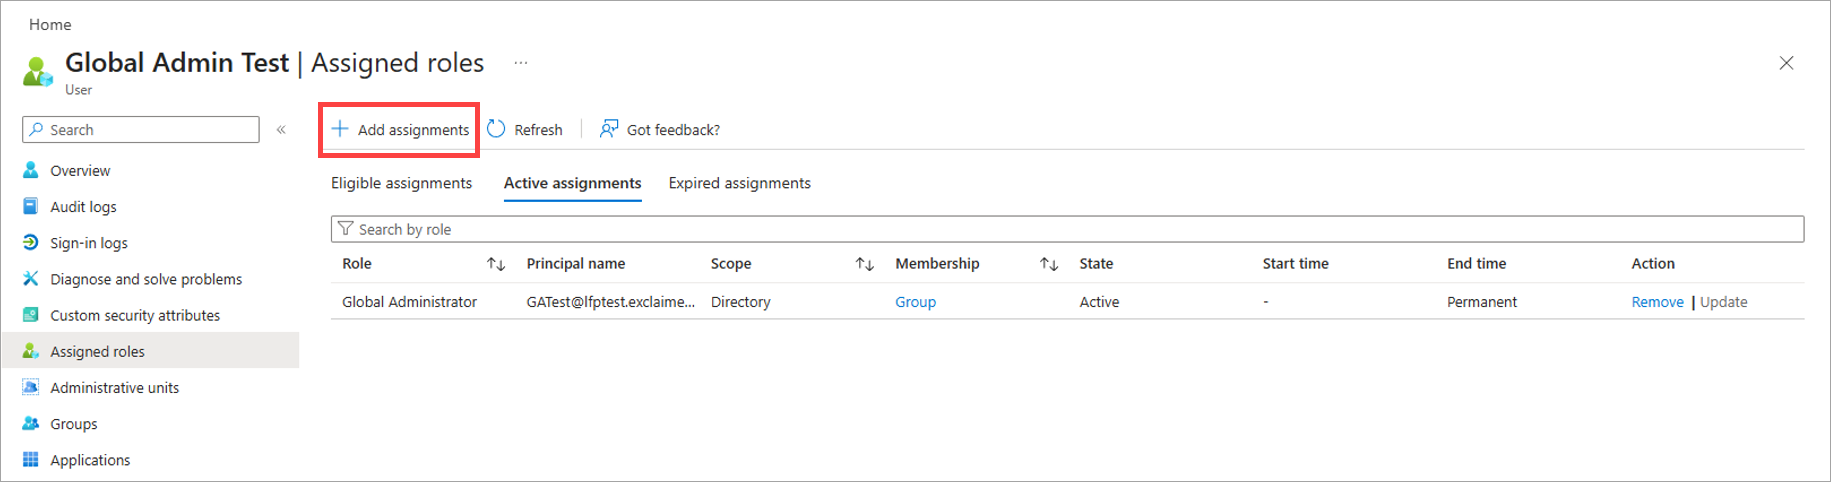
Select Add assignments.
- Select the Setting tab.
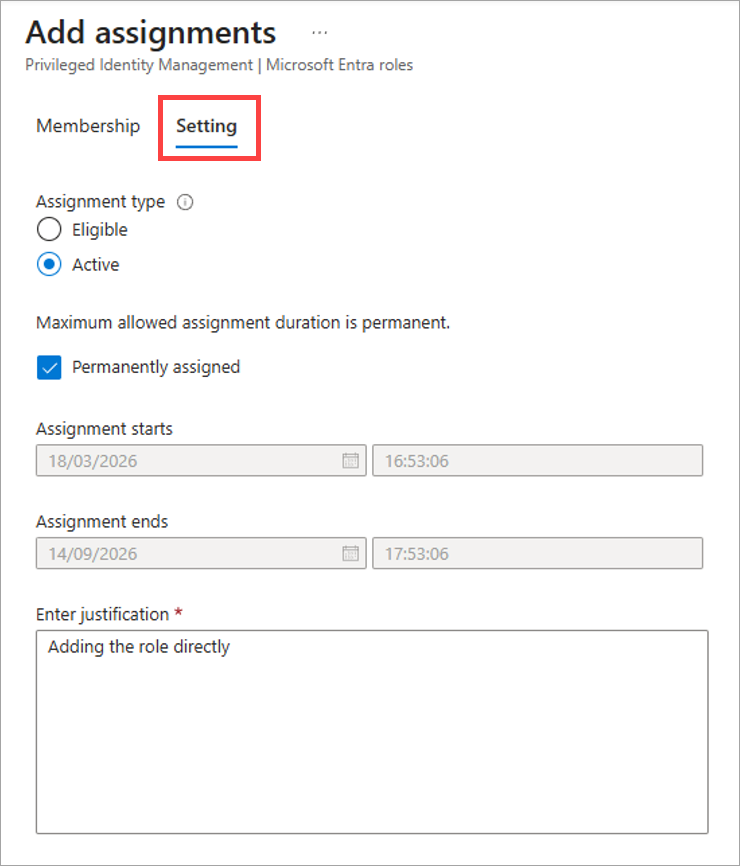
Open the Setting tab.
- Under Assignment type, select the Active radio button.
- In the Enter justification text field, enter a reason for assigning.
- Select Assign.
- Cancel any previous Microsoft 365 processes and attempt to connect to Exclaimer again.
If the problem persists, query Microsoft Graph Explorer to see if the role has assigned correctly.
To query Microsoft Graph Explorer:
- Sign in to Microsoft Graph Explorer using Global Administrator credentials.
-
If prompted, accept the permissions request.
NOTE: You do not need to select the Consent on behalf of your organization checkbox. - In the main Graph Explorer pane, select the Modify Permissions tab.
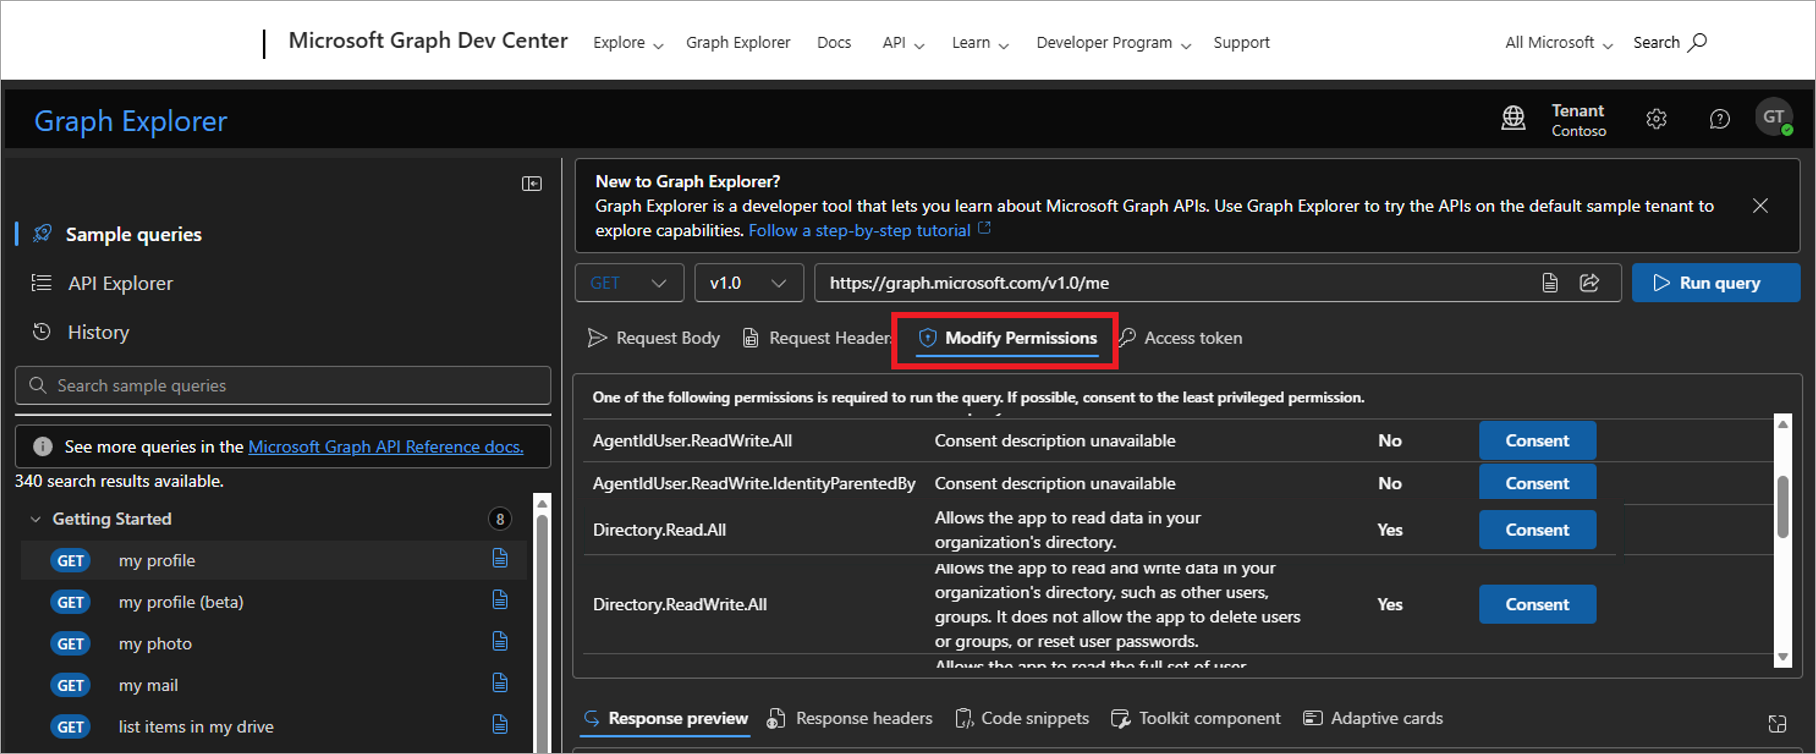
Open the Modify Permissions tab.
- Locate the row for Directory.Read.All and select Consent.
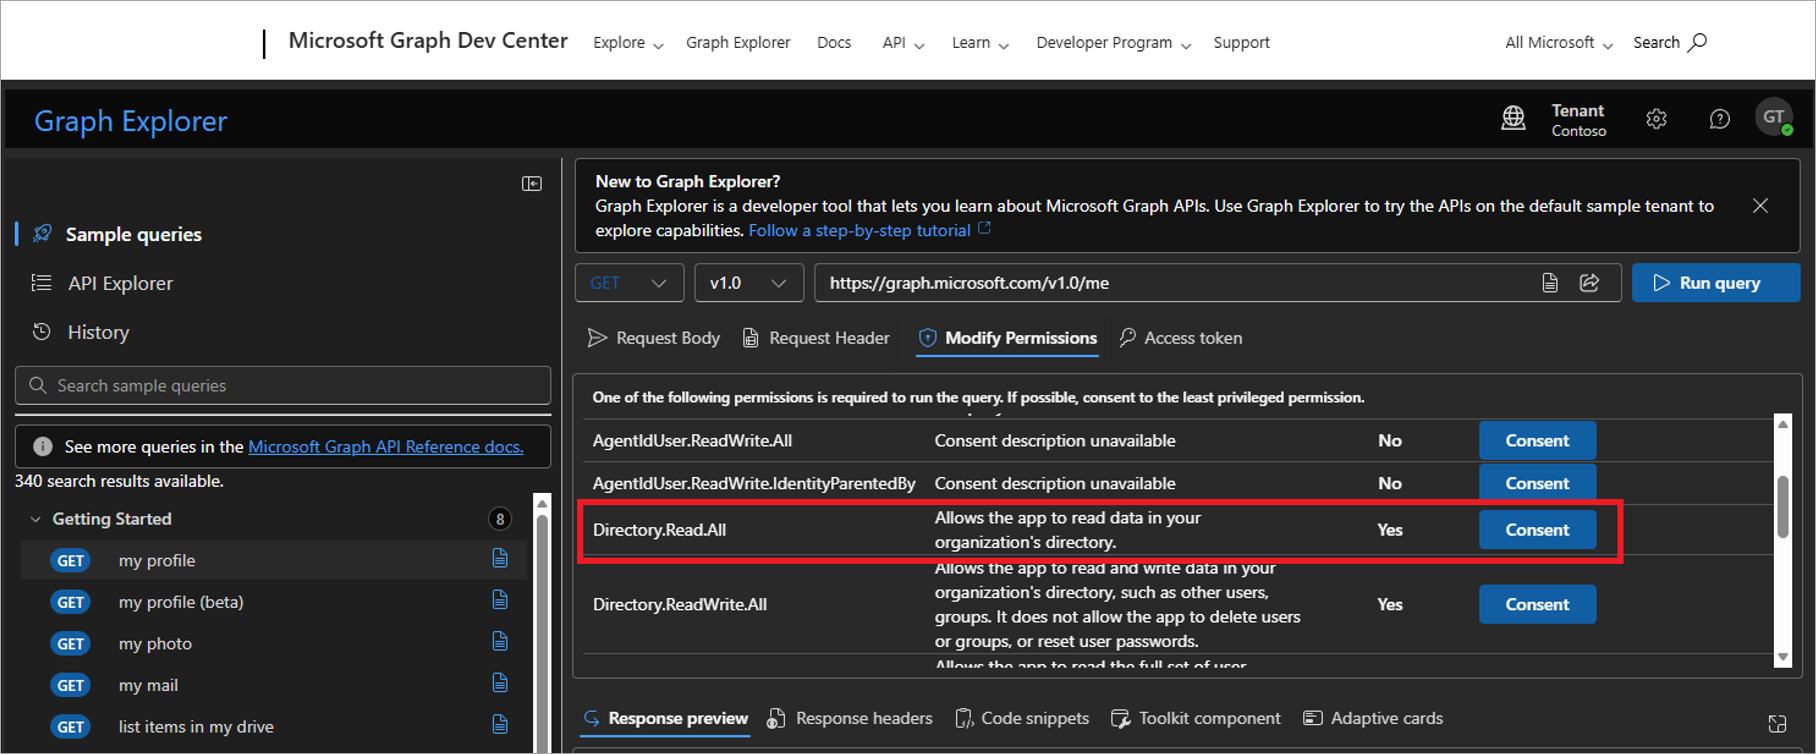
Select Consent on the Directory.Read.All row.
-
When prompted, accept the permissions request.
NOTE: You do not need to select the Consent on behalf of your organization checkbox. -
In the query entry field, enter the following text:
https://graph.microsoft.com/v1.0/directoryRoles(roleTemplateId='62e90394- 69f5-4237-9190- 012177145e10')/members/microsoft.graph.user?$select=displayName,mail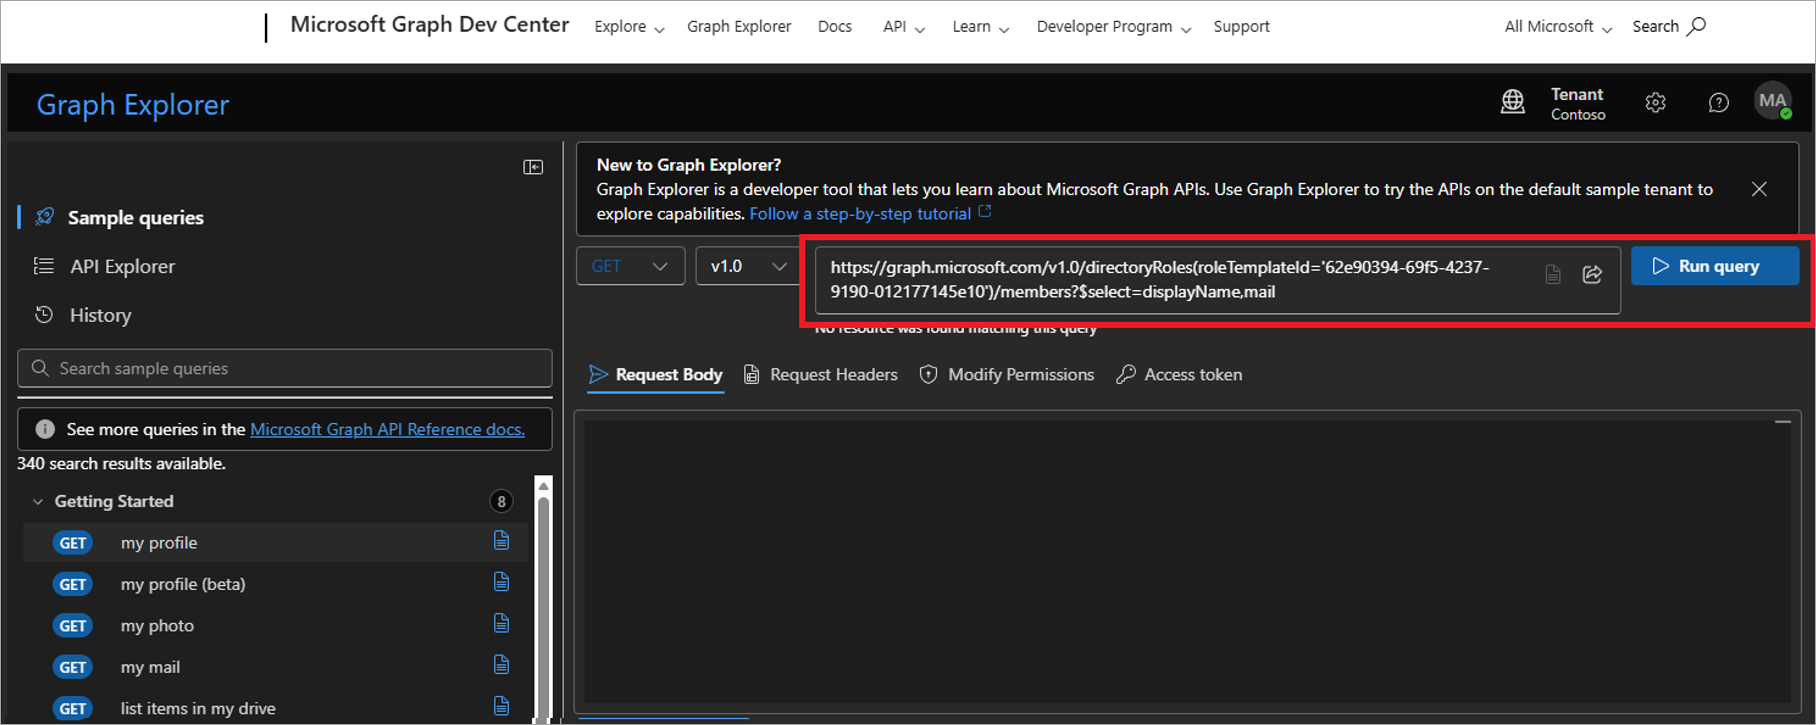
Enter the text in the field.
- Select Run query.
- Check the Response preview window for the account you created in the previous process. If it is not present, re-check that the role assignment is Direct and not Group. If the problem persists, raise a Support ticket.