
Description
If you encounter a technical issue using Exclaimer and need help from our Support team, or need to speak to a member of Account Services, you can raise a ticket via our Support form.
How to access it
To access the Support ticket form within Exclaimer:
- From the header bar, select the question mark icon to open the Help menu.
- Select Raise a support ticket. This opens the Support ticket form.
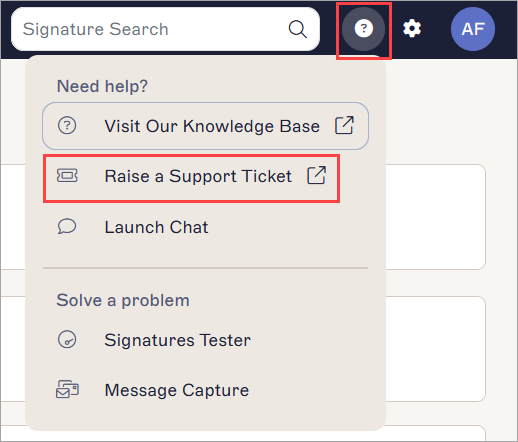
The Help menu is found under the question mark icon.
To access the Support ticket form without logging in:
- EITHER:
From any page of this knowledge base, select Submit a request from the header section. This opens the Support ticket form.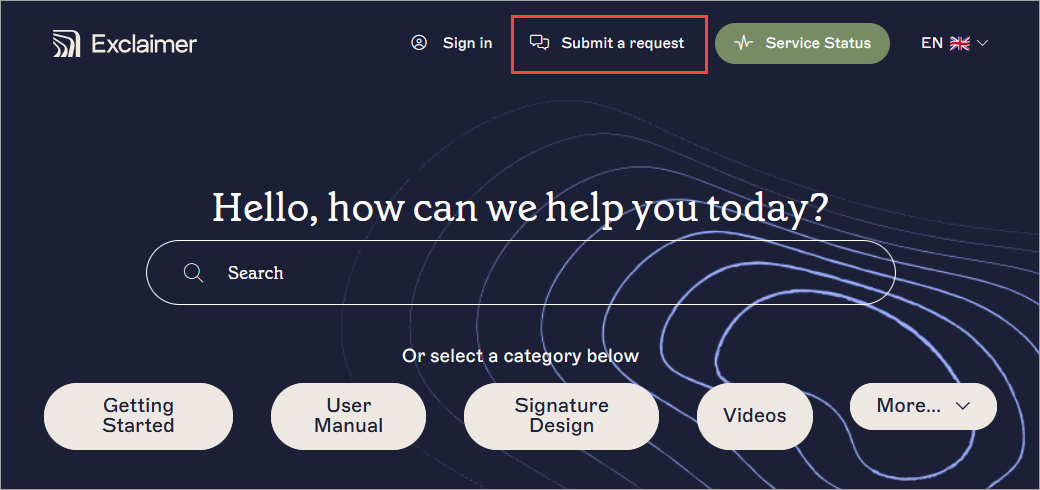
Select Submit a request from the top of any knowledge base page.
OR
From any article on this knowledge base, select the Raise Ticket button under Still need help? in the footer section following the article content.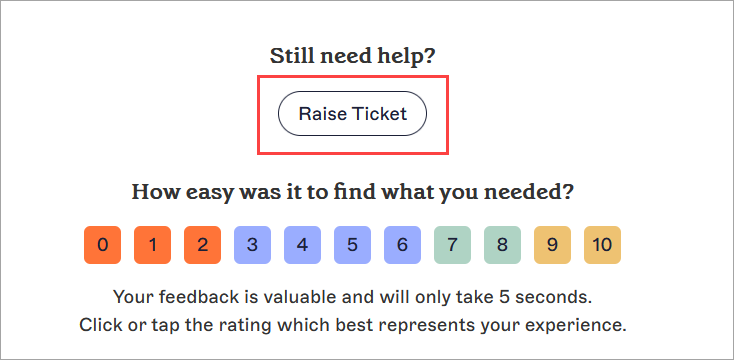
The Raise Ticket button is found after the content of any article.
Raising a Support ticket
To raise a support ticket:
-
Under Raise a ticket, select Technical Support or Account Services.
NOTE:
Choose Technical Support for: Reporting bugs, technical assistance, or issues with features.
Choose Account Services for: Renewals, payment and billing, account issues, partner/distributor questions, or sales.
This opens the appropriate ticket form.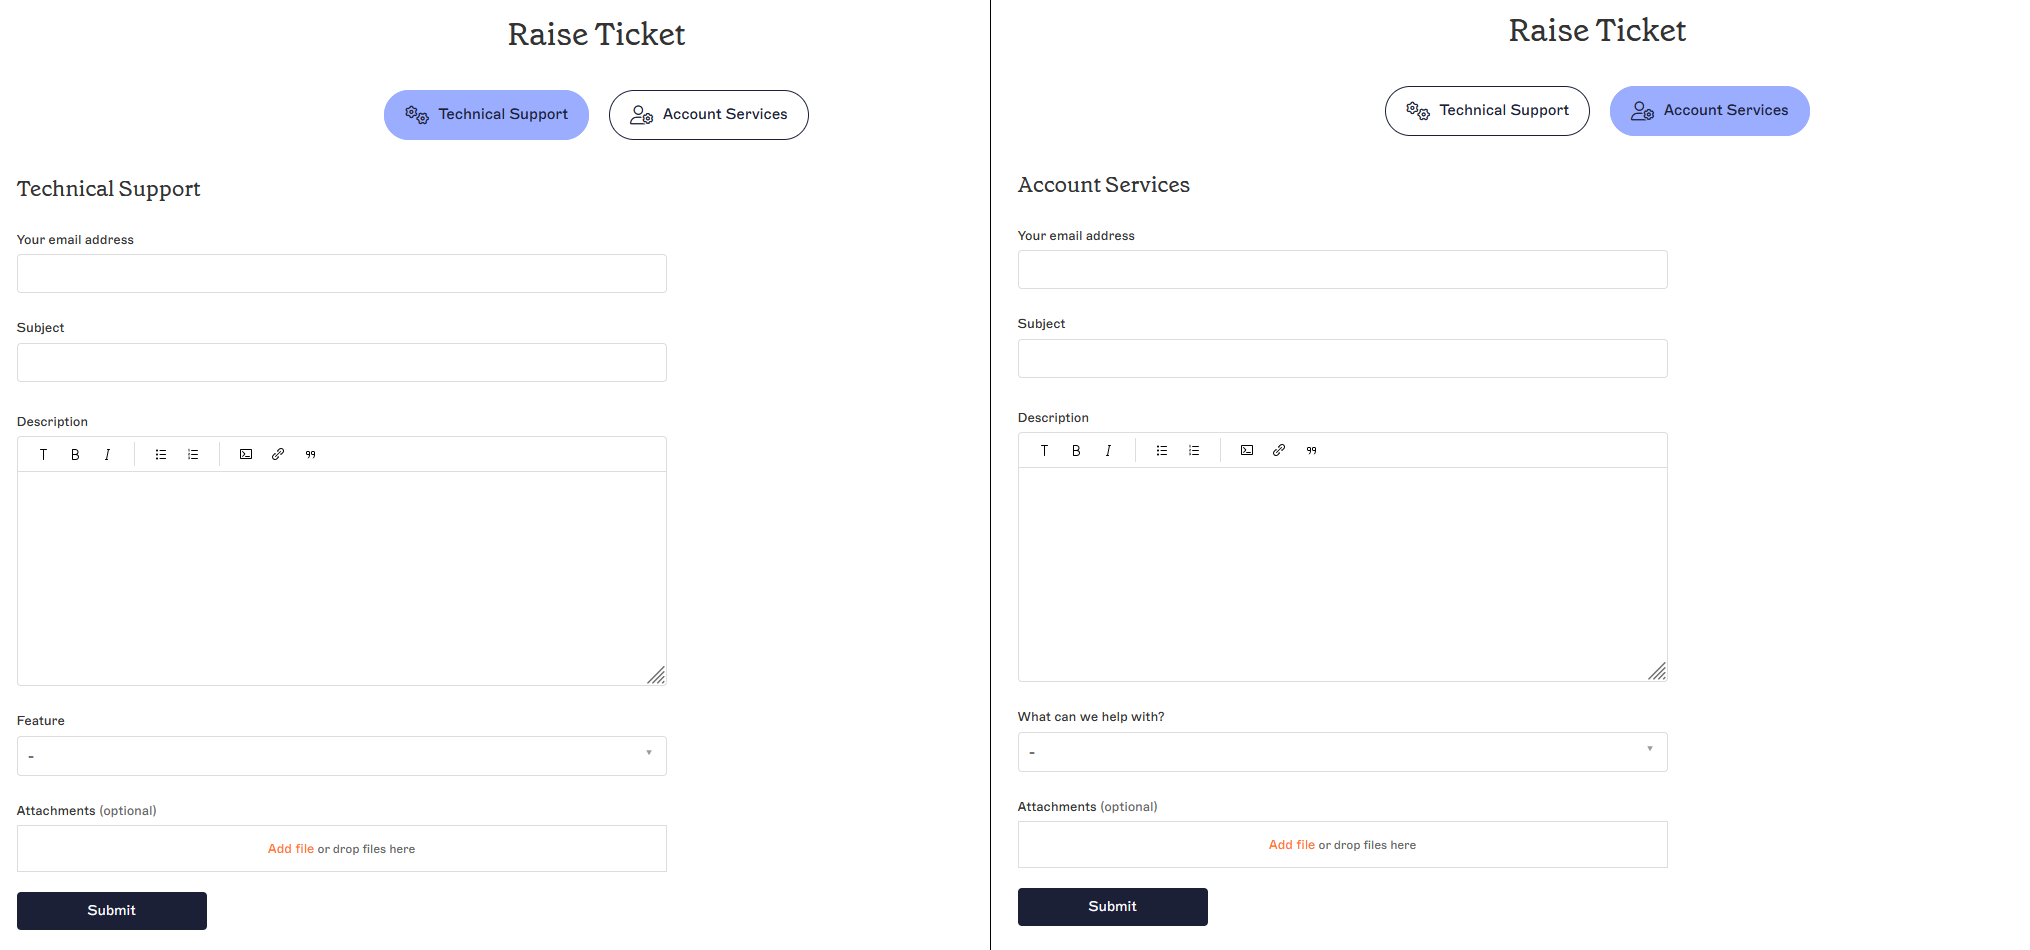
The Technical Support and Account Services ticket forms.
- Under Your email address, enter a contact email for our team to reach you at.
- Under Subject, enter a subject line for your request.
- Under Description, enter your request or describe your problem.
- For Technical Support, select the relevant feature from the Feature drop-down.
- For Account Services, select your type of request from the What can we help with? drop-down.
- [Optional] Under Attachments, drag and drop or select to upload any files you wish to attach, such as screenshots.
-
Select Submit.
Once submitted, a member of the Exclaimer Support or Account Services team will contact you as soon as possible.NOTE: Our Support team may ask you for your Subscription ID to locate your subscription. For more information, see how to locate your subscription ID in the Exclaimer Portal.
Run our diagnostic PowerShell script to help the Support team check your Outlook and Exclaimer Add-In setup. The script safely collects technical details, such as Outlook version, Add-In status, and connectivity without accessing personal data or emails, enabling faster troubleshooting.
To run the script:
- Launch Windows PowerShell. Administrator privileges are optional but recommended.
-
Copy and paste the following command into PowerShell:
Set-ExecutionPolicy -Scope Process -ExecutionPolicy Bypass; Invoke-WebRequest -Uri "https://raw.githubusercontent.com/exclaimerltd/Internal-Support-Scripts/master/AddInChecks.ps1" -OutFile "$env:TEMP\AddInChecks.ps1"; & "$env:TEMP\AddInChecks.ps1" - Follow the on-screen prompts.
-
When complete, a report named AddInChecks.html will be generated.
NOTE: Report Location:
By default: C:\Users\<YourUser>\Downloads\AddInChecks.html
Fallback (if Downloads is unavailable): C:\Temp\AddInChecks.html
Attach the generated file to your Support ticket to allow the Support team to review your configuration.
If your Support request concerns authentication, include an export of the affected user's Entra ID sign-in logs with your Support ticket.
To export the logs:
- Sign in to the Microsoft Entra admin centre.
- Navigate to Monitoring & health > Sign-in logs.
- On the Interactive sign-ins tab, filter by the affected user's UPN and the date range covering the issue, then export as CSV.
- Switch to the Non-interactive sign-ins tab, apply the same filter, and export as CSV.
- Attach both CSV files to your support ticket.