
Scenario
You are using Server-Side deployment and have multiple senders for one signature design. You want the signature to only apply to the first message sent by each user of the signature in an email chain.
Resolution
You can prevent signtures from applying a second time using Server-Side content rules. By using the {DisplayName} user attribute in an exception text phrase, the signature rules detect whether a signature has already been applied for each specific user.
When each user sends an email message, the Advanced Rules detect if a signature with the exception text and their individual display name has already been applied. If the exception text and the individual user's name is detected, meaning the signature has been applied for this user once, then the signature is not applied again. If a new user sends a message in the email chain, the Advanced Rules detect that a signature has not been applied for their display name, so the signature is applied.
This solution requires adding specific text to your signature template, so we recommend using the Text element and then shrinking the text size so that the new text is as invisible as possible.
To edit the signature template:
- Log in to your Exclaimer subscription and select Signatures from the menu sidebar.
- Open your signature in the signature designer by selecting Edit Design on the signature card. If you have not yet created the signature you want to use, select Create Signature. For more information on creating a new signature template, see Create Signature.
- From the Toolbox, expand Text & Fields and add a new Text element to the signature template.
-
Enter a short phrase in the text box that includes the {DisplayName} field. To add the field, enter the { symbol and choose {DisplayName} from the drop-down.
NOTES: You must add the field by selecting it from the list after entering {. The field will not be recognised properly by the Advanced Rules if entered as plain text.
You must add at least one extra word to the text box to create a new phrase - this solution will not work unless the exception text is unique to the signature, meaning the {DisplayName} field alone is not enough.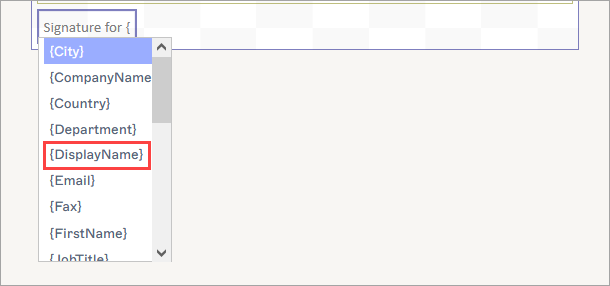
Enter a phrase that contains the {DisplayName} field.
- In the Properties pane, expand the Text section.
-
In the Font entry field, set the font size to 1 pixel.
Tip! To further hide your Text box, you can also set the font color to match any background colors in your signature. However, be aware that colors may display differently if users are using dark mode on their devices.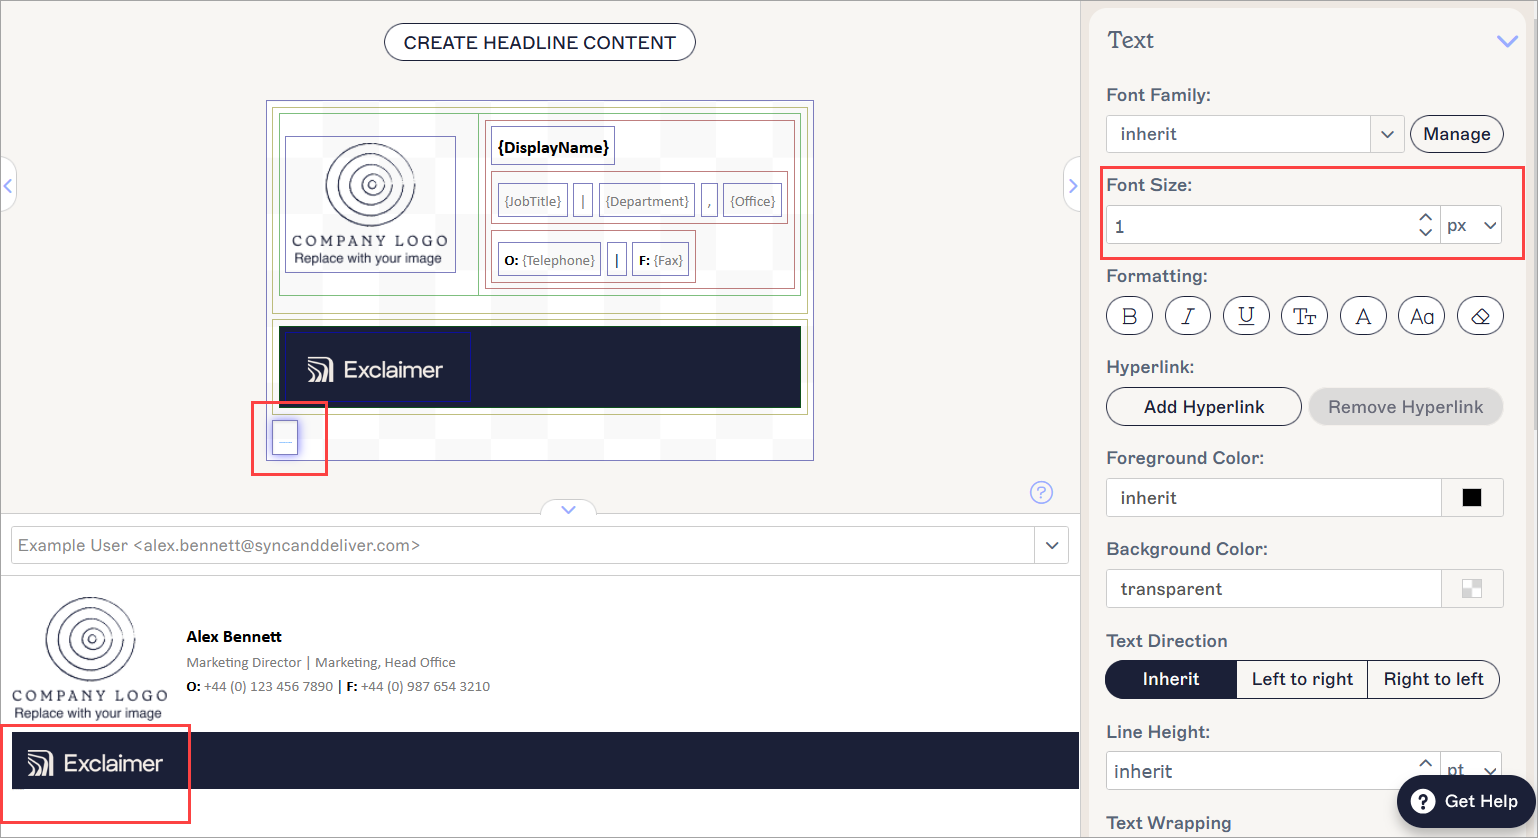
An example of exception text set to 1 pixel. As shown in the Preview pane, the text is barely detectable on the signature.
- In the unsaved changes banner, select Save.
To configure the signature rules:
- From the All Signatures list, locate your signature and select Manage Rules.
- Select the Advanced Rules tab.
- Under Server-Side Content Rules, select the Do not add signature if message contains checkbox.
- In the This Text entry field, enter the exception text you added in the Step 1 section of this article.
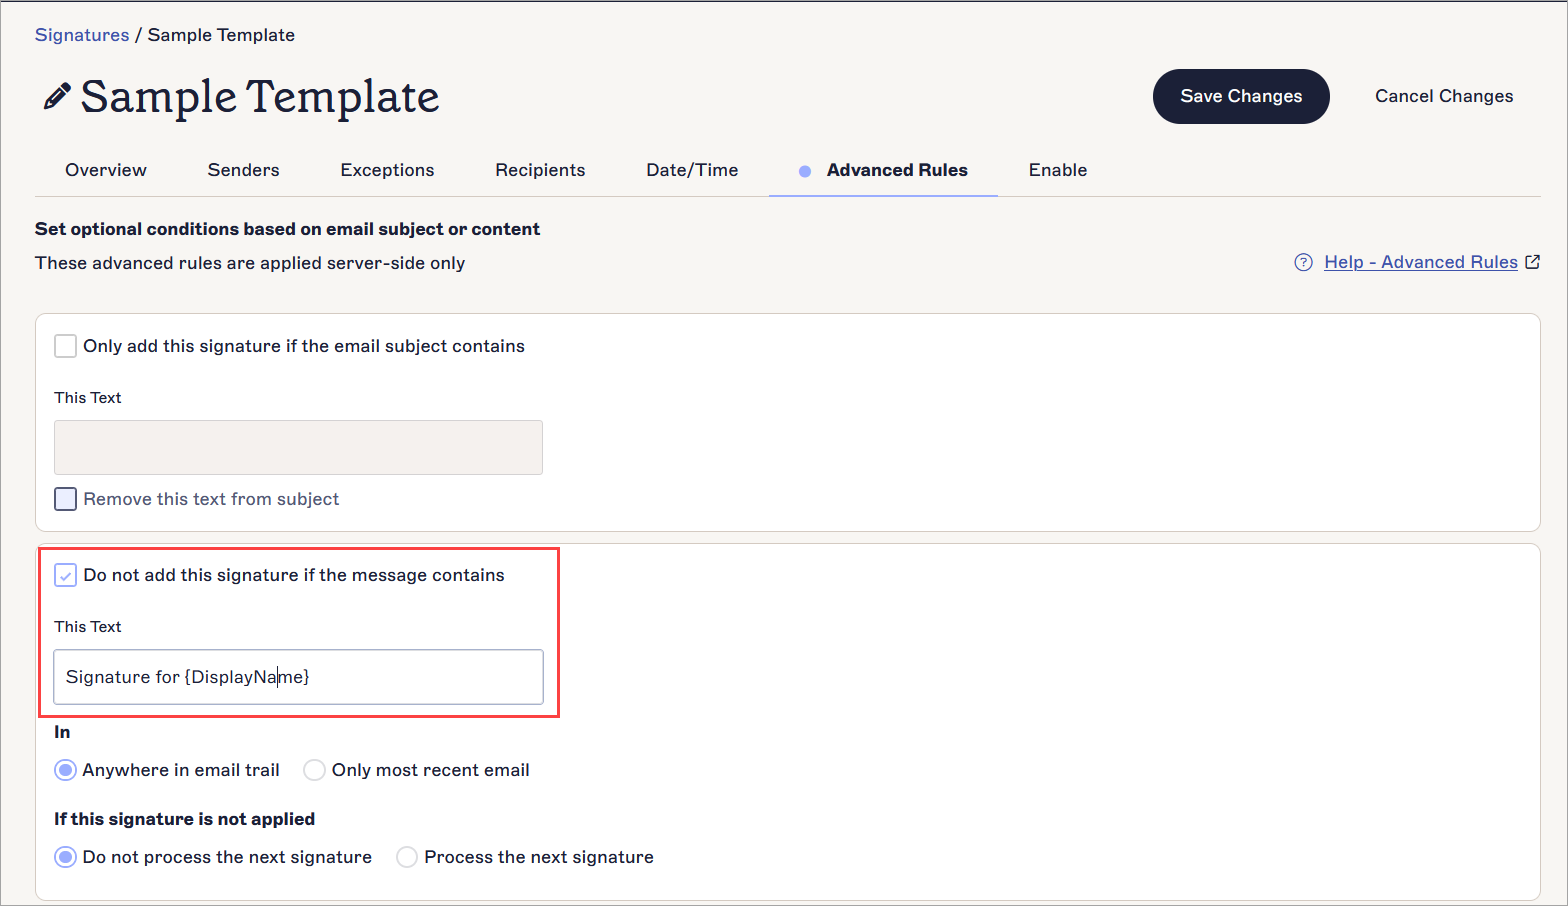
Enter the exception text you added to the template.
- Under In, ensure the Anywhere in email trail radio button is selected.
- Under If this signature is applied, ensure the Do not process the next signature radio button is selected.
- In the unsaved changes banner, select Save.