
Scenario
You are using Exclaimer, and you have created your email signature. The signature looks correct when testing and in the Preview pane. However, the signature appears squashed, with text wrapping causing breaks in the shape of the template on mobile devices or smaller screens.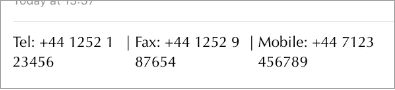
Resolution
This issue is caused by the screen size being smaller than the width of the signature. This can be caused by wide elements such as disclaimers or tables with lots of columns.
To correct this issue, you need to add a fixed width to allow the signature template to scale on smaller devices correctly. This can be done in two ways:
- Adding a fixed width to a table or group - this sets only the elements inside the table or group to the fixed width. The rest of the signature may wrap when your device scales the signature.
- Adding a fixed width to the whole template - this sets the whole signature to the fixed width. The whole signature is scaled by your device.
NOTE: This is not the same as the Text Wrapping property in the Text section of the Properties pane - the Wrap/No Wrap setting applies only to individual text-based elements and controls how the text fits into the tables that make up the signature, whereas in this scenario, the signature and its structure are being 'broken' by the device width issue. This means we must use the fixed width to readjust it, and is why setting text to No Wrap will not affect the larger structure here.
Applying a fixed width to a table
To apply a fixed width:
- Open the required signature template within the Signature Designer.
- Select the outer border of the table or group containing the elements you want to set the width for. For more information on selecting the right border, see Colored borders, grouping, and inherit properties in the Signature Designer.
Select your group or table.
- In the Properties pane, expand the Size section.
- In the Width field, enter a value in pixels (px) or points (pt) to set a fixed with for your signature.
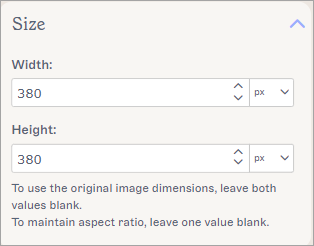
The Size properties.
- Select Save Changes to save your template.
Applying a fixed width to the whole template
To apply a fixed width:
- Open the required signature template within the Signature Designer.
- Select the outermost border of the canvas to select the whole template. For more information on selecting the right border, see Colored borders, grouping, and inherit properties in the Signature Designer.
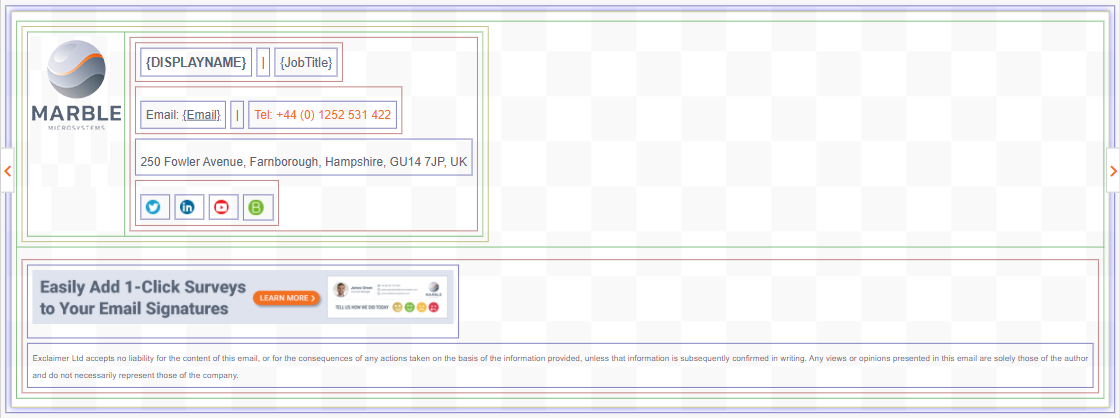
Select the whole canvas.
- In the Properties pane, expand the Size section.
- In the Width field, enter a value in pixels (px) or points (pt) to set a fixed with for your signature.

The Size properties.
- Select Save Changes to save your template.
NOTE: When using a fixed-width signature template, some mobile devices (specifically iOS devices) will try to fit the signature and email into the screen size - this is known as Fit to Screen. This can cause the signature to appear very small. Be aware of scaling without text wrapping when adding a fixed width to templates that contain wide text elements such as Disclaimers.