
Description
When configuring Server-Side signatures for Google Workspace, you must use the Google Workspace Admin Console to set up mail flow settings.
This requires the use of the information provided during the Apply Signatures part of onboarding, or in the Connect to Google Workspace section of Mail Flow after onboarding. You will need to keep Exclaimer open to complete your configuration in the Google Workspace Admin Console.
How to access it
To access the configuration information in Exclaimer during onboarding:
- From the menu sidebar, select Connect to Google.
- Complete the enable and the synchronize process. This opens the Apply Signatures section.
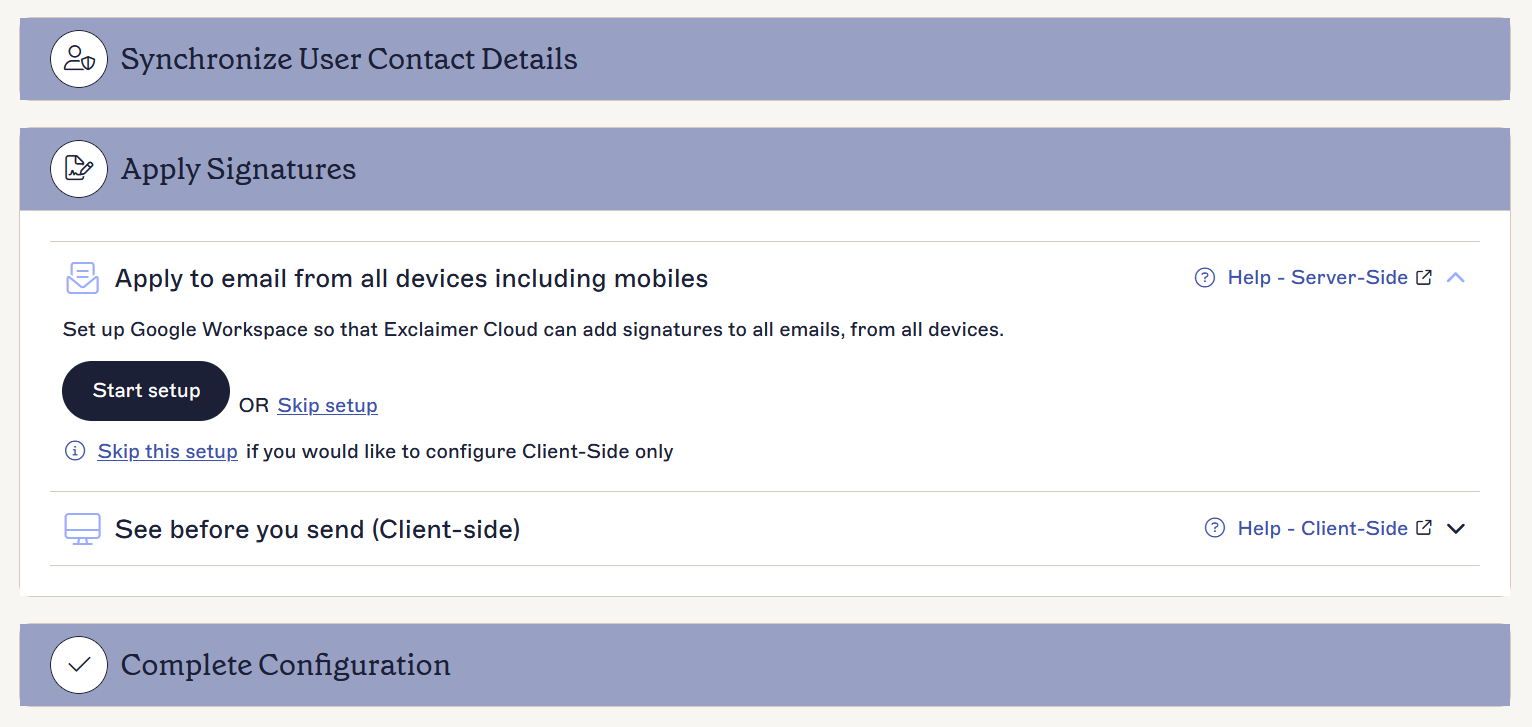
- Select Start setup. This displays the information you will need during the setup process in the Admin Console.
To access the configuration information in Exclaimer after onboarding:
- From the header bar, select the cogwheel icon to open the Settings menu, then select Mail Flow.
- Locate the Connect to Google Workspace section.
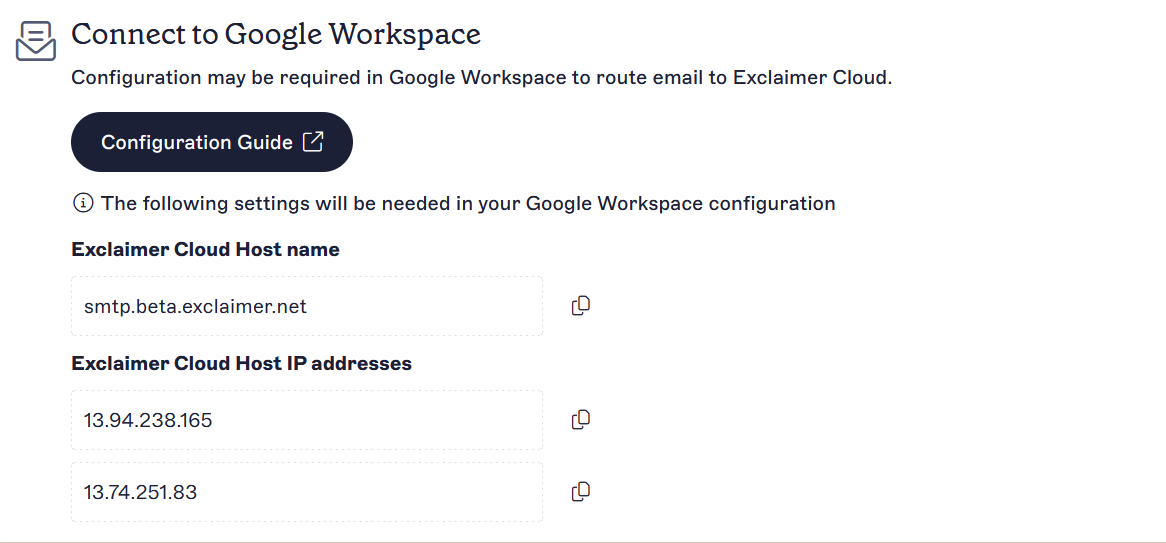
The Connect to Google Workspace section
Configuring Server-Side signatures
For Server-Side signatures, it is important to update the Sender Policy Framework (SPF) record for each domain from which you send emails. Without this, messages may be marked as spam by recipients.
For more information, see:
Exclaimer Simple Mail Transfer Protocol (SMTP) host list and Internet Protocol (IP) Whitelist
How to update the Sender Policy Framework (SPF)
To configure Server-Side signatures:
To add a new host to Google Workspace:
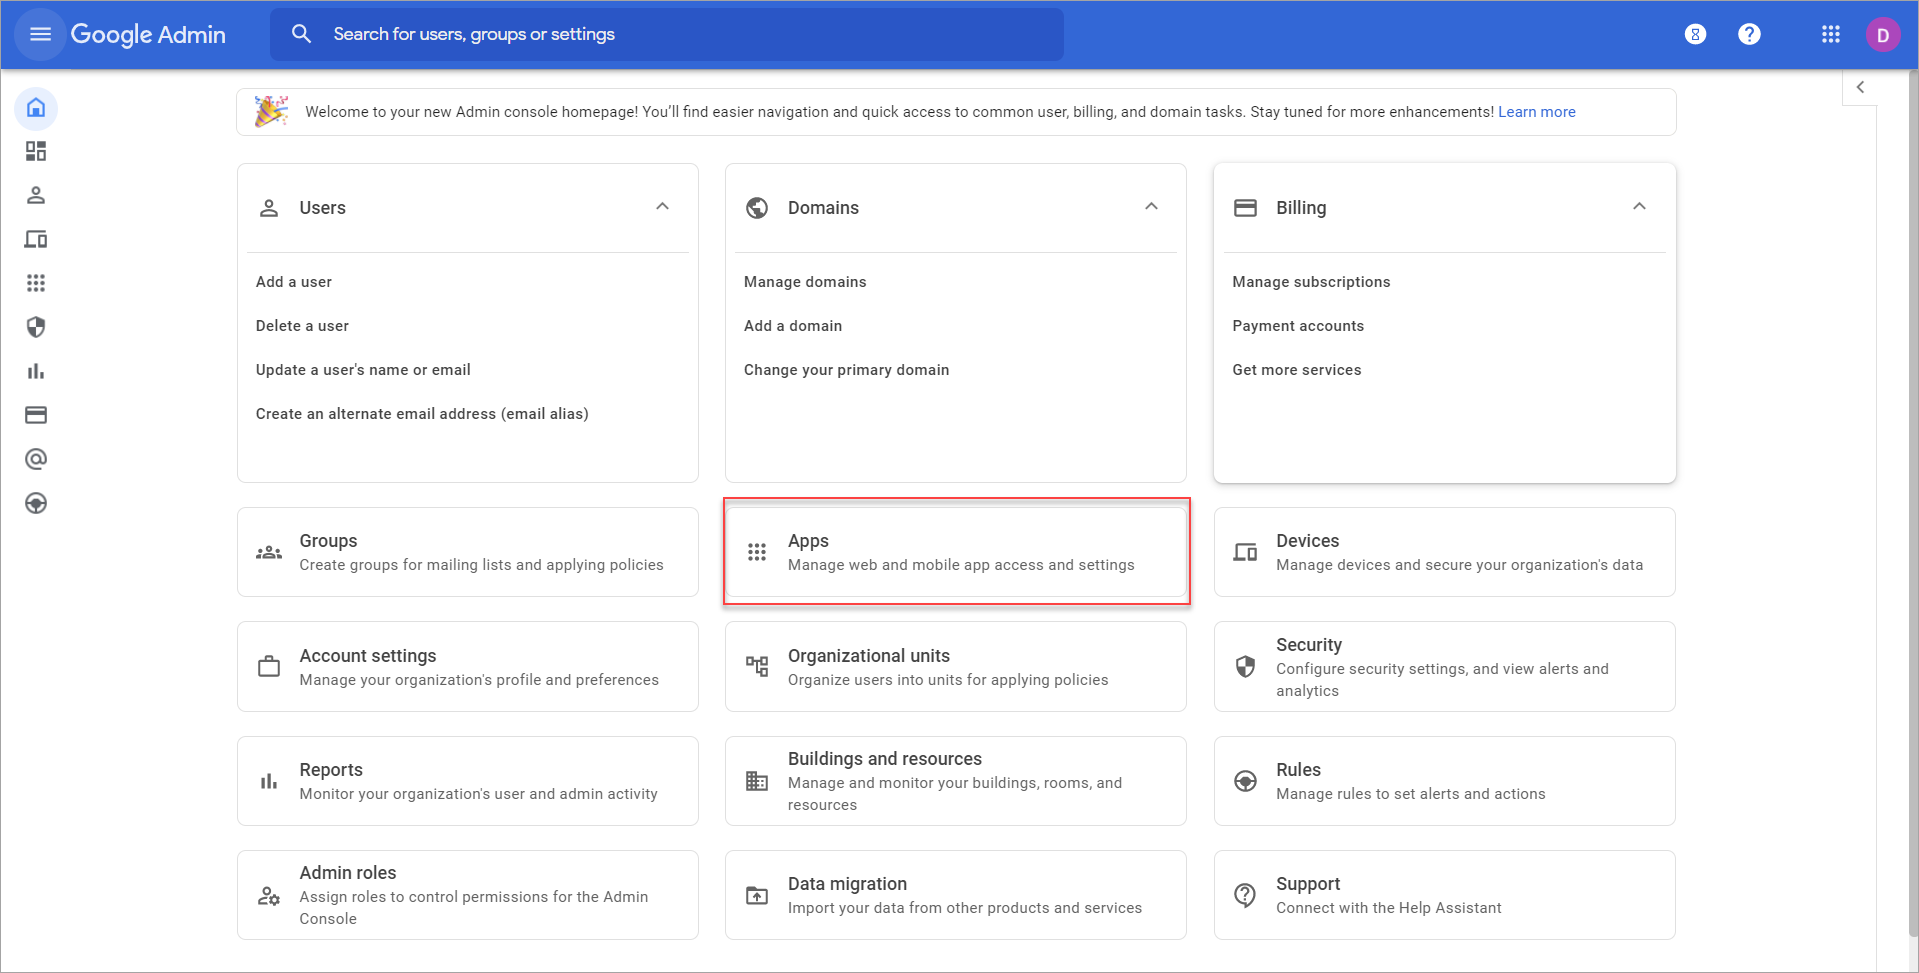
- Log in to the Google Workspace Admin Console using Google Super Admin credentials.
- Select Apps.
-
Select Google Workspace.
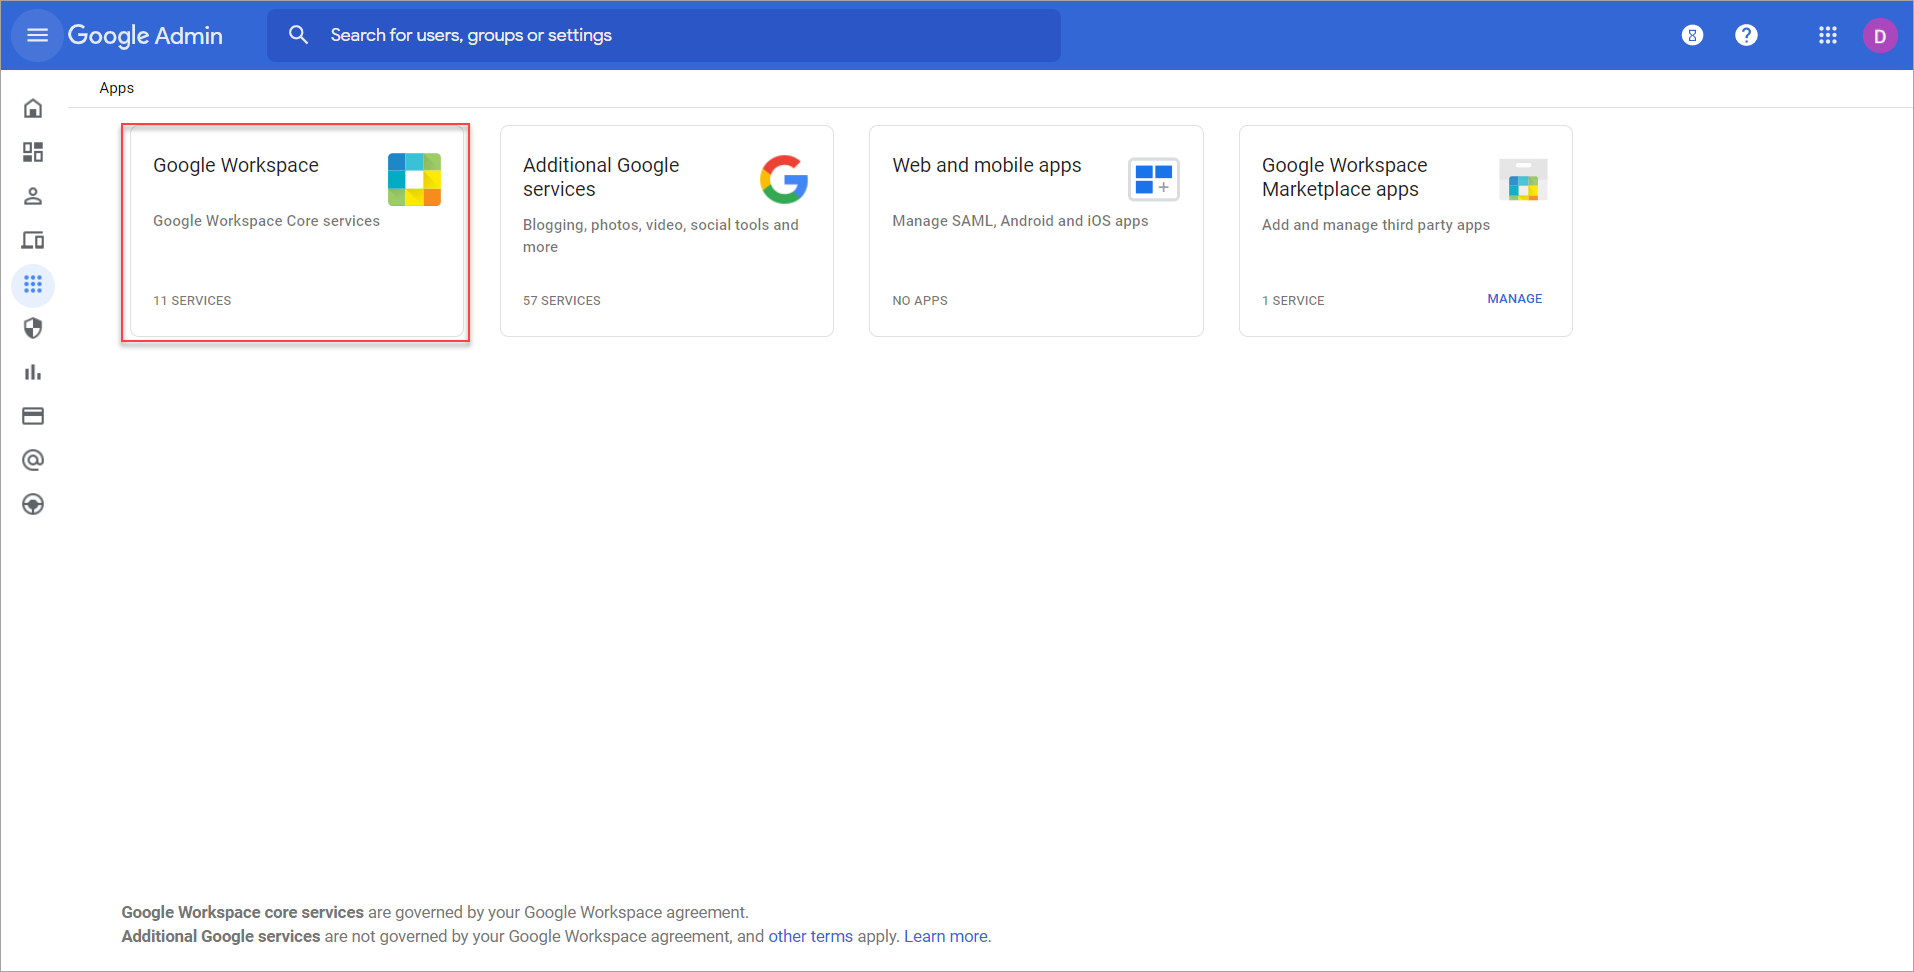
A list of all Google Workspace apps is displayed.
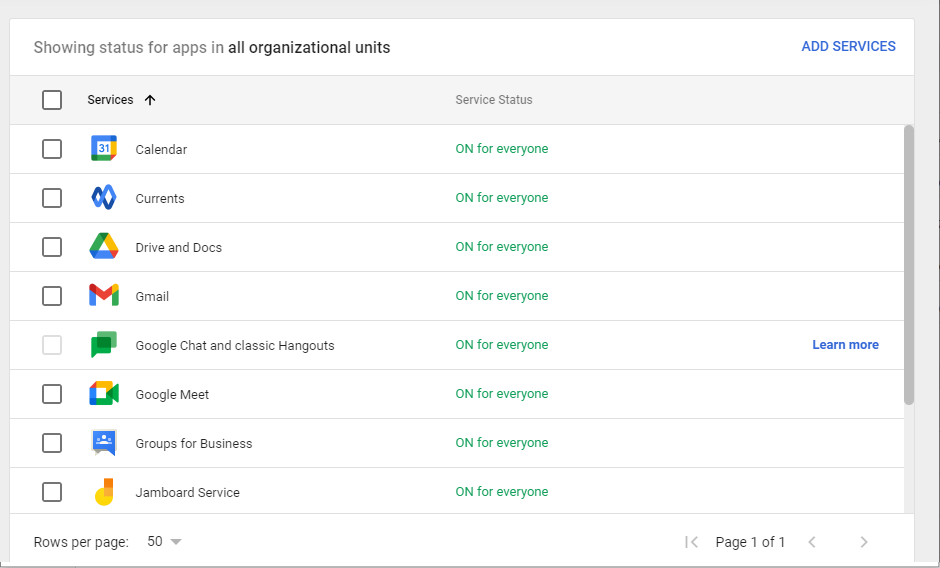
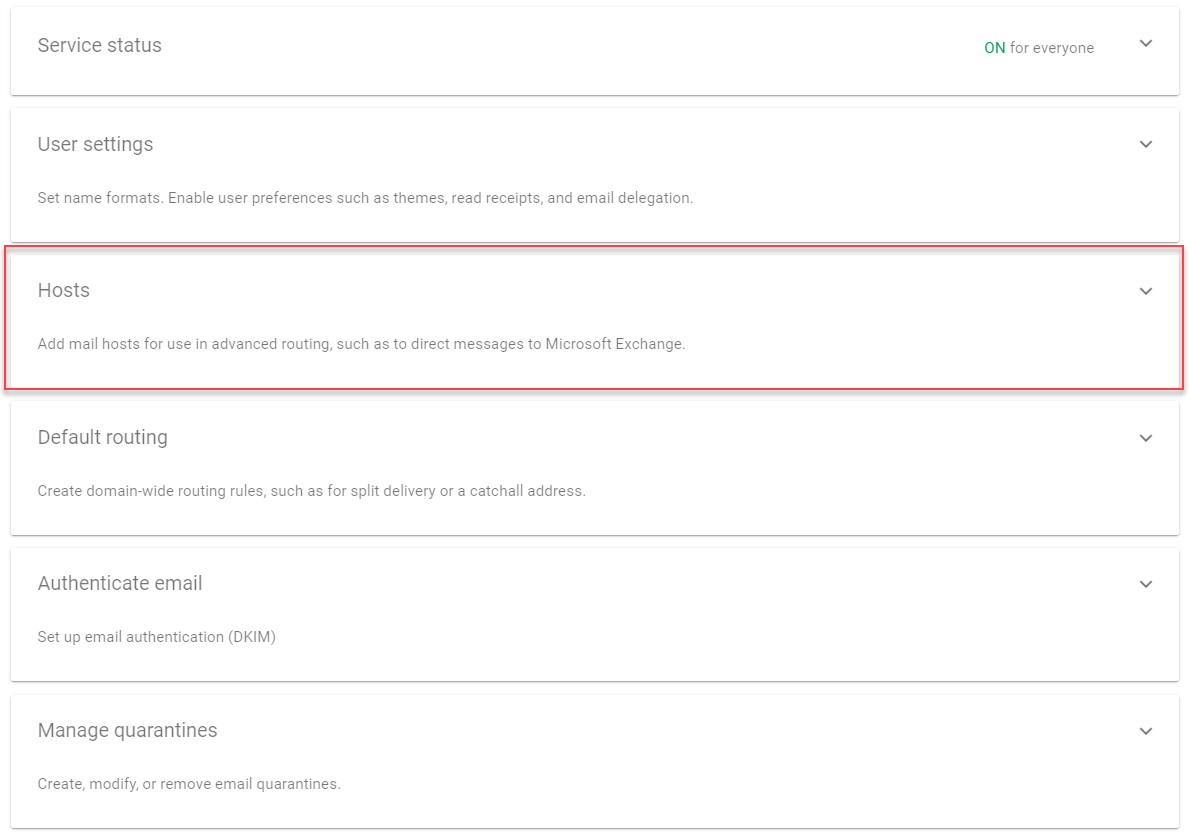
- Select Gmail to display the settings. Do not select the checkbox as this does not open the settings.
-
In the Settings list, locate and expand Hosts.
-
In the Hosts section, select ADD ROUTE.
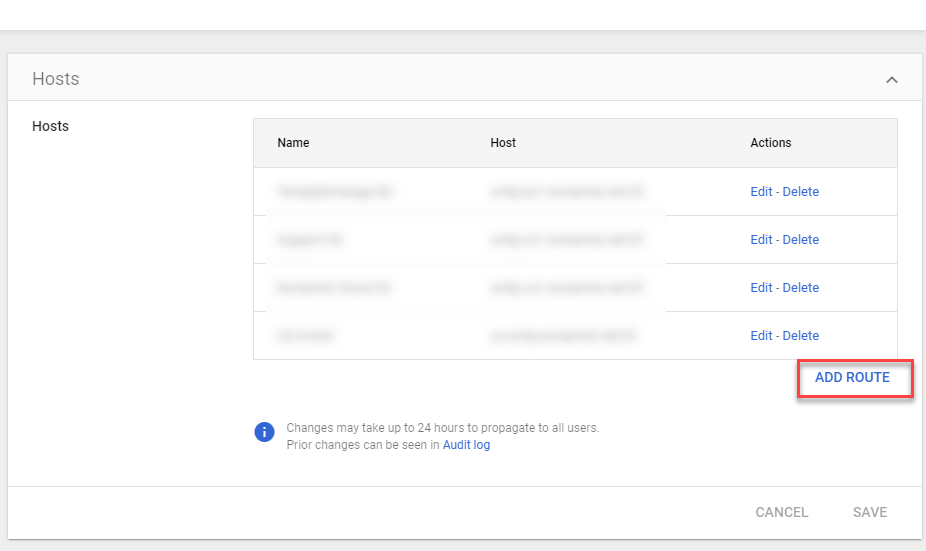
The Add mail route window is displayed.
- In Name, enter a name for the route. This can be any name and will not affect the setup.
-
Select Single host, then enter the host name from the Mail Flow screen, then enter 25 as the port number for the host configuration.
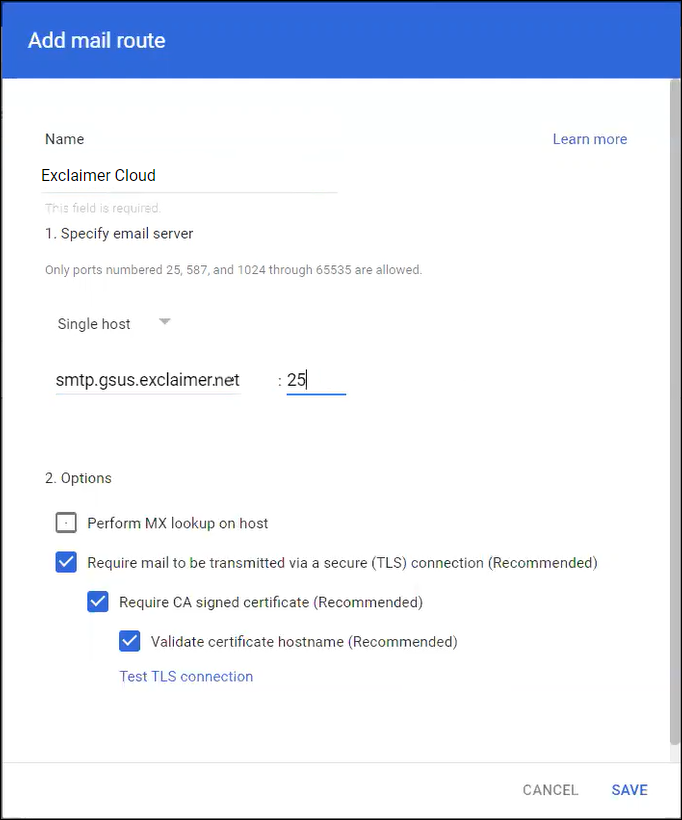
- Select SAVE.
To receive email back from Exclaimer for routing to the end recipients:
- From the list of all Gmail settings, locate and select Routing.
- Locate the SMTP relay service section and select CONFIGURE.
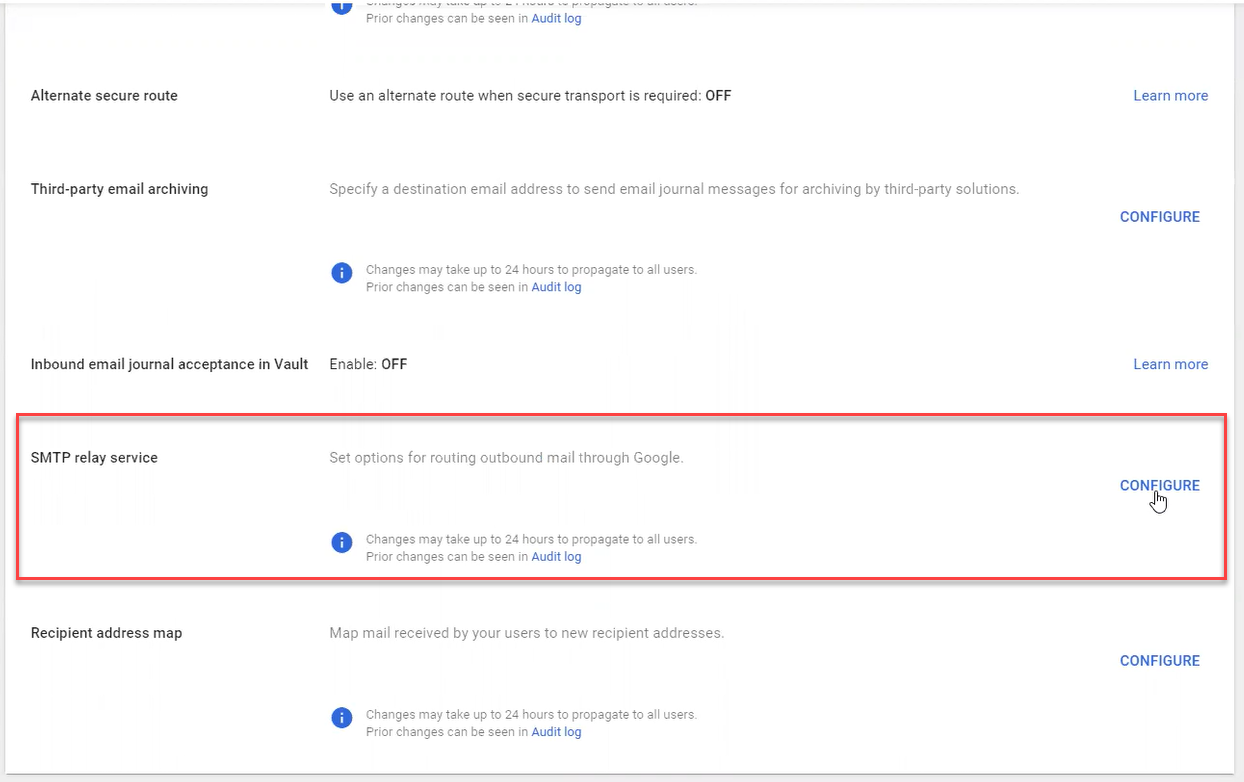
The Add setting window is displayed.
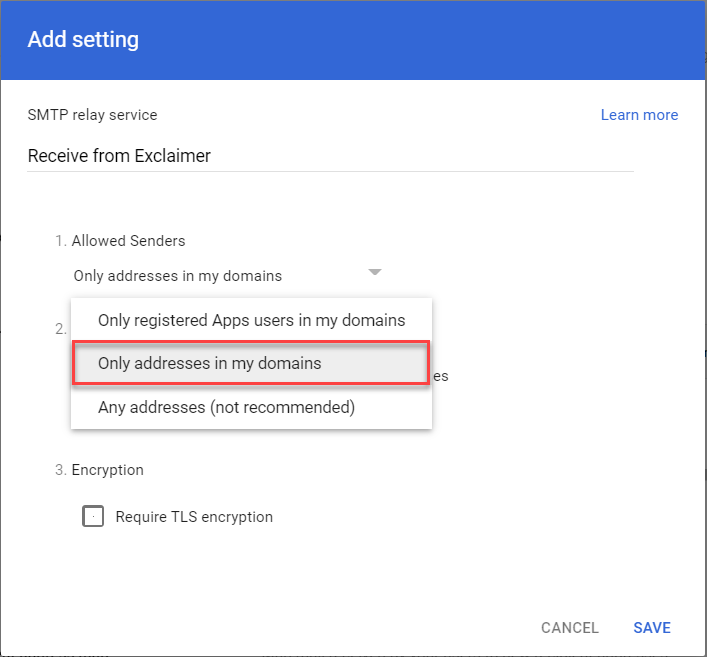
-
In the SMTP relay service field, enter a name or description.
NOTE: For additional information, see Exclaimer Simple Mail Transfer Protocol (SMTP) host list.
- From the Allowed Senders drop-down, select Only addresses in my domains.
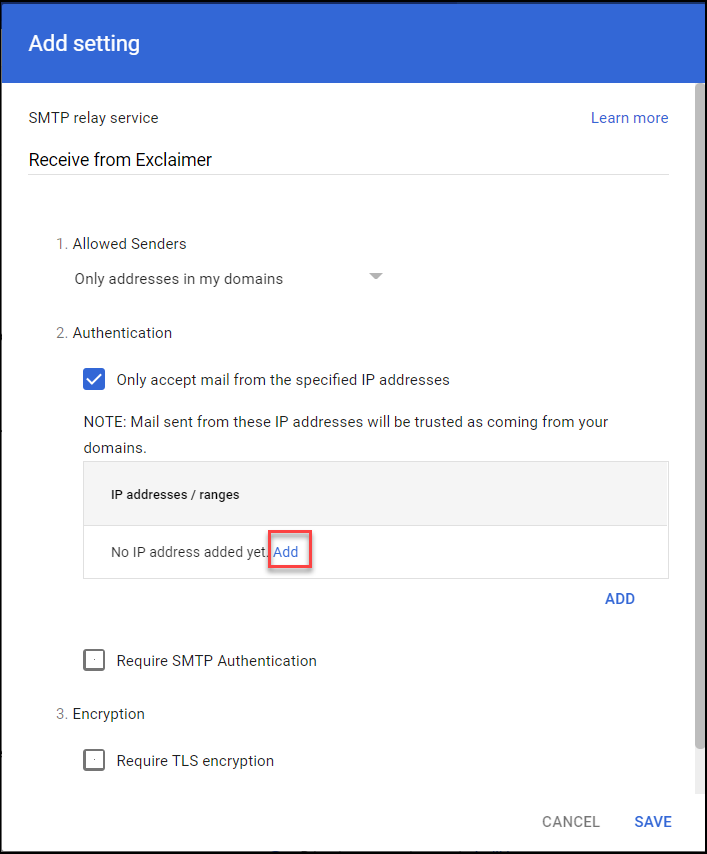
- In Authentication, select the Only accept mail from the specified IP addresses checkbox.
- Under IP addresses/ranges, select Add.
The Add setting window is displayed.
- In Description, enter a description or name for the setting.
- In IP address/range, enter the first Exclaimer Host IP from the Mail Flow screen.
- Select Save.
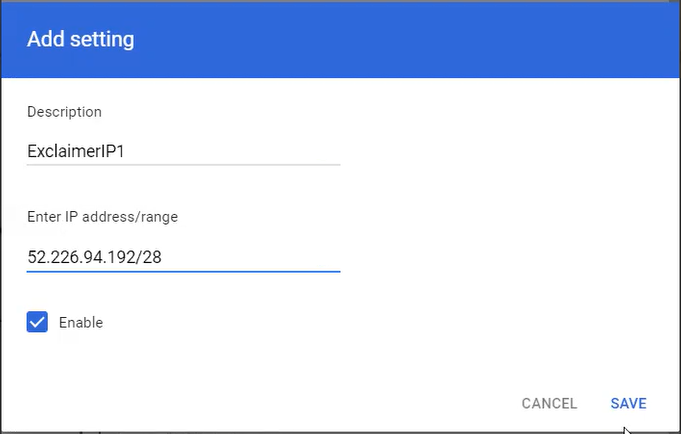
- Repeat steps 7-9 for the second Exclaimer Host IP from the Mail Flow screen.
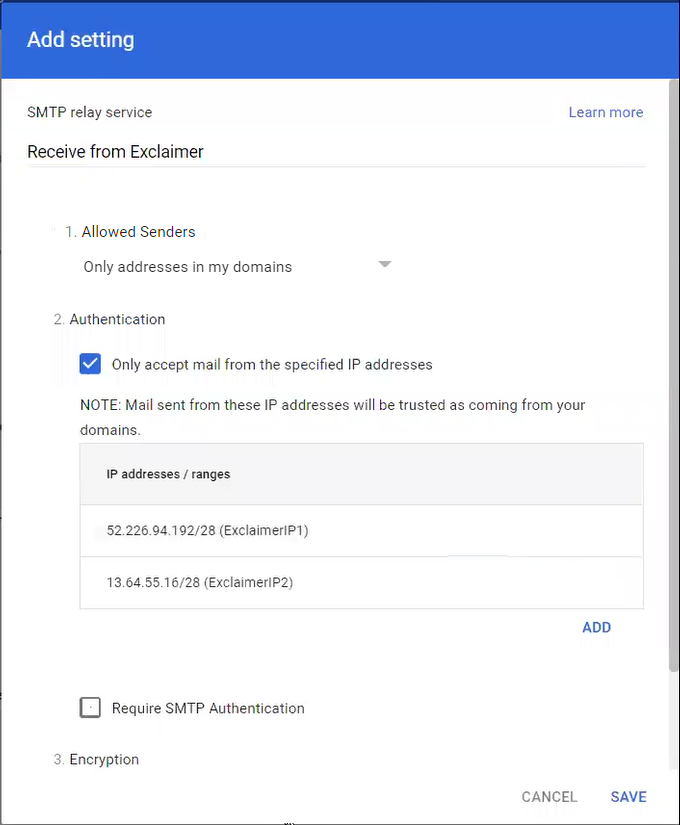
- In Encryption, select Require TLS encryption.
- Select SAVE.
To route your email to Exclaimer:
- From the list of all Gmail settings, select Compliance.
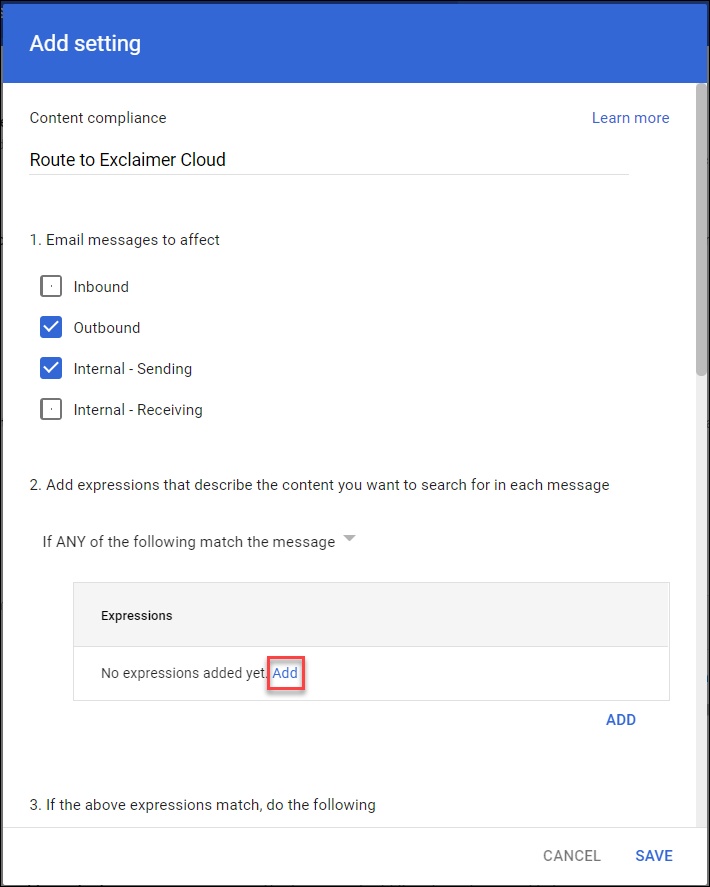
- From the list of all Compliance settings, locate Content compliance and select CONFIGURE.

The Add setting window is displayed.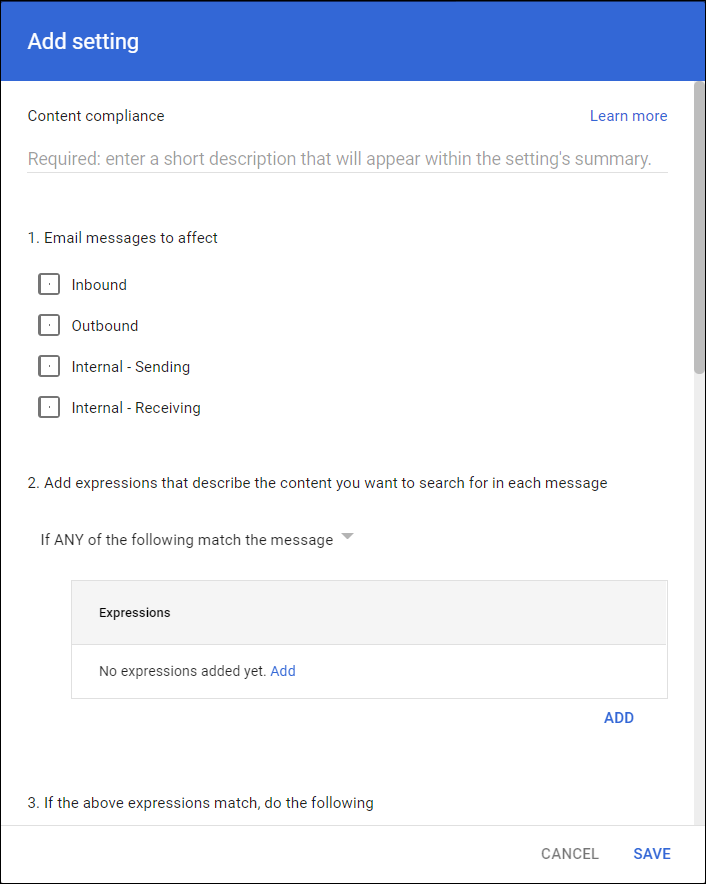
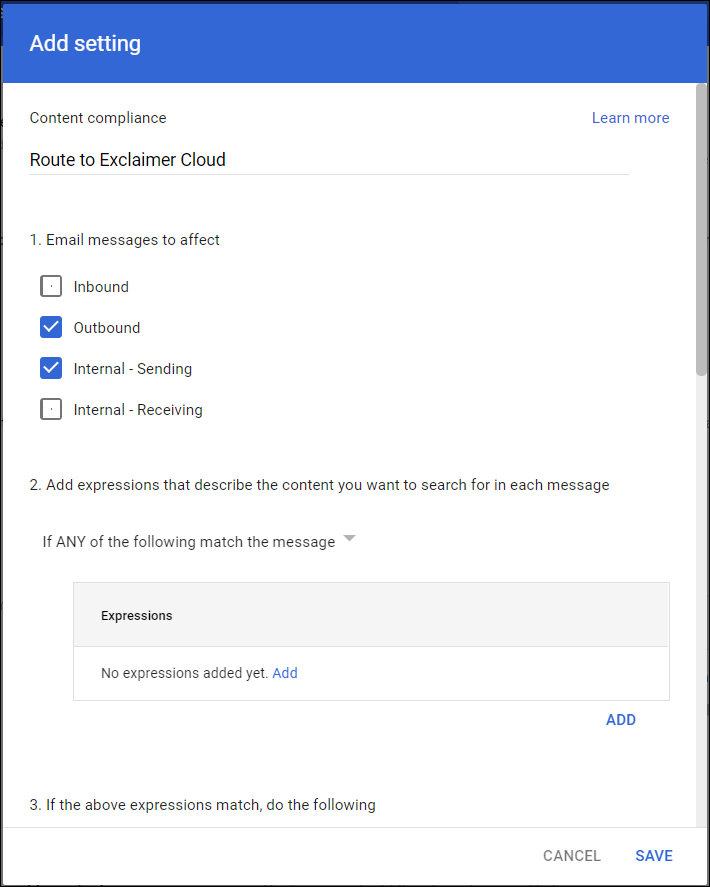
- In the Content compliance field, enter a name or description.
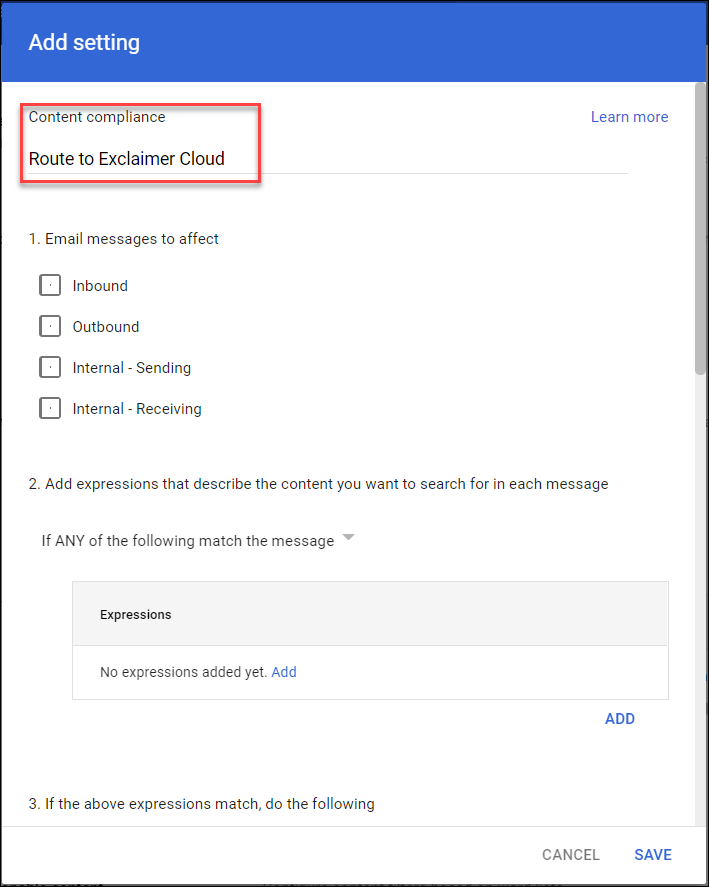
- Under Email messages to affect, select the Outbound and Internal - Sending checkboxes.
- In the Expressions section, select Add.
The Add setting window is displayed.
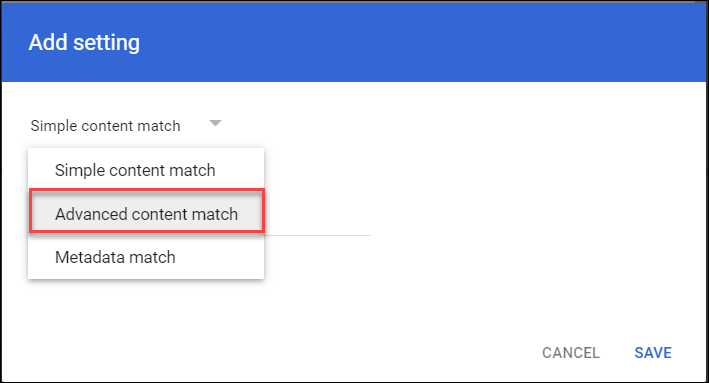
- From the Simple content match drop-down, select Advanced content match.
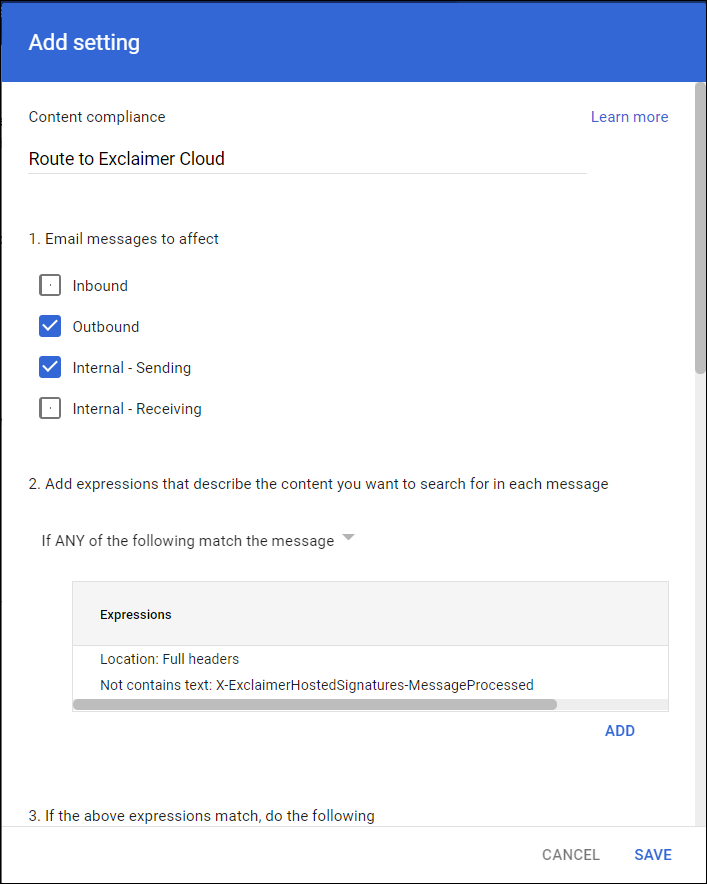
- From the Location drop-down, select Full headers.
- From the Match type drop-down, select Not contains text.
- In Content, enter X-ExclaimerHostedSignatures-MessageProcessed
- Select SAVE to save the settings and return back to the Content Compliance Add setting window.
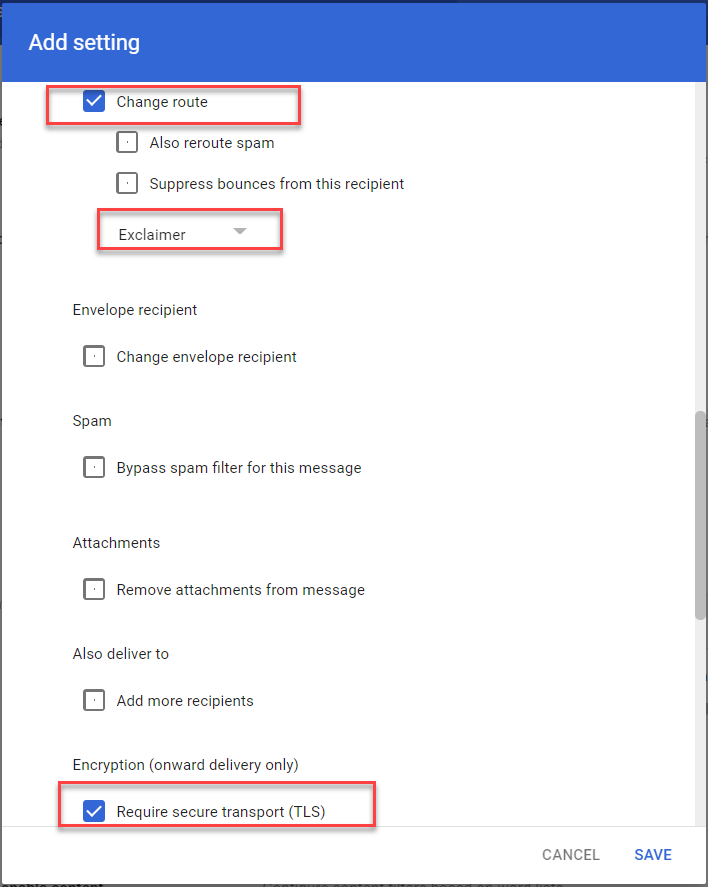
- Under If the above expressions match, do the following, select the Change Route checkbox, then from the Normal Routing drop-down list, select the Exclaimer route.
- In Encryption (onward delivery only), select Require secure transport (TLS)
- EITHER:
If you want to route your email to Exclaimer for all users, select SAVE and proceed to Step 20.
OR
If you want to route your email to Exclaimer for an existing specific user group, proceed with the following steps.
- In the Add setting window, select Show options.
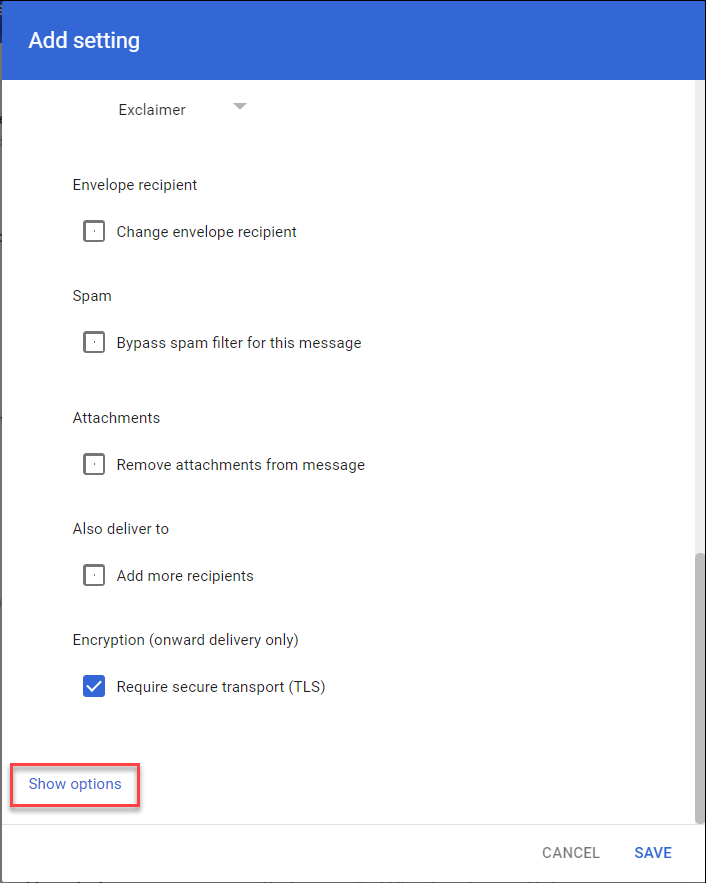
- In Account types to affect, select Users.
- In the Envelope filter, select Only affect specific envelope senders.
- From the Envelope filter drop-down, select Group membership (only sent mail).
Select Select groups.
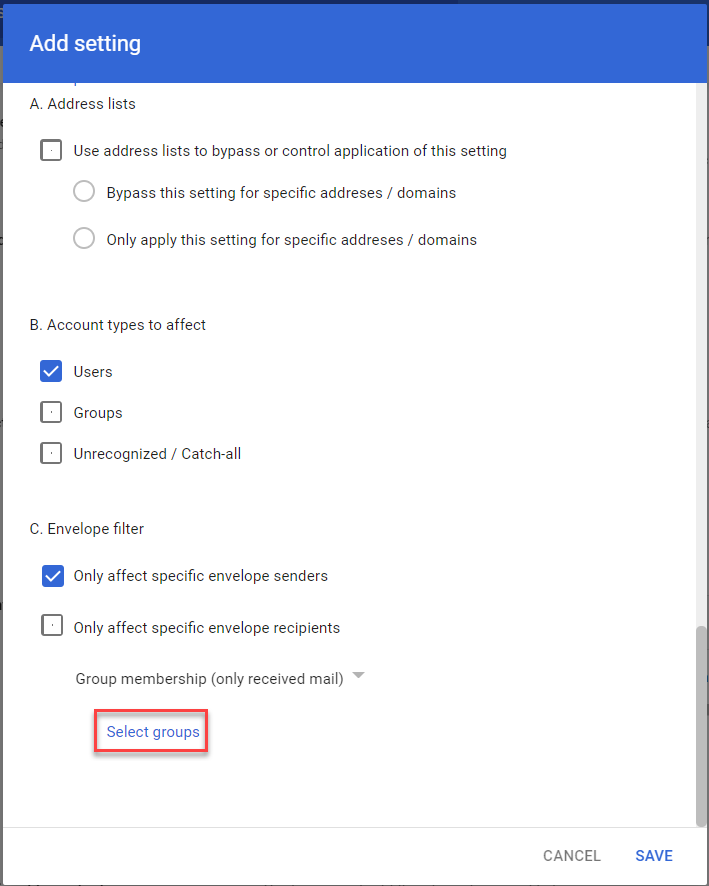 NOTE: To create a new group, go to the Google Workspace Admin console for your subscription and select the Groups option.
- Select a group.
- Select SAVE.
- If you are completing onboarding, return to your Exclaimer account and select I have completed the setup in Google Workspace option.
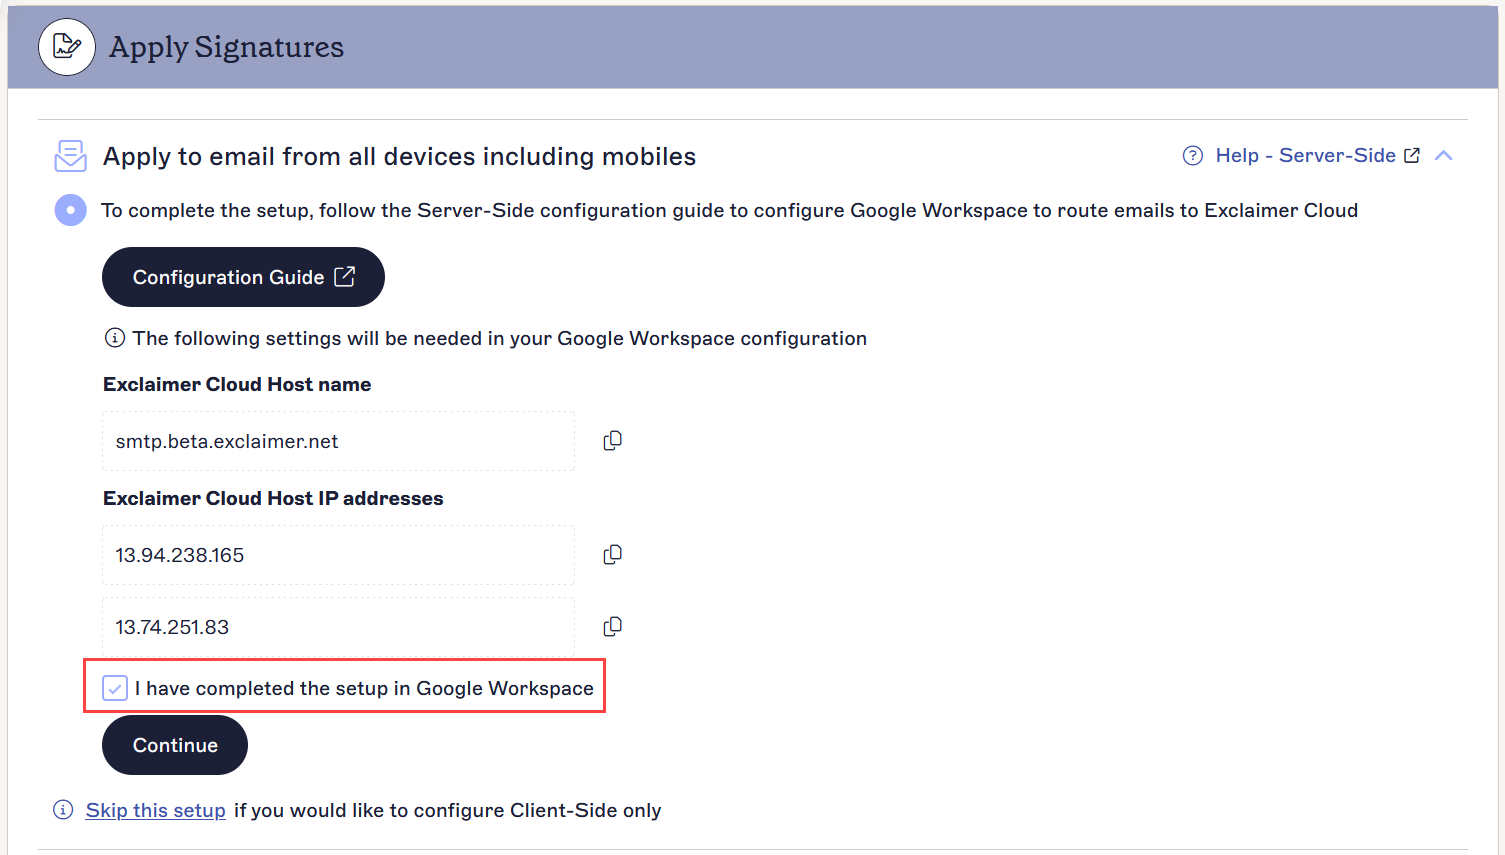
- Select Continue to complete the Server-Side configuration.
Step 4: Add exceptions for Google Drive share notifications and Calendar remindersTo set up exceptions for Google Drive and Calendar:
- Log in to the Google Admin console using your super admin credentials.
- From the Google Admin console, select Apps, then Google Workspace, then Gmail.
- Select Compliance, then select Content compliance.
- Select Edit on the Send to Exclaimer rule.
The Edit setting window is displayed.
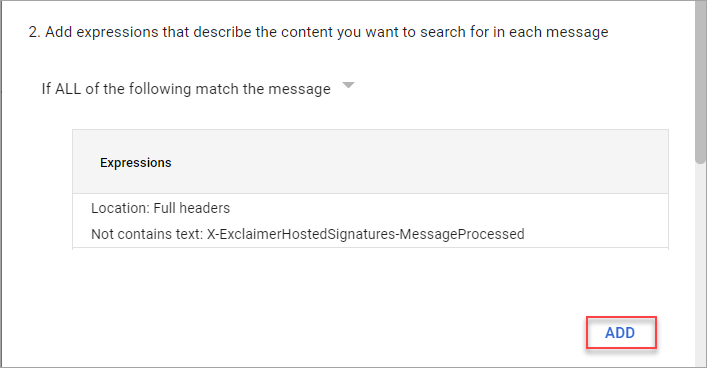
-
In point 2, select If ALL of the following match the message from the drop-down list.
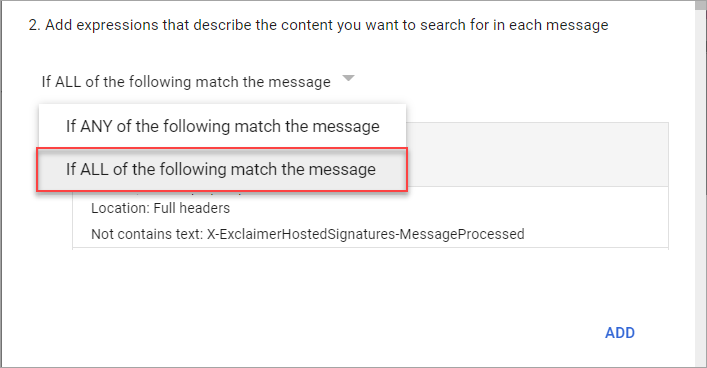 WARNING! You MUST select the correct option from the drop-down list. Selecting the incorrect option will result in mail flow issues.
 - Select ADD to add a new expression.
The Add setting window is displayed.
- From the drop-down menu, select Advanced content match.
- From the Location drop-down menu, select Full headers.
- From the Match type drop-down menu, select Not contains text.
- In Content, enter calendar-notification@google.com.
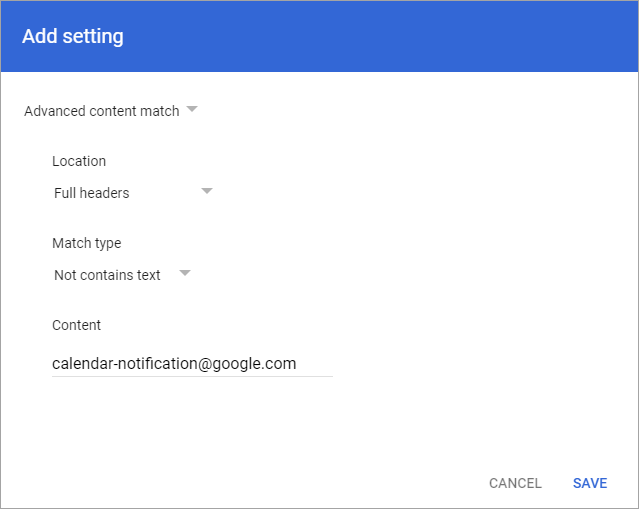
- Select SAVE.
- Select ADD to add another expression.
- From the drop-down menu, select Advanced content match.
- From the Location drop-down menu, select Envelope sender.
- From the Match type drop-down menu, select Not contains text.
- In Content, enter
google.com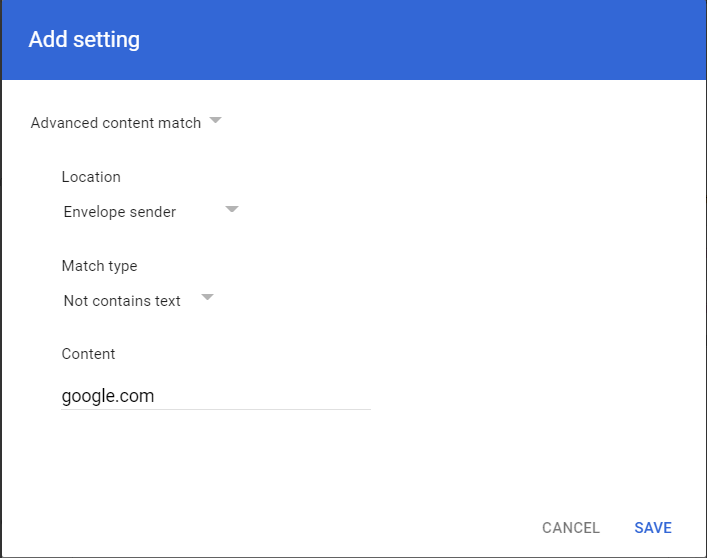
- Select SAVE.
- Select SAVE.
- Select SAVE to save the settings and return back to the Content Compliance Add setting window.