
Scenario
To use the Exchange On-Premises feature, you need to install the Exclaimer Exchange Transport Agent.
If you want to install it on Windows Server Core - see Installing Exclaimer Exchange Transport Agent (on Windows Server Core).
Resolution
Pre-requisites:
Before starting the setup, make sure you have the following:
Before starting the setup, make sure you have the following:
-
System requirements for the Exclaimer Exchange Transport Agent
- Windows Server 2016 and above
- Exchange 2016 CU18 and above
- PowerShell version 4 or above
- .Net Framework 4.7.2 or above -
A domain administrator account for the on-premise domain
To have the required permission level to install the Exclaimer Exchange Transport Agent, you will need to be signed in with an account that is a domain administrator.
Downloading the Exclaimer Exchange Transport Agent
To download the Exclaimer Exchange Transport Agent:
- From the header bar, select the cogwheel icon, then select Exchange On-Premises.
- Select Download to download the Agent.
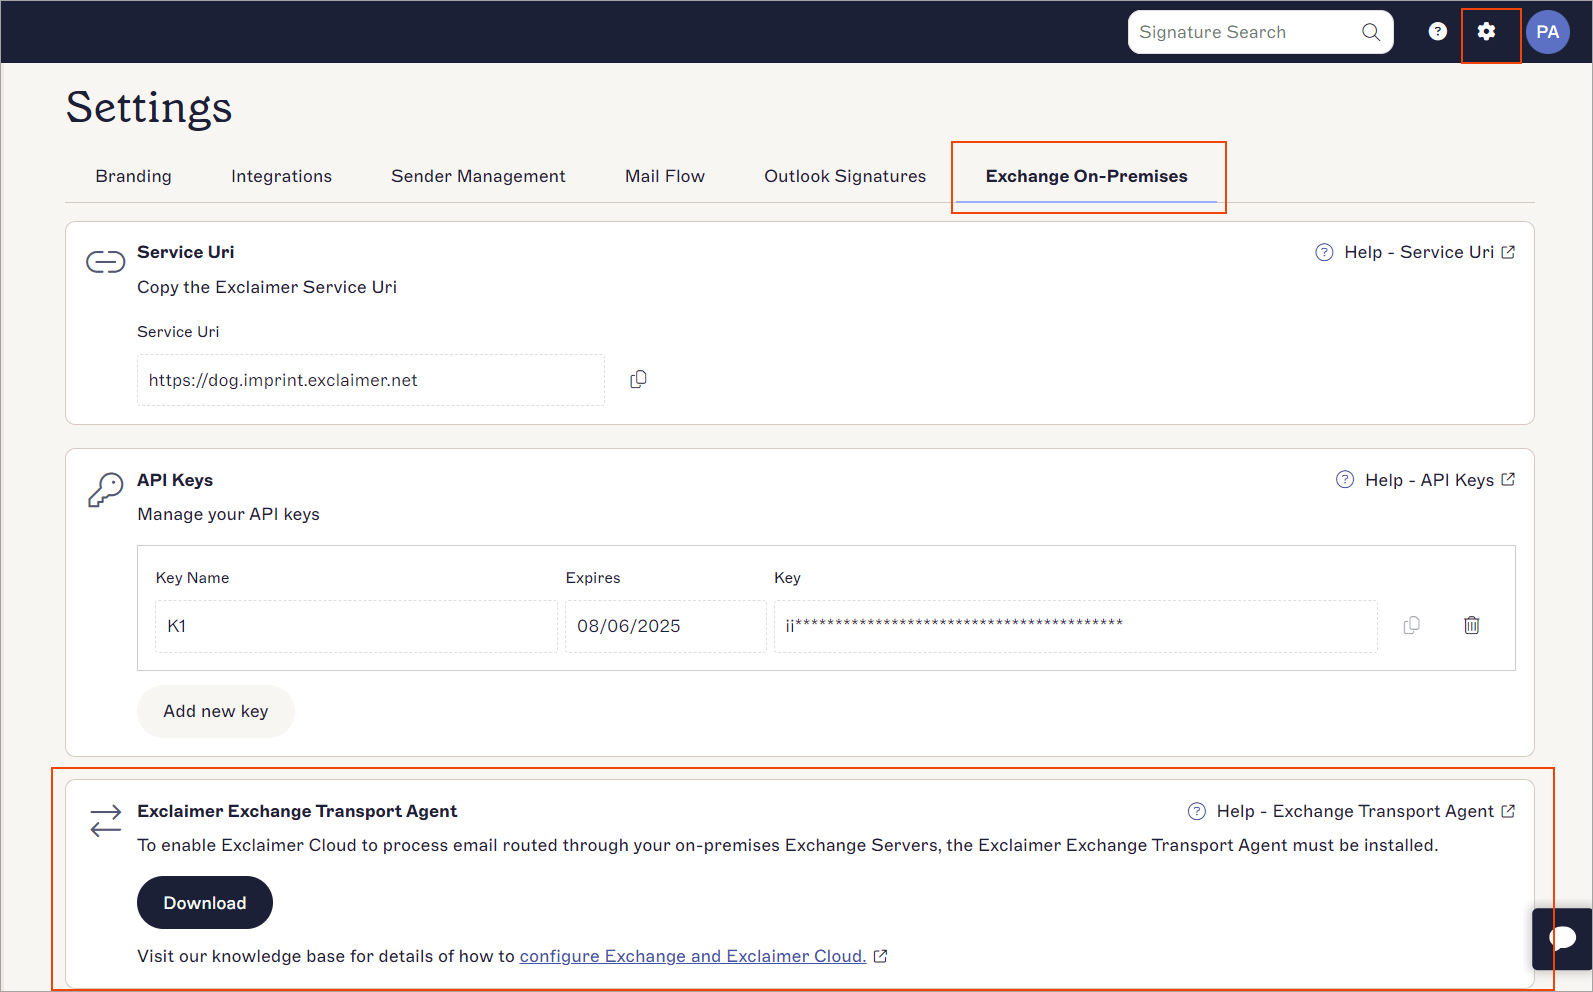
The Exclaimer Exchange Transport Agent section.
For more details, see Exclaimer Exchange Transport Agent.
Installing the Exclaimer Transport Agent
To install the Exclaimer Exchange Transport Agent on Windows Server Desktop Experience:
- Click Start then type CMD to search for the Command Prompt app.
- Right-click the Command Prompt app and select Run as Administrator.
The Command Prompt app window will open.
- Enter the following command:
msiexec /i "C:\Users\ABC\Downloads\ExclaimerCloudForExchange.msi" /l*v "install.log".- Edit the full file path with the copy of the installer file you previously downloaded (see above the Downloading the Exclaimer Exchange Transport Agent section).
NOTE: The system creates a log file named install.log in the Command Prompt's current directory in case any troubleshooting is required.The Exclaimer Signatures for Exchange Setup wizard is displayed.
The Exclaimer Signatures for Exchange Setup wizard.
- Select Next to continue.
- Enter the required folder destination to install the Exclaimer Signatures for Exchange.
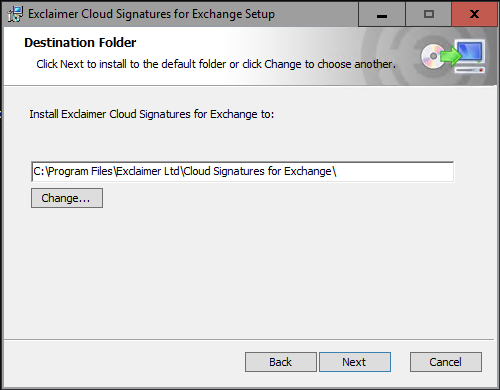
The Exclaimer Signatures for Exchange Setup wizard.
- Select Next to continue.
- In Exclaimer Imprint Front End Service Url, paste the Service Uri.
- In API Key, enter the API key.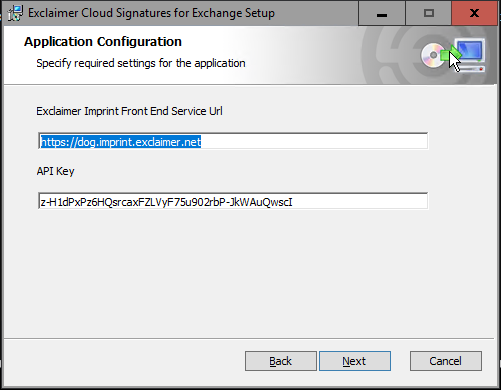
The Exclaimer Signatures for Exchange Setup wizard.
- Select Next to continue.
- Select the required option:
- All: Select to have all users' emails imprinted.
- Restricted to senders: Select to have specific sender's emails imprinted. Enter the complete email addresses. Multiple addresses can be separated by spaces, commas or semi-colons.
- Restricted to group: Select to have specific group member's emails imprinted. Enter group display names. Multiple groups can be separated by spaces, commas or semi-colons.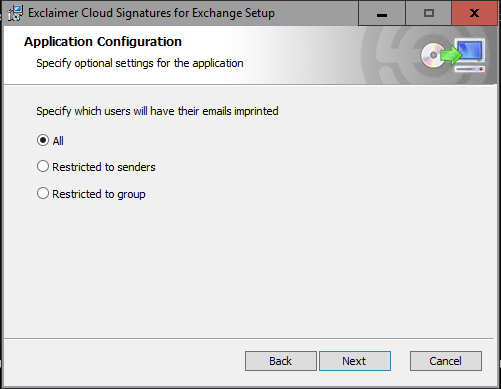
The Exclaimer Signatures for Exchange Setup wizard.
- Select Next to continue, then select Install to continue with the installation.
A warning message box is displayed, prompting that the Microsoft Exchange Transport Service will be restarted during the installation.
- Select Yes to continue with the installation, else select No to abort the installation process.
- Select Finish once the installation is complete to exit from the Setup Wizard.
Next Steps: Once you have completed your configuration, you can start creating your first signature.