
Scenario
You have set up Exclaimer for Microsoft 365 and have configured your subscription to apply to a group of specific users. You now want to extend Exclaimer to apply to more or all of the people in your organization. For example, you are happy with your testing phase and want to extend Exclaimer to more than your testing users.
Resolution
To deploy signatures across the entire organization, you need to re-synchronize your user data to include the new users, then reconfigure your Server-Side and/or Client-Side deployment. We also recommend checking the Sender rules for your signatures after completing this process to ensure the new users are included in any specific sender rules you may have added.
Pre-requisites: To complete this process, you must:
- Be an Owner or Admin. For more information on Exclaimer user roles, see User Management.
- Have Microsoft 365 Global Admin credentials.
To run a data synchronization:
- Log in to your Exclaimer subscription as an Owner or Admin.
- From the header bar, select the cogwheel icon to open the Settings menu, then select Sender Management.
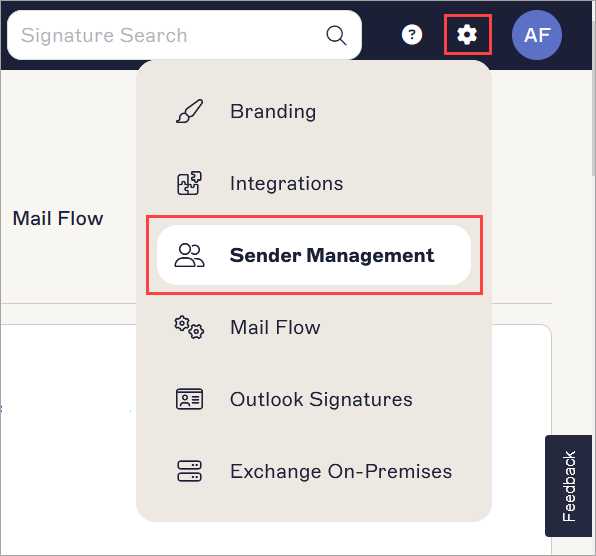
The Settings menu is found under the cogwheel icon.
-
In the Start Synchronization section, EITHER:
Select the Synchronize All Users checkbox to synchronize the contact details of all members of your organization with Exclaimer.
OR
In the Group entry field, enter a mail-enabled security group containing all relevant users you wish to sync. For information on creating groups, see How to create a mail-enabled security group.WARNING! If the Group option is selected then all user data for people outside this group will be removed from the database.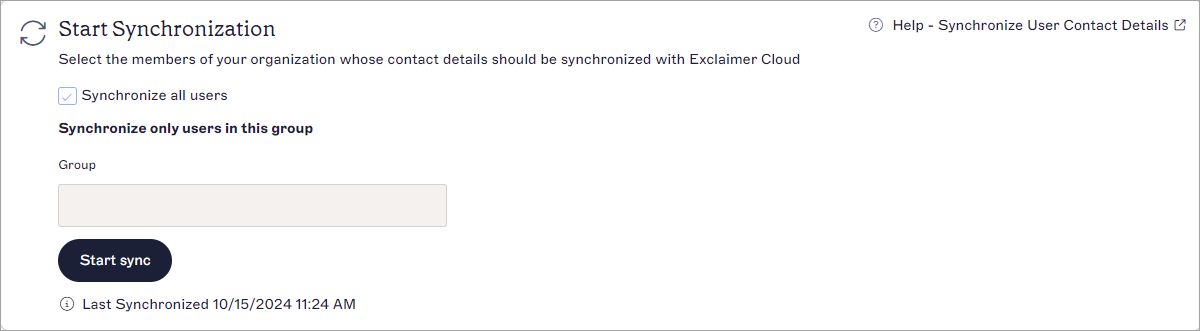
The Start Synchronization section.
- Select Start Sync. Allow up to three hours for a sync to complete. For more information on your synchronization, see Synchronize user data.
For Server-Side deployment, you must re-run the Connect to 365 wizard to include the new users. If you do not use Server-Side deployment, skip this section.
To re-run the Connect to Microsoft 365 wizard:
- From the header bar, select the cogwheel icon to open the Settings menu, then select Mail Flow.
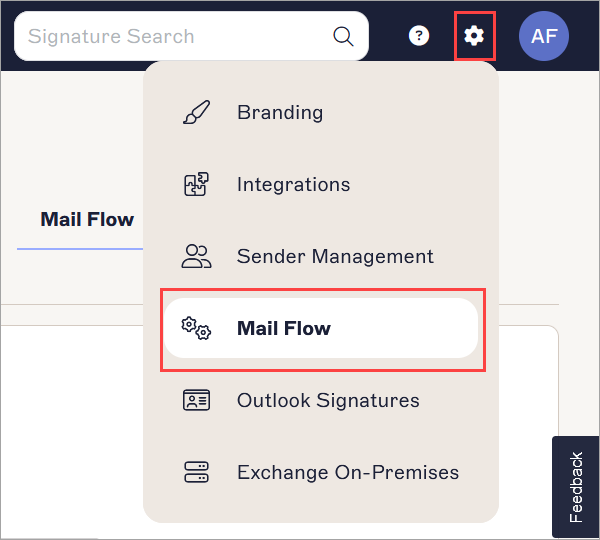
The Settings menu is found under the cogwheel icon.
- In the Connect to Microsoft 365 section, EITHER:
Select the Send all email to Exclaimer checkbox to process emails for all users.
OR
In the Test Group Name entry field, enter a mail-enabled security group containing all users you wish to process emails for. For information on creating groups, see How to create a mail-enabled security group.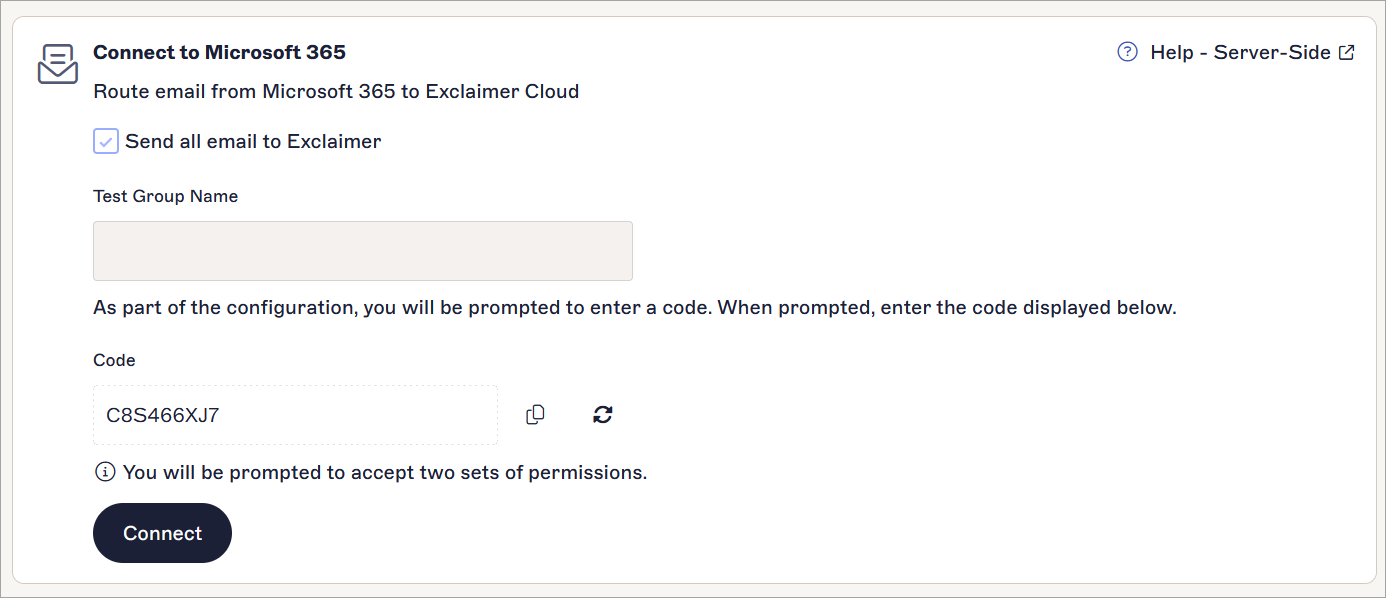
The Connect to 265 section.
- Copy or record the code in the Code field. This will be required later.
- Select Connect.
- Enter your Global Administrator credentials when prompted.
- Accept any requested permissions.
- In the Enter code window, enter or paste the code you recorded/copied in Step 3, then select Next.
- Select the relevant account from the Pick an account window.
- Select Continue to confirm sign-in. The re-connection may take some time to complete. Progress is indicated by a spinner.
For Client-Side deployment, you must re-assign users for the Outlook Add-In in the Microsoft 365 Admin Center. If you do not use Client-Side deployment, skip this section.
To assign users for the Add-In:
- Log in to the Microsoft 365 admin center as a Global Administrator.
- From the menu sidebar, select Settings, then select Integrated apps.
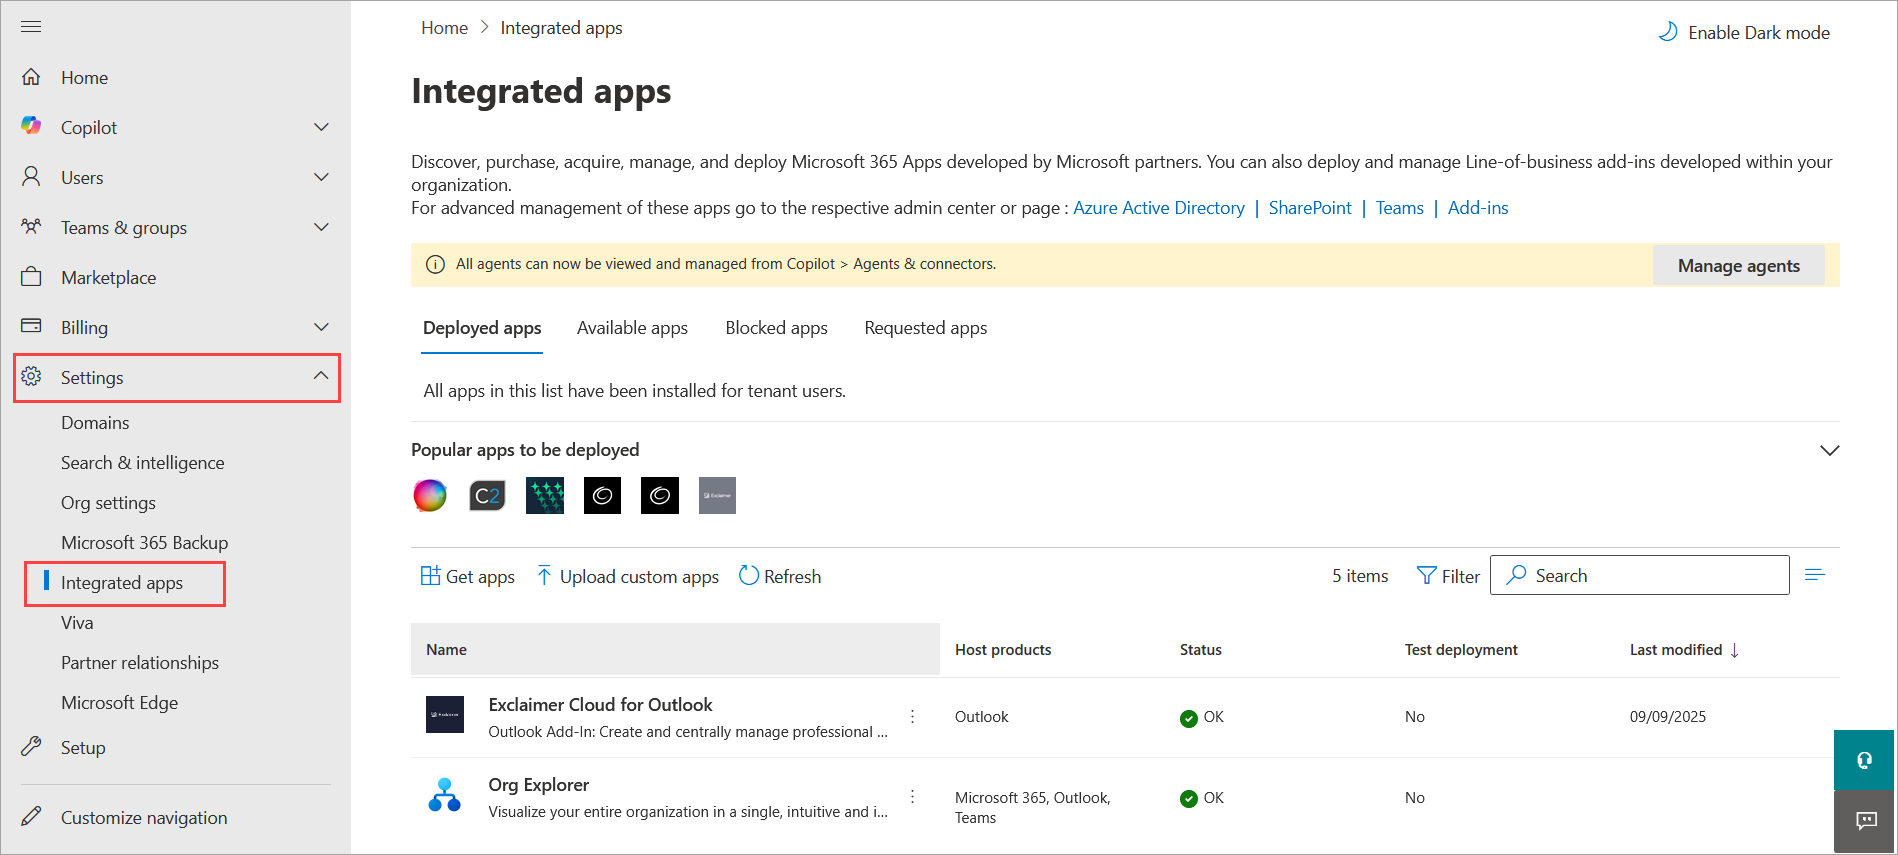
Open the Integrated apps screen.
-
Select the vertical ellipsis menu on the Exclaimer for Outlook entry in the apps list, then select Edit users.
Tip! You can also access Edit users from the app pane. Select the app to open the pane.
Select Edit users.
- Select EITHER:
Entire organization to deploy Exclaimer for all users in your organization.
OR
Specific users/groups to add more users to your existing specified users. Your currently added users/groups appear below the search field. To add users/groups, use the search field and select the users/groups from the list.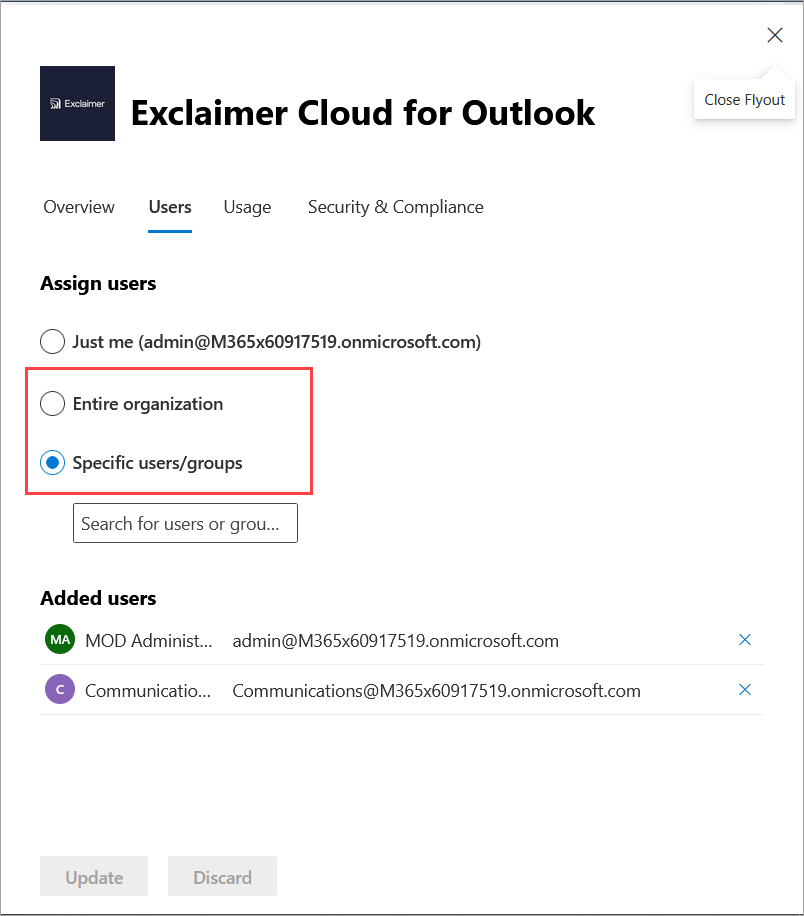
Select the appropriate radio button for your users. In this example, Specific users/groups is selected.
- Select Update.
- Log out of the admin portal and return to Exclaimer.
If you have configured specific sender rules for your signature(s), your new users may not have these signatures applied as they have not been included in your specified senders.
To check your Sender rules:
- From the menu sidebar, select Signatures. This opens the All Signatures list.
- Locate your signature and select Manage.
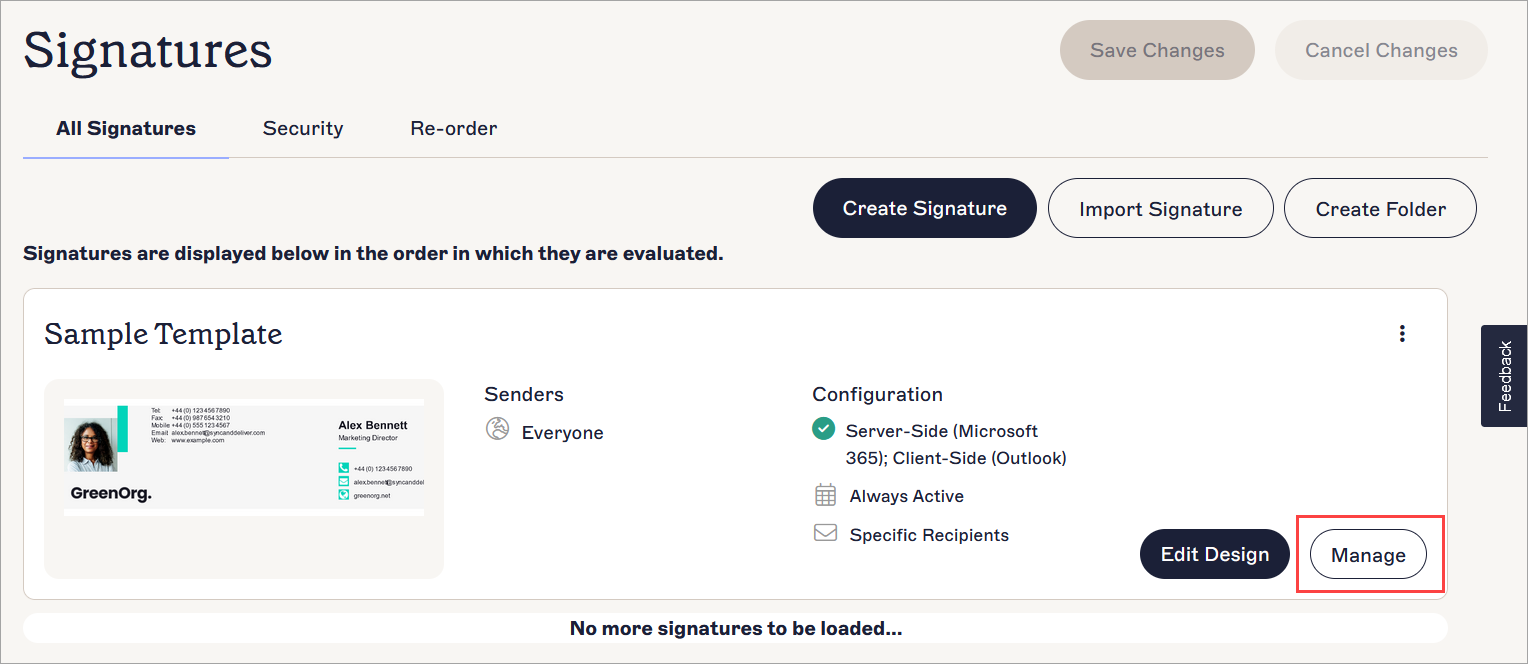
The Manage button is found with the Edit button on the signature card.
- Select the Senders tab.

The Senders tab shows what options you may have configured for this signature's permitted senders.
- If the Everyone in my organisation radio button is selected, your new users are automatically available as senders for this signature. If the Specific senders or groups in my organization radio button is selected, check that your new users are included in the Group, Sender, or Advanced Query set up for this signature. You may need to change or add details depending on what you have set up. For guides on configuring your sender options, see Signature Senders.
- Repeat for any other applicable signatures.