
Description
The Meeting Branding feature allows you to attach personalised nametags and backgrounds to users' video feeds on apps such as Zoom, Microsoft Teams, or Google Meet. This uses the Icon and Background assets in our Brand Kits feature - once you add your branding, it is then used for both your organisation's signatures and your video calls. You can design multiple Meeting Branding themes to connect to different Brand Kits.
For Microsoft Teams users, users can download the theme's icon, nametag overlay, and/or background branding you set as a picture background from the User Details Editor. Transparent backgrounds are accepted and behave as blurred backgrounds in calls.
For Google Meet users, users can download the theme's icon, nametag overlay, and/or background branding you set as a picture background from the User Details Editor. The participant's details must be made part of the picture background. You cannot use transparent backgrounds or just the overlay due to limitations in Google Meet - you must upload a background to your branding.
For Zoom users, Exclaimer integrates the Exclaimer Zoom app with the Zoom Desktop client. Overlays show the participant's display name, job title, and optional brand icon and picture background from the theme. Overlays are also compatible with Zoom backgrounds.
How to access it
To access Meeting Branding:
- From the menu sidebar, select Meeting Branding.
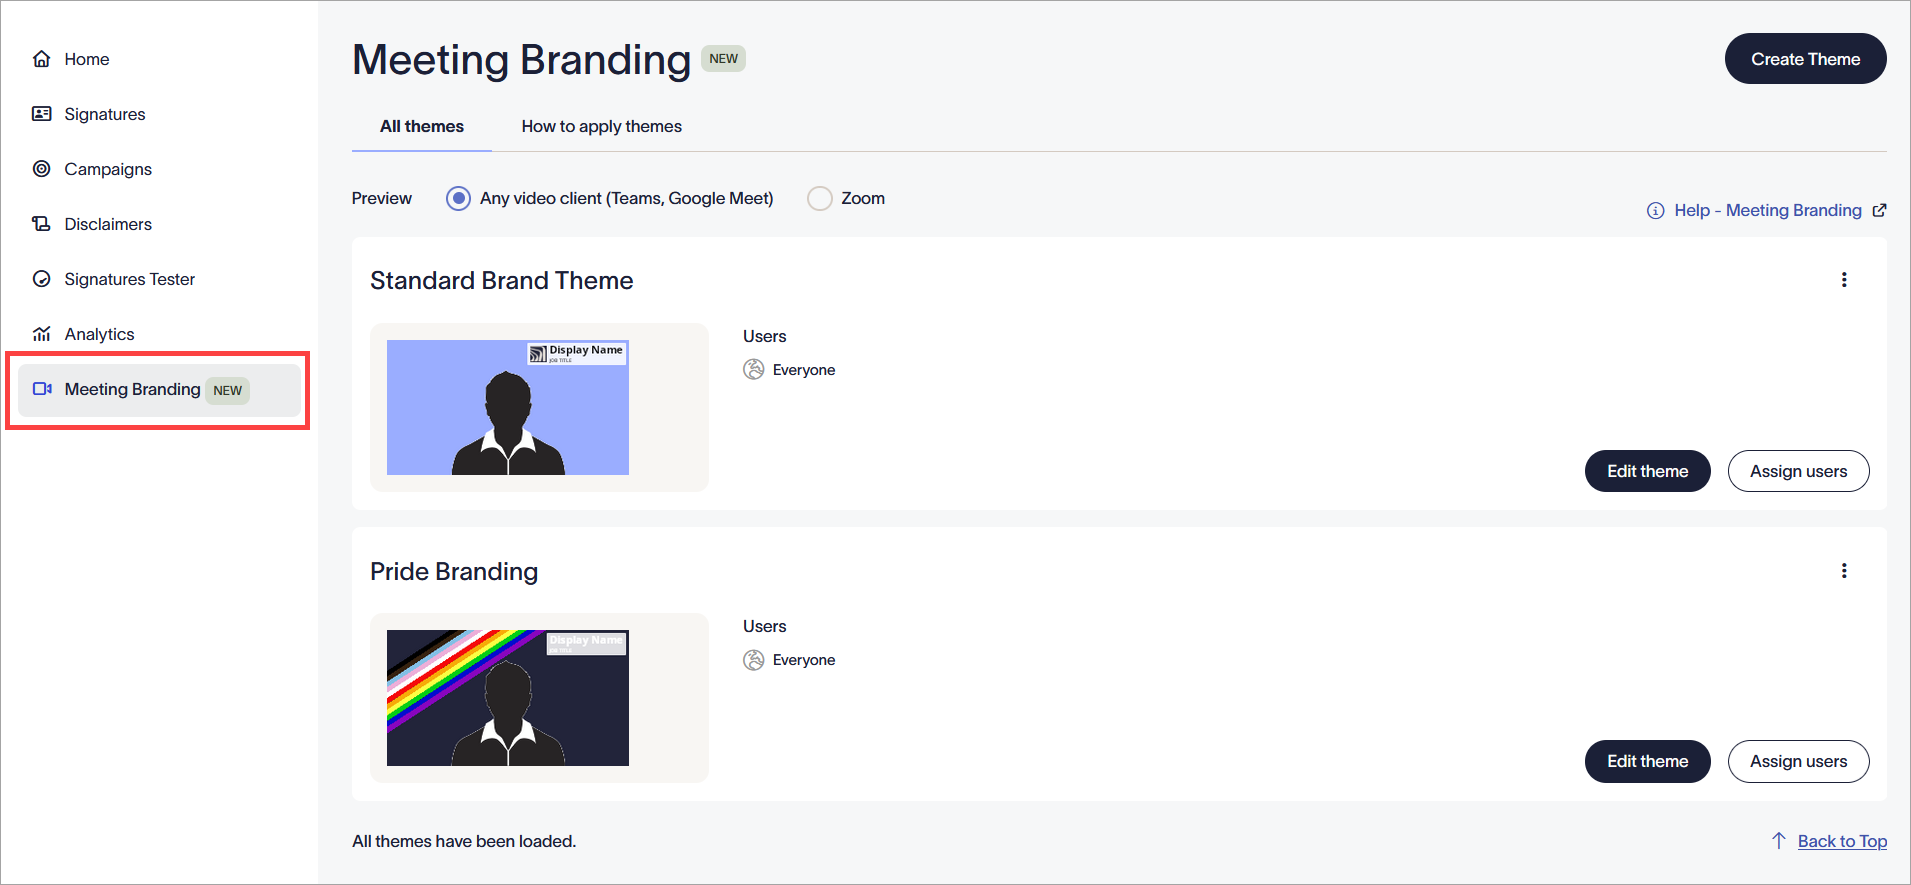
The Meeting Branding section.
The Meeting Branding screen has two tabs:
- All themes: The default tab lists all created themes, including a platform-specific preview of your branding for each theme, and the option to edit or create new themes. To view your theme preview for different video clients, use the radio buttons for Any video client (Teams, Google Meet) or Zoom.
- How to apply themes: This tab includes options to apply Meeting Branding for Microsoft Teams and Google Meet and install Meeting Branding for Zoom.
Creating and editing themes
The All themes tab lists all created themes. Create a theme to customize your nametag and background, then assign users to your theme to control who can use the theme in their meetings.
To create a theme:
- Select Create Theme. This opens the New Theme window.
- Edit your theme name by selecting the New Theme text in the header.
-
In the Brand Kit assets section, select a Brand Kit from the drop-down menu. This applies the Brand Kit assets from that Brand Kit to this theme. A preview of the background and icon images used in this kit is displayed.
NOTE: To edit the chosen Brand Kit or create a new one, use the Edit this Brand Kit or Create Brand Kit buttons to redirect you to the Brand Kits screen. This does not save your theme progress. -
In the Nametag Content section, customize your fonts, colors, and transparency for your nametag overlay.
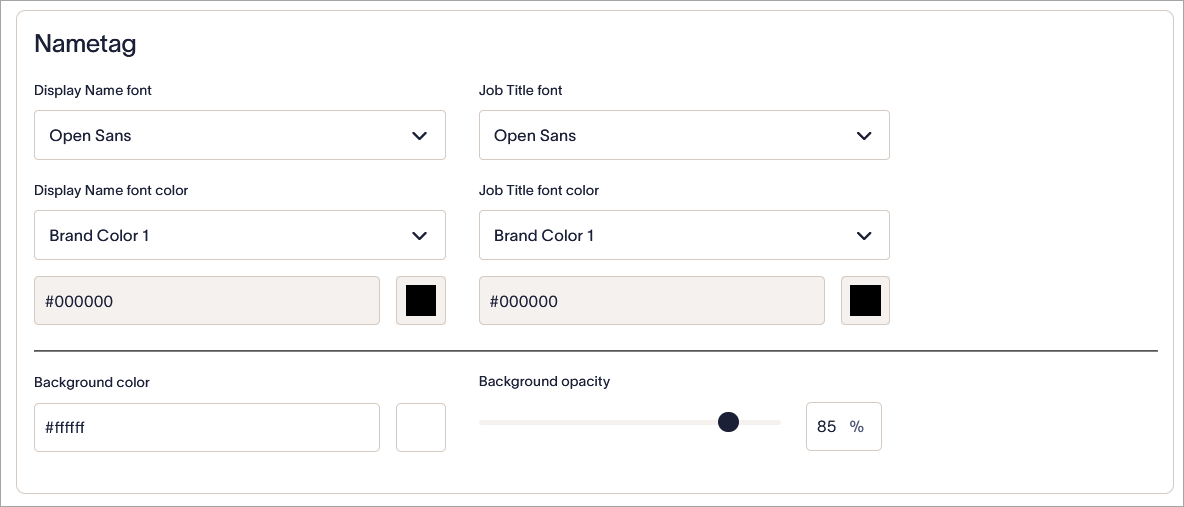
The Nametag Content section.
The following table outlines the different customization options available for the nametag overlay:Setting Description Display Name font This affects the Display Name on your nametag. Select the entry field to open the dropdown and choose from our list of available fonts.
You cannot upload custom fonts for this setting.
Job Title font This affects the Job Title on your nametag. Select the entry field to open the dropdown and choose from our list of available fonts.
You cannot upload custom fonts for this setting.
Display Name font color This affects the Display Name on your nametag. From the drop-down list, select Brand Color 1 or Brand Color 2 pulled from Brand Kits to set your Display Name font color. Select Custom to enter a Hex Code in the entry field, or select the colored square to open the gradient and slider color picker. Job Title font color This affects the Job Title on your nametag. From the drop-down list, select Brand Color 1 or Brand Color 2 pulled from Brand Kits to set your Job Title font color. Select Custom to enter a Hex Code in the entry field, or select the colored square to open the gradient and slider color picker. Background color Either enter a color code in the entry field, or select the colored square to open the gradient and slider color picker. Background opacity Use the slider or enter a percentage in the entry field to set how transparent you want your nametag background to be. The leftmost side of the slider and 0% are for opaque nametags, and the rightmost side of the slider and 100% are for fully transparent nametags. Your changes are shown instantly in the Theme Preview section. We recommend using this to review your customization.
- Select Save. Your new theme is added to the All themes list.
- To edit an existing theme, select Edit Theme. This reopens the theme window.
- To delete a theme, select the vertical ellipsis icon, then select Delete.
When you assign users for a theme, only the users you specify will be able to apply the theme to their meetings.
To assign users for a theme:
- Locate your theme in the All themes list and select Assign users.
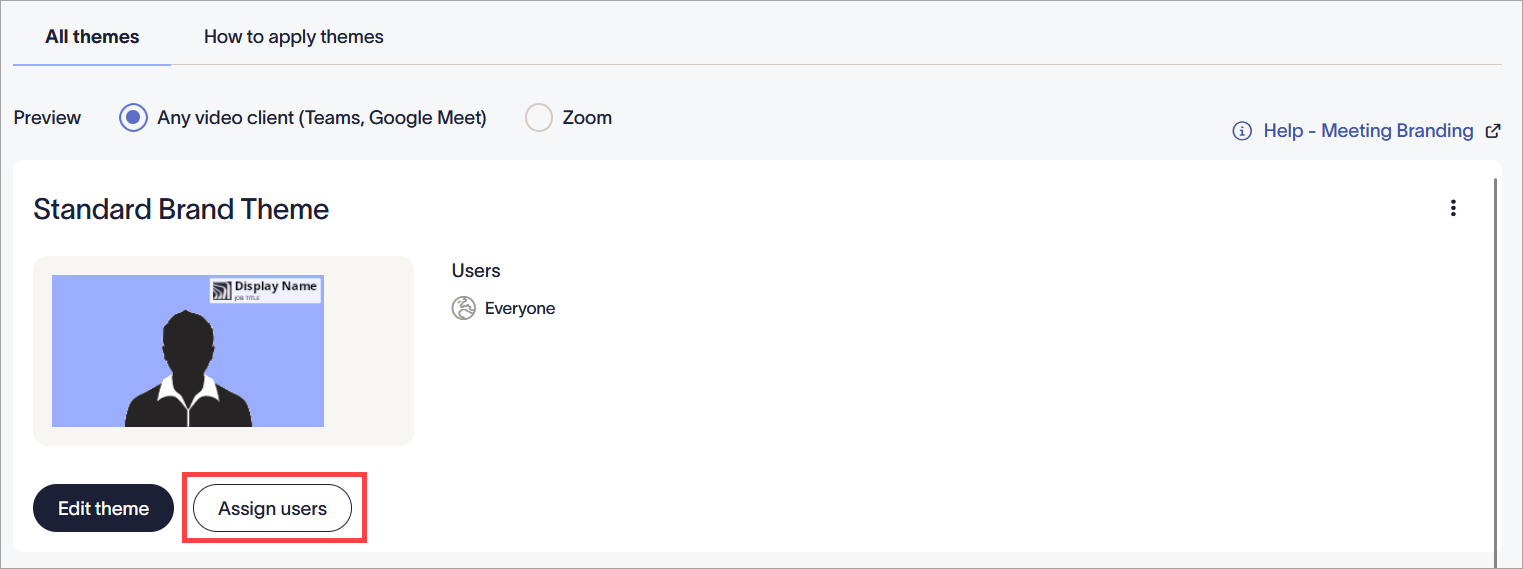
Select Assign users.
- By default, a theme is applied to all users. To assign a theme to specific users only, select the Specific users or groups in my organization radio button.
- To allow users from a specific group that you configured using your Microsoft or Google Directory to use this theme, select
 Add Group to enable the drop-down list under Members of this group.
- Under Members of this group, enter the group name. The predictive text field displays names as you type.
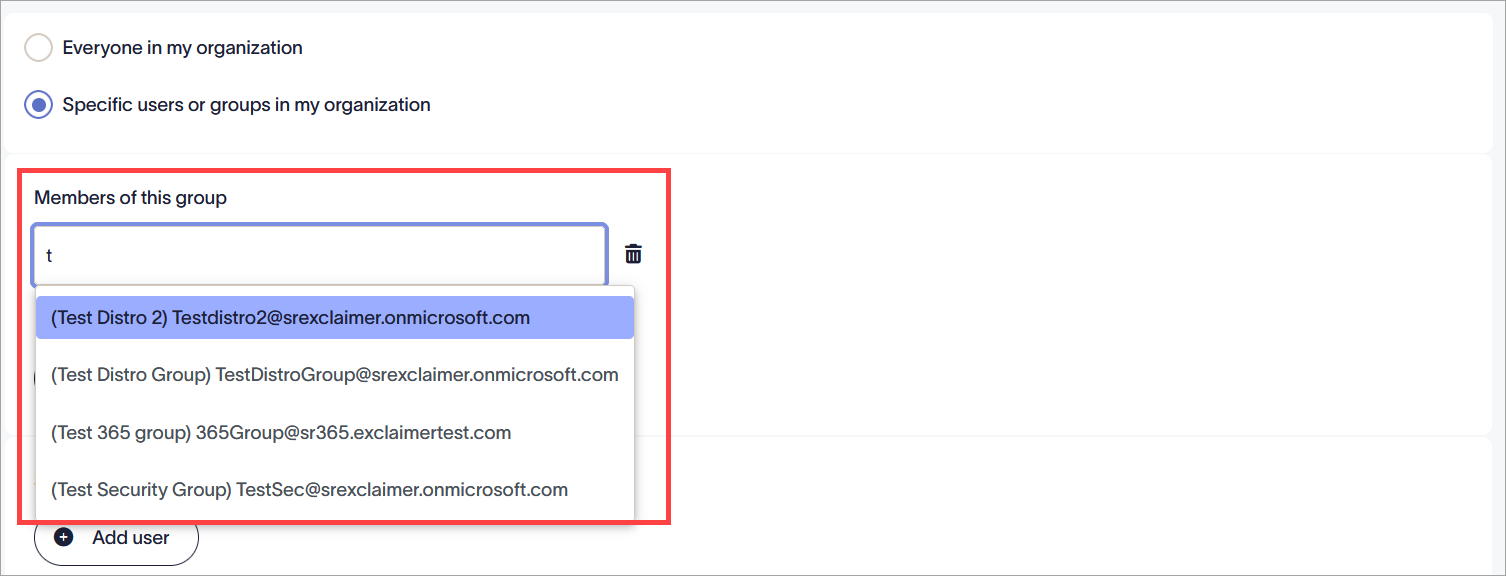
Enter your text. - To add another group, select Add Group. To delete a group, select the bin icon
 .
.
- To allow individual users or domains to use this theme, select Add user to enable the drop-down list under Specific user, email address or @ domain for all users in domain.
-
Enter the specific sender name, email address or domain. The predictive text field displays names as you type.
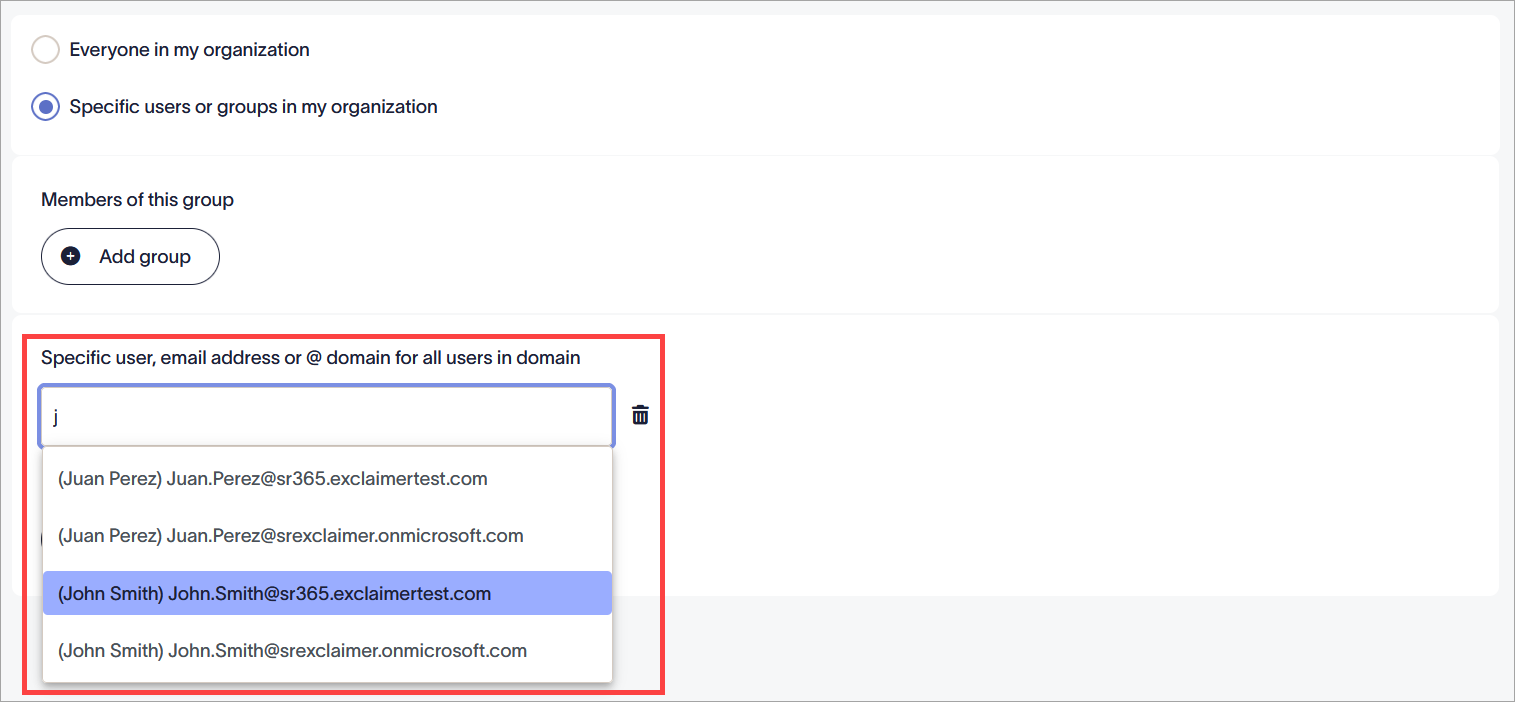
Enter your text.Tip! You can also use a wildcard (*) when entering an email address or domain name. Wildcard represents any available characters attached to the complete text. Exclaimer allows for any number of characters to be substituted for a wildcard.
Some examples using wildcards are:
*@greenorg.net - this would include any email addresses that are followed by '@greenorg.net'.
@exclaimer.* - this would include any domains attached to Exclaimer email addresses.
@*.de - this would include any domains that are followed by .de. - To add another sender, select Add Sender. To delete a sender, select the bin icon .
- In the unsaved changes banner, select Save to apply your rules, or select Cancel to revert all changes.