
Beschrijving
Als wederverkoper geeft uw Exclaimer-account u de mogelijkheid om alle actieve Exclaimer-abonnementen van uw klanten op één locatie te beheren.
Wanneer u inlogt op het Exclaimer-portaal, ziet u een lijst van al uw klantabonnementen, plus acties om ze individueel te beheren. U kunt ook meer abonnementen toevoegen en eerdere bekijken. 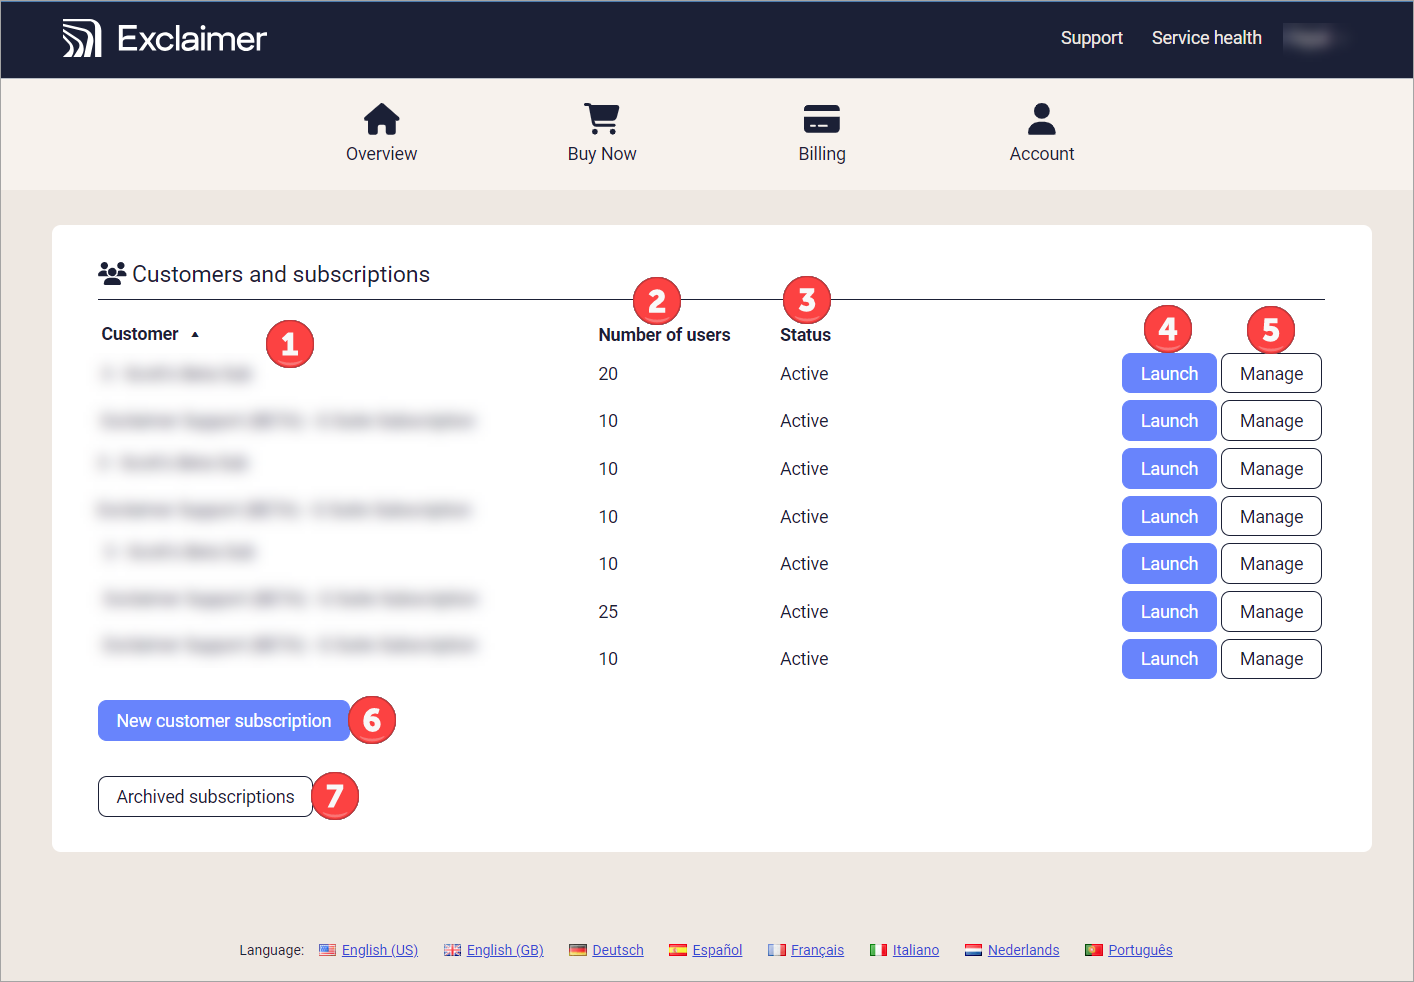
Voorbeeldscherm met een lijst van wederverkopersklanten en hun bijbehorende abonnementen. Elk nummer komt overeen met een andere sectie of functionaliteit. Elk wordt beschreven in de volgende tabel.
De volgende tabel geeft een overzicht van de functies die beschikbaar zijn in het Overzicht-tabblad:
|
Klant |
De naam van de klant, zoals ingevoerd bij het aanmaken van het abonnement. |
|
Aantal gebruikers |
Het aantal gebruikers op dit abonnement. |
|
Status |
De status van dit abonnement. |
|
Starten |
Selecteer om dit abonnement te starten. Dit opent de Startpagina. |
|
Beheren |
Selecteer om het scherm Beheren te openen. Hiermee kunt u:
Voor een volledige handleiding over het beheren van een abonnement, zie Beheer uw abonnement. |
|
Nieuwe klantabonnement |
Selecteer om een nieuw klantabonnement aan uw account toe te voegen. Volg de instructies in de sectie Een nieuw klantabonnement toevoegen van dit artikel. |
 Gearchiveerde abonnementen Gearchiveerde abonnementen
|
Selecteer om eerder beëindigde klantabonnementdetails te bekijken. Verlopen abonnementen blijven 90 dagen zichtbaar. |
Om een nieuw klantabonnement aan uw account toe te voegen, volgt u de onderstaande instructies:
Om een nieuw klantabonnement toe te voegen:
- Selecteer Nieuw klantabonnement.
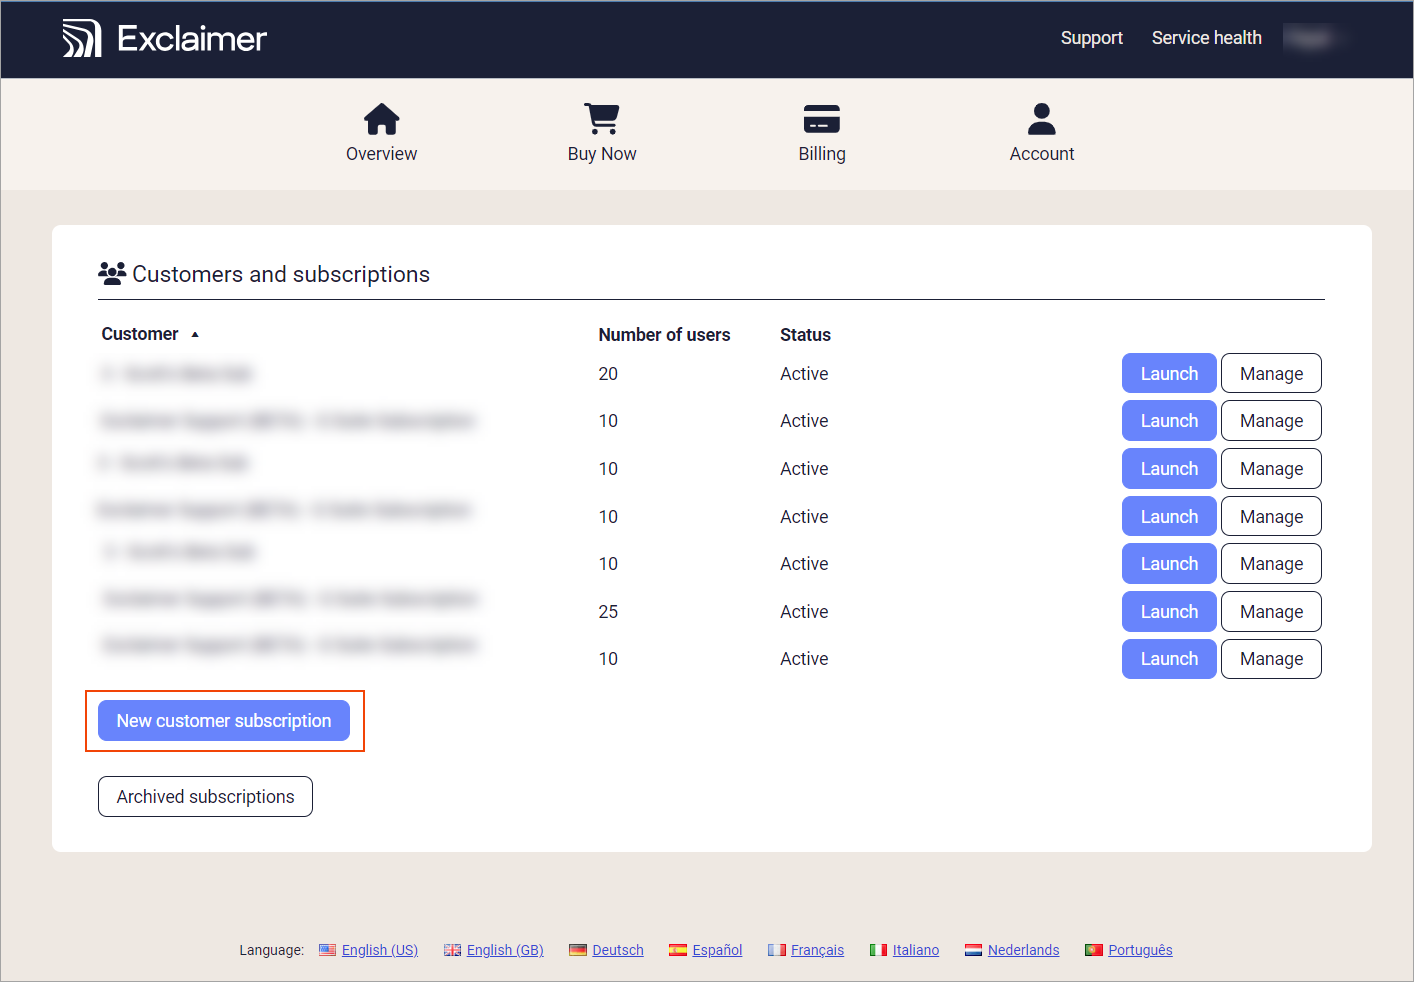
Selecteer Nieuw klantabonnement.
Het venster Nieuw klantabonnement wordt weergegeven.
- Selecteer onder Product de optie Handtekeningen voor Office 365 of Handtekeningen voor G Suite.
- Selecteer in de vervolgkeuzelijst Hostingregio de regio waar de klant gevestigd is.
- Voer bij Naam klantbedrijf de naam van het bedrijf van de klant in.
- Voer bij Aantal gebruikers het totale aantal gebruikers in de organisatie van de klant in.
- OF:
Als de klant zelf toegang krijgt tot Exclaimer om handtekeningen en andere Exclaimer-functies te gebruiken, vink dan het selectievakje Klant handtekeningen laten bewerken? aan. Dit maakt extra velden beschikbaar.
OF
Als u de handtekeningen en andere Exclaimer-functies van de klant beheert en de klant geen toegang krijgt tot Exclaimer, ga dan door naar stap 9.
- Als u het selectievakje in stap 6 hebt aangevinkt: voer bij Naam klantcontact de naam van de klant in.
- Als u het selectievakje in stap 6 hebt aangevinkt: voer bij E-mailadres klant het e-mailadres van de klant in.
- Vink het selectievakje Ik heb de algemene voorwaarden gelezen en ga ermee akkoord aan.
- Selecteer Aanmaken.
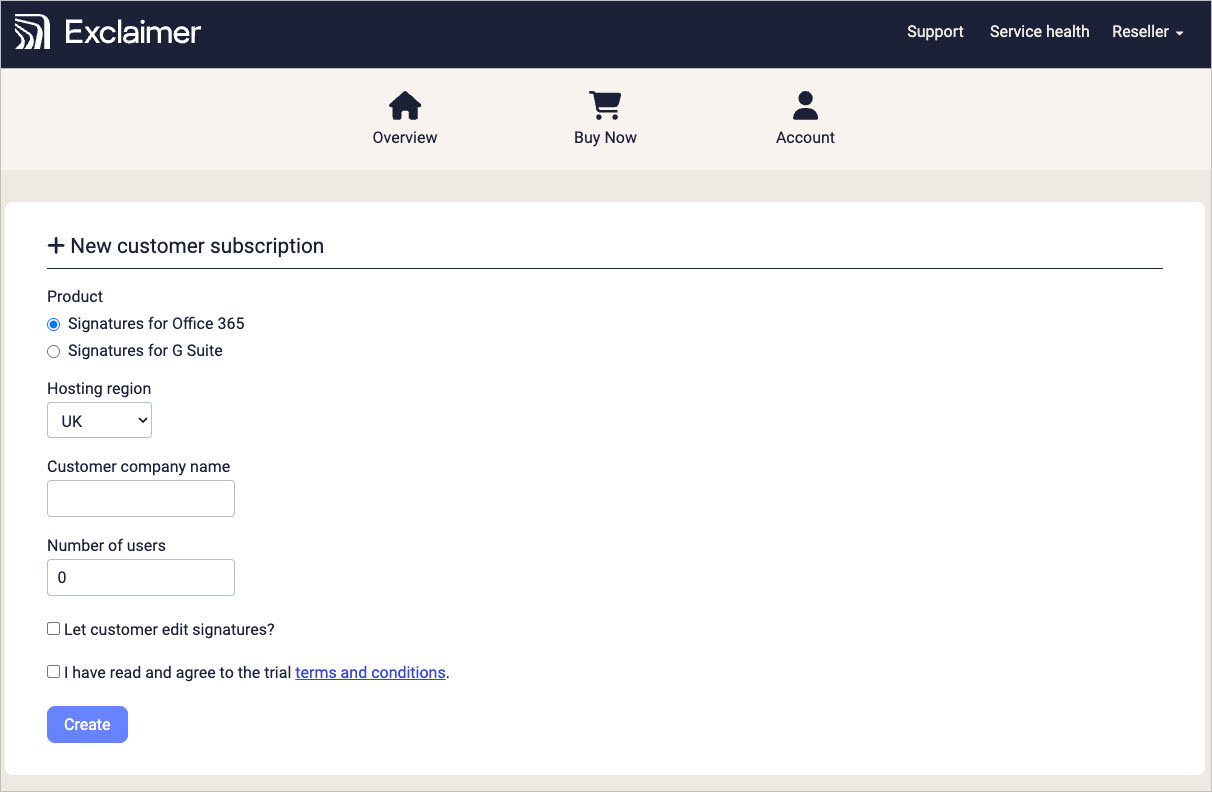
Vul de velden naar wens in en selecteer vervolgens Aanmaken.
• De klant ontvangt een automatische e-mailuitnodiging om Handtekeningen voor Microsoft 365 / Google Workspace te gebruiken. De klant moet op de link in de e-mail klikken, zijn contactgegevens invoeren en een veilig wachtwoord aanmaken. De gebruikersnaam van de klant is het e-mailadres.
• Een proefperiode van 14 dagen start automatisch zodra het abonnement is aangemaakt. Klanten kunnen alleen hun handtekeningen beheren in de gebruikersinterface. Ze hebben geen toegang tot facturering. Facturering wordt beheerd via uw Exclaimer-account.