
Scenario
You have populated the 15 available Microsoft custom attributes (known as Extension Attributes), but want to add more custom data for use in your email signature templates or name your own attributes outside of the standard attribute names.
Resolution
You can create extra custom attributes by creating new objects in the Active Directory schema.
Pre-requisites: This solution only applies to environments that have an on-premises Active Directory. Pure Microsoft 365 environments are unable to use this method.
By default, the Active Directory schema snap-in is not enabled on Domain Controllers or Remote Server Administration Tools (RSAT) installed machines. Enable the schema by completing the following steps:
- Open an Elevated Command Prompt.
- Run the following command: regsvr32 schmmgmt.dllWARNING! Changing the Active Directory schema is an advanced change to the Active Directory Domain environment.
Select each option below to view the related instructions:
1. Create a new Attribute-
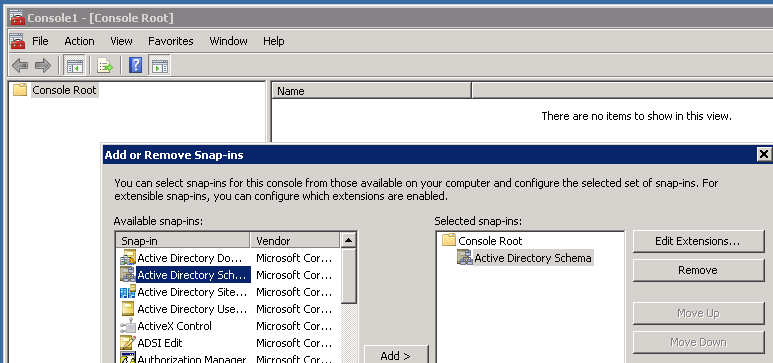
- Enter the command 'mmc' into the command prompt window to open a new Microsoft Management Console window.
- Navigate to File > Add or Remove Snap-ins, then select the Active Directory Schema option. Double-click the option or select Add, then select OK to load the Snap-in.
-
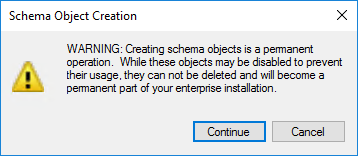
From the Snap-in column, right-click on the Attributes entry then select Create Attribute...
NOTE: If the Create Attribute option is greyed out, ensure you are a member of the Schema Admins group. - A warning is displayed. Ensure you read and fully understand the warning, as you will not be able to delete these updates. Select Continue.
- This opens the Create New Attribute window. Enter the data in the entry fields and select Ok.
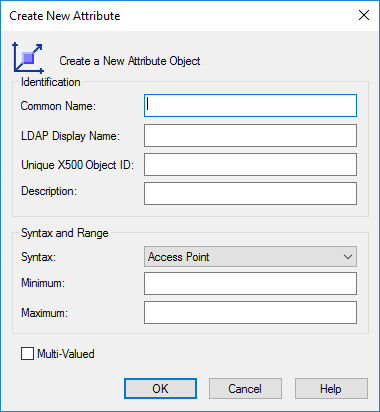
The following table provides full details for each of the values in the window and how they function:
- Enter the command 'mmc' into the command prompt window to open a new Microsoft Management Console window.
Field Purpose Required? Notes Common Name Name of the Attribute.
This cannot be changed.✔ LDAP Display Name Used for checking the Attribute in LDAP lookups. ✔ Autofilled by Common Name. Unique X500 Object ID Must begin with either 0., 1. or 2. ✔ This script can be used to generate an appropriate Object ID Description Description of the Attribute. × Syntax Format of the Attribute. ✔ Unicode String is recommended as the default option. Minimum A minimum number of entries is required to apply the attribute to an account. × Recommended to use a binary value (64,128 or 256). Maximum A maximum number of entries that can be stored. × Recommended to use a binary value (64,128 or 256). Multi-Valued Changes the Attribute to allow it to accept Multiple Values. × Not recommended for use with Exclaimer Products. 2. Enable Global Catalogue Replication and add a new Attribute to the User Class- Right-click the new attribute, then select Properties. The Properties window is displayed.
- Select Replicate this attribute to the Global Catalogue option to enable replication to the Global Catalogue.
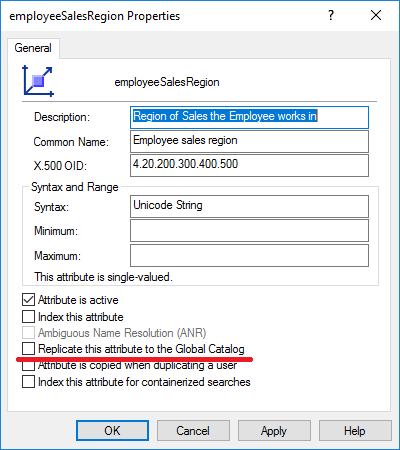
- Select OK.
- You must now assign the attribute to the user class so that it becomes available within the Attribute Editor. In the console, expand the Classes folder, locate the user class, then right-click and select Properties. The user Properties window is displayed.
- Open the Attributes tab, and select Add...
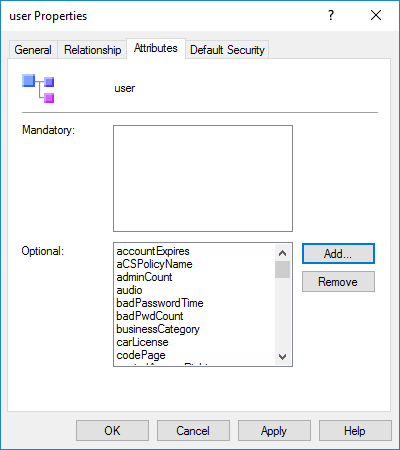
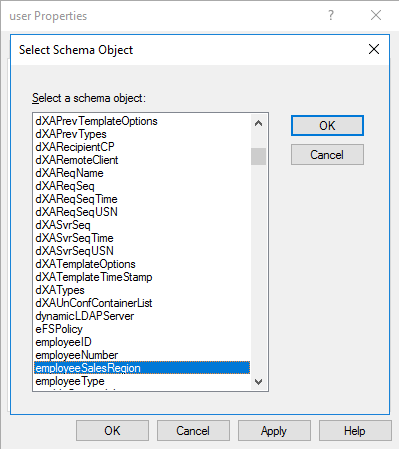
-
Locate and select your new attribute and select OK twice to save the change.
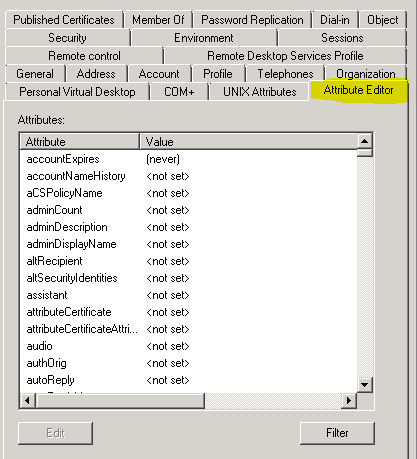
WARNING! These changes can take a few minutes to come into effect within your Active Directory.
Allow 15 minutes to ensure that these fields become available. You can then update the data for the new field(s) within the Attribute Editor tab of a user's Active Directory entry.
3. Update the Entra Connect (formerly Azure AD Connect) configuration- Open Microsoft Entra Connect and select Tasks.
- From the Additional tasks list, select Refresh Directory Schema.
- Select Next.
- Enter your Microsoft Global Administrator credentials and select Next.
- Ensure the checkbox for your domain is selected, then select Next. This opens the Ready to Configure screen.
- Select the Start synchronization process when configuration completes checkbox to proceed with automatic synchronization after configuration. Select Configure.
- Once the configuration process has been completed, select Exit.
Next steps: To add the new extension to the Entra Connect configuration, see Enable and configure Directory Extensions in Entra Connect. -