
Scenario
You have configured Exclaimer and have found that email content such as voting buttons, tasks and contacts that use Transport Neutral Encapsulation Format (TNEF) are missing from received emails.
Reason
Transport Neutral Encapsulation Format (TNEF) is a proprietary format created by Microsoft to enable some Outlook-specific features. Other mail clients may not support TNEF, which may cause compatibility or display issues when configured incorrectly.
By default, emails leaving a Microsoft 365 environment will be converted to a Standard email (EML) format instead of TNEF to avoid such issues.
As tasks, voting buttons and contacts are stored as MAPI properties encapsulated in the Transport Neutral Encapsulation Format (TNEF), these are stripped out by Exchange when the email leaves Microsoft 365 on its way to Exclaimer as they are not supported in the EML format.
Resolution
To resolve this, you need to create an internal remote domain and set TNEF to True on that domain:
You can do any one of the options described below - please click on the required options listed below to go through the detailed description:
-
Install the Exchange Online Powershell module.
To do this:
- Open the Windows Powershell and run this command as an Administrator:Install-Module -Name ExchangeOnlineManagement- Confirm that you want to install this Powershell module.
NOTE: For additional installation options, see ExchangeOnlineManagement.
-
Connect to Exchange Online Powershell.
Run this command:Connect-ExchangeOnline -UserPrincipalName <UserName- Where UserName is the user name of your global administrator account.
-
Run this command:
New-RemoteDomain -DomainName "domain.com" -Name <DisplayName- Where DomainName must be the domain you are sending from. The DisplayName can be whatever you wish - we recommend 'internal'.
-
Run this command:
Set-RemoteDomain -Identity "DisplayName" -TNEFenabled $true - Repeat this process for each internal domain that you send from.
- Navigate to https://admin.exchange.microsoft.com/#/remotedomains
- Sign in with your global administrator credentials.
- Click Add a remote domain.

A New remote domain screen is displayed.
- In Name, enter a domain name. In this example, we have entered 'Internal'.
- In Remote domain, enter your internal domain name. In this example, we have entered 'Internaldomain.com'.
Example:
- Click Next to proceed.
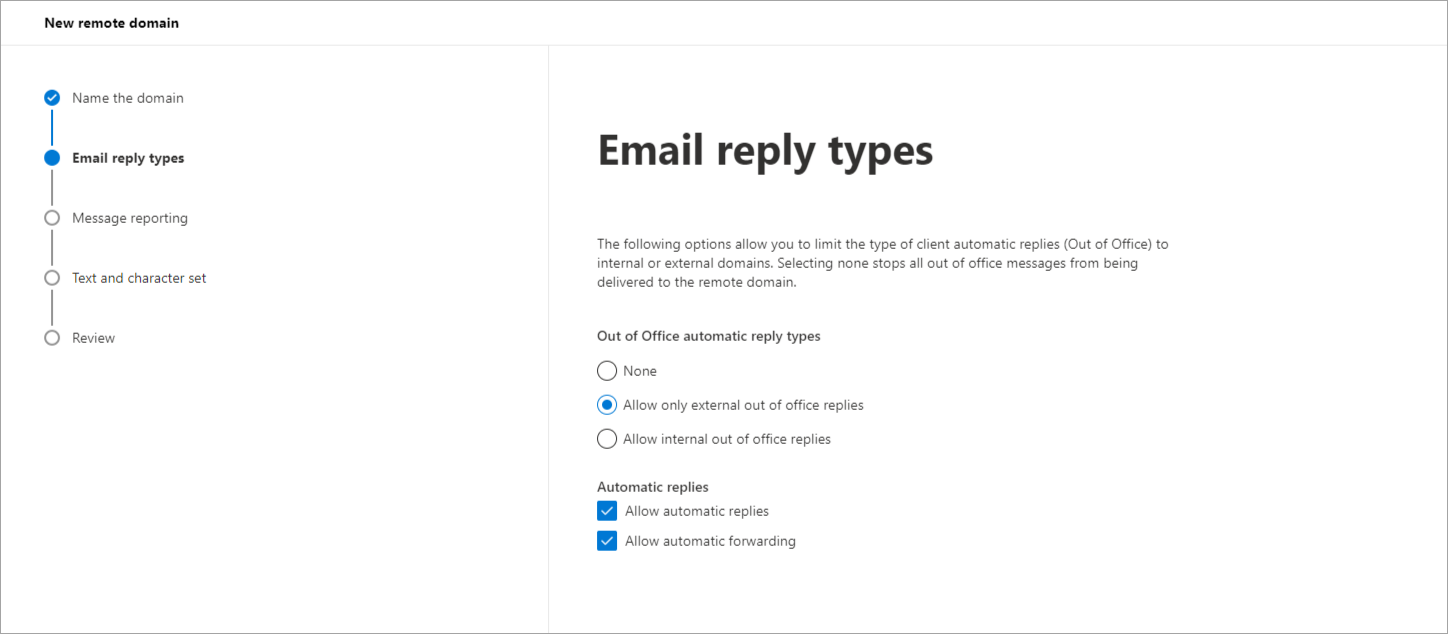
- In Out of Office automatic reply types, select Allow only external out of office replies.
- In Automatic replies, select Allow automatic replies and Allow automatic forwarding.
- Click Next to proceed.
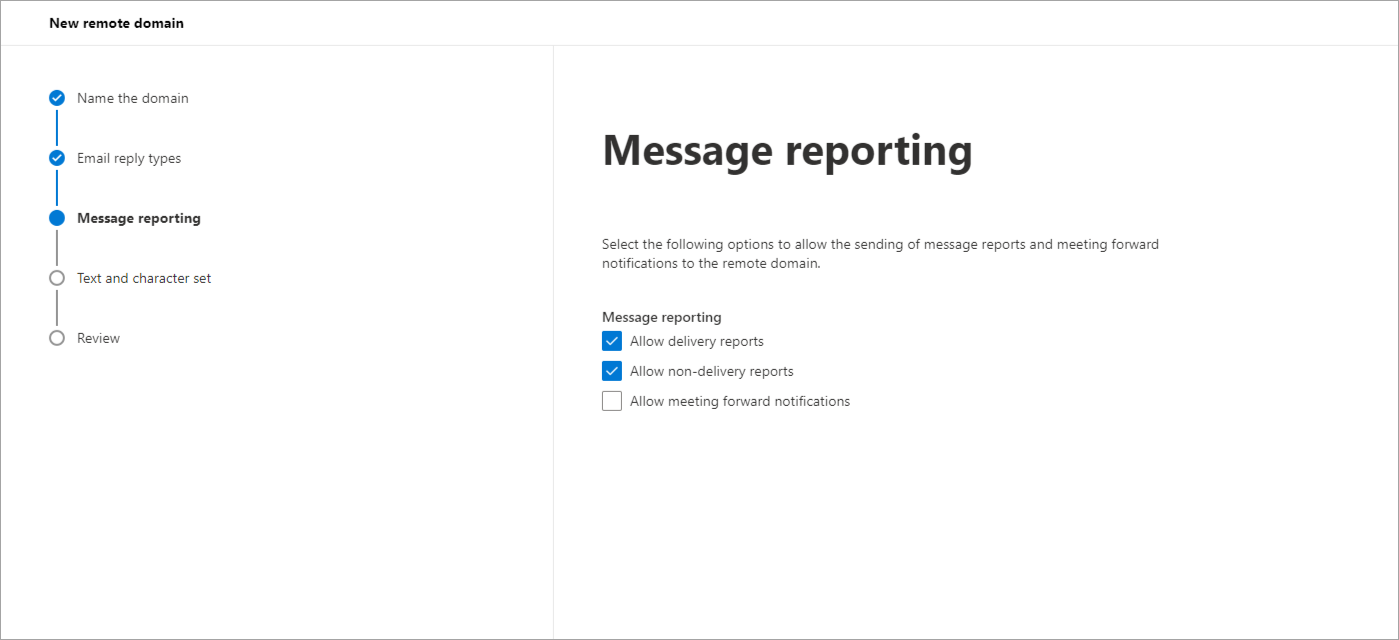
- In Message reporting, select Allow delivery reports and Allow non-delivery reports.
- Click Next to proceed.
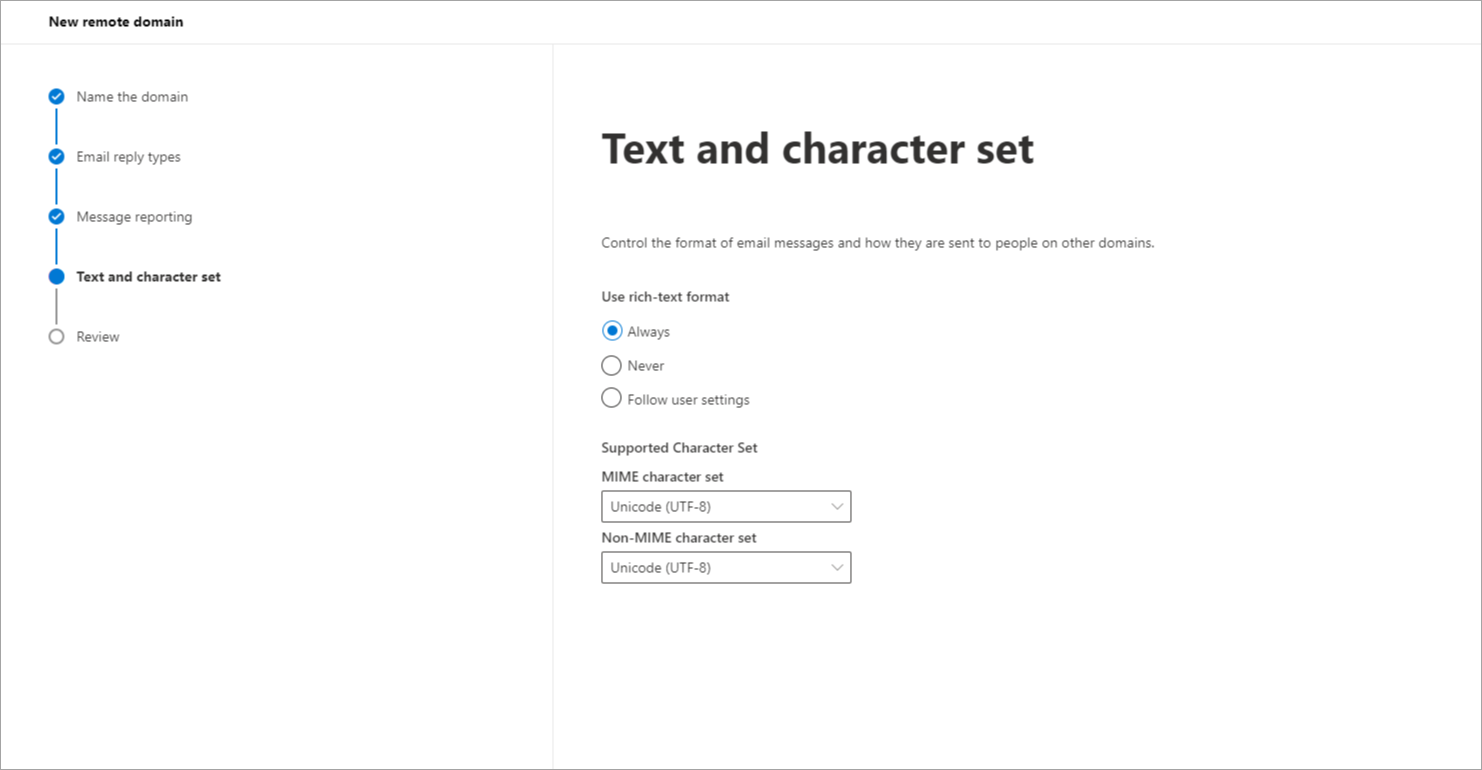
- In Use rich-text format, select Always.
- From the MIME character set drop-down, select Unicode (UTF -8).
- From the Non-MIME character set drop-down, select Unicode (UTF -8).
- Click Next to proceed.
- Now, review the settings you've selected.
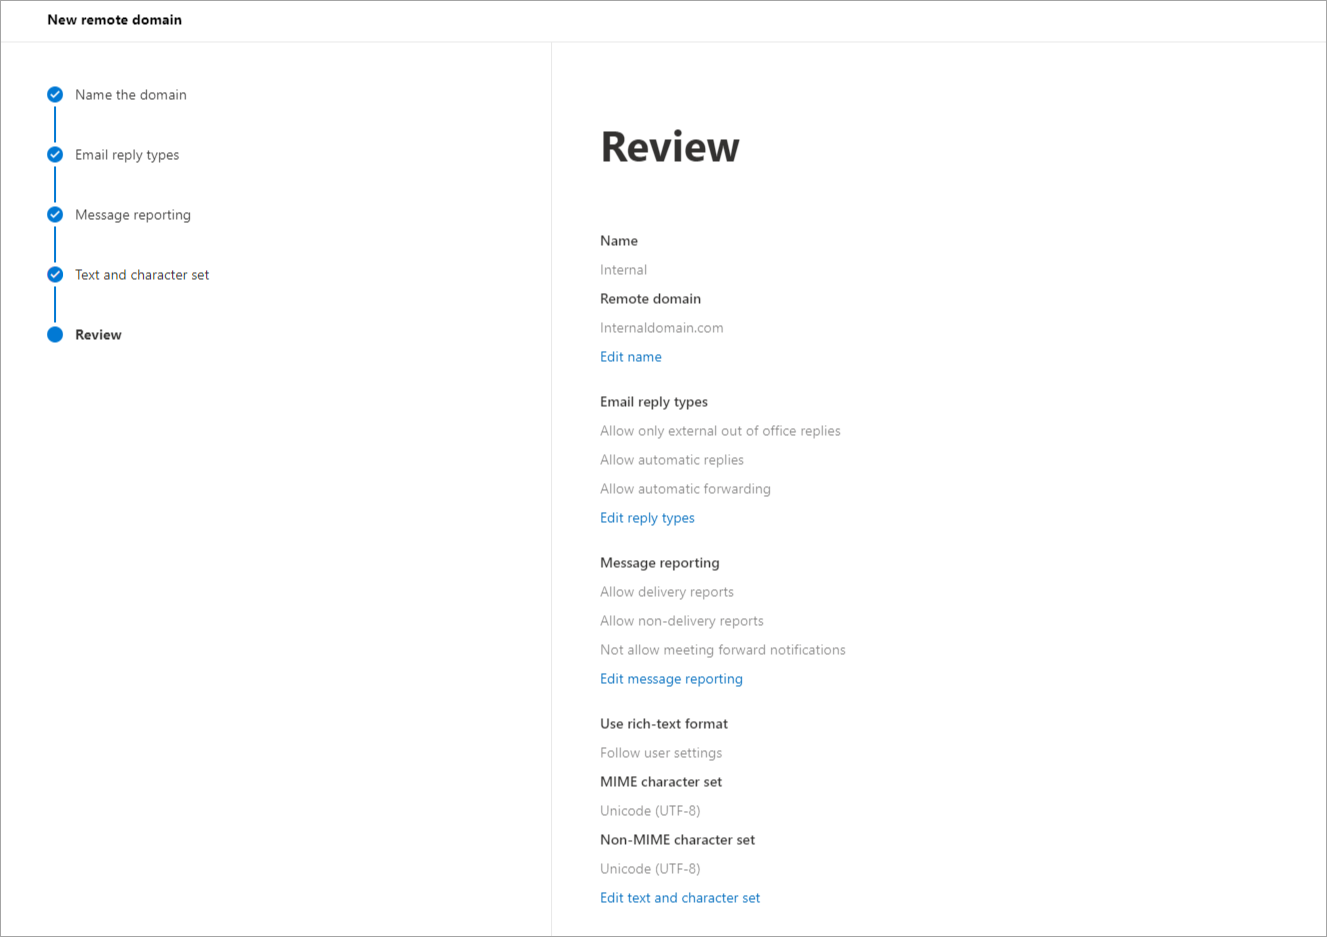
- Click Save to save the settings.
A message is displayed that the new remote domain has been successfully created.
- Repeat this process for each internal domain that you send from.