Scenario
You wish to synchronize user attributes from an LDAP server such as Active Directory to Google Workspace for use with your Exclaimer signatures.
Resolution
You can synchronize many of the Standard user attributes and other custom attributes from your LDAP server to Google Workspace using the Google Cloud Directory Sync tool (this is available to download from Google).
Please click on the required options listed below to go through the detailed description:
Set up the Google Cloud Directory Sync tool and connect to Google Workspace and the LDAP server
To set up the Google Cloud Directory Sync tool and connect to Google Workspace and the LDAP server:
- Download and install the Google Cloud Directory Sync tool.
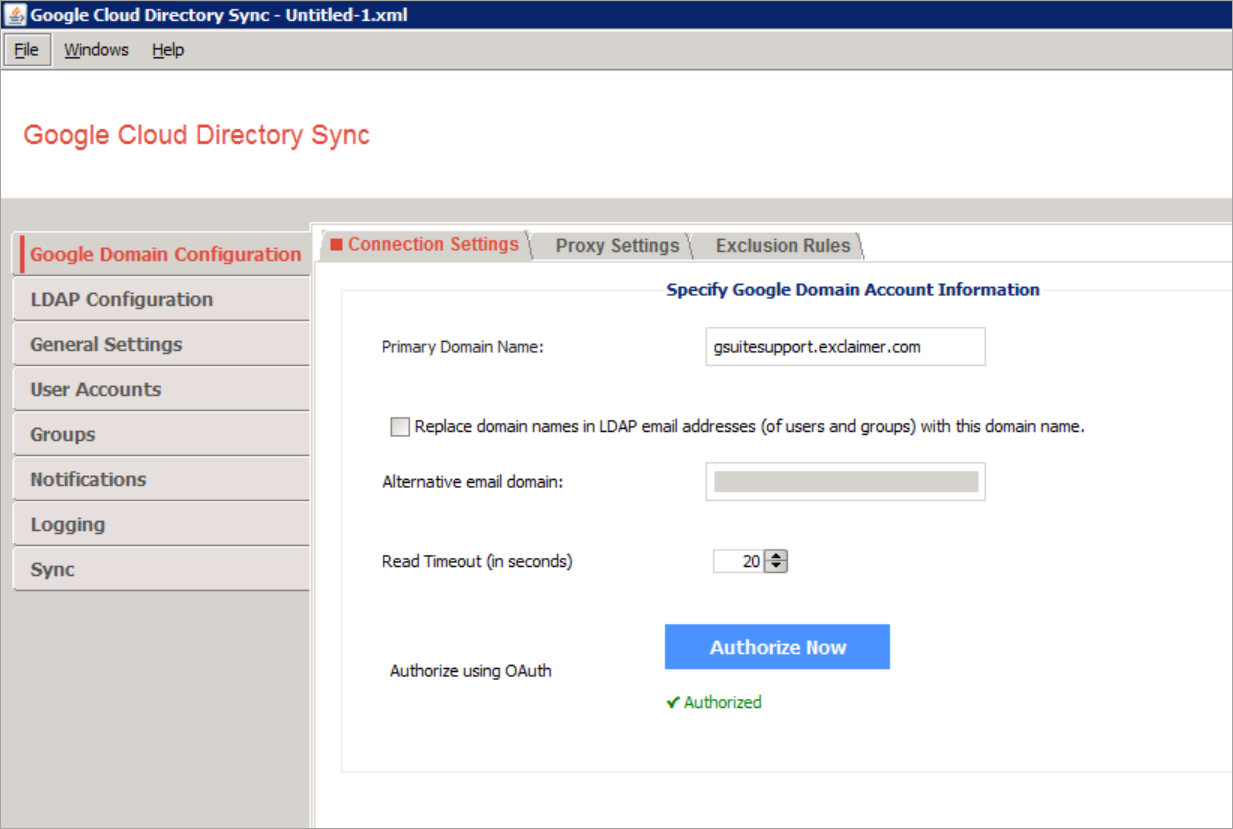
- Enter your domain name and authorize the connection by clicking Authorize Now.
- From the left-hand side, select LDAP Configuration. From the right-hand side, Configuration Settings tab, specify the required details to connect to your LDAP server.
Example: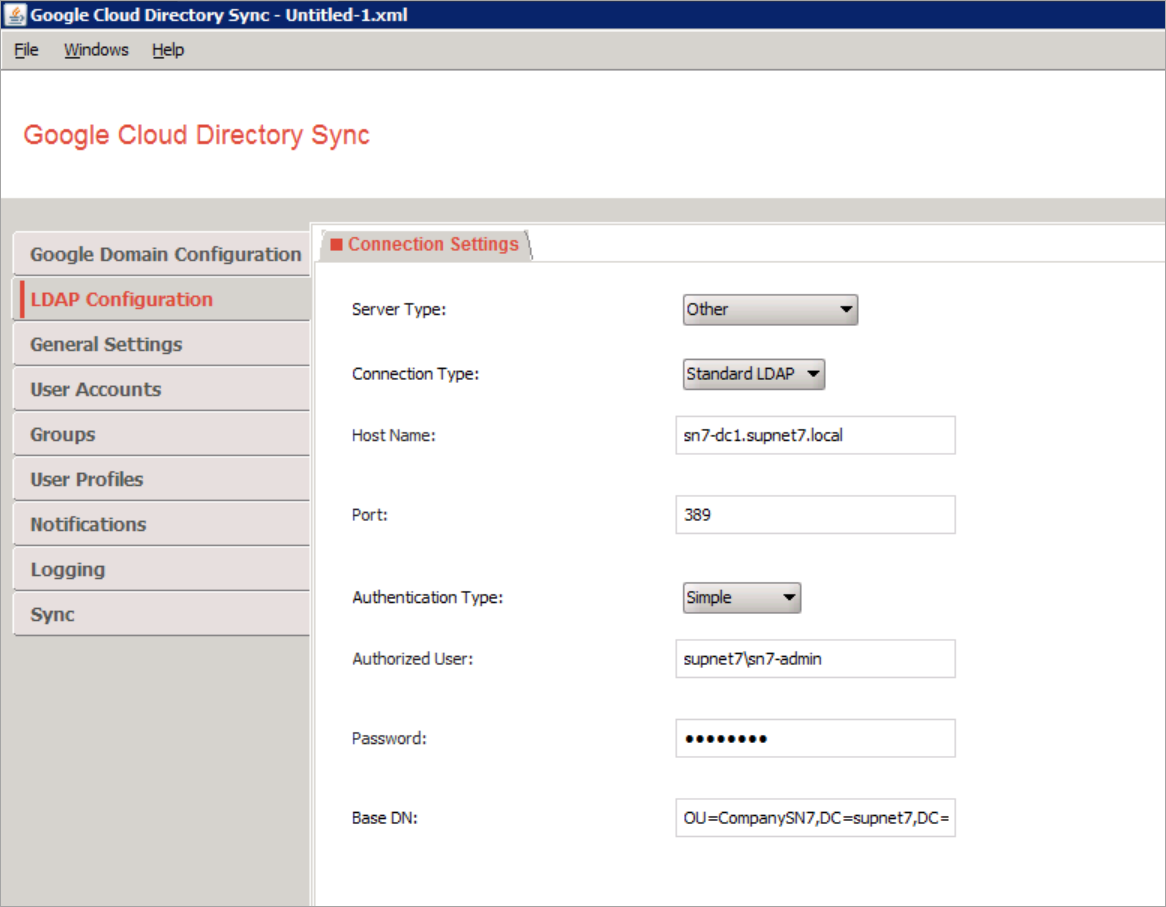
- From the left-hand side, select User Accounts. From the right-hand side, select the User Attribute tab and specify a unique identifier Attribute.
Example: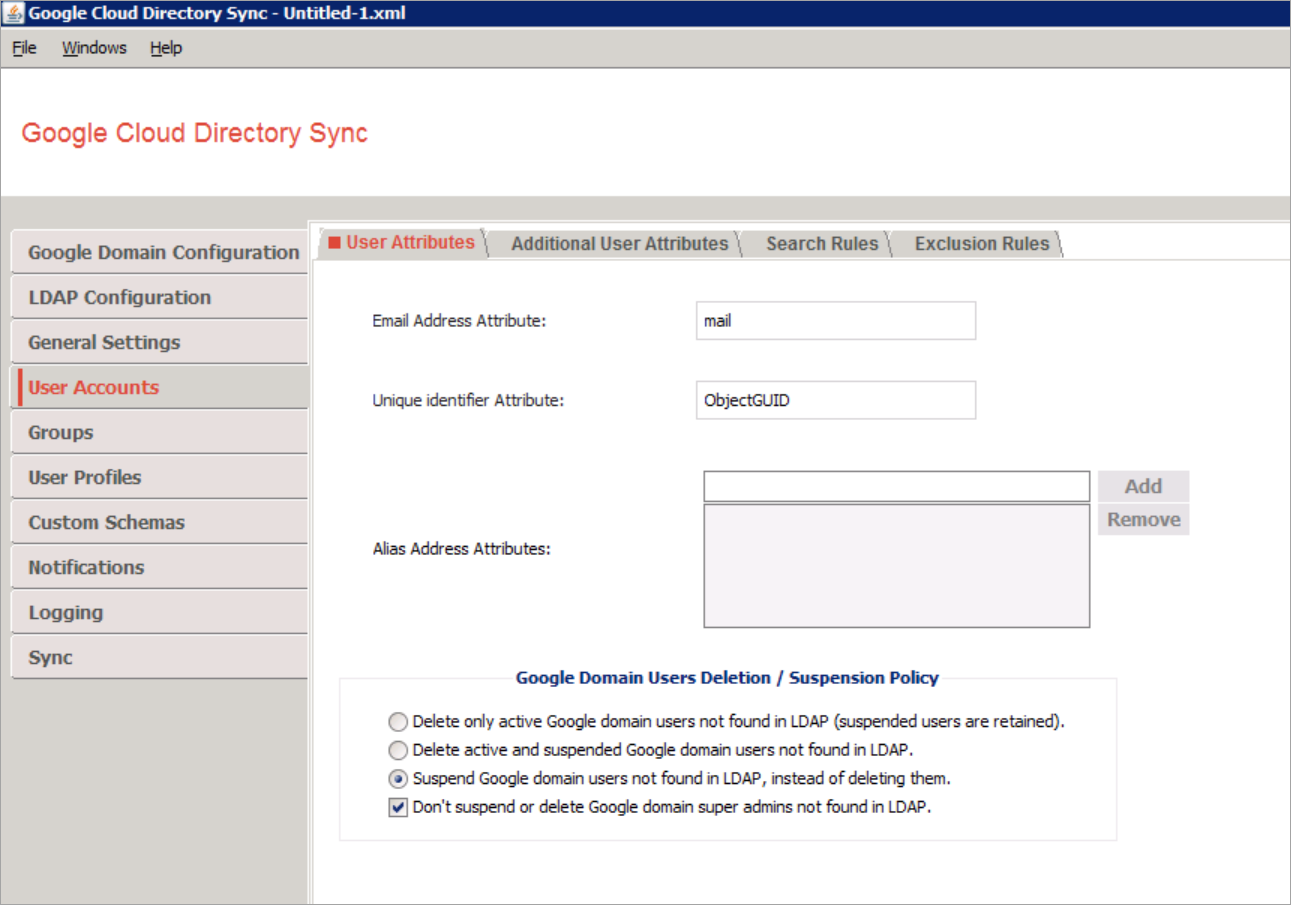
- Now, select the Search Rules tab. As required, specify an LDAP query.
Example:
Synchronize Standard user attributes
To synchronize Standard user attributes:
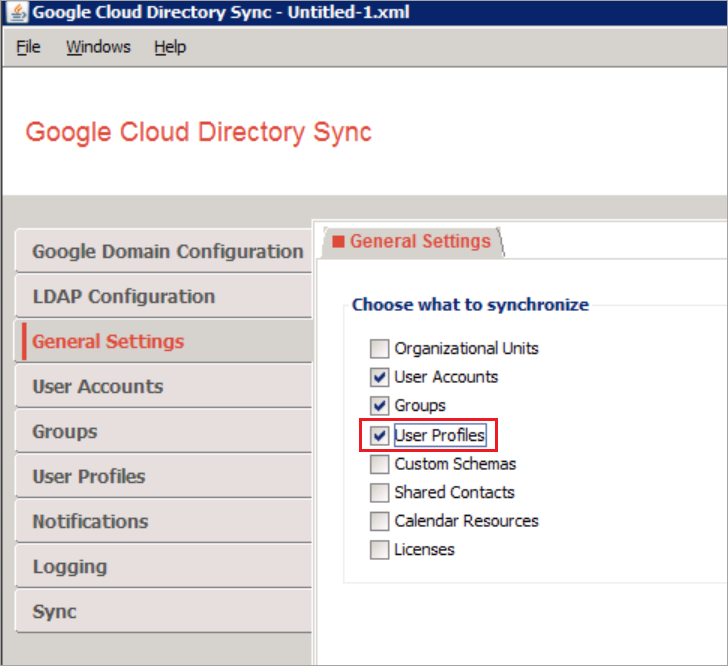
- Within the Google Cloud Directory Sync tool, from the left-hand side, select General Settings. From the right-hand side, General Settings tab, select User Profiles.
- From the left-hand side, select User Profiles. From the right-hand side, select the User Profile Attributes tab and specify the required LDAP attributes.
Example: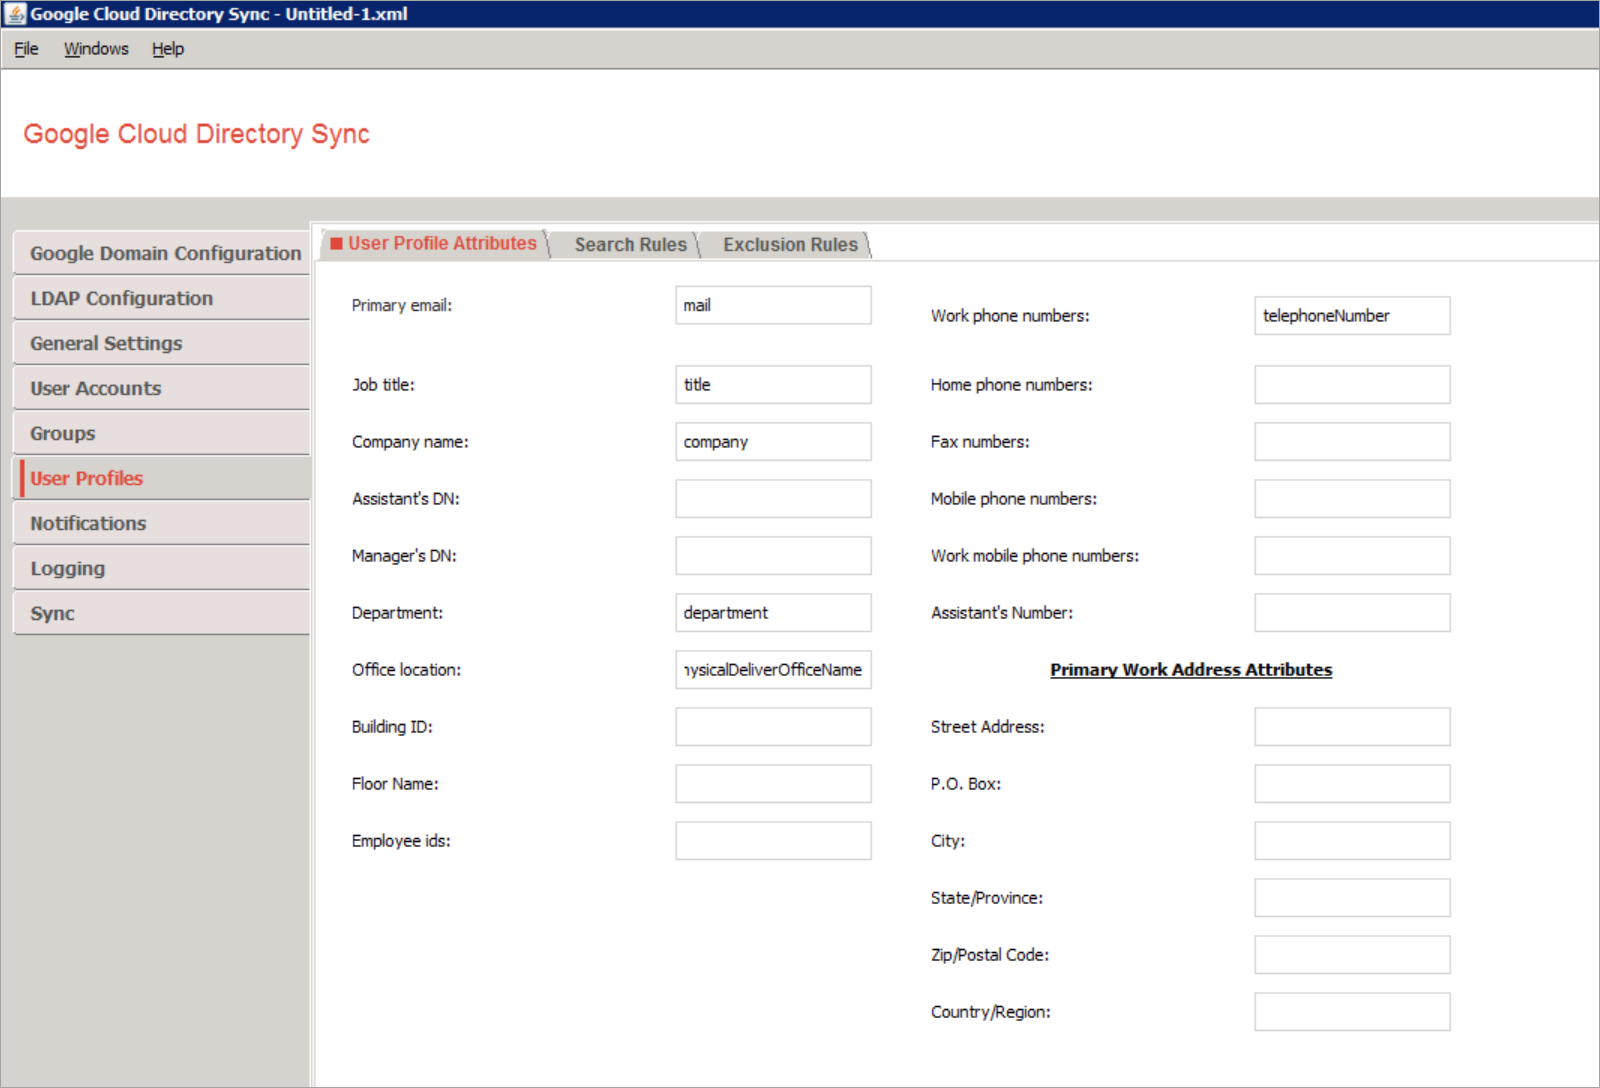
NOTE: Only the following fields can be used in Exclaimer signatures: Primary Email, Job title, Department, Work phone numbers, Home phone numbers, Mobile phone numbers. - From the Search Rules tab, as required, specify an LDAP query.
Example: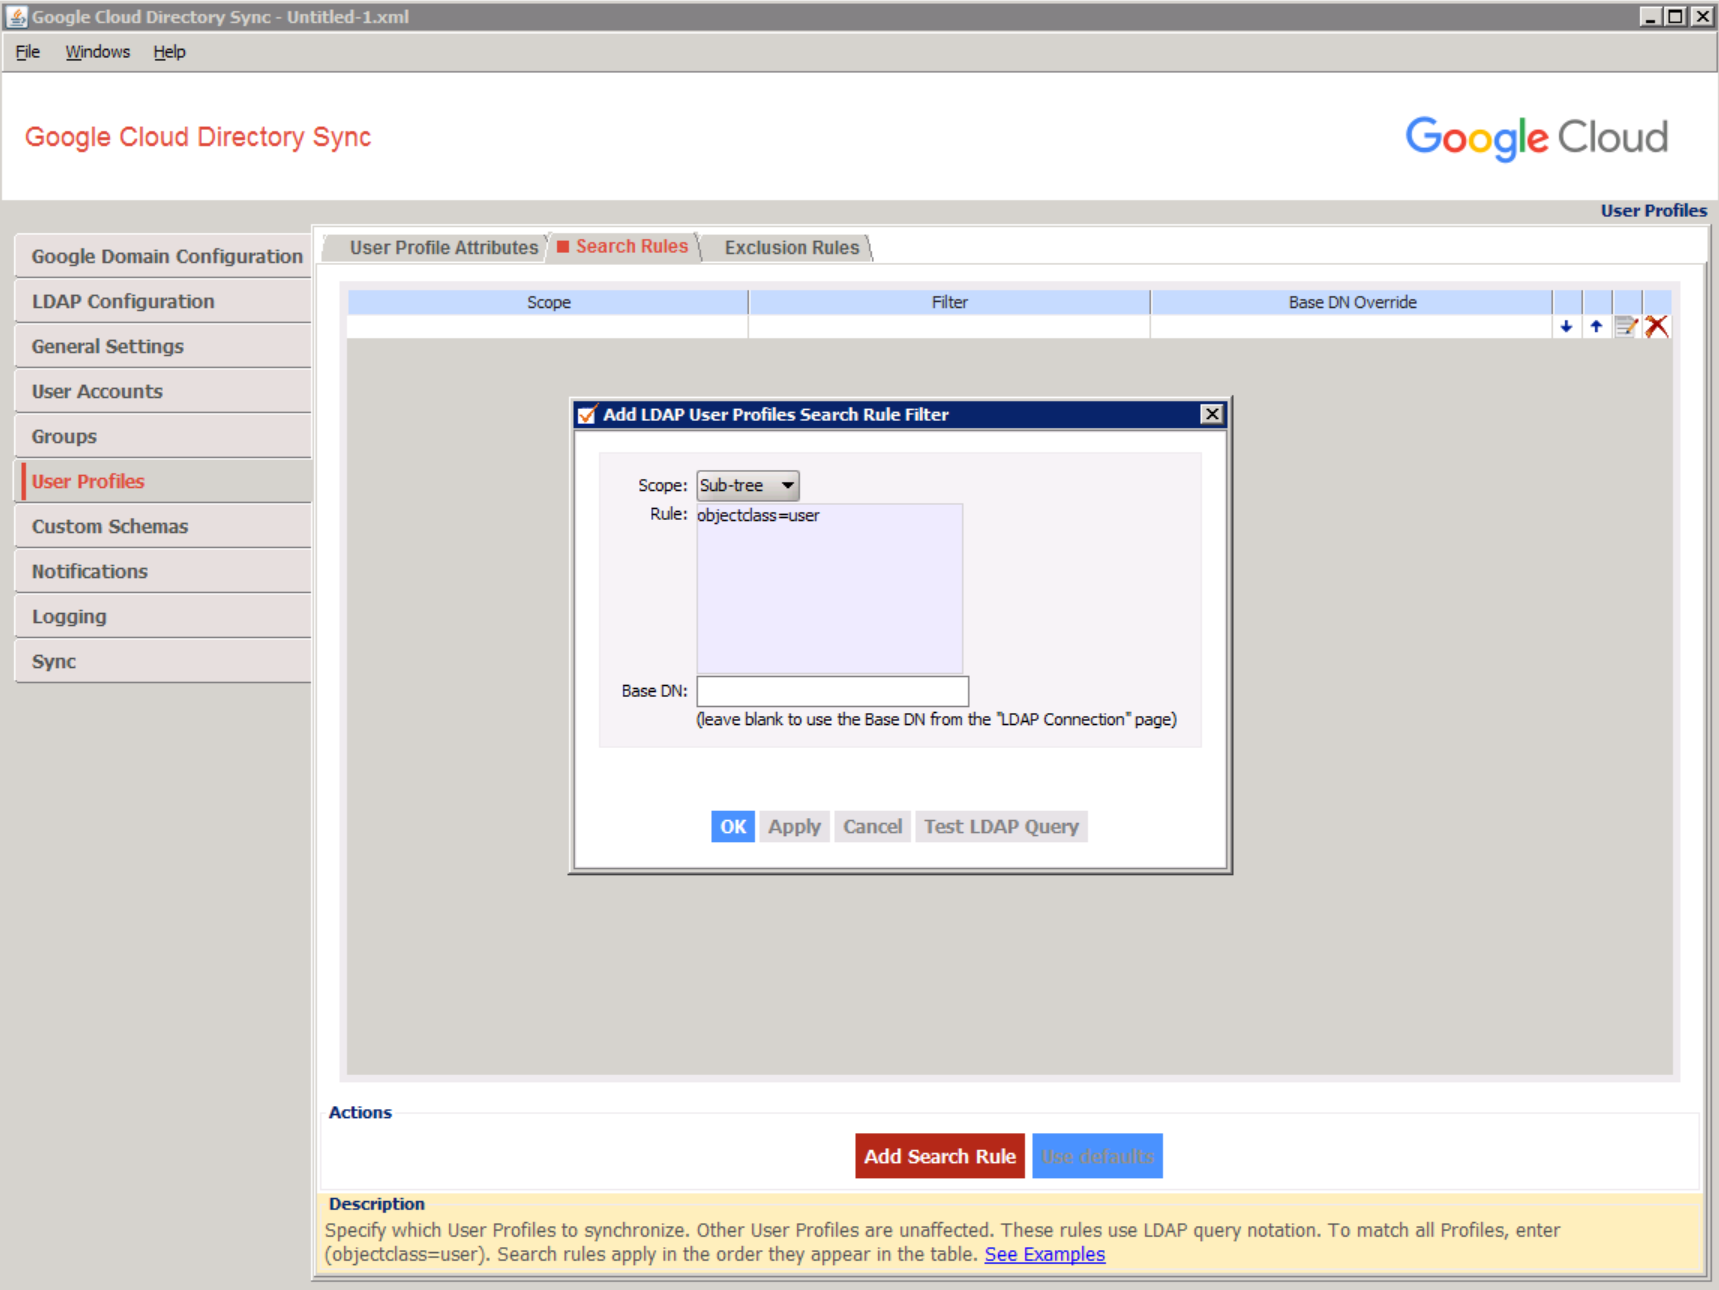
Synchronize custom user attributes
To synchronize custom user attributes:
- Within the Google Cloud Directory Sync tool, from the left-hand side, select General Settings. From the right-hand side, General Settings tab, select Custom Schemas.
Example: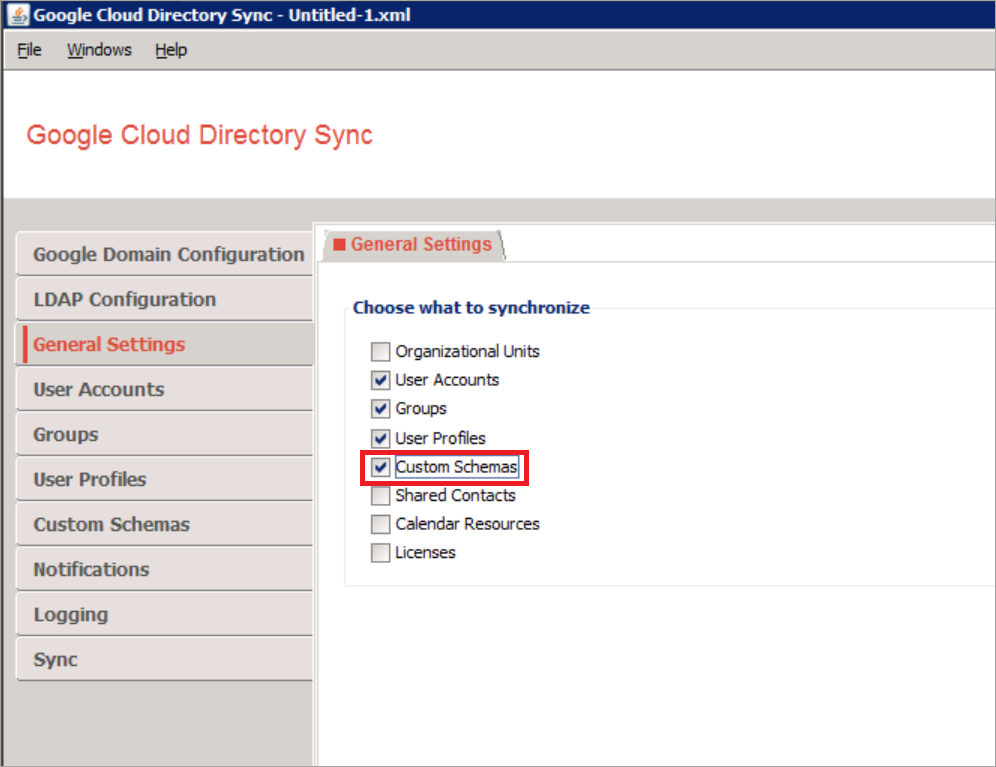
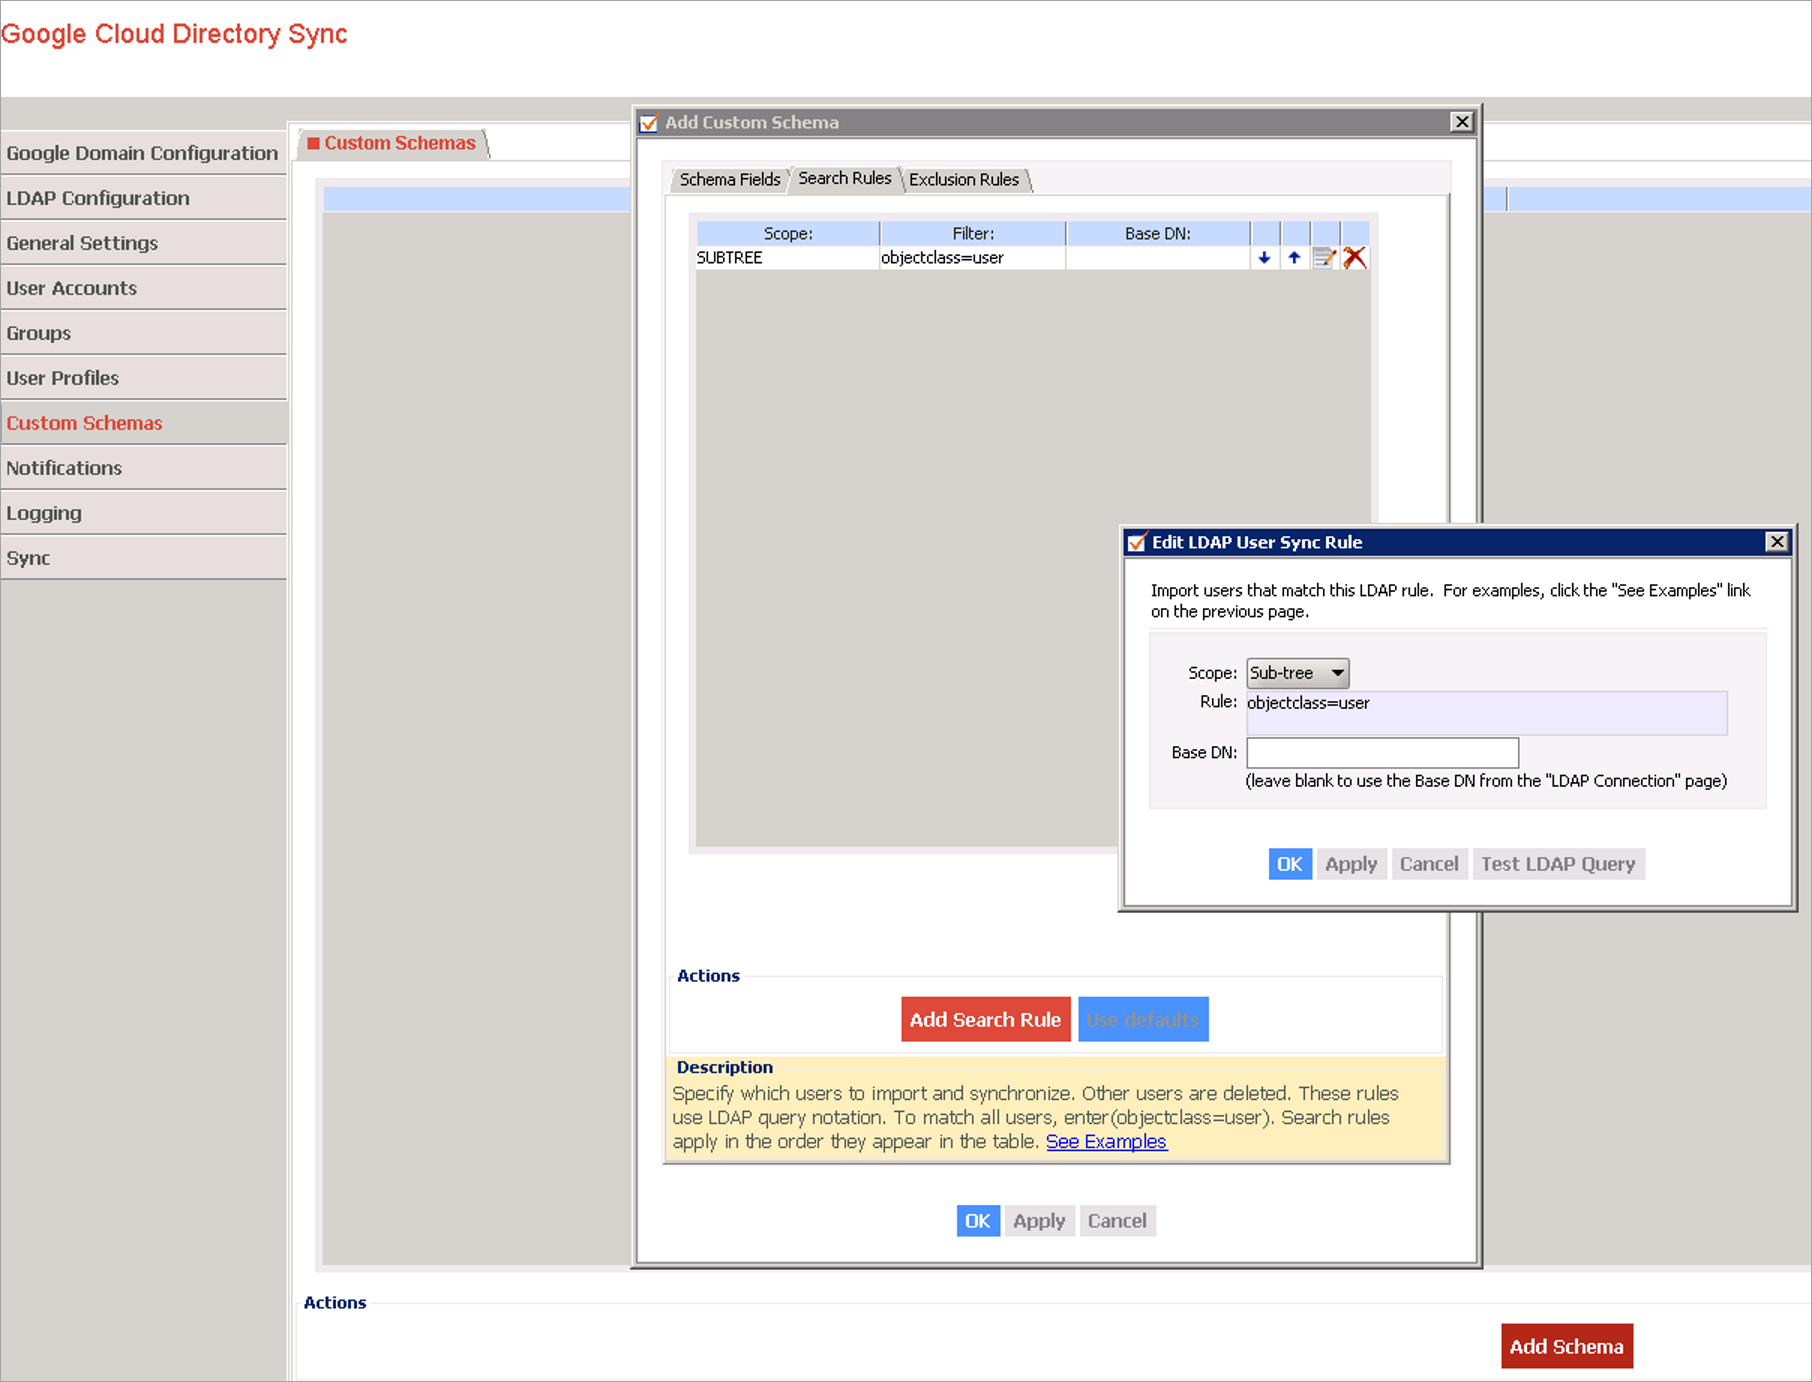
- From the left-hand side, select Custom Schemas. From the right-hand side, Custom Schemas tab, click Add Schema. The Add Custom Schema window is displayed.
- Give your new schema a name and add the required custom fields.
Example: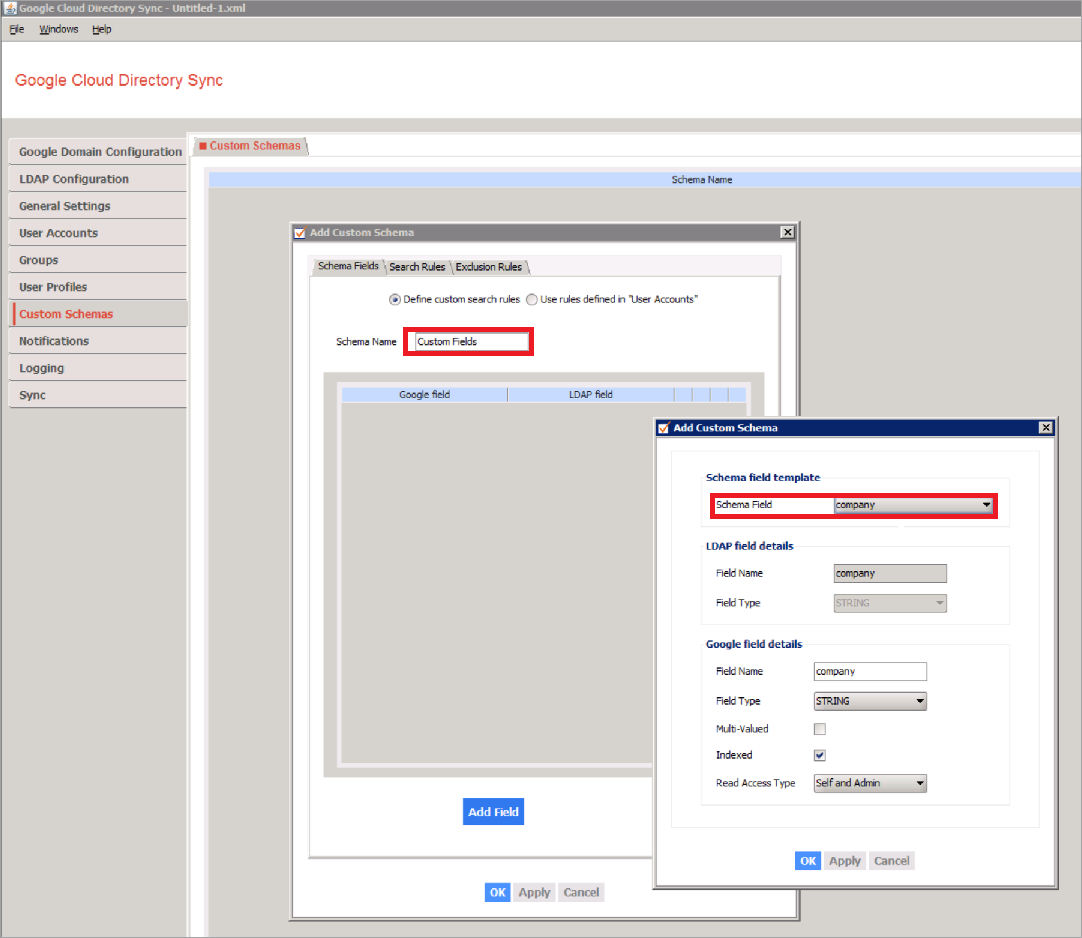
- In the Search Rules tab, as required, specify an LDAP query.
Example: