
Scenario
You have configured Exclaimer, and at the time of billing or renewal, you notice that some 'Noreply_skype’ emails are imprinted with signatures - this obviously has a direct effect on how much you are billed for.
Reason
By default, once the Server-Side setup has been completed, the emails for 'all users' are routed to Exclaimer for processing.
However, you can restrict which emails get routed to the Exclaimer servers.
Resolution
To reduce billable traffic, you only route emails to the Exclaimer servers for those users who need a signature.
To restrict which user's emails are routed to the Exclaimer servers, you need to modify the mail flow rule in Exchange Online.
To modify the mail flow rule:
-
Sign in to the Exchange Online admin portal (https://admin.exchange.microsoft.com) as an Administrator.
The Exchange admin center is displayed.
-
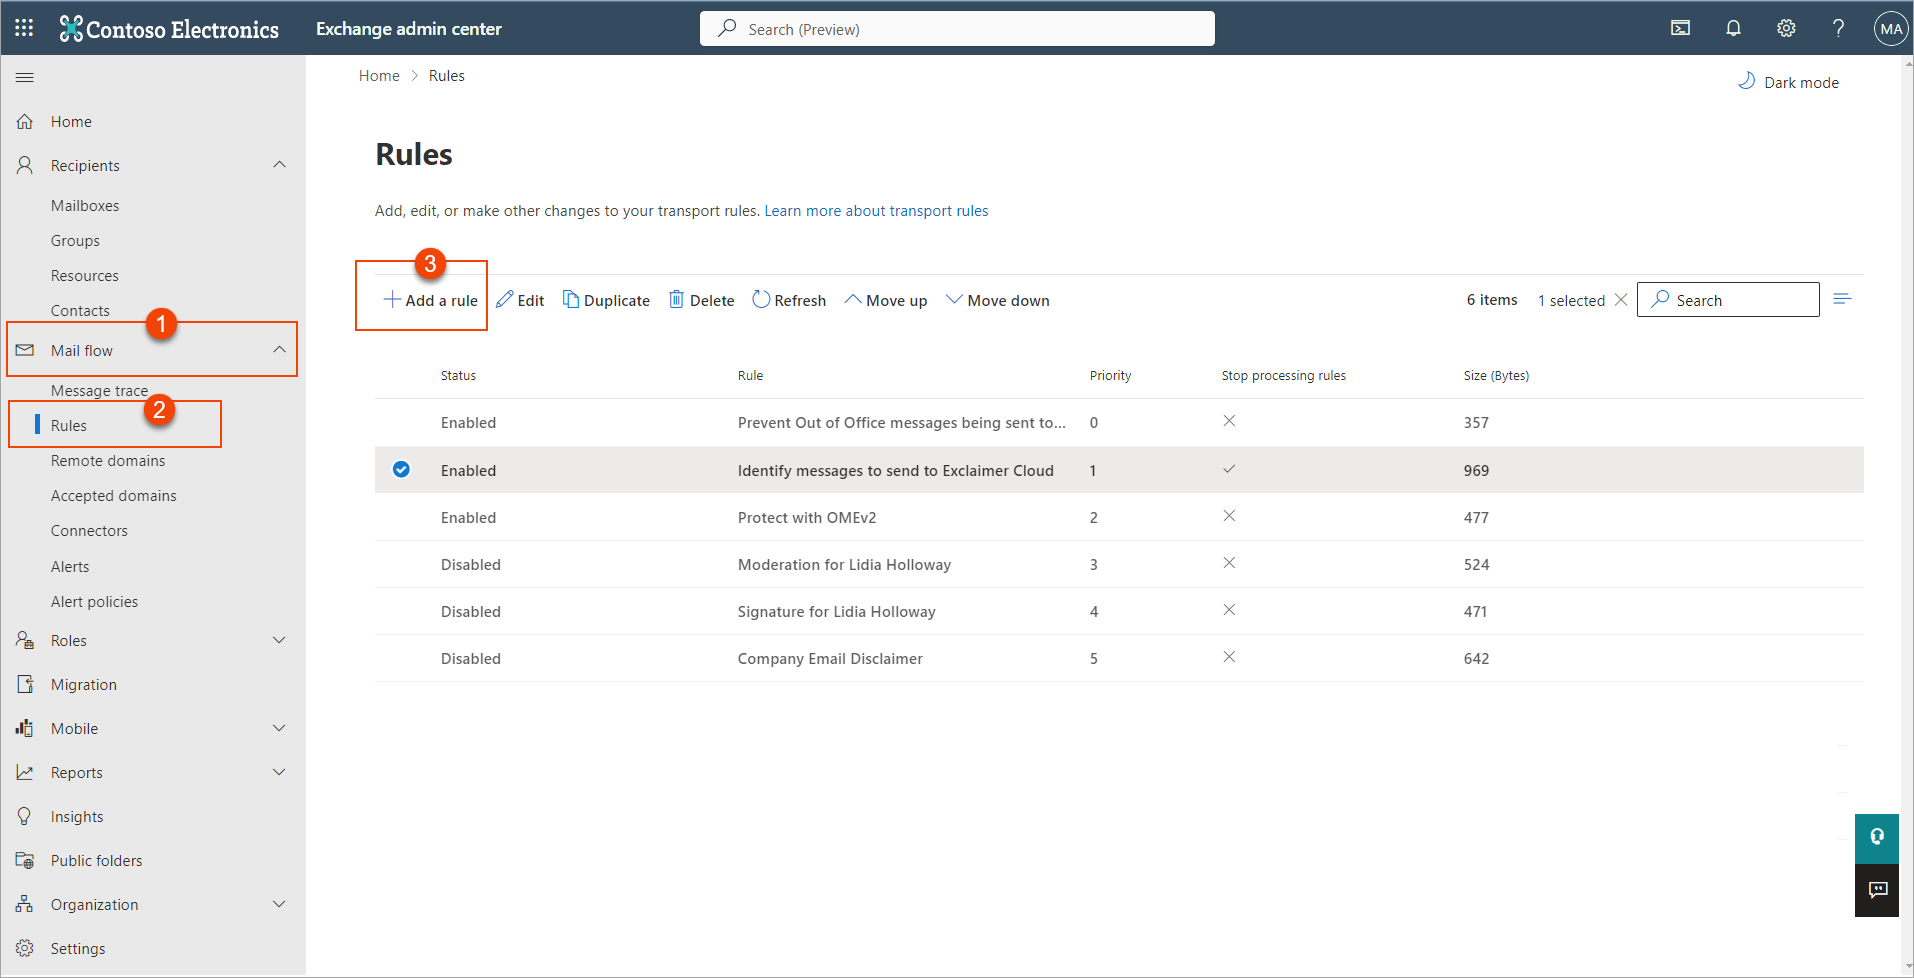
From the left-hand navigation menu, select Mail Flow, then select Rules.
- From the rules list, select the Identify messages to send to Exclaimer Cloud rule.
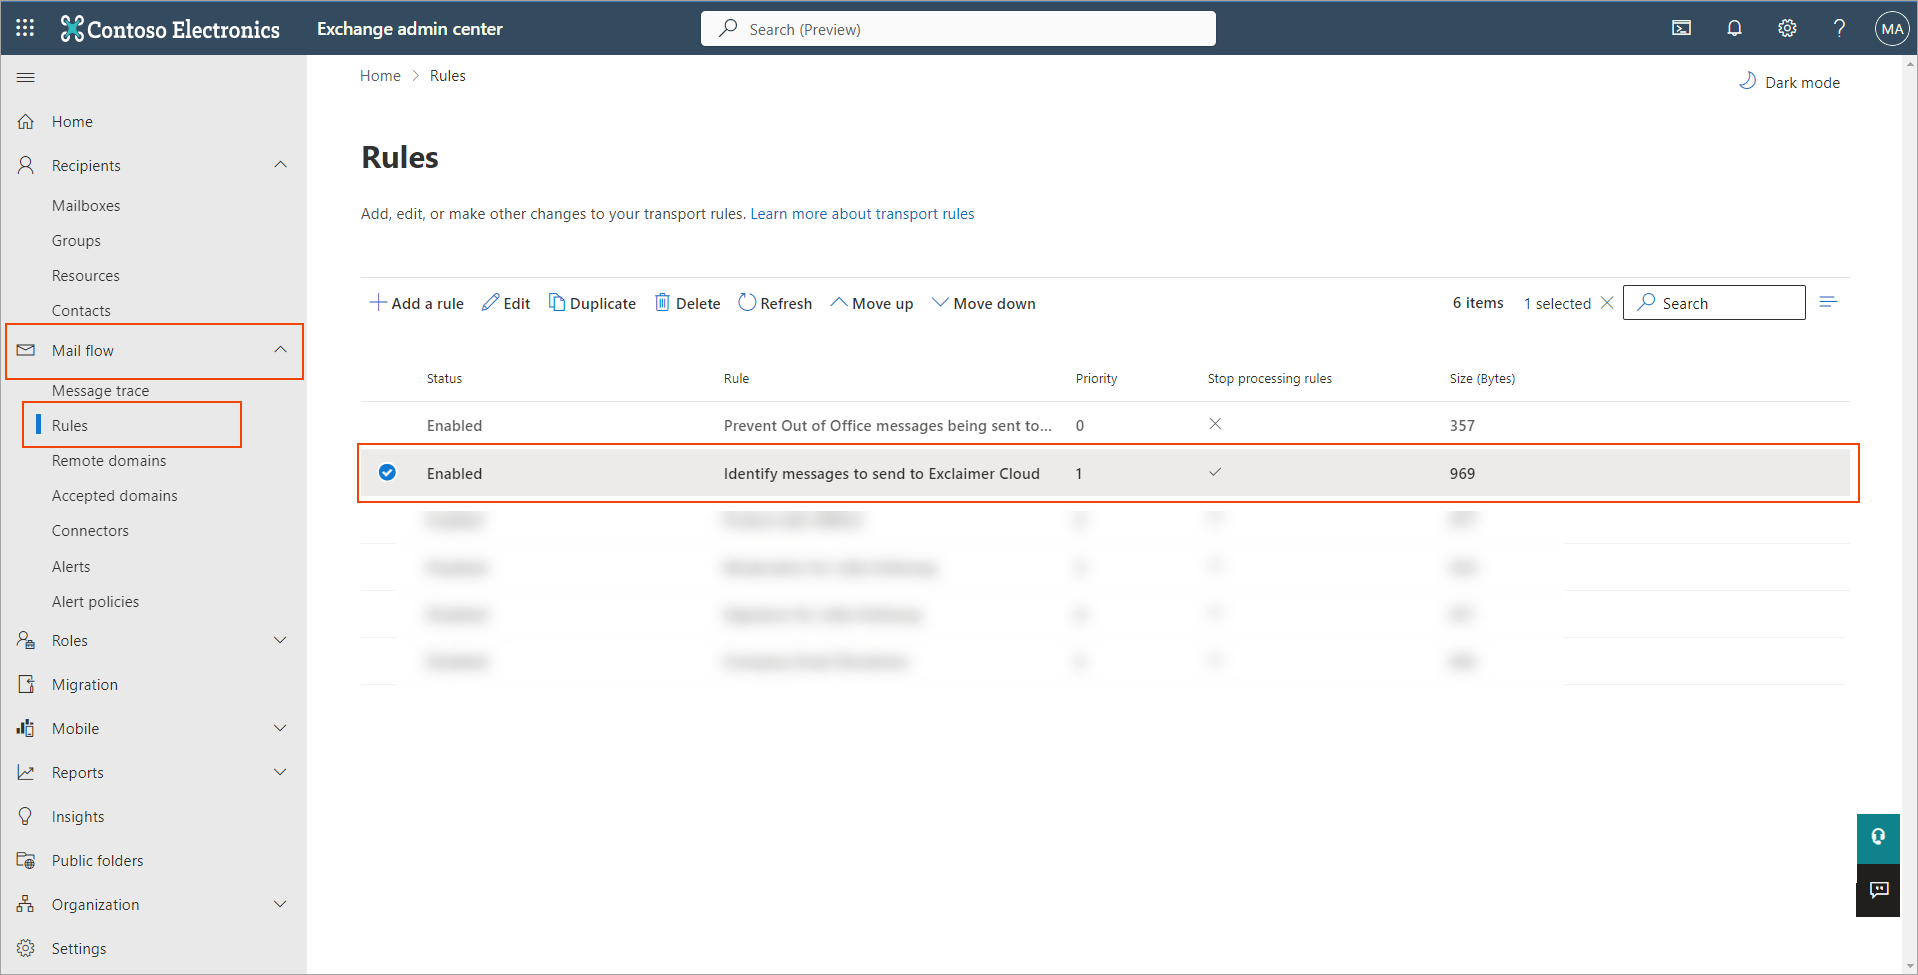
The details are displayed on the right-hand pane.
-
Click Edit rule conditions.
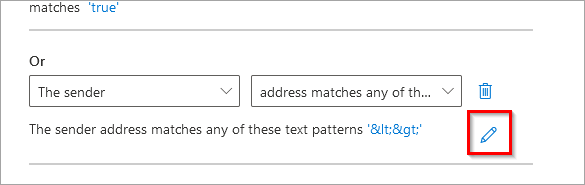
- From the Except if drop-down list, select The sender. From the adjacent box, the address includes any of these text patterns option is already.
- Click the pencil icon to edit it.
- In the specify words or phrases pane, enter enter noreply_skype:
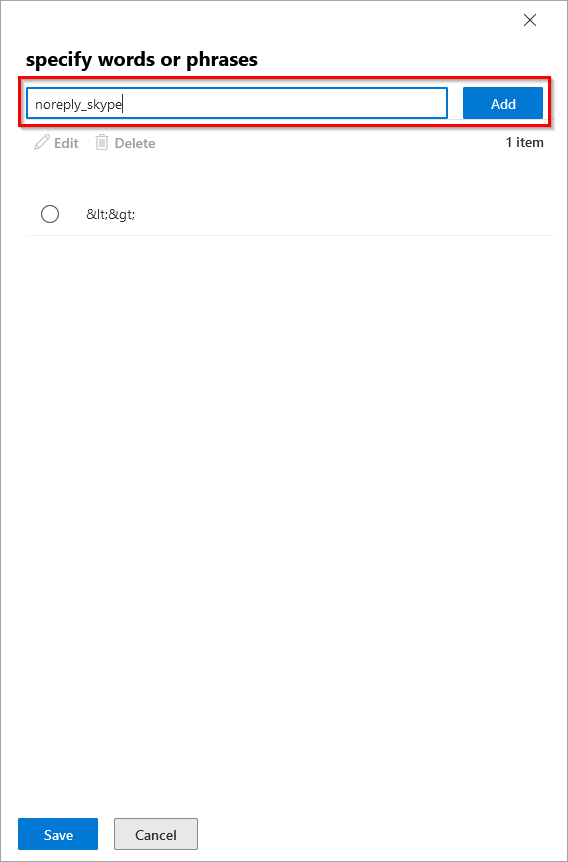
- Click Add to add the entered phrase as a condition.
- Click Save to save the changes made.
- The updated condition is added to the selected rule:
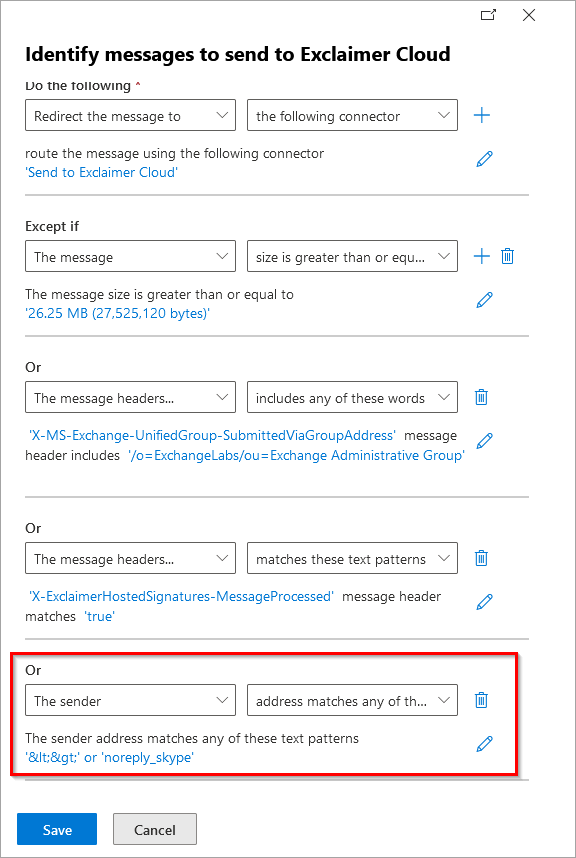
- Click Save to save the changes made.
-
Sign in to the Exchange Online admin portal (https://admin.exchange.microsoft.com) as an Administrator.
The Exchange admin center is displayed.
-
From the left-hand navigation menu, select Mail Flow, then select Rules.
-
Click Add a rule then select the Create a new rule option.
 The new transport rule pane is displayed.
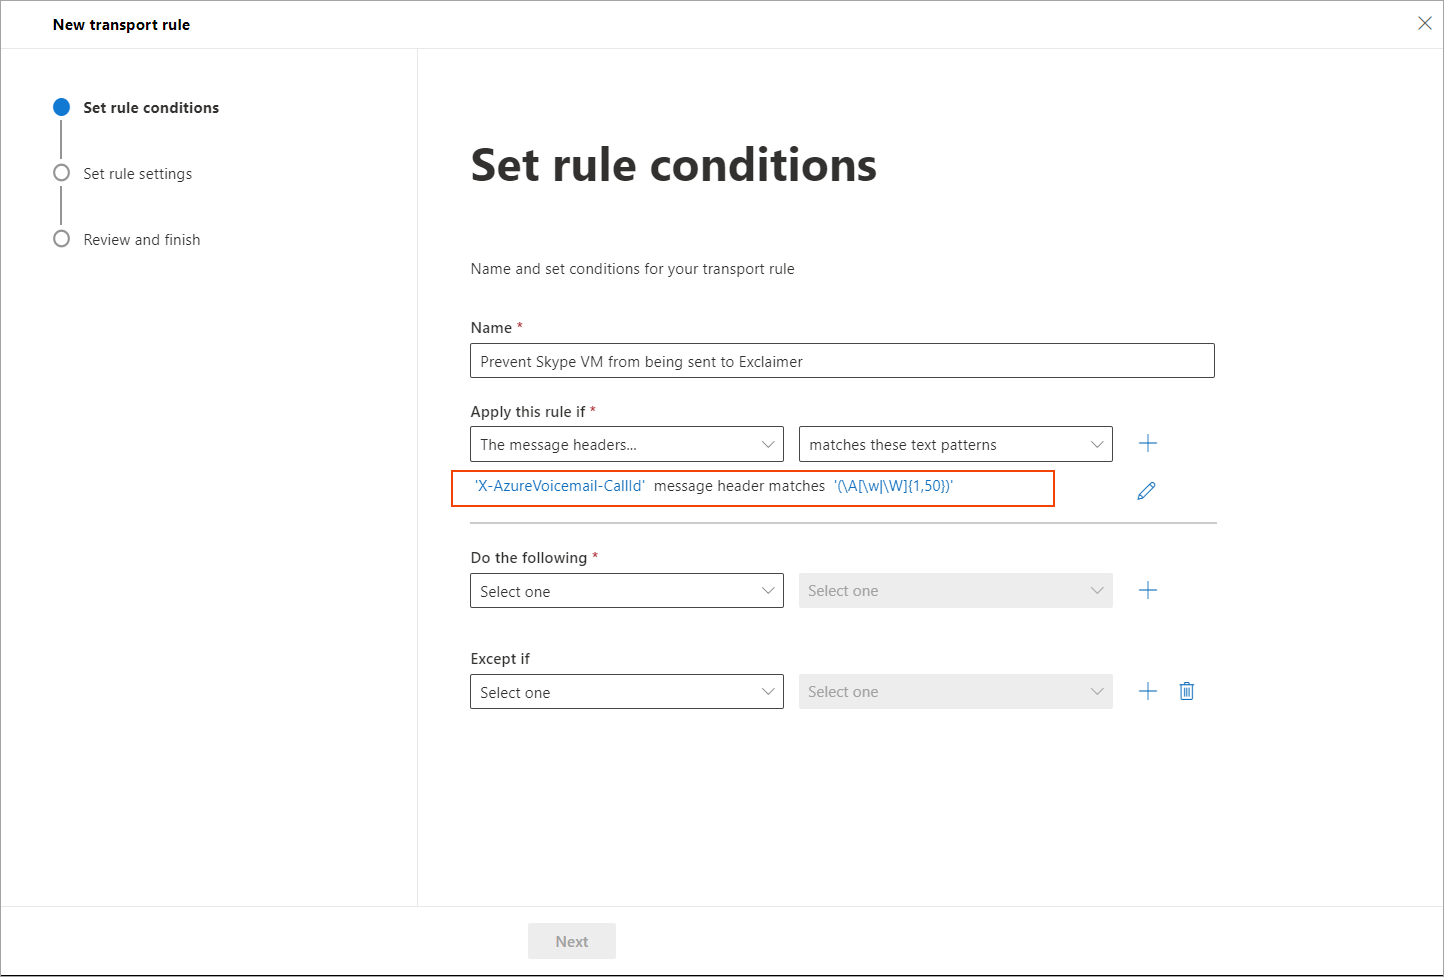
- In Name, enter a name for the rule. Example: Prevent Skype VM from being sent to Exclaimer.
- From the Apply this rule if... drop-down list, select The message headers... then select matches these text patterns.
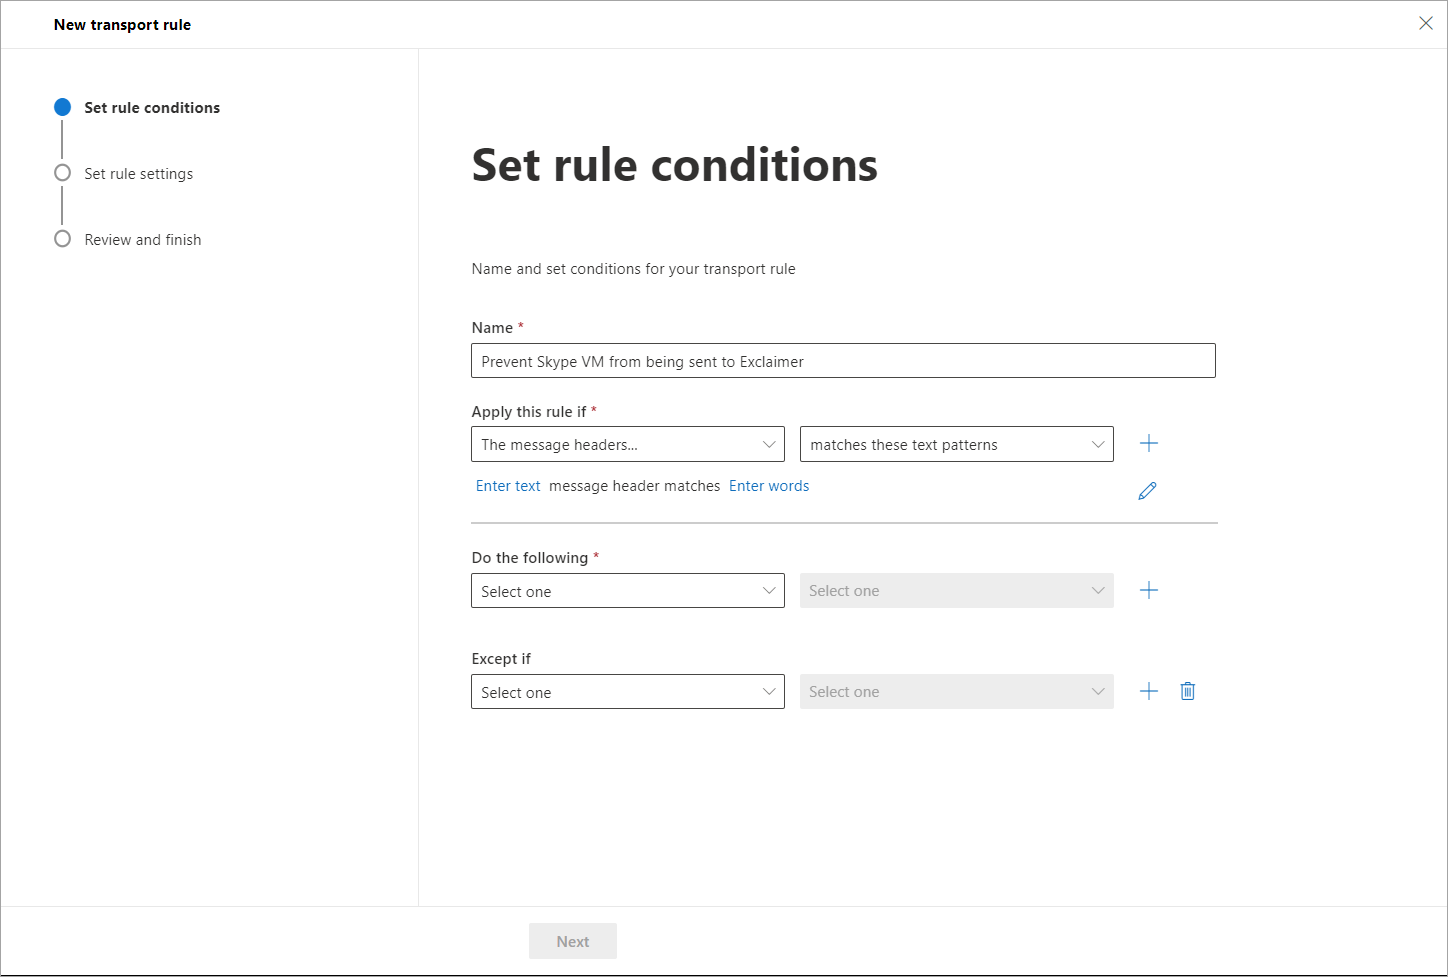
- Click Enter text to set a condition.
The specify header name pane is displayed. -
In the space provided, enter X-AzureVoicemail-CallId.
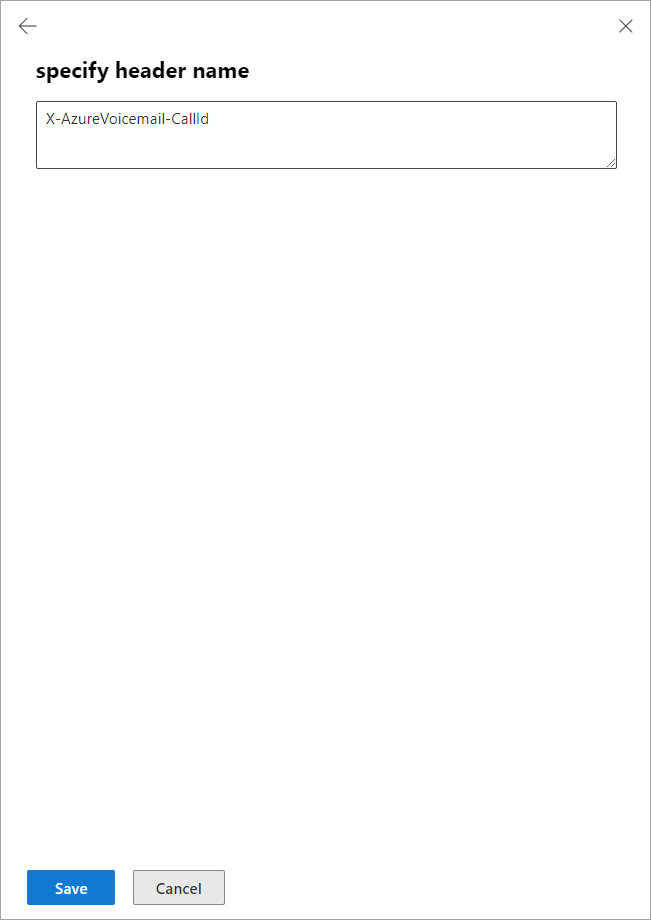
- Click Save to save the changes made.
The updated condition is added to the selected rule: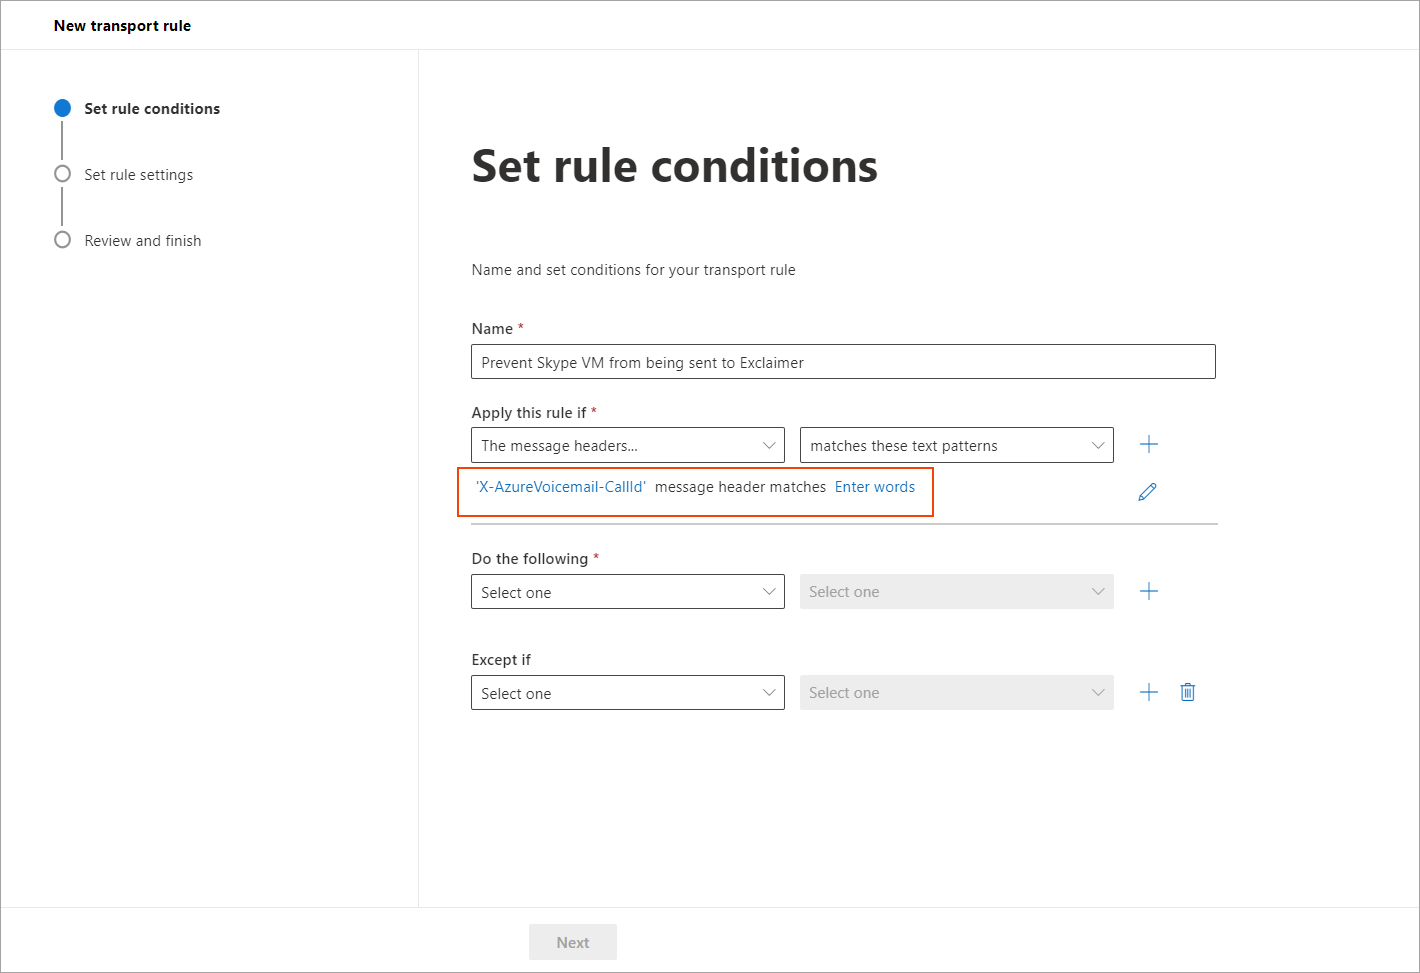
- Now, click the Enter words link.
The specify words or phrases window is displayed. -
In the space provided, enter (\A[\w|\W]{1,50}).
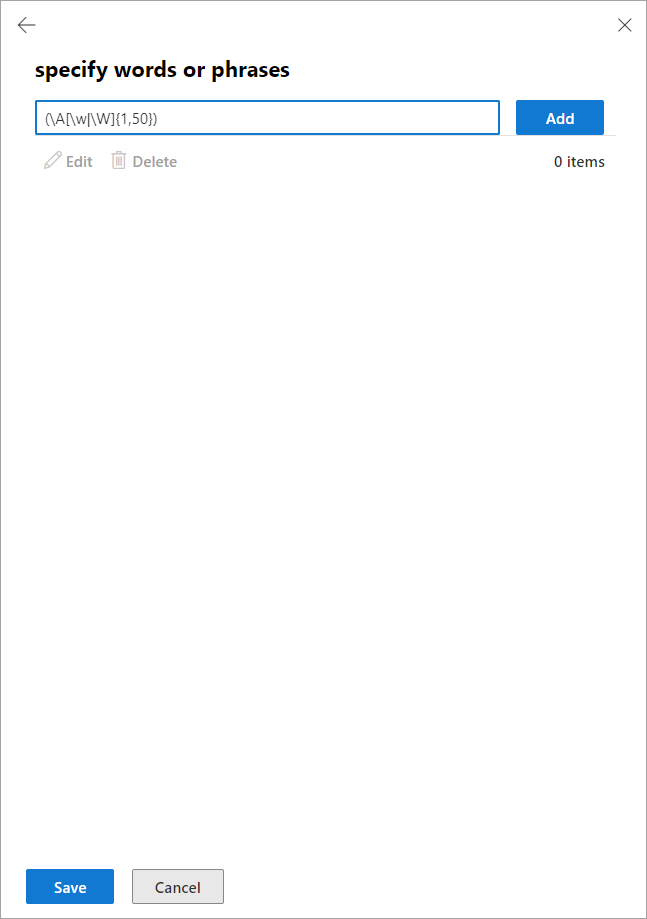
- Click Add to add entered phrase as a condition.
- Click Save to save the changes made.
- The updated condition is added to the selected rule:
- From the Do the following... drop-down list, select Modify the message properties... then select set a message header.
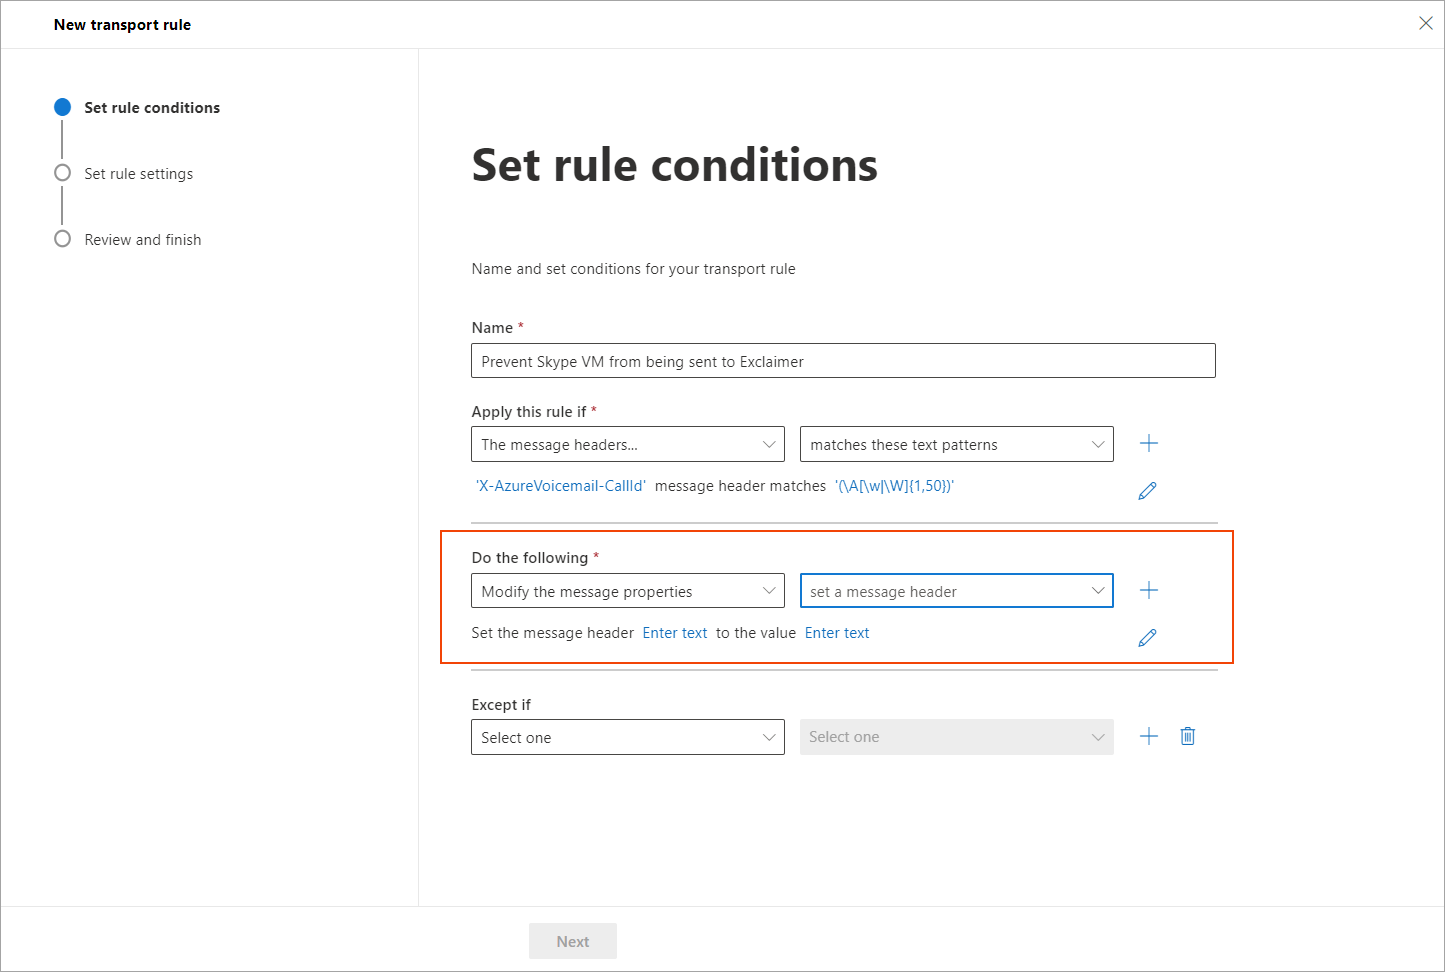
- Now, set the action to match. For the message header, click Enter text. The message header pane is displayed.
- Enter X-ExclaimerHostedSignatures-MessageProcessed and click Save to save the changes made.
-
To set the value, click Enter text.
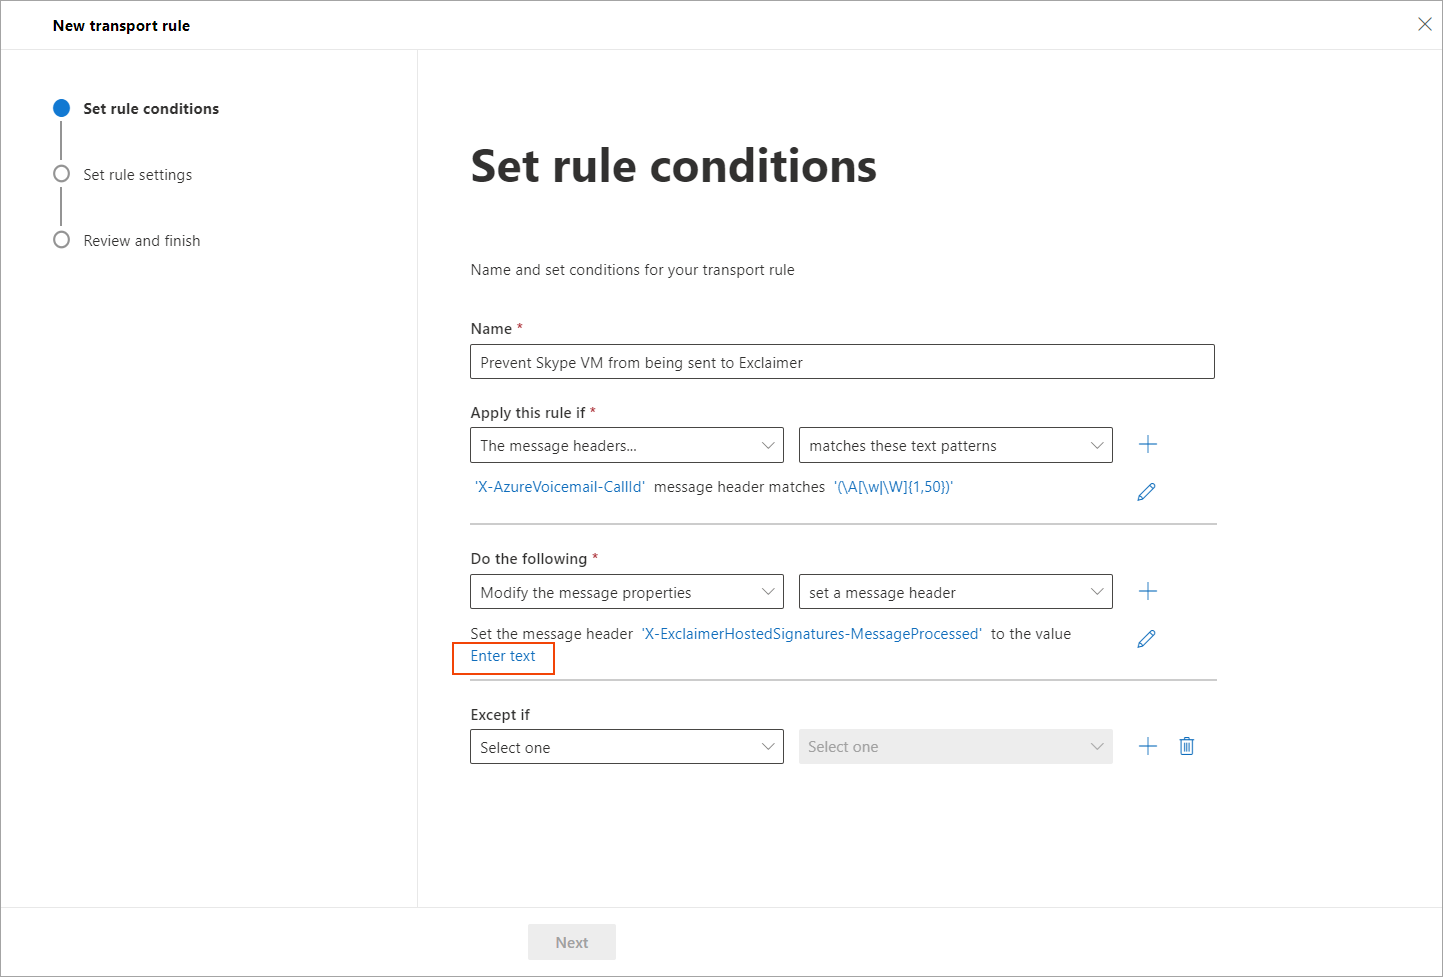
The message header pane is displayed.
- Enter True.
- Click Save to save the changes made.
The updated condition is added to the selected rule: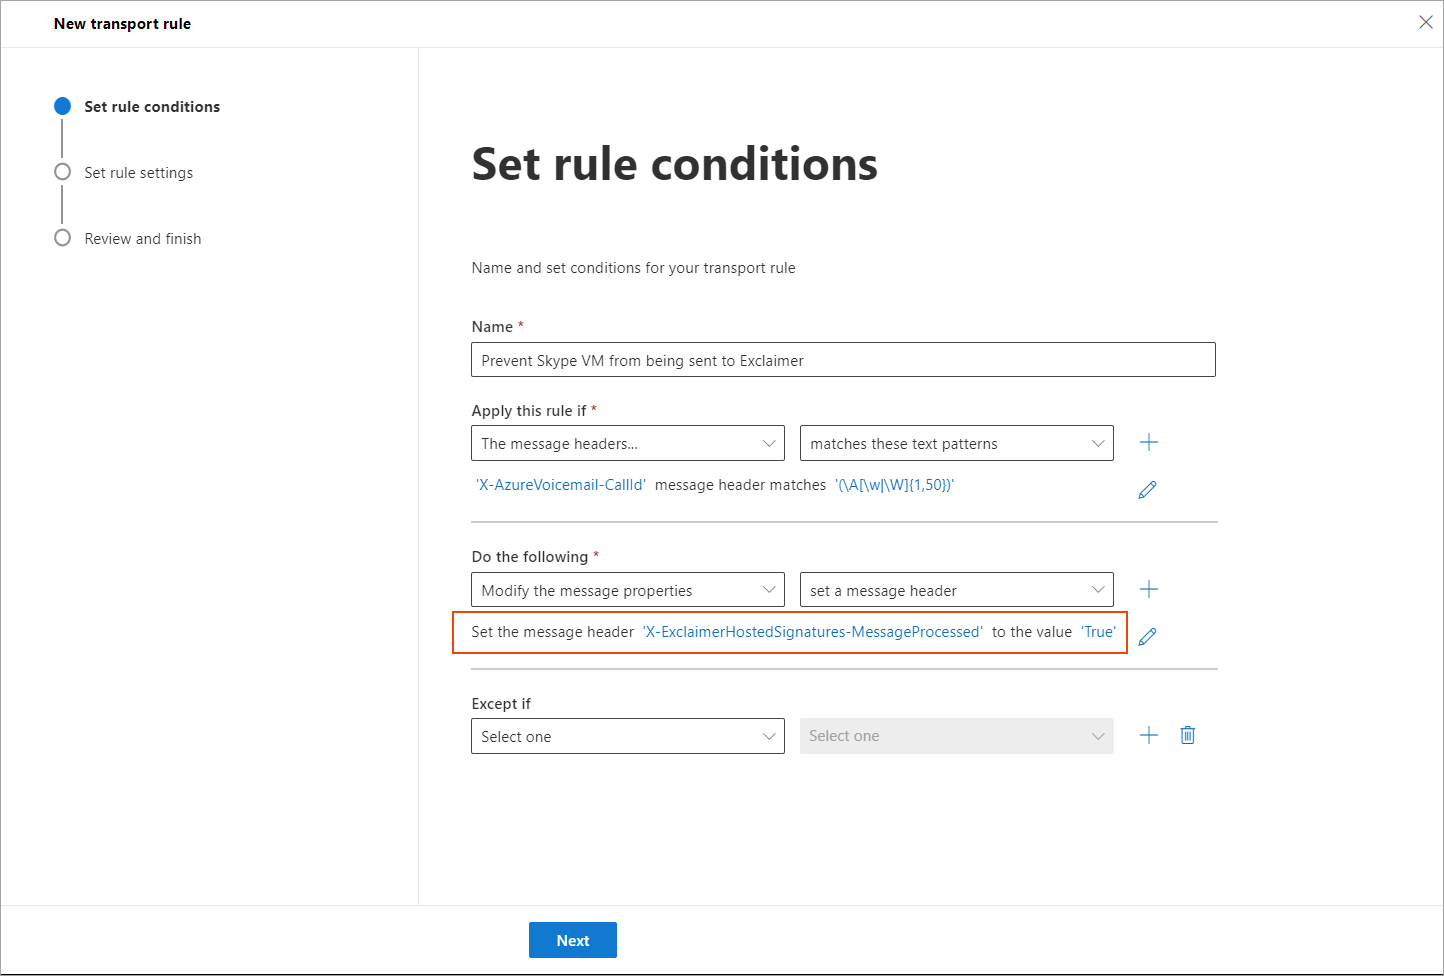
- Click Next then click Finish to save the rule.
- Place this rule above the Identify messages to send to Exclaimer Cloud rule by using the arrow buttons on top.
If you experience any issues when trying to modify mail flow rules, contact our Support team, and we'll be happy to help.