
Description
Let your support team sign in to the Exclaimer Managed Service Provider (MSP) Connect Portal with their own Microsoft accounts. Use a Microsoft Entra ID Security Group that you control to manage access. This removes the need to share the exclaimer@msp-domain.com login.
Pre-requisites
Before you begin, make sure you have:
• The dedicated exclaimer@msp-domain.com account already set up for the MSP Connect Portal.
• A Microsoft Entra ID Security Group in your own tenant that contains the people who need access.
• The Object ID of that group in GUID format.
• One-time tenant administrator consent for the GroupMember.Read.All permission, granted when the exclaimer@msp-domain.com account was first set up.
The account and its permissions are set up during onboarding. For what Exclaimer requires, see Dedicated Microsoft account requirements for the Exclaimer MSP Connect Portal.
How team sign-in works
Until now, everyone at an MSP who needed the portal shared one login: exclaimer@msp-domain.com. That works for one person. It gets awkward once you have a support team, and some MSPs aren't comfortable with employees sharing a generic logon.
With team sign-in, you register one Microsoft Entra ID Security Group.
Members of that group sign in at msp.exclaimer.net with their own Microsoft account. They can then access the Your Subscriptions page and manage and launch all subscriptions.
You manage group membership in your own Entra ID tenant. You do not need to update membership in Exclaimer.
When a team member signs in, Exclaimer checks whether they belong to the registered group. Exclaimer does not sync the group or run a background job. Exclaimer also does not create, store, or overwrite user accounts or roles for people in the group.
What team members get
Group members receive these Exclaimer UI roles for the duration of their session on any subscription they log in to:
- Admin
- Editor
- Analytics
- Designer
- Auditor
- User Manager
- Finance
Team sign-in doesn't include the Owner role, which stays separate. Group membership determines the roles. If someone already has an Exclaimer account, Exclaimer ignores the roles on that account while the person belongs to the Entra ID group.
What stays the same
The exclaimer@msp-domain.com account:
- Receives your API key.
- Receives billing communications and back-office correspondence.
- Can always sign in, even if you delete the registered group.
To give one customer contact access to one subscription, continue to use Account > User management in the Exclaimer UI or the Add Subscription User API.
We recommend creating a security group specifically for Exclaimer access. A dedicated group makes it easier to control and track who has access.
Avoid broad groups such as Everyone, All Staff, or All Users. Everyone in a registered group gets full access to all subscriptions.
To create a security group
- Sign in to the Microsoft Entra admin center.
- Select Entra ID > Groups > All groups.
- Select New group.
- In Group type, select Security.
- Enter a Group name, for example Exclaimer Admins, and add a description if you want one.
- Add the people who need access.
- Select Create.
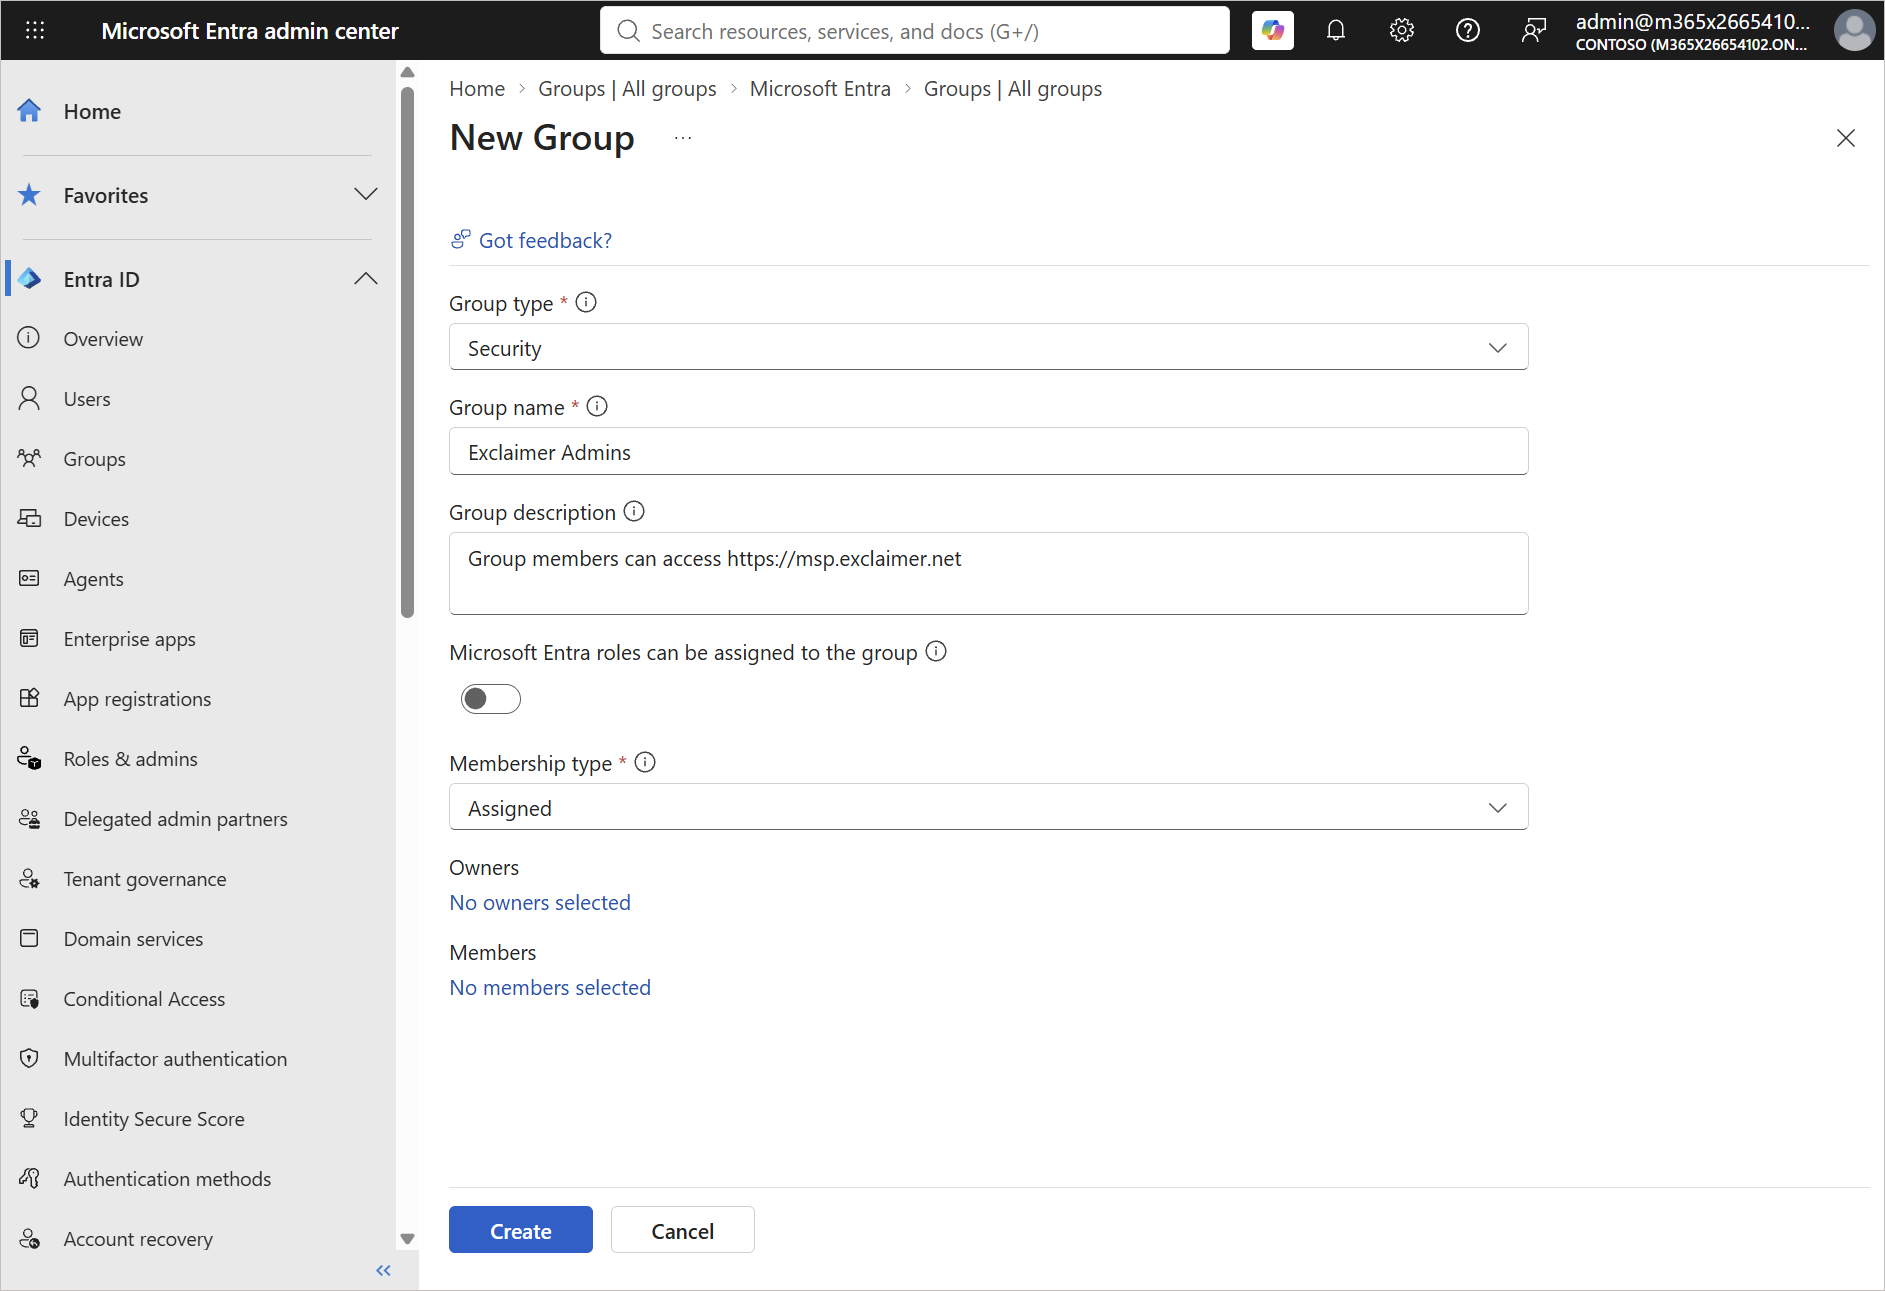
Entra admin center New group page showing Group type: Security and the group name.
To find the Object ID
- In the Microsoft Entra admin center, select Entra ID > Groups > All groups.
- Select your group.
-
On the Overview page, copy the Object ID.
The Object ID is a GUID in this format: xxxxxxxx-xxxx-xxxx-xxxx-xxxxxxxxxxxx
IMPORTANT! Do not use the group name or your Tenant ID.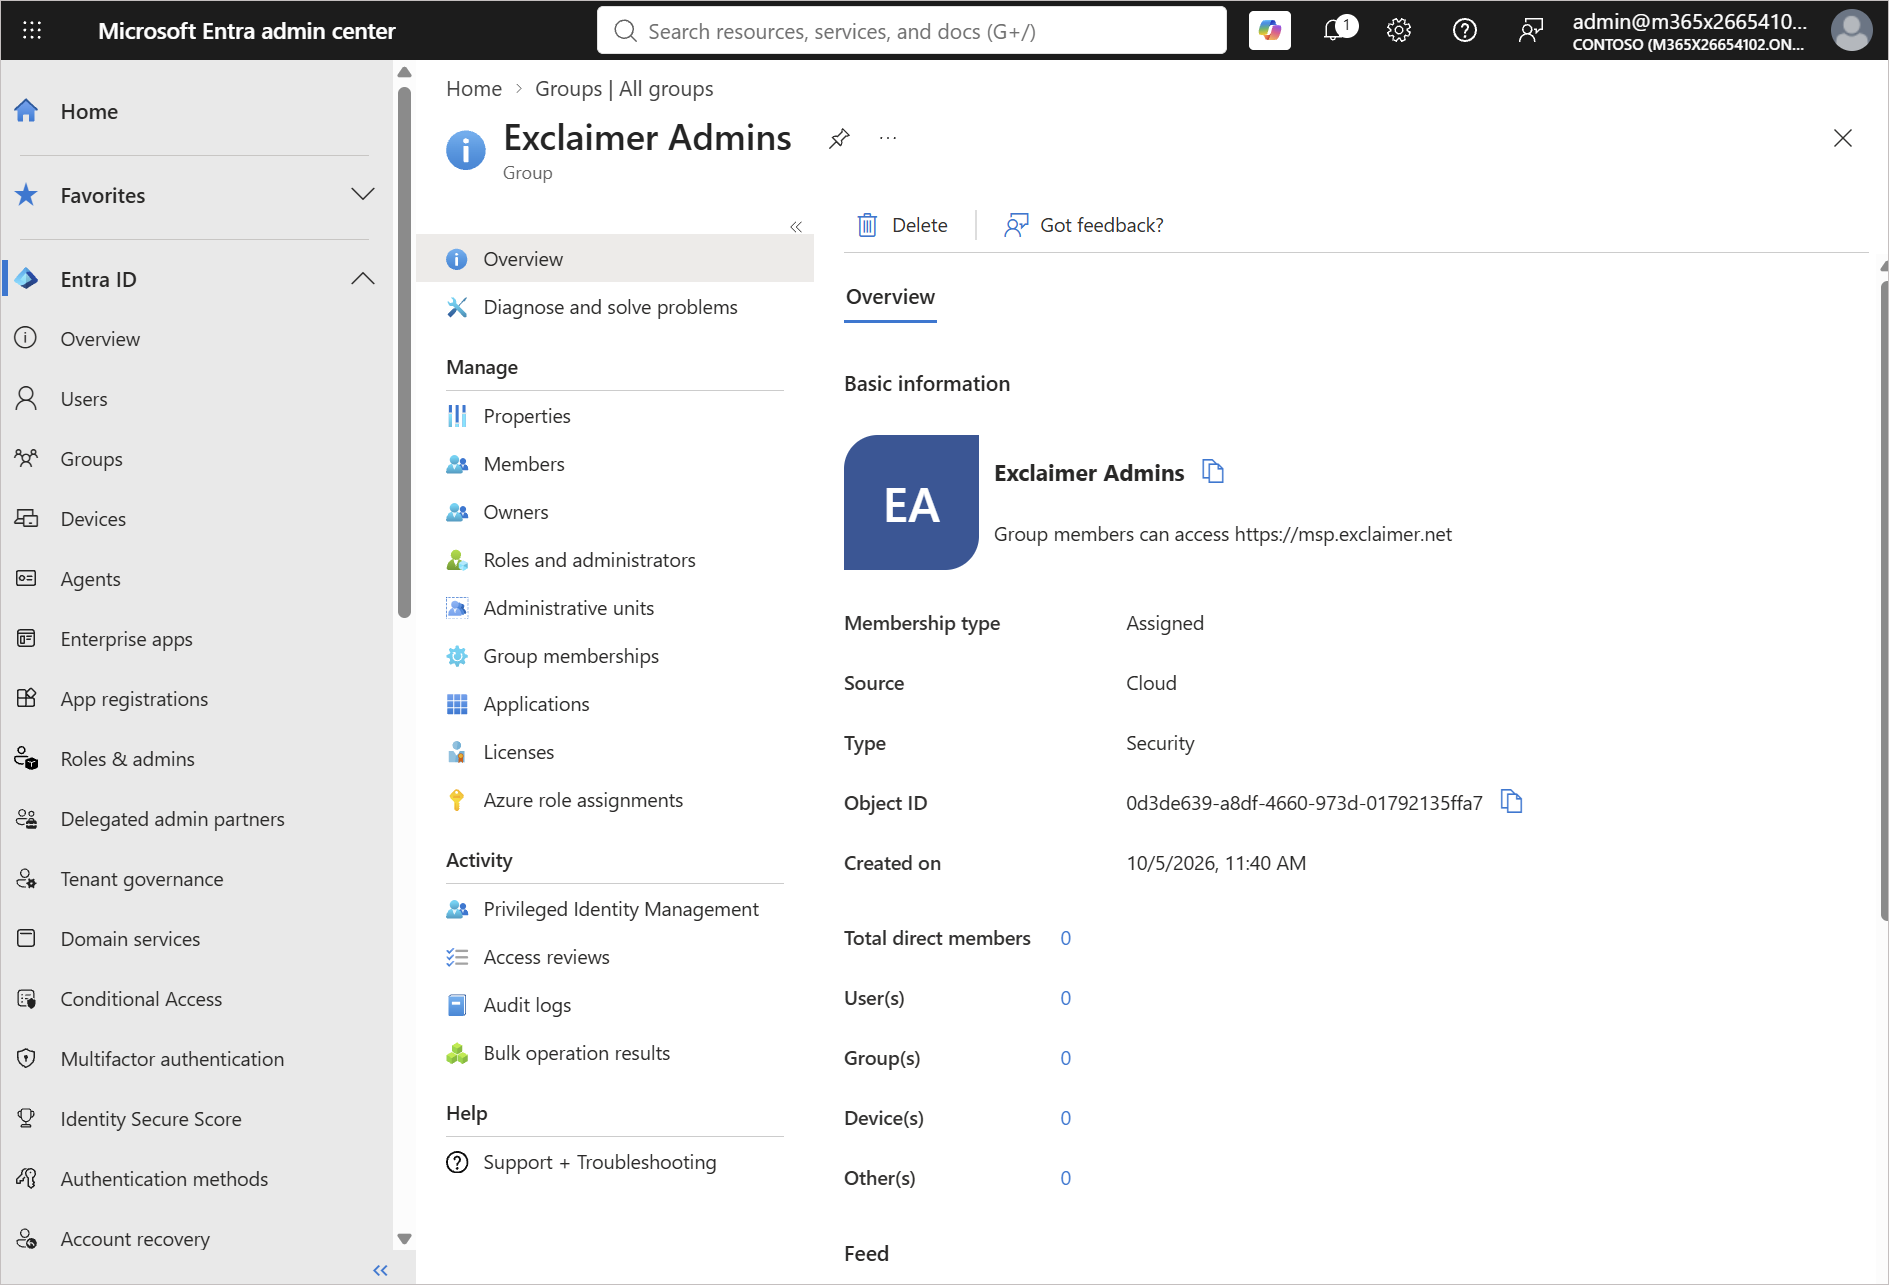
Entra admin center group Overview page with the Object ID highlighted.
To register your group:
- Go to msp.exclaimer.net.
- Sign in with exclaimer@msp-domain.com.
- At the bottom left of the Your Subscriptions page, select the cog icon. The Team sign-in via Entra ID group window opens.
- In Entra ID Security Group Object ID, paste the Object ID. Check group becomes available when the value is in a valid GUID format.
- Select Check group. Exclaimer looks up the group in your tenant and shows the group name, the group ID, the number of members, and a Guardrail check result.
- Check that the group name and member count are correct.
- Select Confirm and enable.
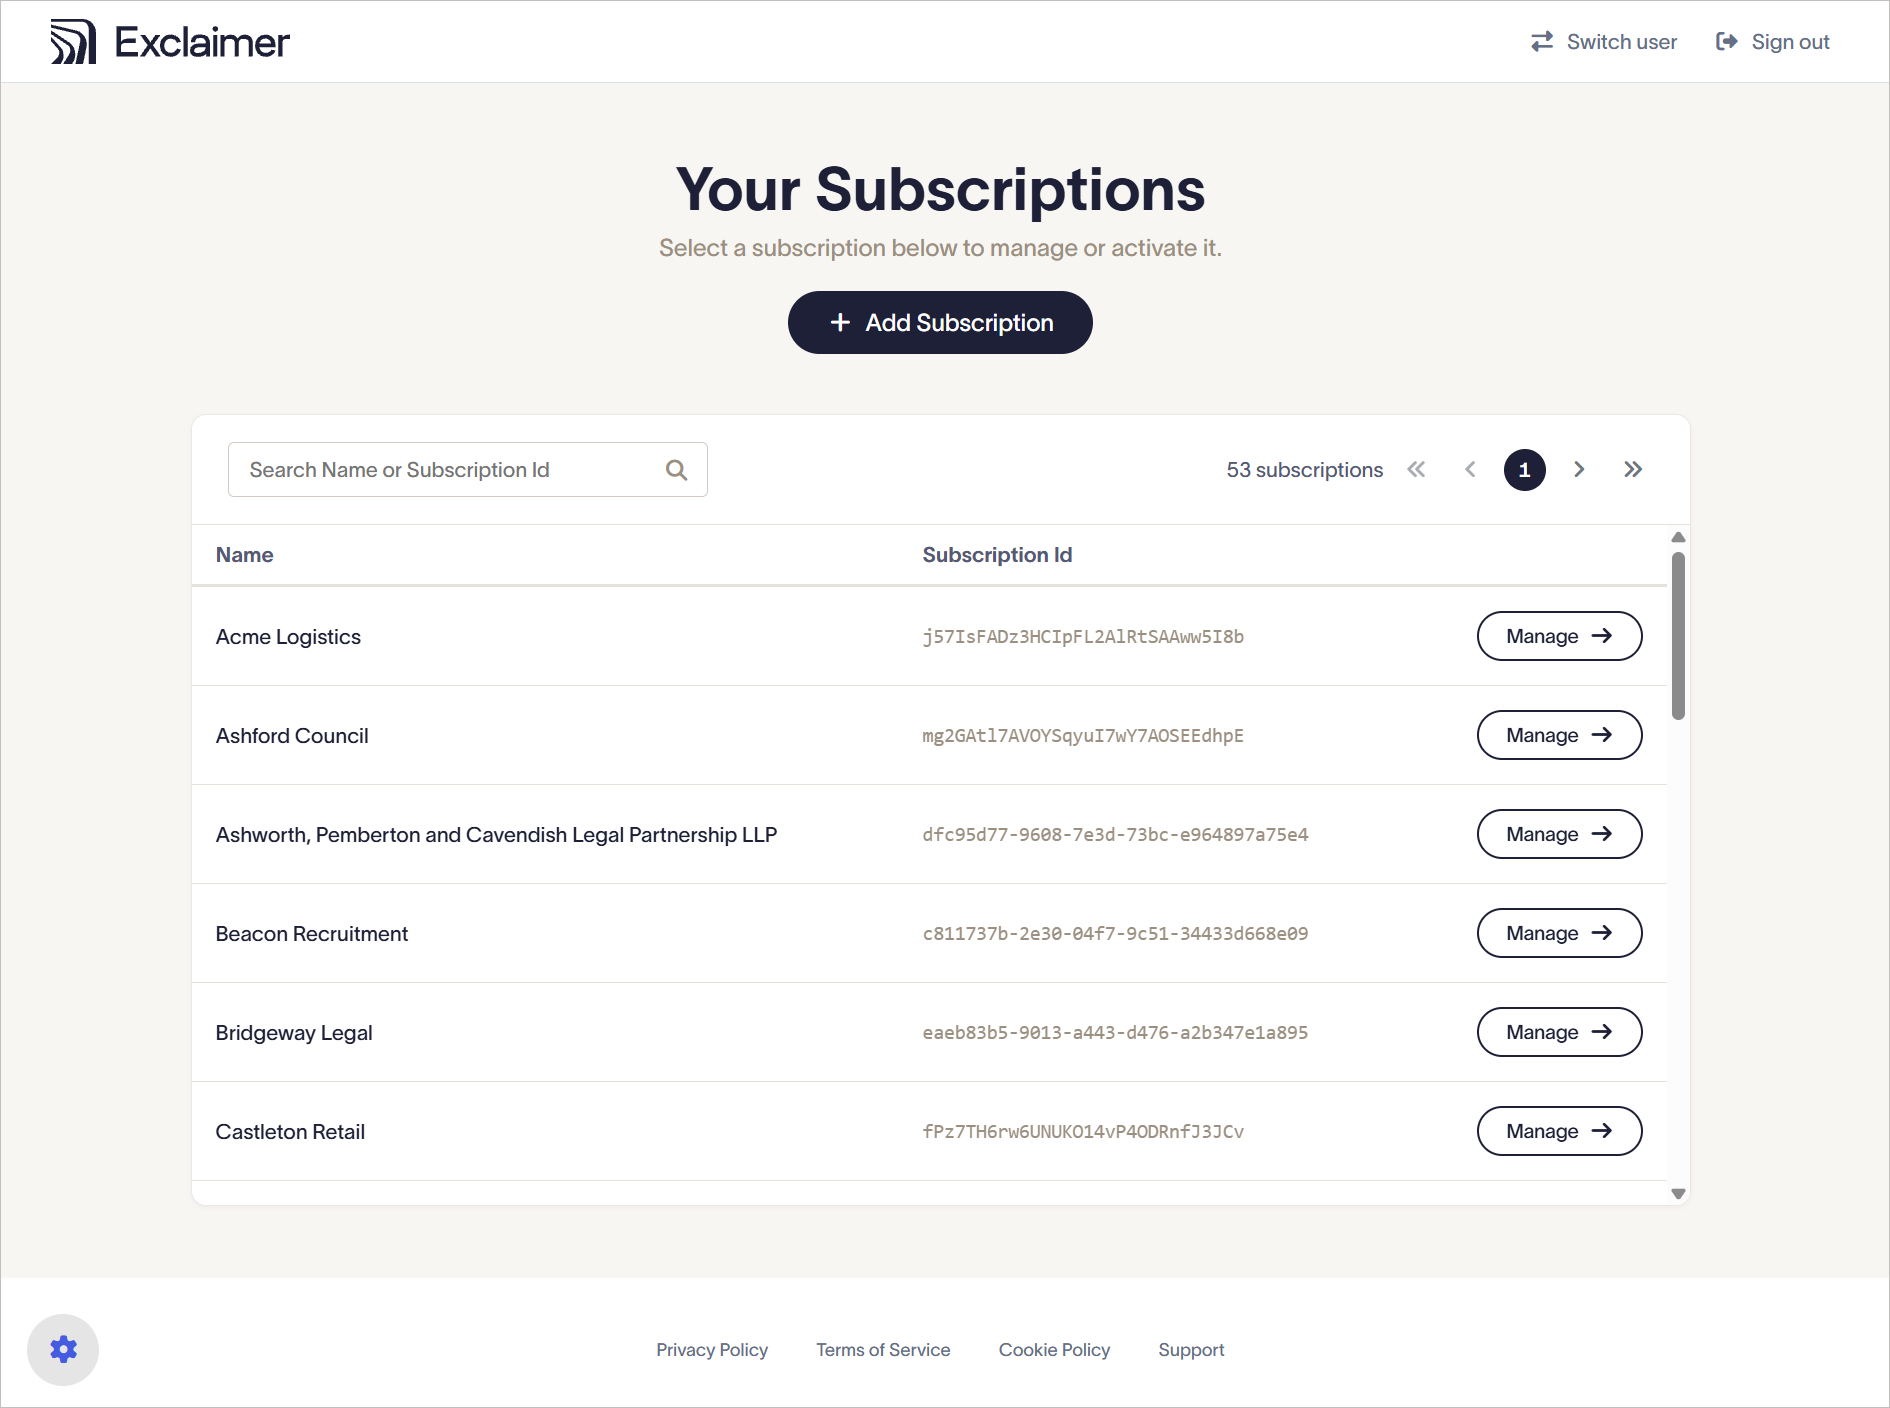
Your Subscriptions page signed in as exclaimer@msp-domain.com, with the cog icon in the bottom left footer circled.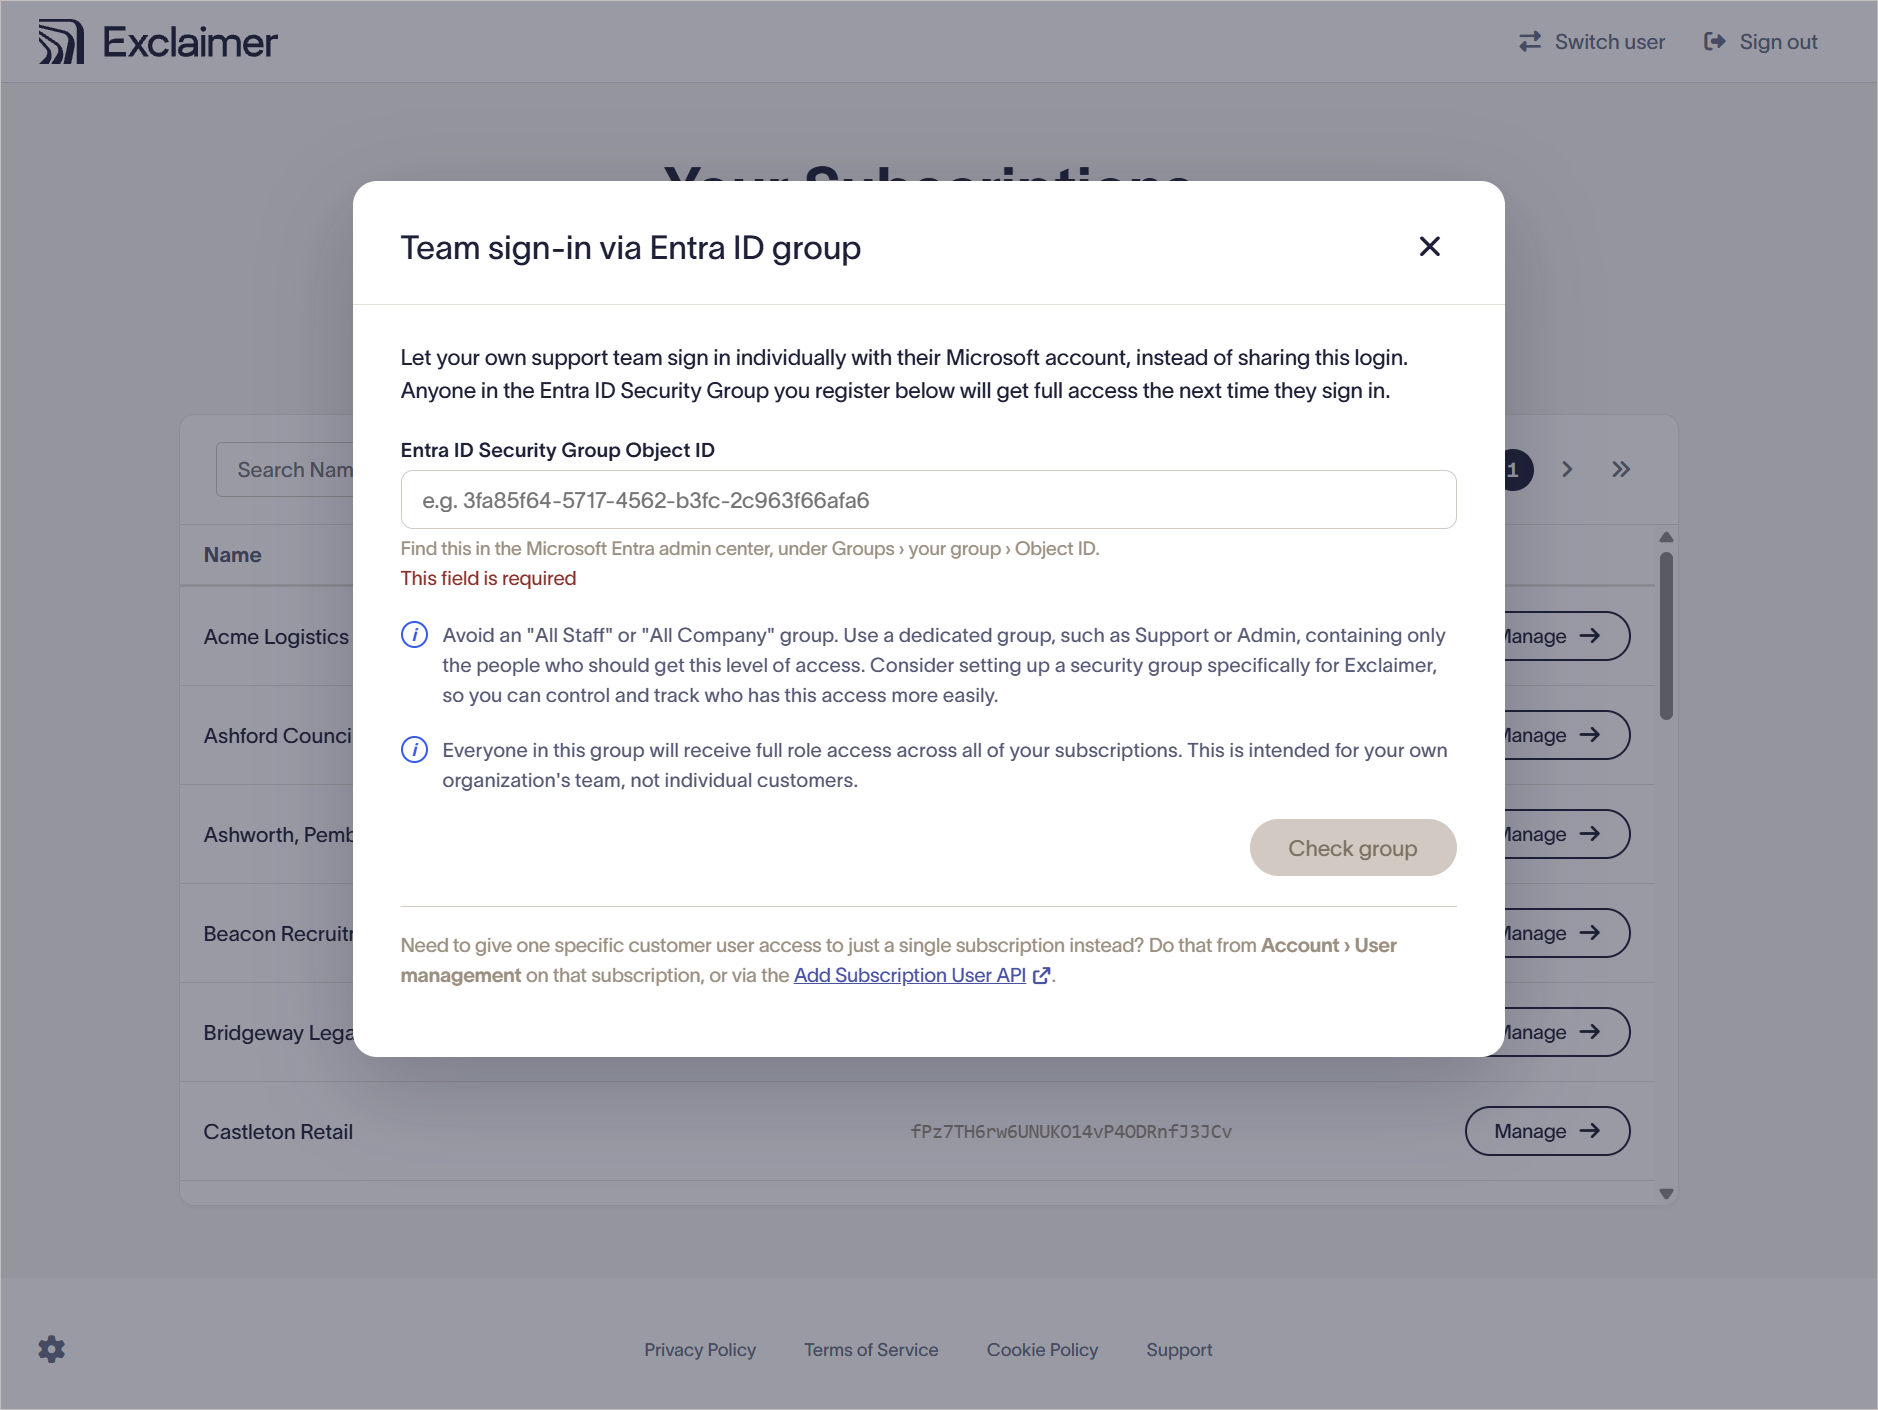
Team sign-in via Entra ID group window in its empty state.
The above shows the Team sign-in via Entra ID group window in its empty state: example GUID in the field, the two information notes, Check group greyed out, and the footer note pointing to Account > User management and the Add Subscription User API.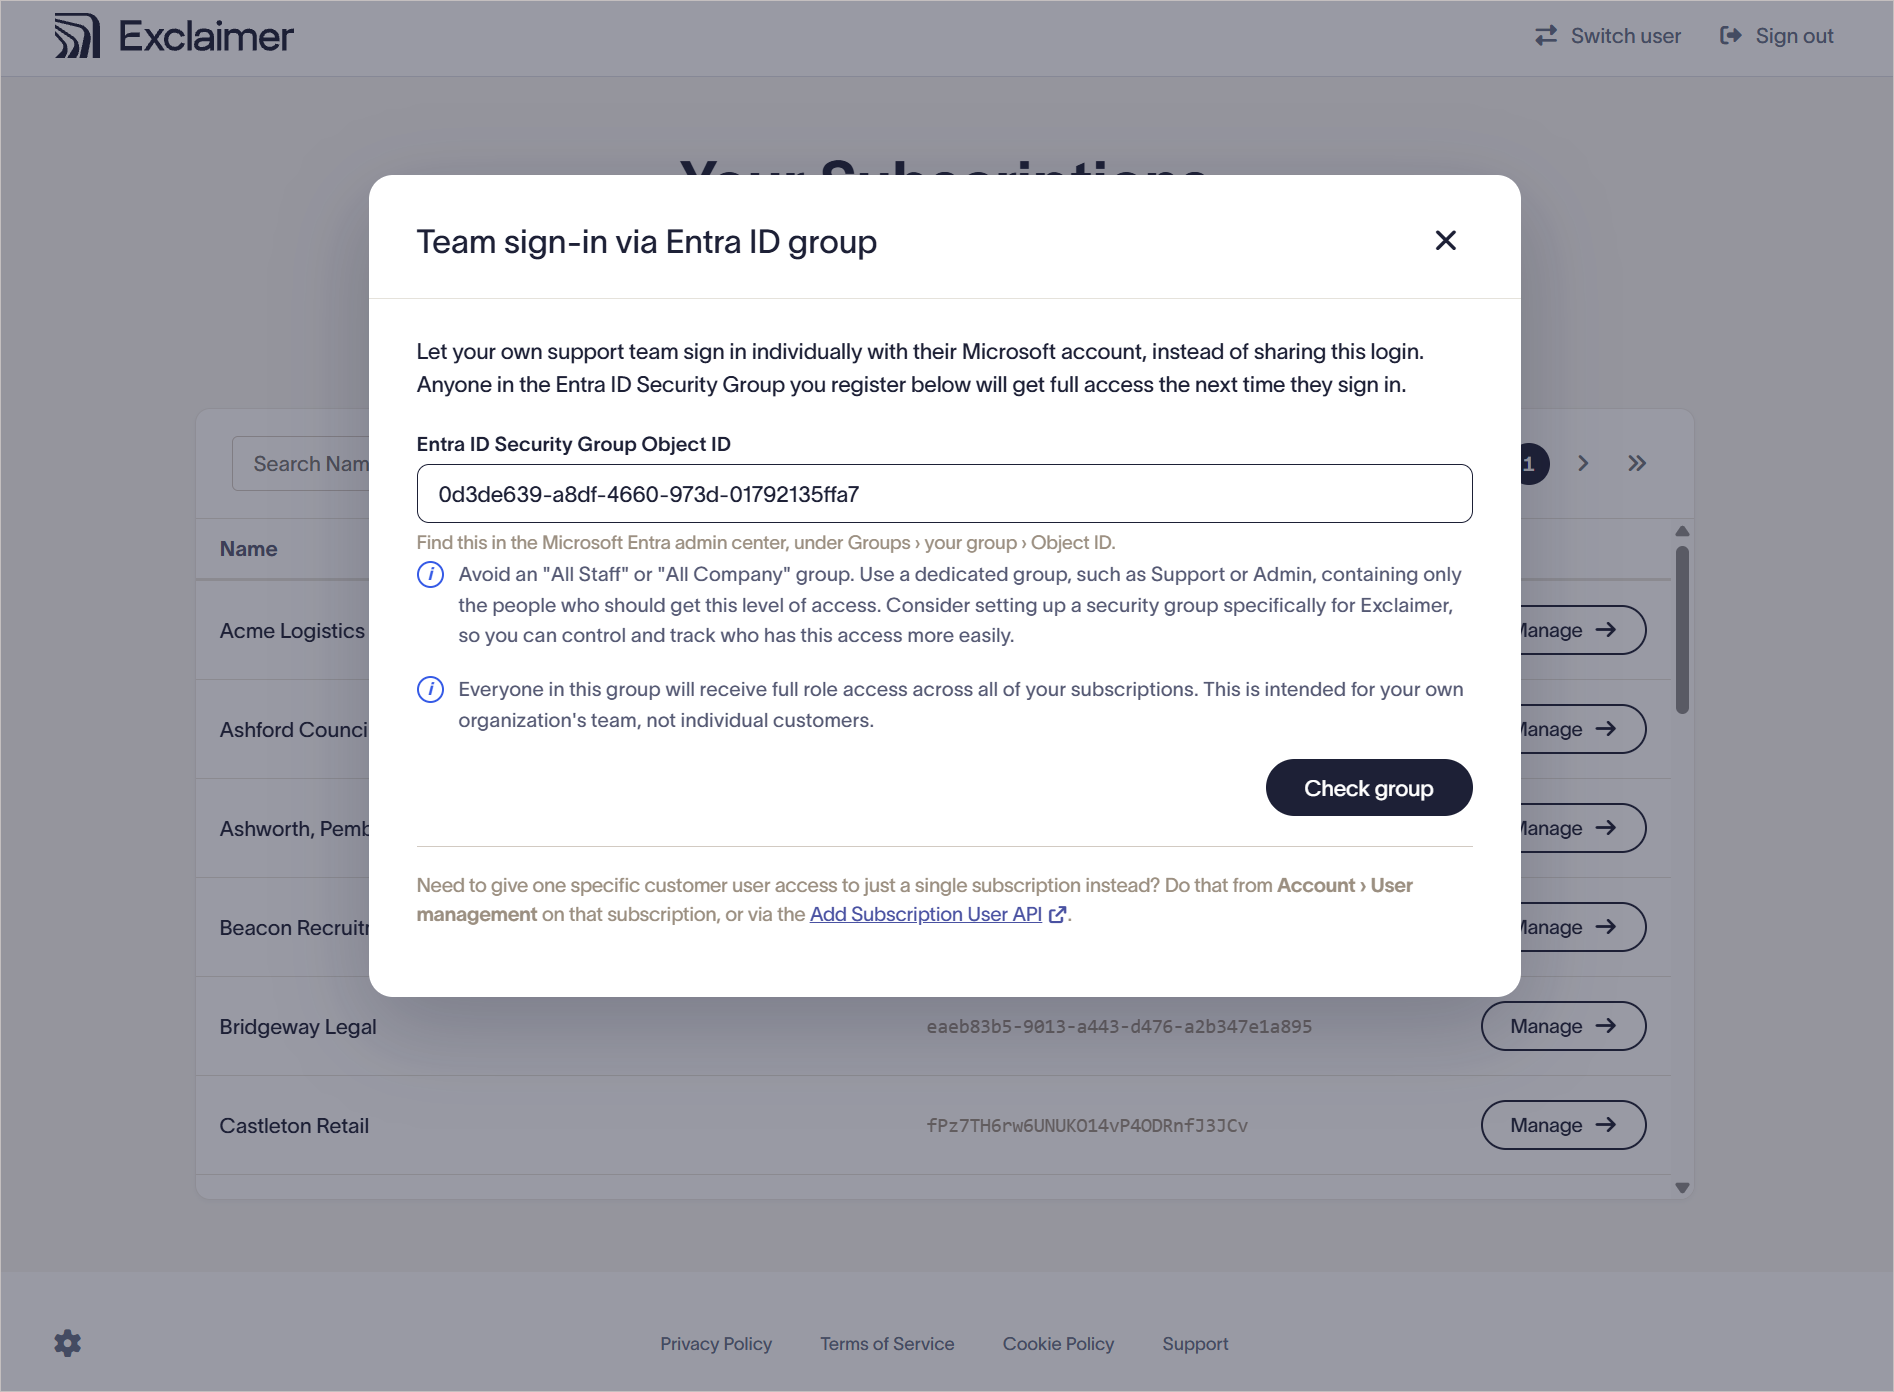
The Team sign-in via Entra ID group window with a valid GUID entered and Check group active.
Team sign-in is now on and group members can access the portal the next time they sign in.
The guardrail check helps you identify a potentially unsuitable group before you enable team sign-in.
| Result | When you see it | What to do |
| Looks reasonable (green) | The group has fewer than 20 members, and its name doesn't look like a company-wide group. | Select Confirm and enable. |
| Review recommended | The group has 20 or more members, or its name contains Everyone, All Staff, or All Users. | Check you have the right group. If you do, you can still select Confirm and enable. |
NOTE: The guardrail check provides a recommendation. It does not prevent you from registering a group.
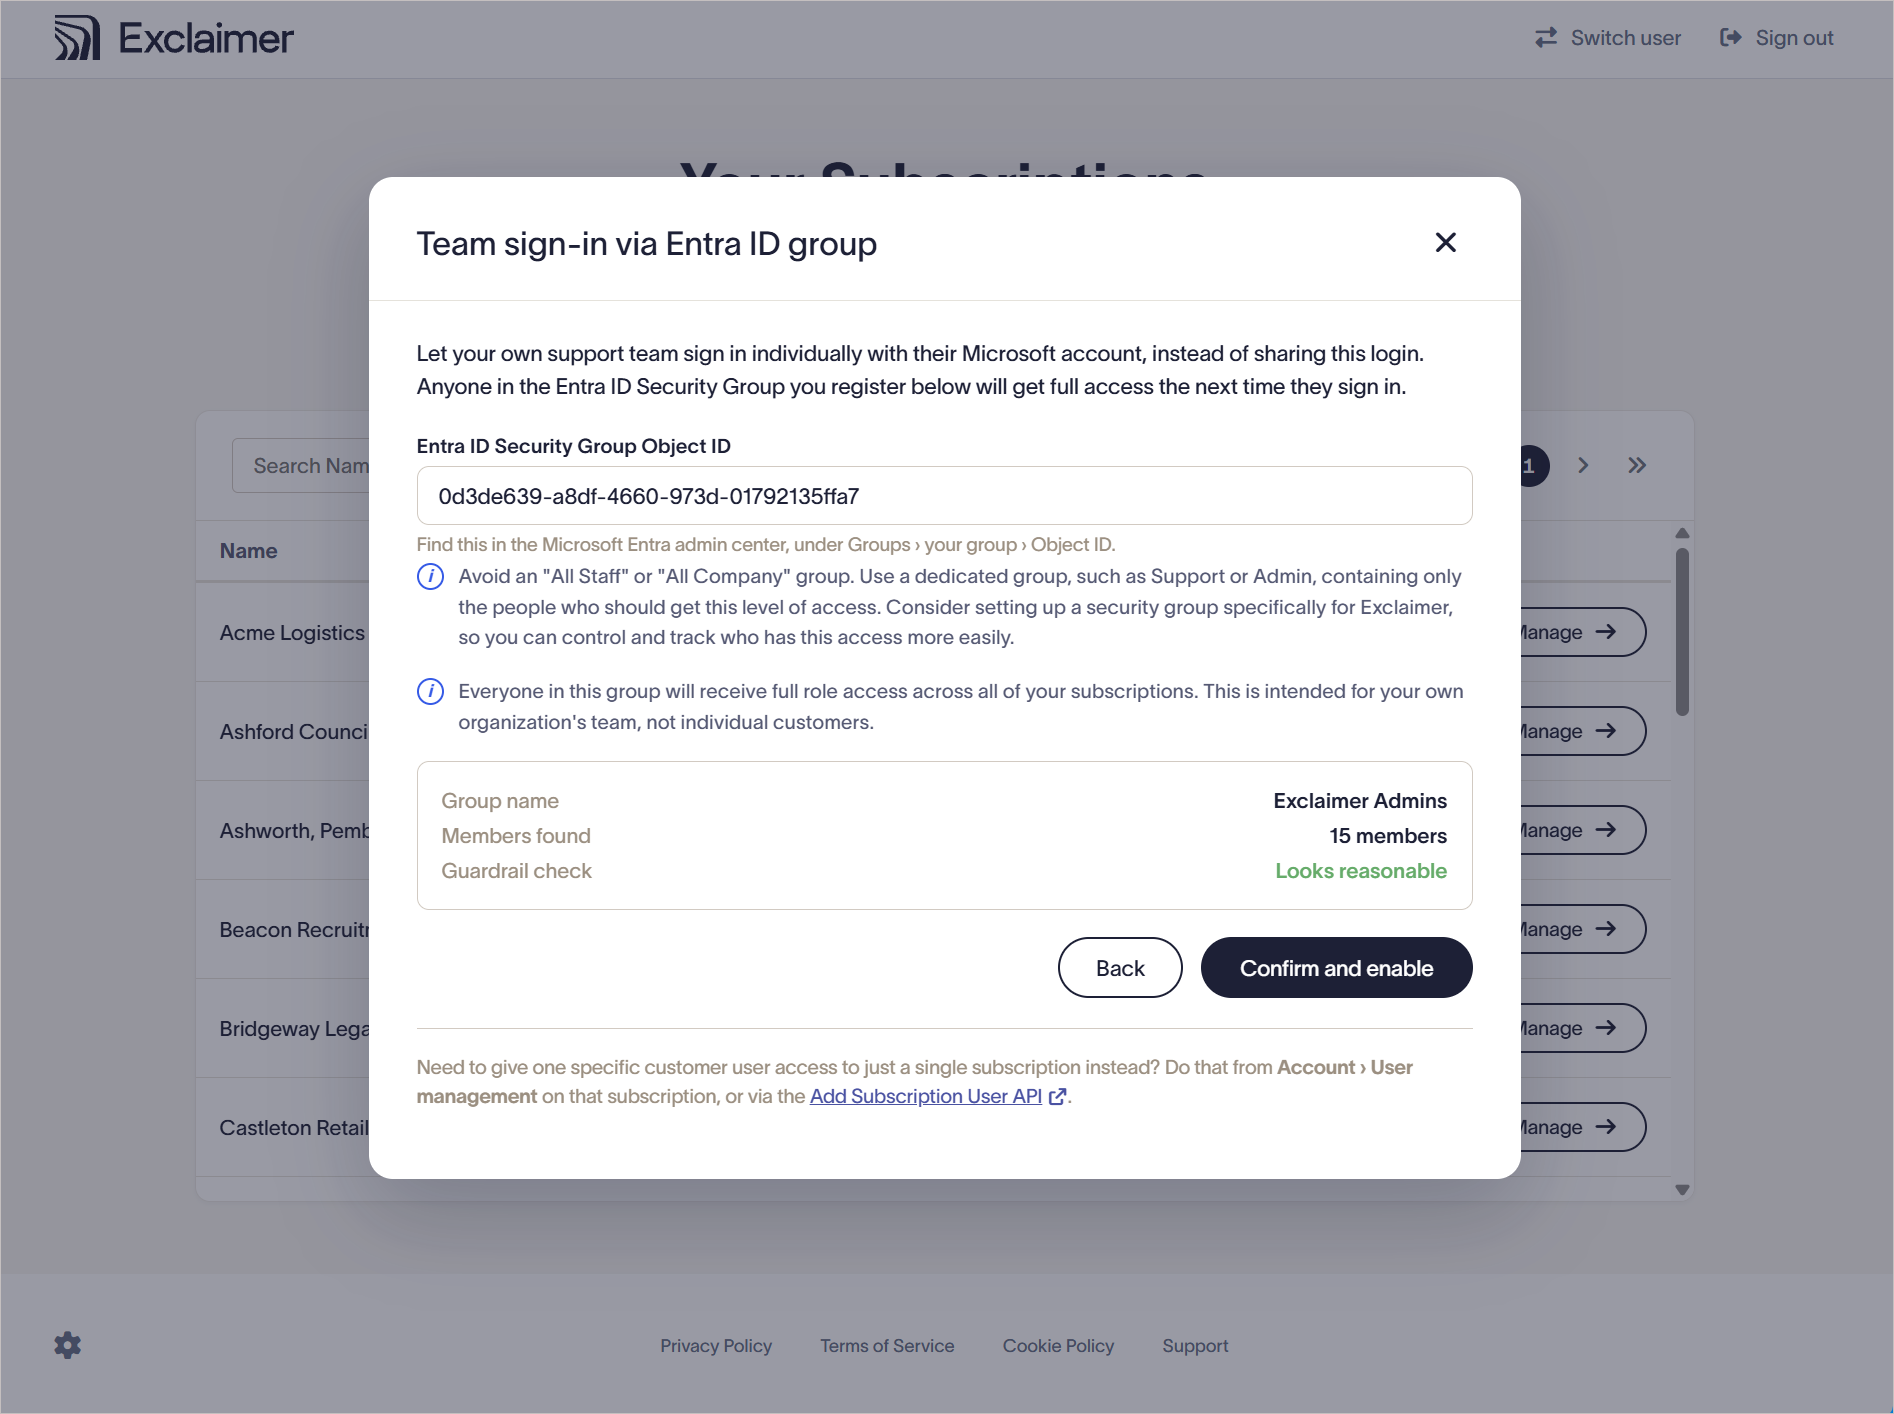
Check result for a small group: group name Exclaimer Admins, 15 members, Looks reasonable in green, Confirm and enable available
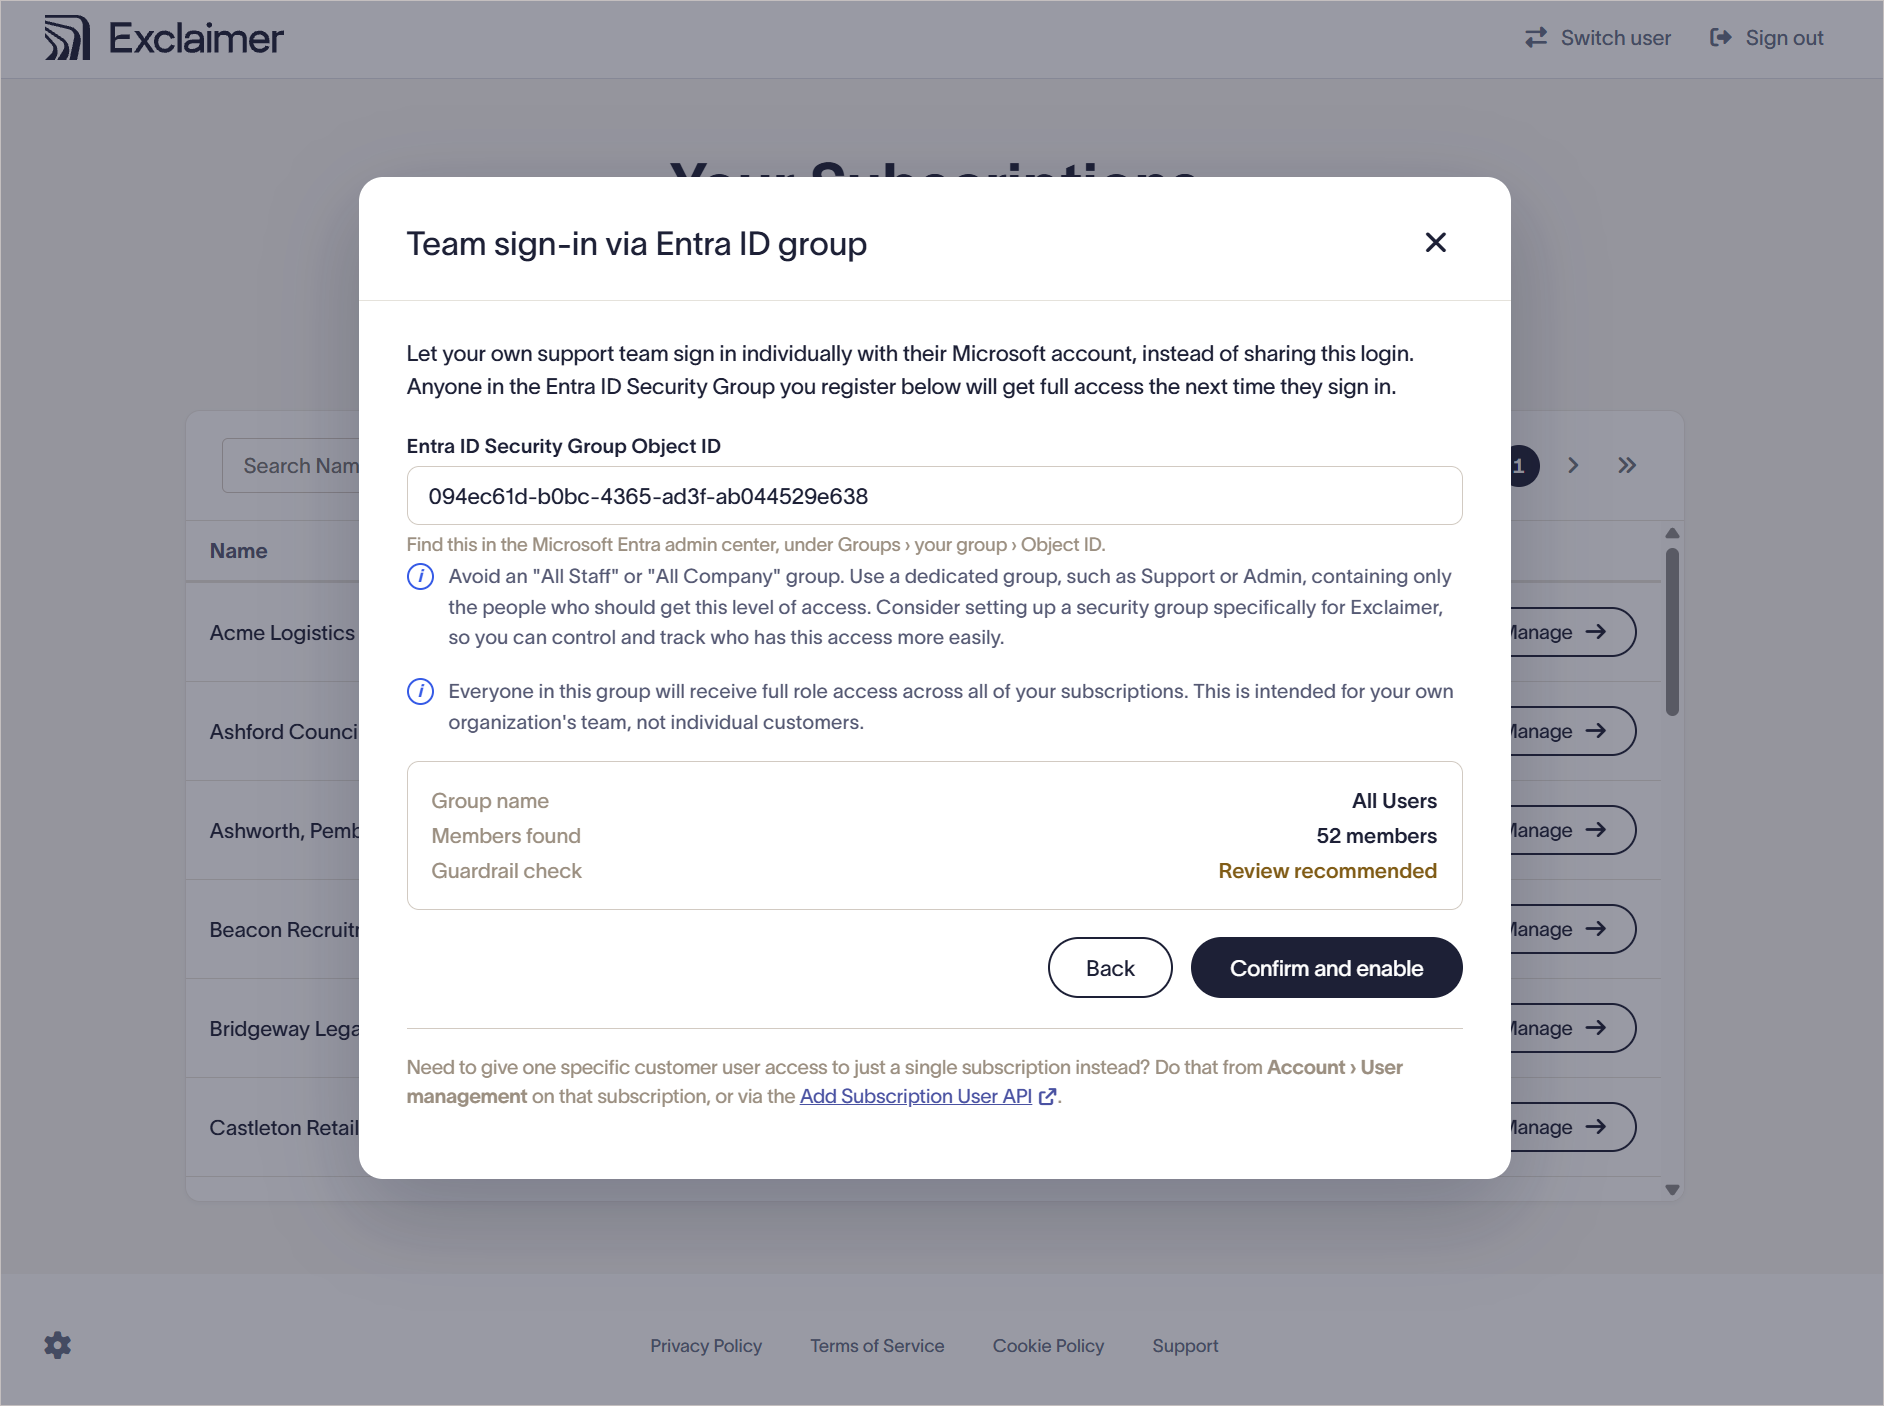
Check result for a large group: group name All Users, 52 members, Review recommended warning, Confirm and enable still available.
Manage team members directly in Entra ID.
Give someone access
Add the person to the registered group. They can sign in the next time they try.
Remove someone's access
Remove the person from the registered group.
They can finish their current session but cannot sign in again.
When someone leaves your organization, follow your standard offboarding process. Disabling their Microsoft 365 account prevents them from signing in.
You can register one group at a time.
- Sign in to msp.exclaimer.net with exclaimer@msp-domain.com.
- Select the cog icon.
- Replace the existing Object ID with the new group's Object ID.
- Select Check group.
- Review the result.
-
Select Confirm and enable. The new group replaces the old group.
Members of the old group who are not members of the new group can finish their current session but cannot sign in again.
- Sign in to msp.exclaimer.net with exclaimer@msp-domain.com.
- Select the cog icon.
-
Select Remove.
Exclaimer clears the Object ID, closes the window, and turns off team sign-in.
Team members can no longer sign in. The exclaimer@msp-domain.com account is not affected.
You can register a group again at any time.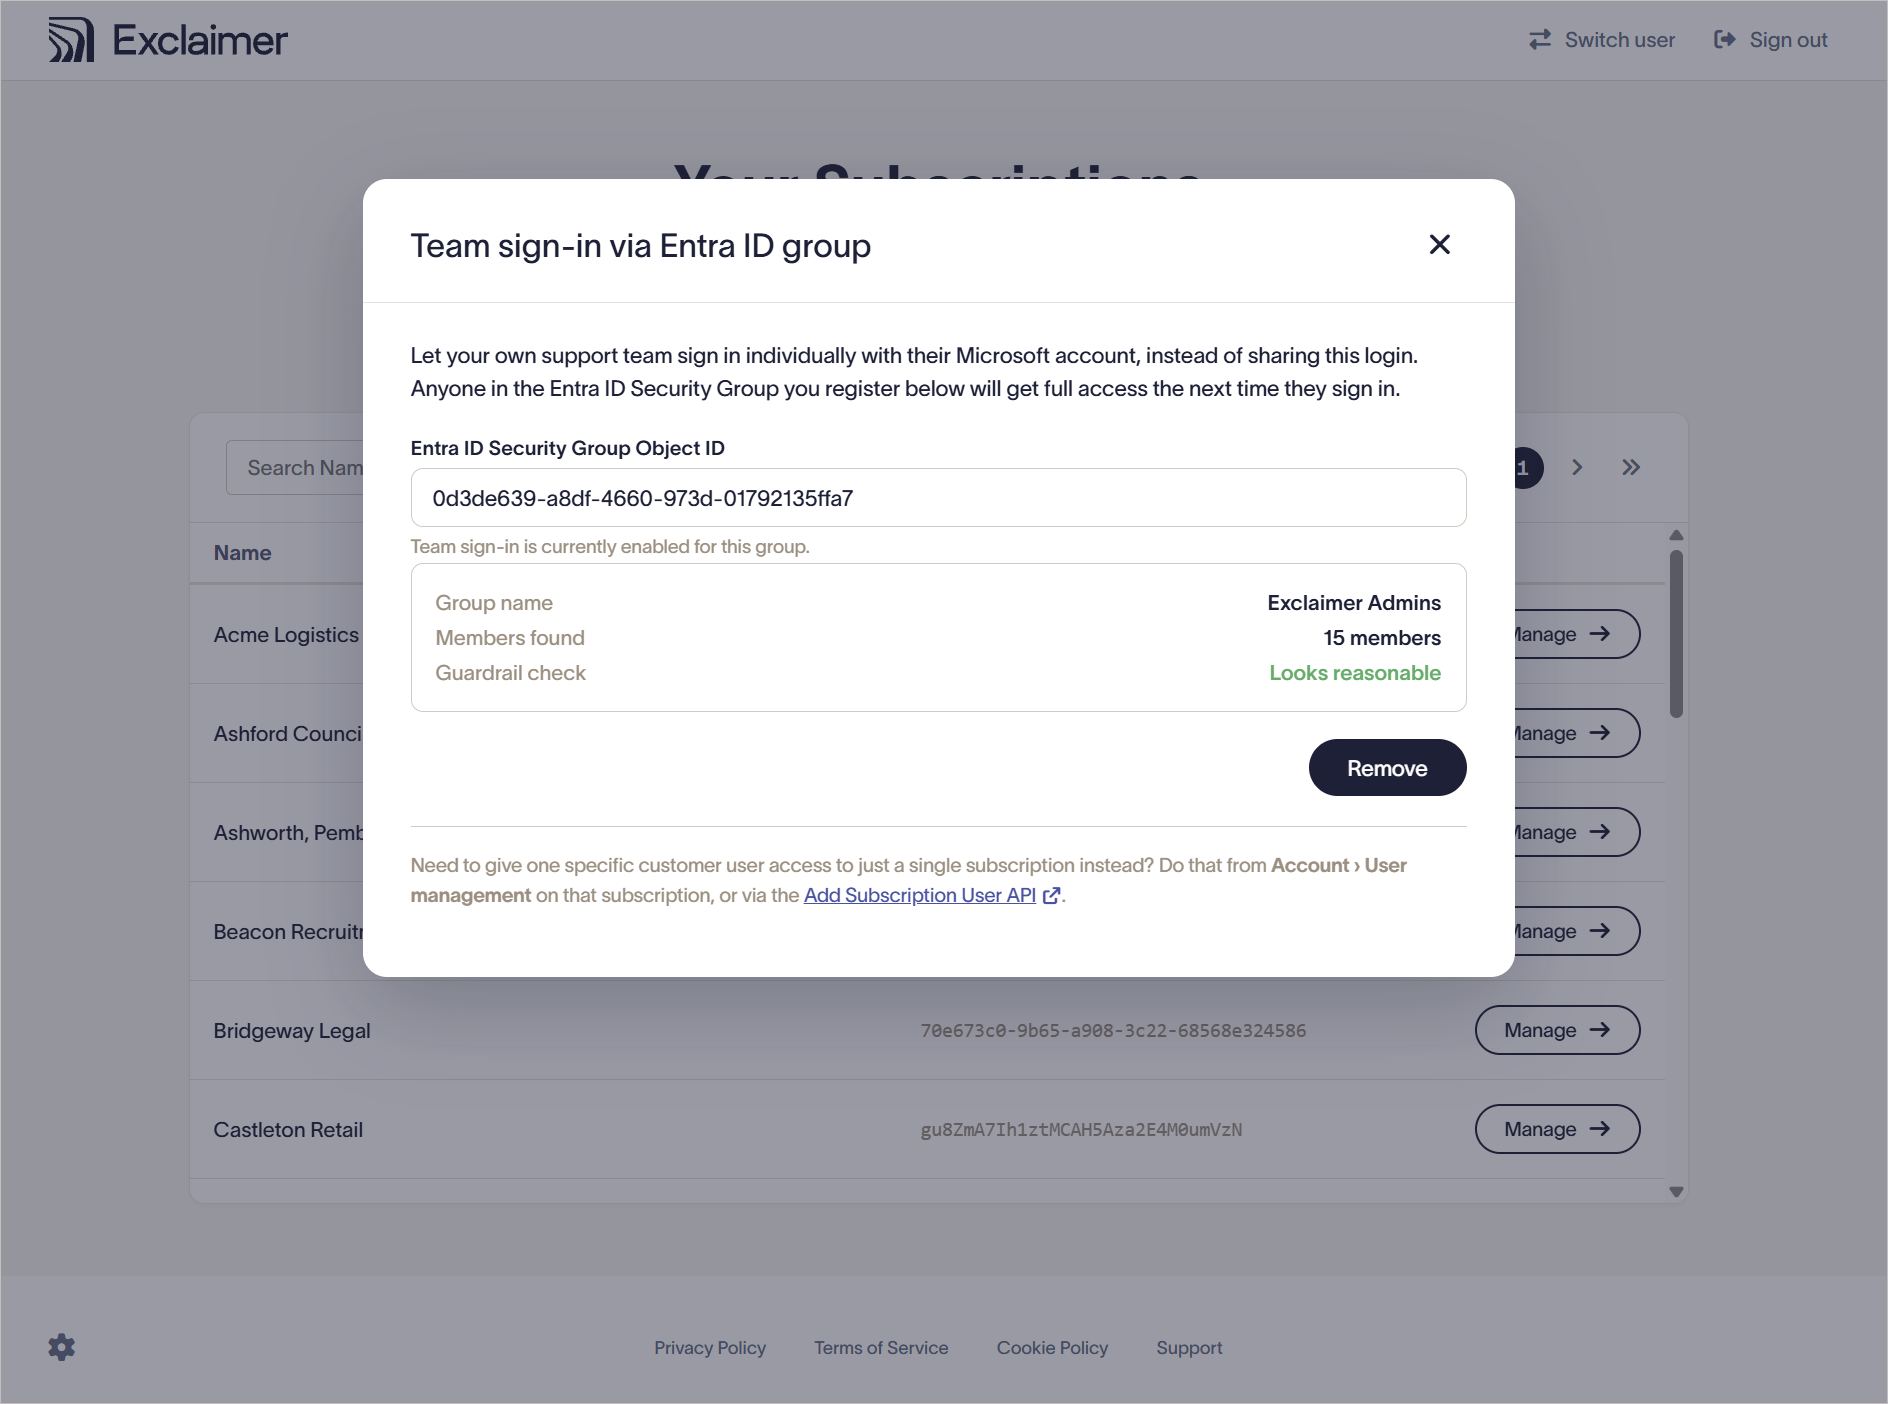
Team sign-in window showing the saved Object ID and Remove button.
Team sign-in needs one extra Microsoft Graph permission on top of those listed in Dedicated Microsoft account requirements for the Exclaimer MSP Connect Portal: GroupMember.Read.All (delegated).
This is Microsoft's least-privileged permission for reading group membership.
A tenant administrator grants consent once when you first set up the account. Exclaimer uses this permission to:
- Read the group's name and member count when you register the group.
- Check whether someone belongs to the registered group when they sign in.
Exclaimer cannot change anything in your tenant. It cannot read mailboxes, calendars, files, or Teams data. The exclaimer@msp-domain.com account does not need an admin role.
| Problem | Likely cause | What to do |
| I can't see the cog icon | You're signed in with a team member account. | Sign in with exclaimer@msp-domain.com. Only that account can configure team sign-in. |
| Check group is greyed out | The value isn't a valid Object ID. | Copy the Object ID from the group's Overview page in Entra. Don't use the group name or your Tenant ID. |
| A team member gets access denied |
They aren't in the registered group, or they signed in with an account from outside your tenant. | Check their membership in Entra. Ask them to sign in with their own work account. |
| A team member's roles aren't what you expected | Group membership sets roles. Roles on an existing account are ignored. | To limit one person to fewer roles, leave them out of the group and grant access through Account > User management or the Add Subscription User API. |