
Description
This integration will be available for Pro Plan users only. For more information on pricing plans, see Exclaimer Pricing Plans
You can use Workday Reports as a Service (RaaS) to integrate Workday with Exclaimer through Bindbee.
RaaS publishes a custom Workday report as a secure web service. Bindbee connects to the report, maps the fields, and syncs the data to Exclaimer.
Exclaimer uses Bindbee as the integration platform for the Workday RaaS connection. During setup, you may see Bindbee URLs, authentication prompts, or connection windows.
This integration is available for Exclaimer subscriptions using Microsoft 365 and Google Workspace.
Set up Workday RaaS for Exclaimer integration (Workday RaaS)
Follow the steps below to set up Workday RaaS before connecting it to Exclaimer:
Before you start, ensure you have:
• Permission to create custom reports in Workday.
• Permission to create Integration System Users (ISU).
• Permission to create and manage Security Groups.
• Access to configure domain security policies.
• Access to the Exclaimer subscription.
To create an Integration System User in Workday:
-
Navigate to Workday.
NOTE: You must have Admin access to Workday. Workday URLs vary by organization, so use your company’s specific login link. If you do not have access or are unsure how to proceed, contact your Workday Administrator. -
In the search bar, enter Create integration system user.
The Create Integration System User window is displayed.
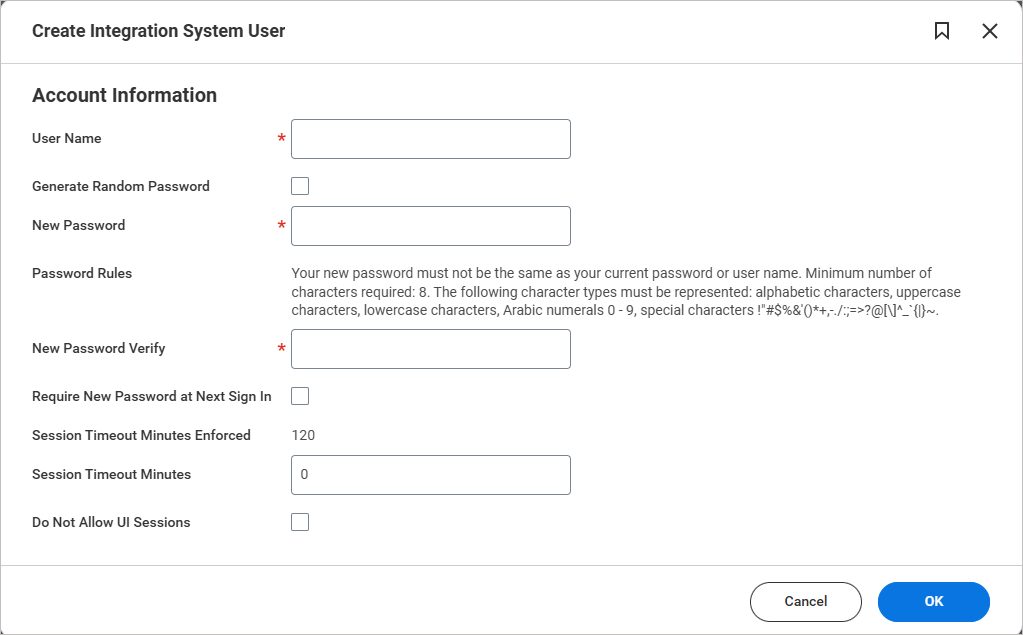
The Create Integration System User window.
- In User Name, enter a unique user name.
-
In Password, enter a password.
NOTE:
Your new password cannot be the same as your current password or your username.
• It must contain at least 8 characters.
• The password must include a mix of the following character types:
• Alphabetic characters (letters)
• Uppercase letters (A–Z)
• Lowercase letters (a–z)
• Numbers (0–9)
• Special characters such as: !"#$%&'()*+,-./:;=>?@[\]^_{|}~` -
Leave all other fields blank.
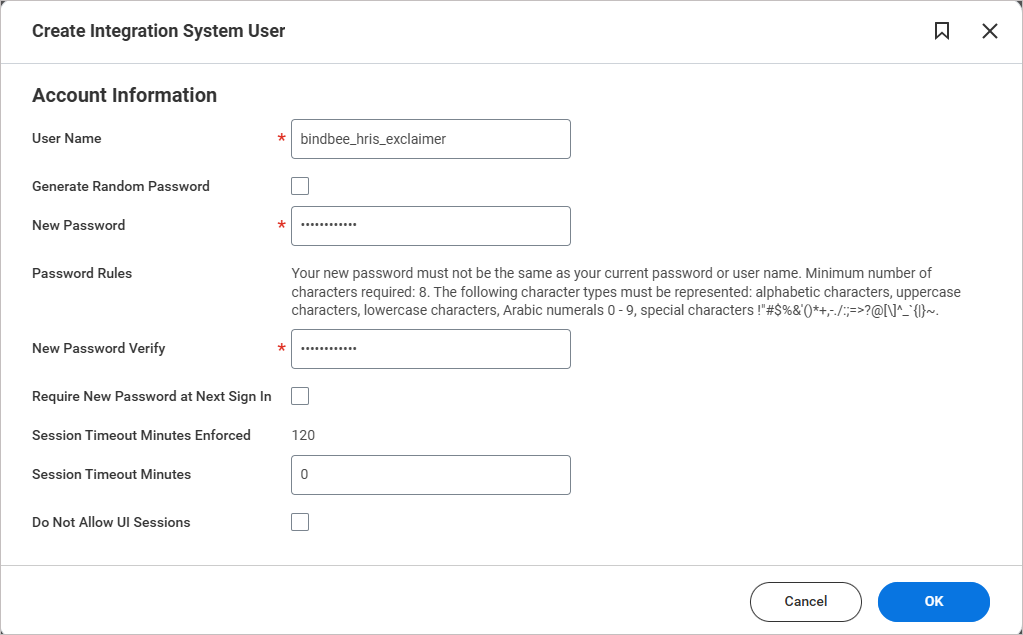
Example image of the Create Integration System User window. Enter the user name and password. Leave all other fields blank.
- Select OK.
-
Review the new system user. Select Done.
TIP! Record these credentials securely. They will be required for the integration.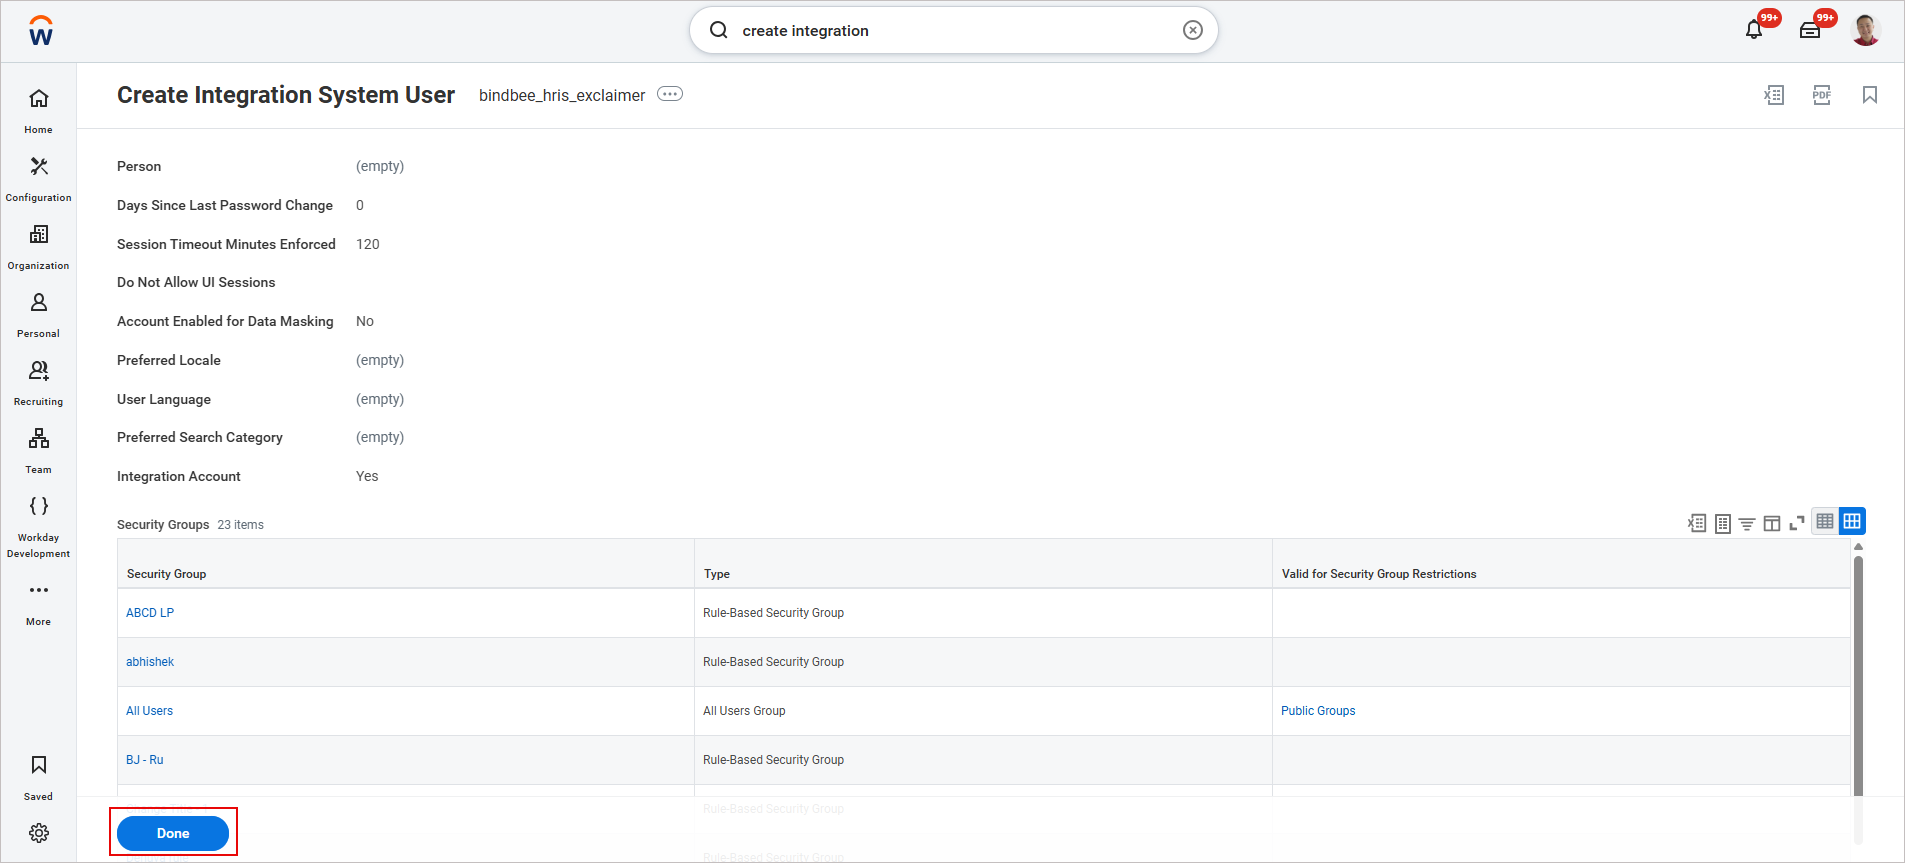
Example image of the Create Integration System User window. Review the new system user you created, then select Done.
Accounts used by system users and integrations are typically configured with non-expiring passwords and should be limited to security administrators.
To prevent the password from expiring:
- In the search bar, enter Maintain Password Rules.
The Maintain Password Rules window is displayed.
-
In System Users exempt from password expiration, add the Integration System User (ISU) you created.
To add the Integration System User you created earlier:
- Select the note menu icon.
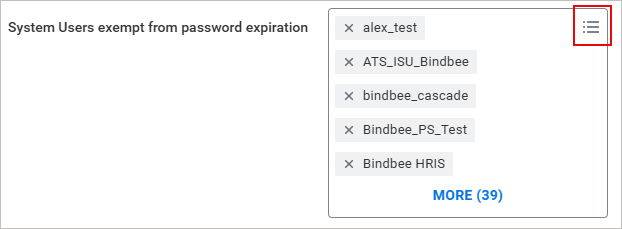
To add an Integration System User, select the three horizontal lines.
-
The Search text entry field is displayed. Enter the name of the new system user and press [Enter].
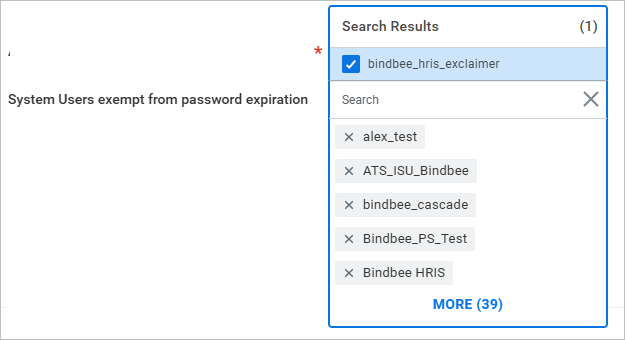
In the search entry field, enter the name of the new system user.
The added user will now appear in the list.
- Select the note menu icon.
- Select OK, then select Done.
To create a security group to manage the permissions required for the integration:
- In the search bar, enter Create Security Group.
The Create Security Group window is displayed.
- From the Type of Tenanted Security Group drop-down, select Integration System Security Group (Unconstrained).
-
In Name, enter a name for the new security group.
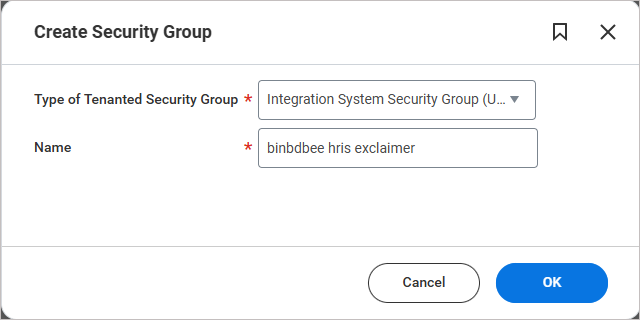
Example image of the Create Security Group window.
TIP! You can use any name, but for consistency, it is recommended to match the Integration System User name. - Select OK.
The Edit Integration System Security Group (Unconstrained) window is displayed.
- In Integration System Users, add the new Integration System User you created earlier.
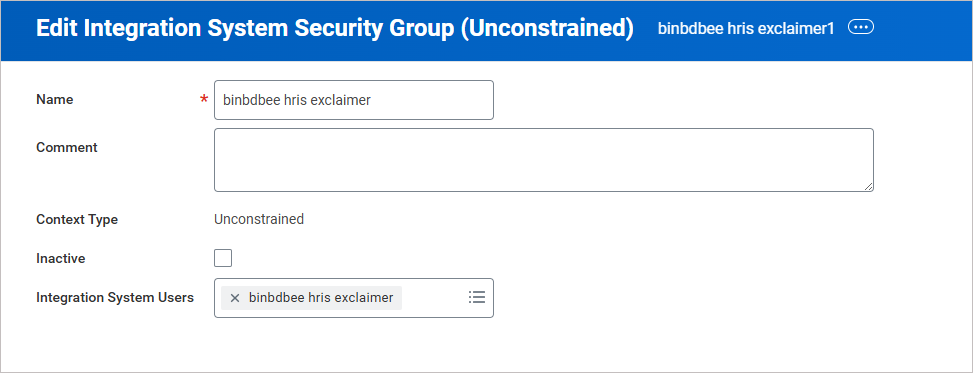
Example image of the Edit Integration System Security Group (Unconstrained) window.
- Select OK, then select Done.
To apply and activate the pending security policy changes:
- In the search bar, enter Activate Pending Security Policy Changes.
The Activate Pending Security Policy Changes window is displayed.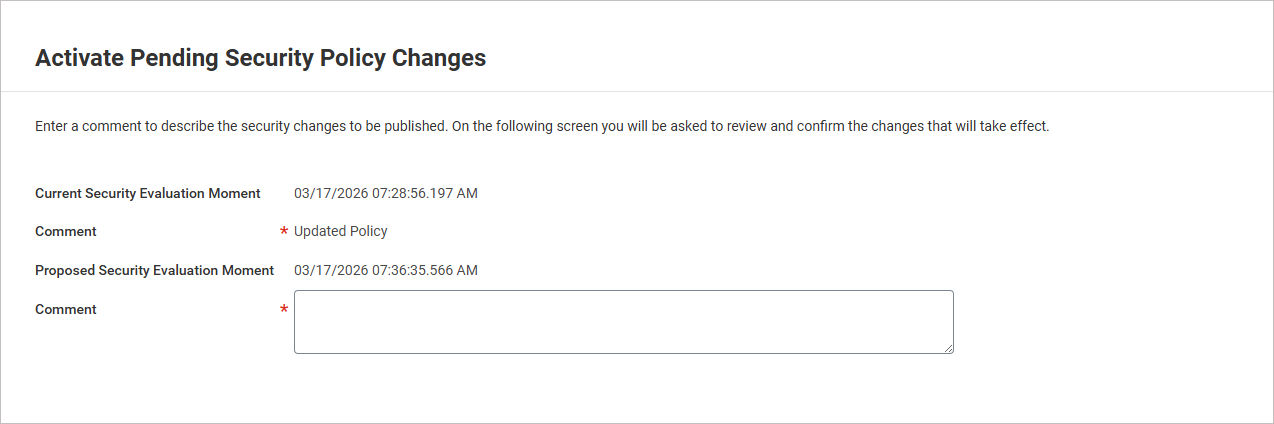
Example image of the Activate Pending Security Policy Changes window.
- In Comment, enter a comment describing the changes.
For example: "Exclaimer integration: updated security policy"
- Select OK.
- Select the Confirm checkbox to confirm all security policy changes.

Example image showing the Confirm check box option.
- Select OK.
To create a custom Workday report and enable it as a web service:
- In the search bar, enter Create Custom Report.
The Create Custom Report window is displayed.
- In Report Name, enter a name for the custom report.
- Expand the Report Type drop-down and select Advanced.
-
Check the Enable As Web Service option.
IMPORTANT! Make sure this option is enabled. Exclaimer cannot access the report if this option is disabled. - Uncheck the Optimized for Performance option.
- In Data Source, enter All Workers and press [Enter].
-
Select OK.
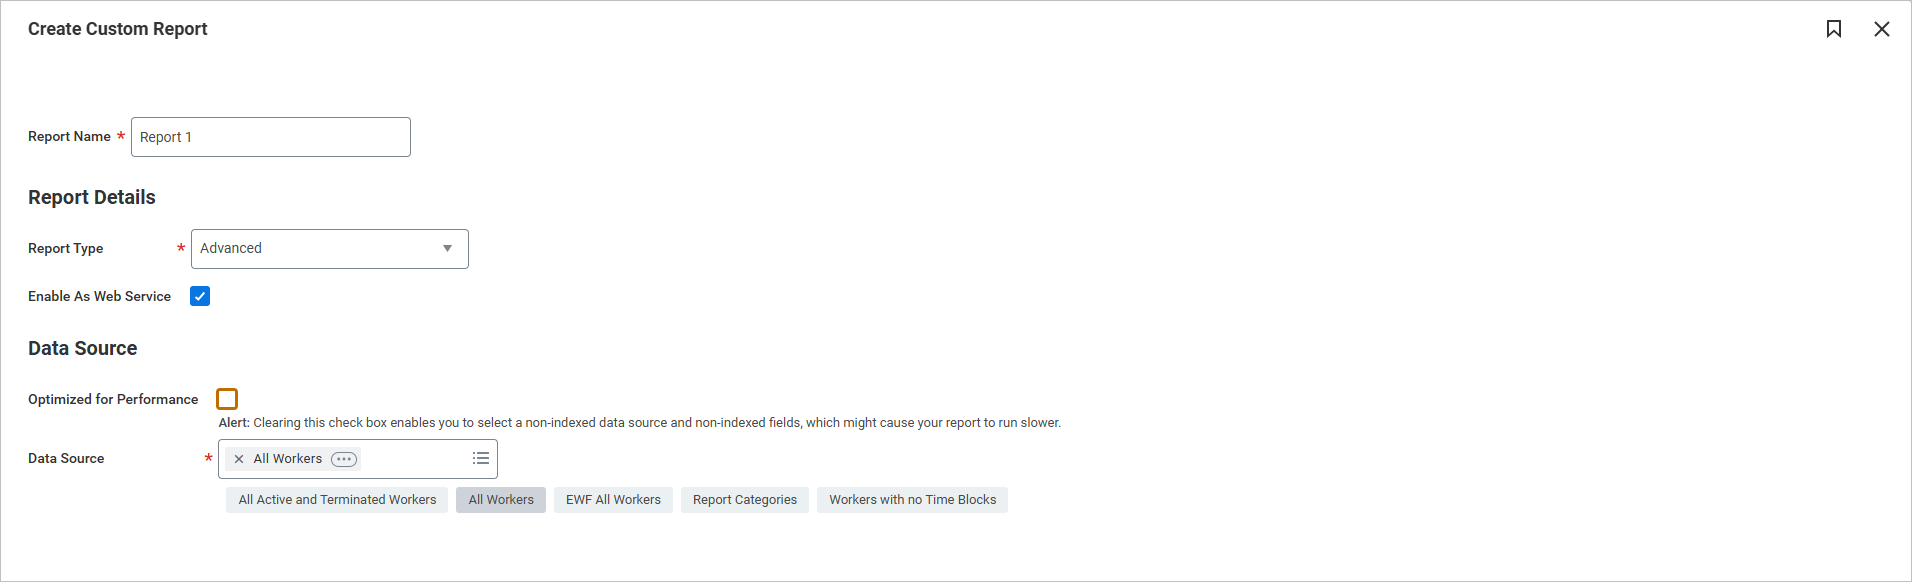
Example image of Create Custom Report. - Make sure that in the Primary Business Object, the option Worker is selected.
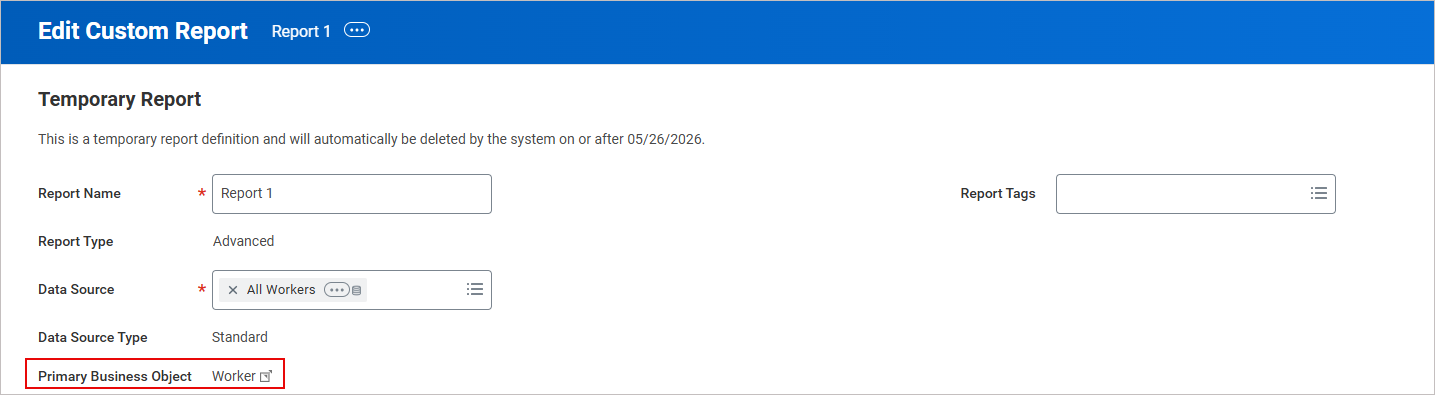
Example image showing that the Worker option is selected in the Primary Business Object.
- In the Additional Info section, select the Columns tab.
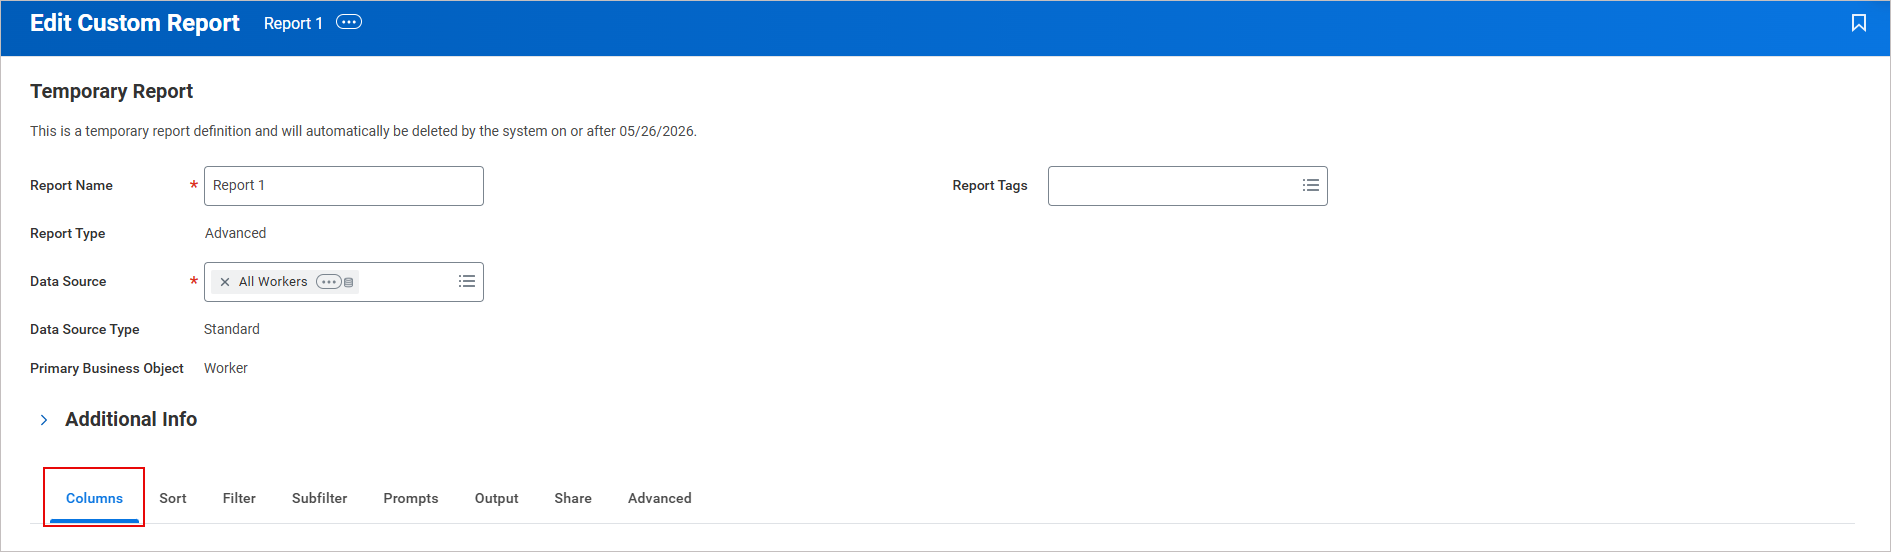
Example image showing the Columns tab selected.
-
Add the following fields to map to the Exclaimer fields:
TIP! Copy and paste the Field names directly to search for and add them. Once you paste the entry, press [Enter]. Select the required entry.Add a new row for each field.
Business Object
Field
Column Heading Override XML Alias
Worker
Company - Name
Company_-_Name
Worker
Job Title
Job_Title
Worker
Supervisory Organization
Supervisory_Organization
Worker
Supervisory Organization - ID
Supervisory_Organization_-_ID
Worker
Workday ID
workdayID
Worker
Legal Full Name
Legal_Full_Name
Worker
Employee ID
Employee_ID
Worker
Worker Status
Worker_Status
Worker
Legal Name - First Name
Legal_Name_-_First_Name
Worker
Legal Name - Middle Name
Legal_Name_-_Middle_Name
Worker
Legal Name - Last Name
Legal_Name_-_Last_Name
Worker
User Name
User_Name
Worker
Primary Work Mobile Phone
Primary_Work_Mobile_Phone
Worker
Preferred Full Name
Preferred_Full_Name
Worker
Email - Primary Work
primaryWorkEmail
Worker
Work Address - Formatted Line 1
Work_Address_-_Formatted_Line_1
Worker
Work Address - Formatted Line 2
Work_Address_-_Formatted_Line_2
Worker
Work Address - City
Work_Address_-_City
Worker
Work Address - State/Province
Work_Address_-_State_Province
Worker
Work Address - Country
Work_Address_-_Country
Worker
Work Address - Postal Code
Work_Address_-_Postal_Code
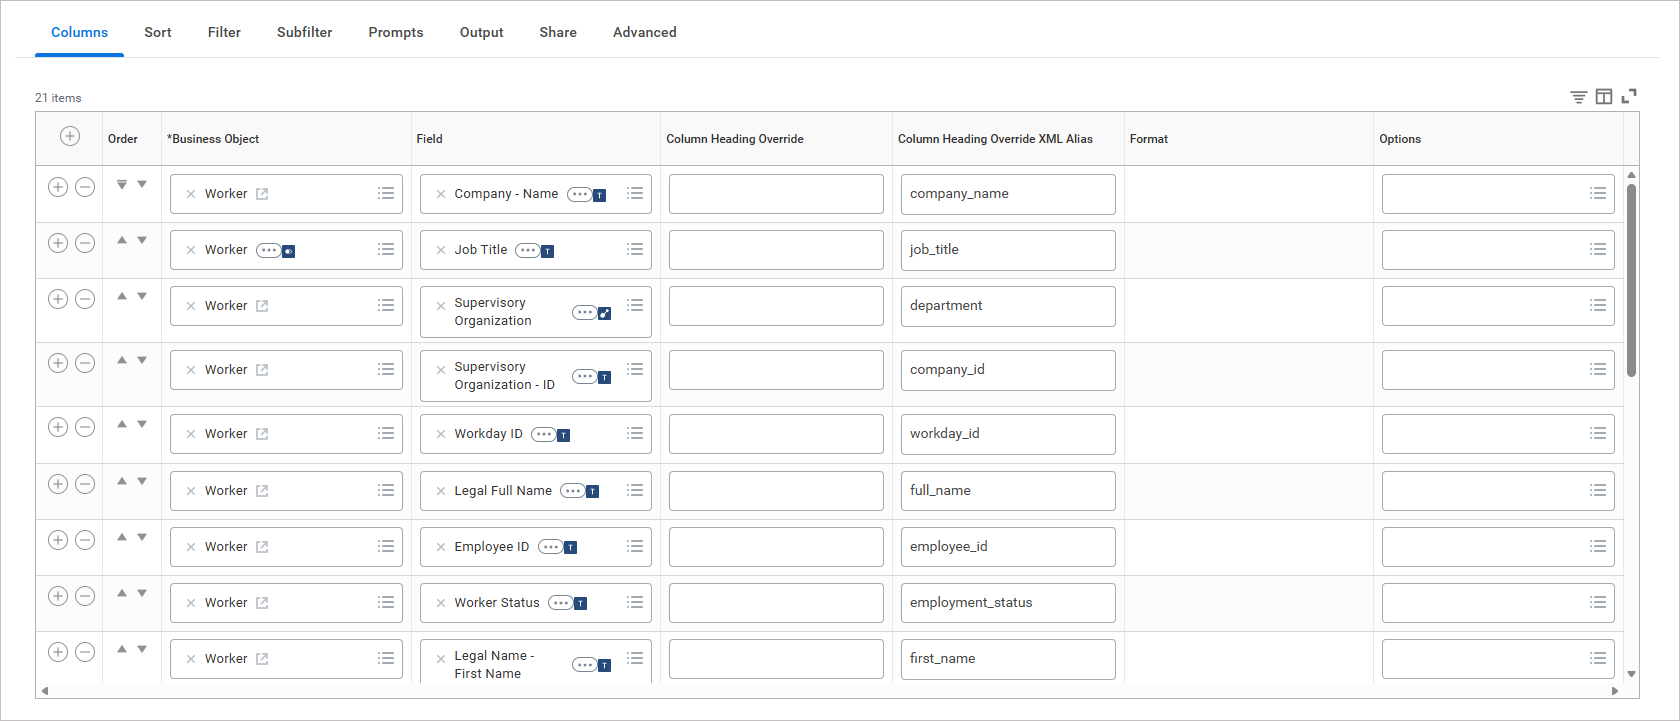
Example image showing the Fields mapped.
NOTE:
• If you need custom attributes, you will need additional permissions. Contact the Support team for more information.
• Make sure you use clear XML Aliases.
• Additional domain security policies may be required for custom fields. - Select the Share tab.
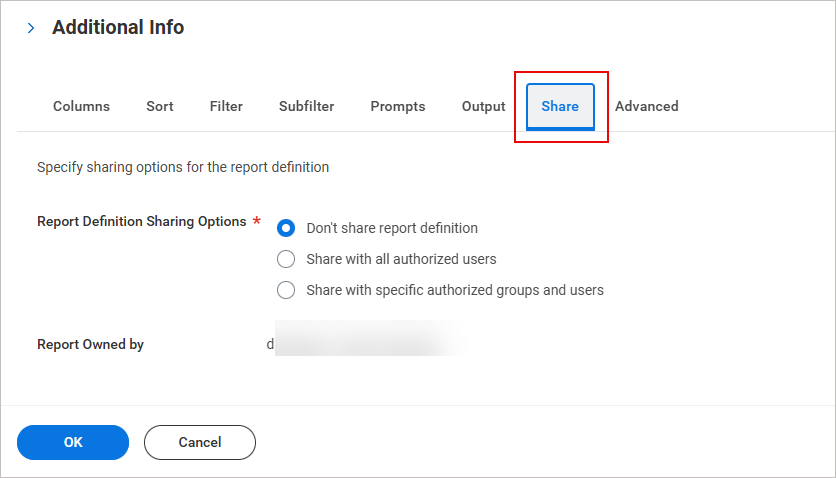
Example image showing the Share tab selected.
- In Report Definition Sharing Options, select Share with specific authorized groups and users.
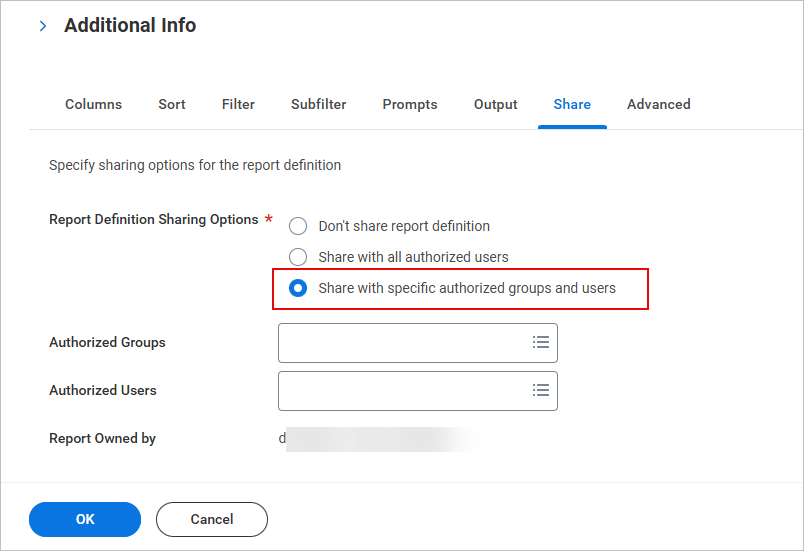
Example image showing that the Share with specific authorized groups and users option is selected.
- In Authorized Users, enter the authorized integration user you created earlier.
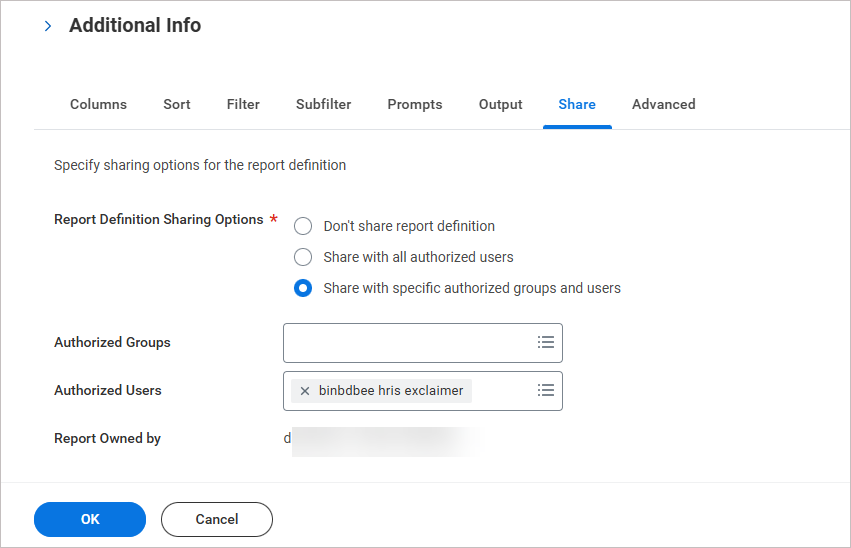
Example image showing the Authorized Users filled in.
- Select OK, then select Done.
To assign the minimum read-only permissions required for Exclaimer to retrieve employee data:
- In the search bar, enter Maintain Permissions for Security Group.
The Maintain Permissions for Security Group window is displayed.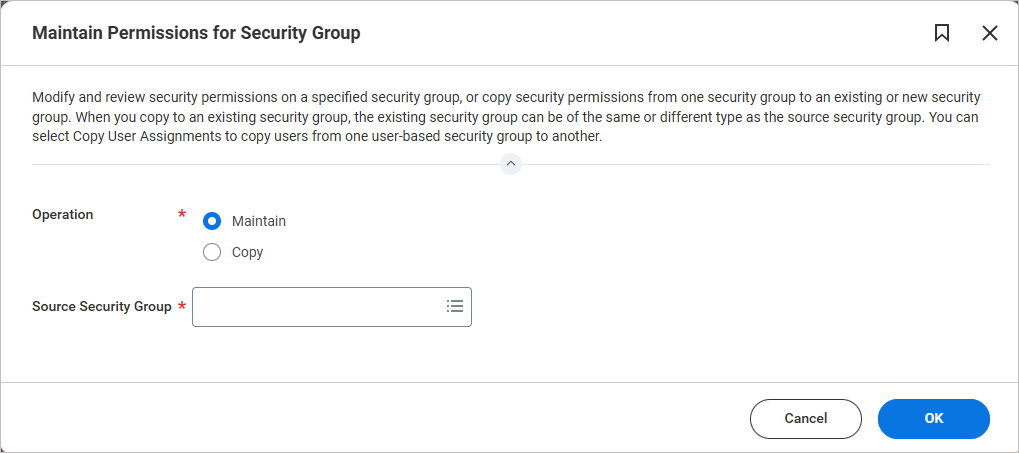
Example image showing the Maintain Permissions for Security Group window.
- In Source Security Group, enter the name of the security group you created.
- Select OK.
- Select the + icon to add a blank row of permissions.
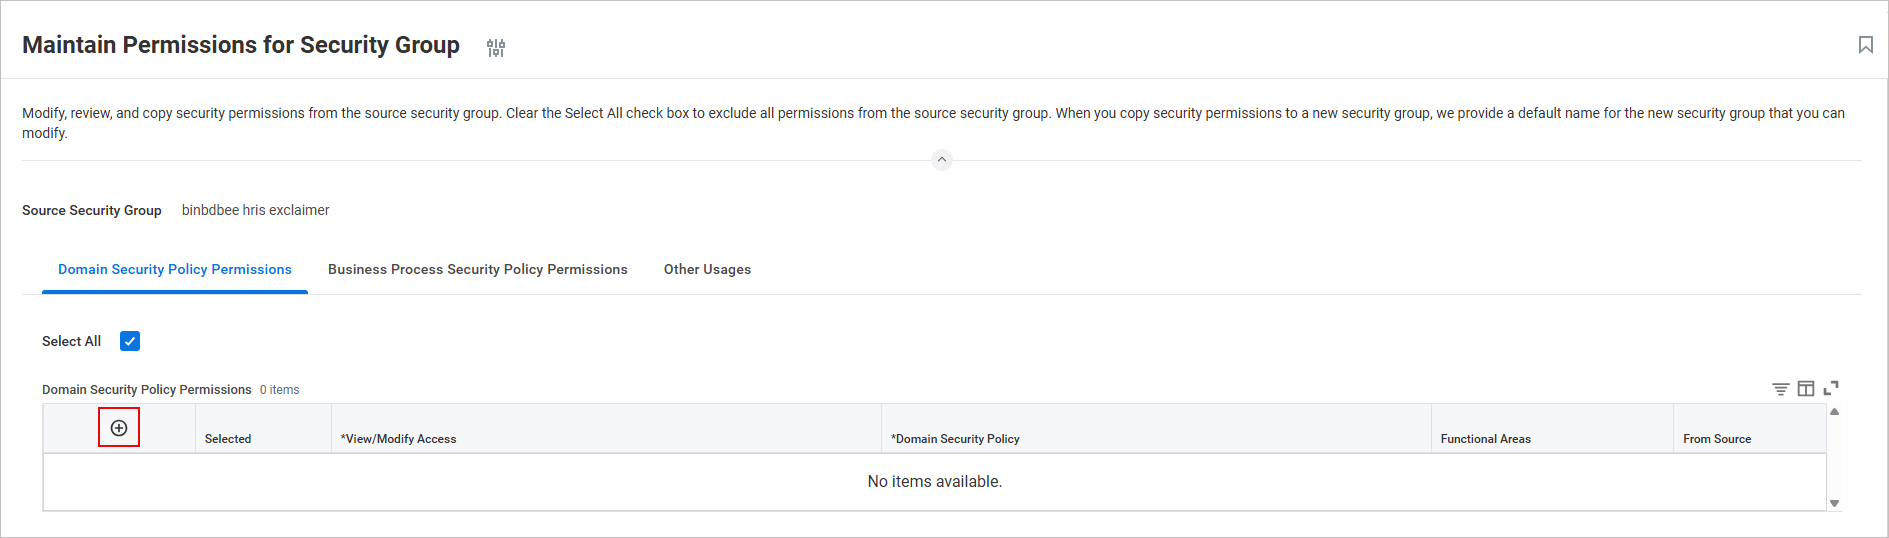
Example image showing the + icon to add a blank row of permissions.
A blank Security policy permission row is inserted in the table.
-
Configure the permissions required for Exclaimer to retrieve employee data from your Workday tenant. Exclaimer only retrieves the employee data required to populate and assign email signatures and does not access other sensitive information.
Add a new row for each permission.
The following table shows the recommended minimum set of Get Only (read-only) permissions:TIP! Copy and paste the permission names directly to search for and add them in Workday RaaS. Once you paste the entry, press [Enter].View/Modify Access
Domain Security Policy
Reason
Get Only Person Data: Work Contact Information
Work email address and phone number
Get Only Worker Data: Workers
Basic access to worker records
Get Only Manage: Organization Integration
Organization/department of the worker
Get Only Person Data: Name
Worker's legal and preferred name
Get Only Person Data: Work Address
Company/work address fields
Get Only Worker Data: Current Staffing Information
Identify active vs inactive employees
Get Only Worker Data: Active and Terminated Workers
Identify active vs terminated employees
NOTE:
• You only need to fill in the View/Modify Access and Domain Security Policy columns. After you have entered all permissions, select OK, the Functional Areas column will populate automatically.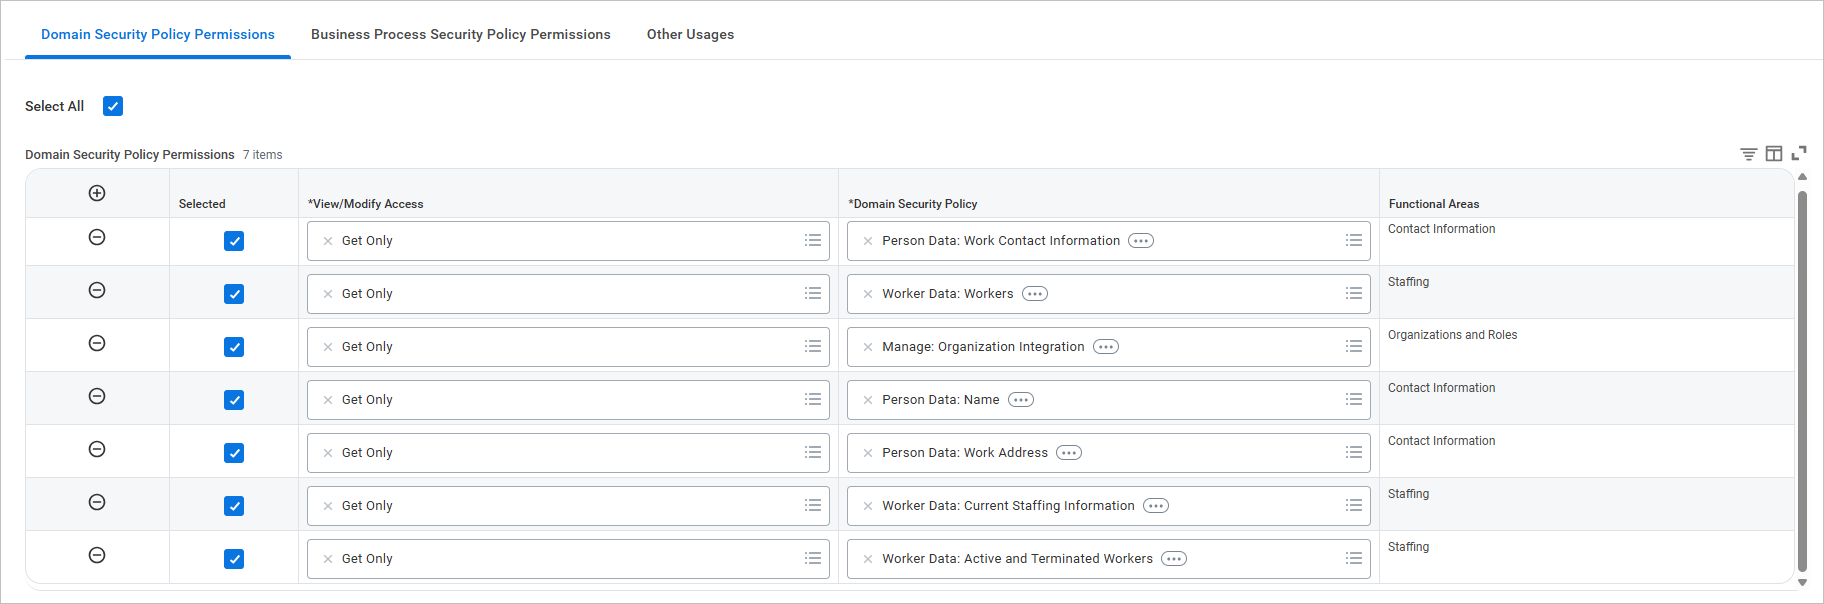
Example image showing the View/Modify Access and Domain Security Policy columns.
• If you need custom attributes, you will need additional permissions. Contact the Support team for more information. - Select OK, then select Done.
To apply and activate the pending security policy changes:
- In the search bar, enter Activate Pending Security Policy Changes.
The Activate Pending Security Policy Changes window is displayed.
Example image of the Activate Pending Security Policy Changes window.
- In Comment, enter a comment describing the changes.
For example: "Exclaimer integration: updated security policy"
- Select OK.
- Select the Confirm checkbox to confirm all security policy changes.
Example image showing the Confirm check box option.
- Select OK.
To verify the custom report output and copy the JSON report URL:
-
In the search bar, enter View Custom Report.
The View Custom Report window is displayed.
In Custom Report, enter the name of the report you created earlier.
-
Select OK.
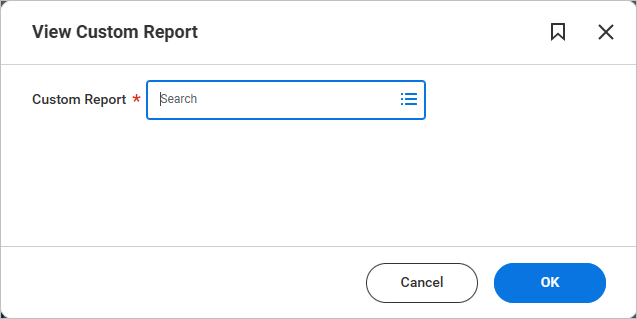
Example image showing the View Custom Report window.The selected report page is displayed.
Select the three dots next to the report name, select Web Services, and then select View URLs.
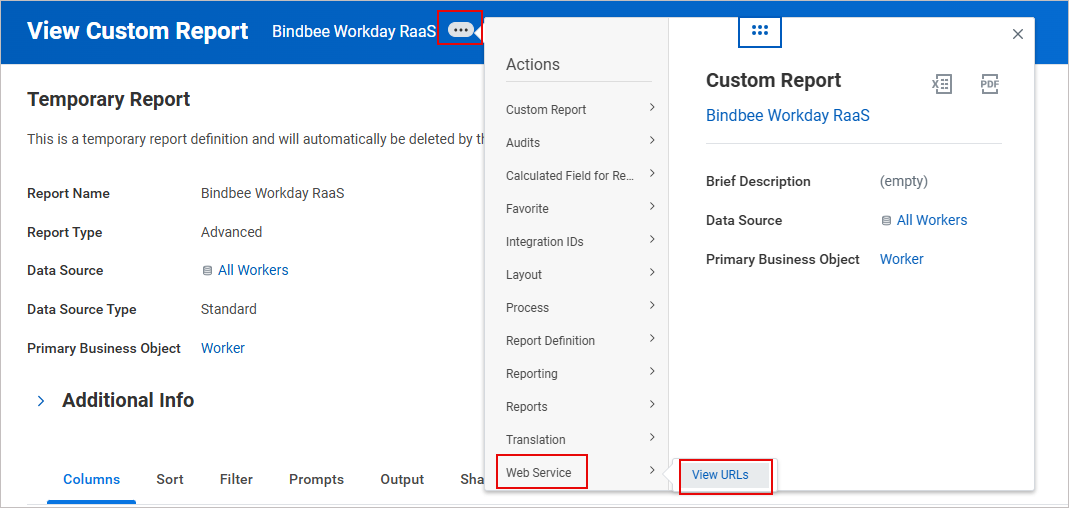
Example image showing how to select the View URLs.
The View URLs Web Service screen is displayed.
Scroll to the JSON section.
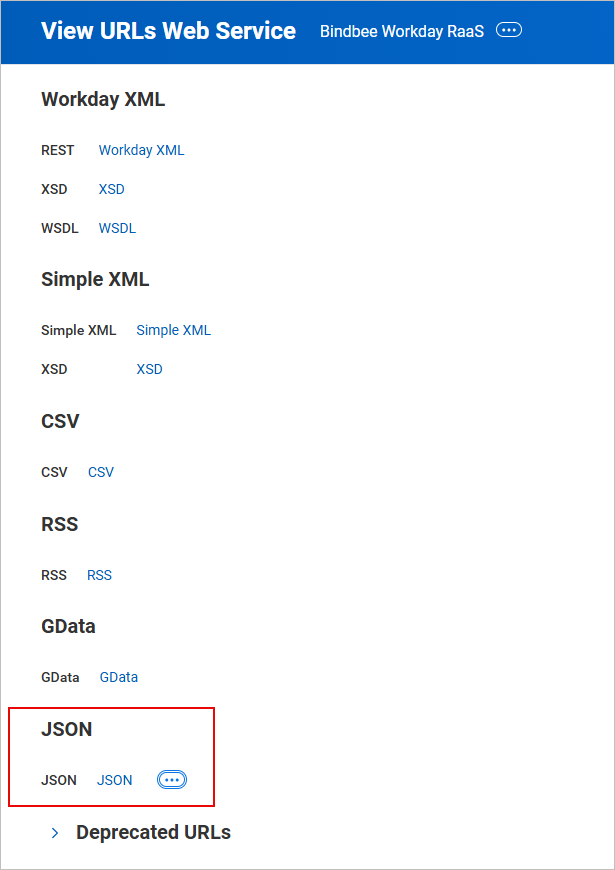
Example image showing the JSON section.
-
Right-click JSON and select Copy URL.
TIP! Record the URL securely. It will be required for the integration. -
Select the JSON link to download the JSON file. If prompted, enter the ISU credentials. Check that:
All required fields appear.
The field values are correct.
If fields are missing from the JSON output, check the ISU domain security policies first. Missing permissions are the most common cause.
To create an API client to allow secure authentication for the integration:
In the search bar, enter View Domain.
The View Domain window is displayed.
In Domain, enter Report Execution and press [Enter].
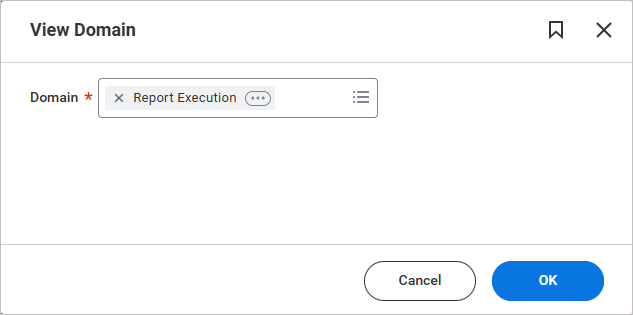
Example image showing the View Domain window.
-
Select OK.
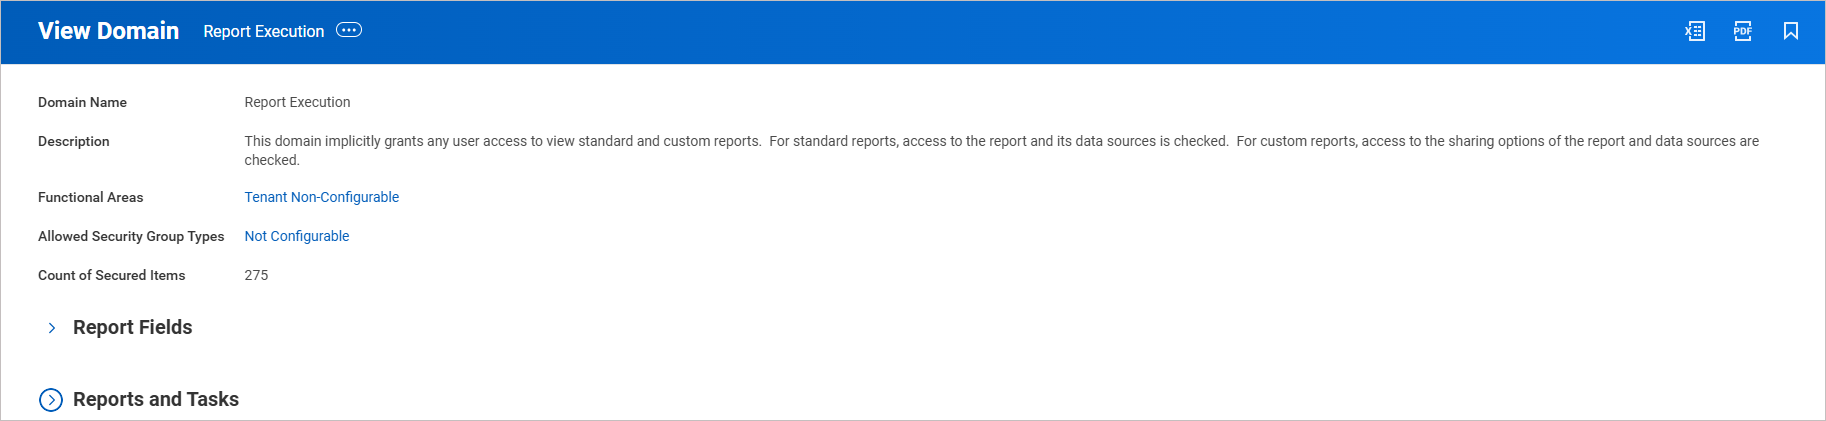
Example image showing the View Domain window.
TIP! Record the Functional Areas securely. It will be required later.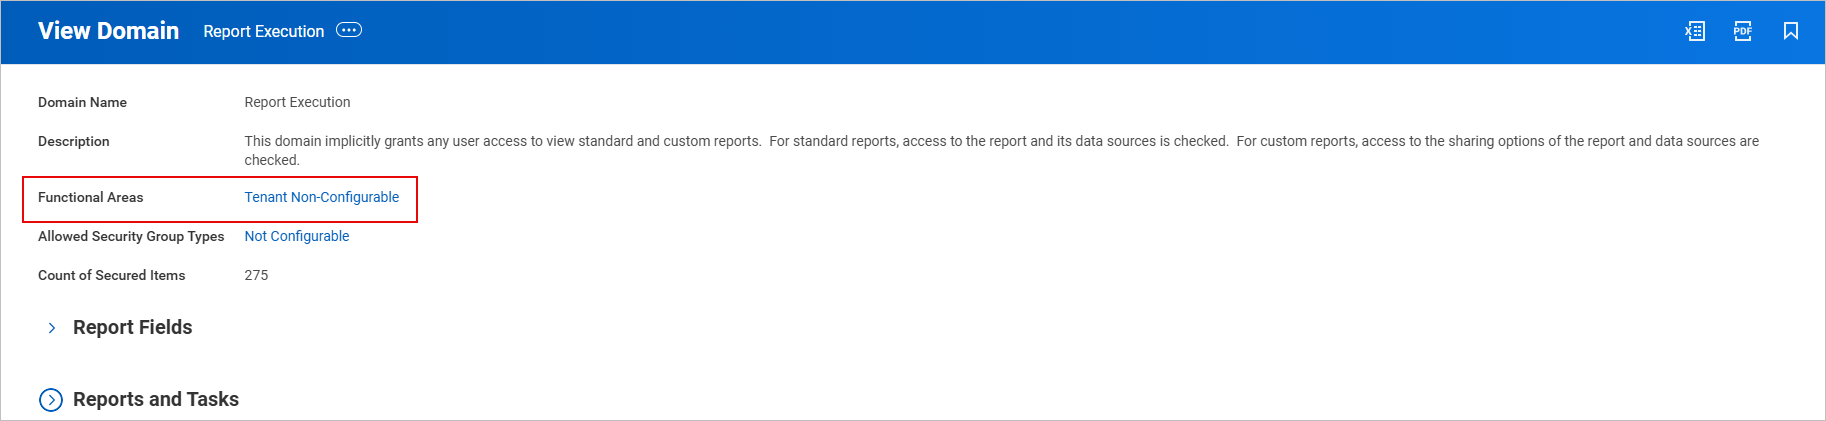
Example image showing the Functional Areas that need to be recorded, as they will be used later.
-
In the search bar, enter Register API Client for Integrations.
The Register API Client for Integrations window is displayed.
In Client Name, enter the client name.
In Scope, enter the required scopes, including functional areas from the View Domain window.
Paste the previously copied Functional Area here.
-
Select OK.
TIP! Upon creation of the API client, ensure that you securely copy and store the Client Secret, as it will only be displayed at the time of creation and will not be accessible thereafter.
Example image showing the Client ID and Client Secret.
To generate or reuse a refresh token for the API client:
- In the search bar, enter View API Clients.
The View API Clients screen is displayed.
- Select the API Clients for Integrations tab.
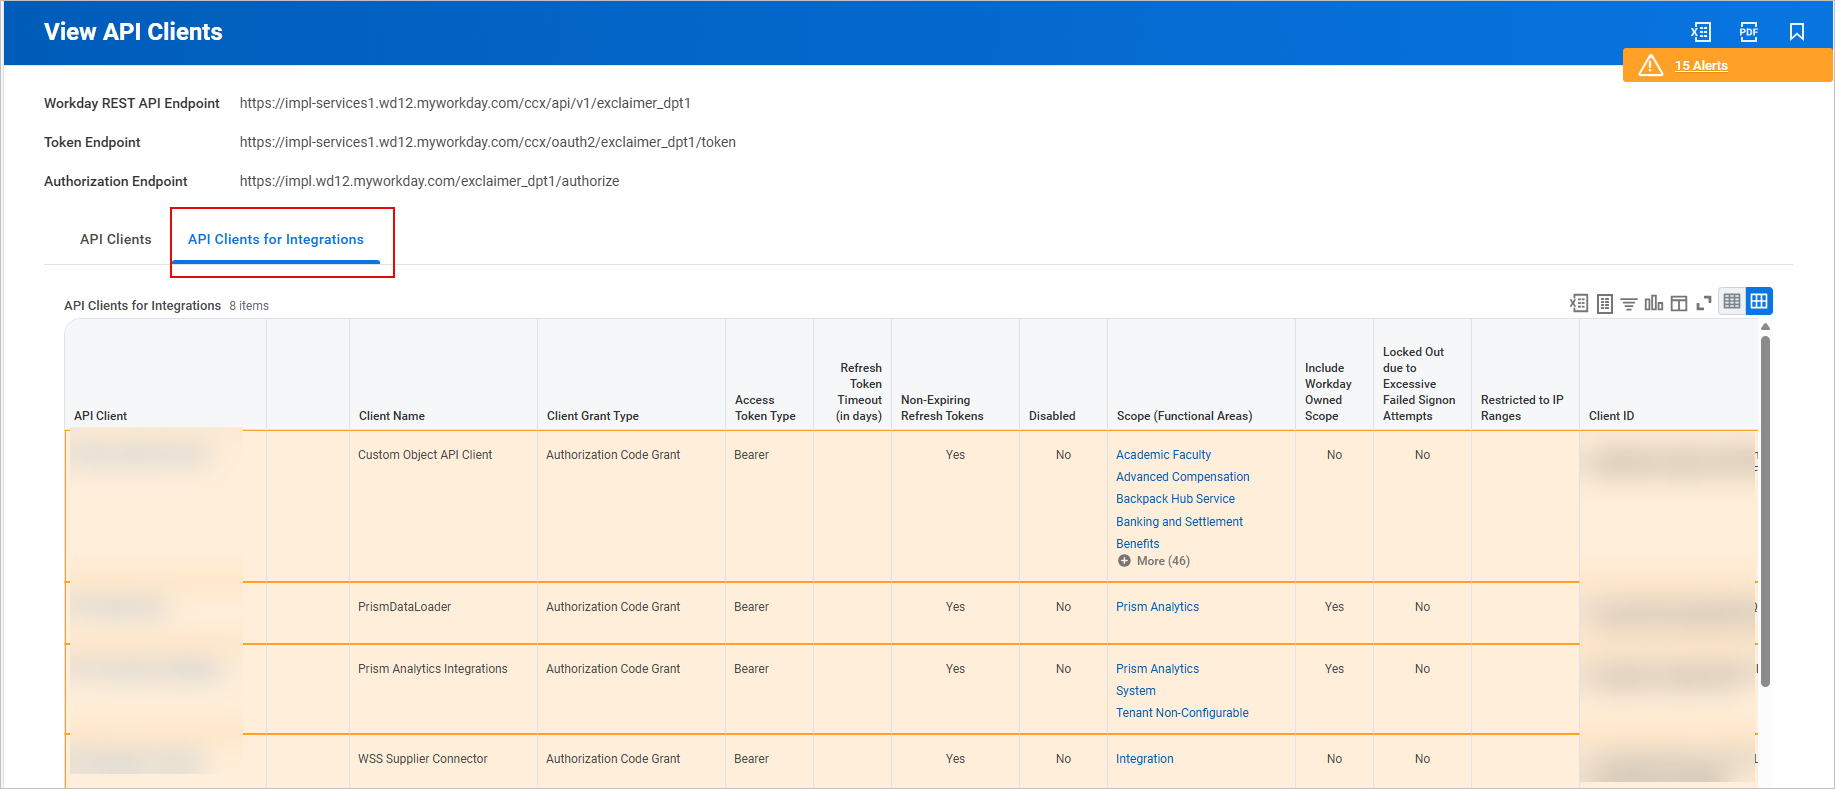
Example image showing the API Clients for Integrations tab selected.
- Search for your API client.
- Select the three dots next to the name of your API Client. Select API Client, then select Manage Refresh Tokens for Integrations.
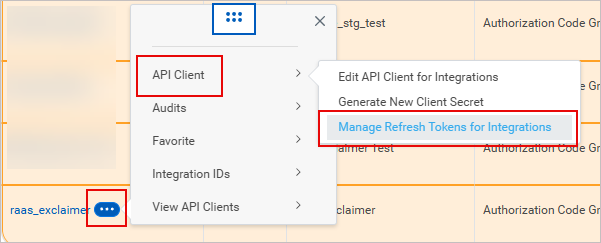
Example image showing the Manage Refresh Tokens for Integrations option.
The Manage Refresh Tokens for Integrations window is displayed.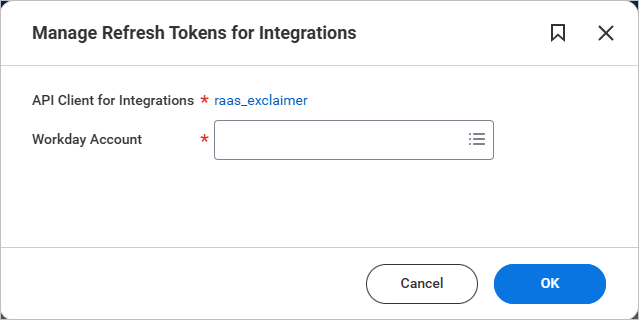
Example image showing the Manage Refresh Tokens for Integrations window.
- In Workday Account, add the same authorized user configured for the API client.
- Select OK.
-
Reuse the existing refresh token if it is already being used by other integrations.
If there are no other integrations, select Generate New Refresh Token, then select Confirm Delete.TIP! Copy the refresh token and store it securely, as it will be used during Exclaimer integration.
To retrieve the Client ID and Client Secret required for the Exclaimer connection:
- In the search bar, enter View API Clients.
The View API Clients screen is displayed.
- Select the API Clients for Integrations tab.
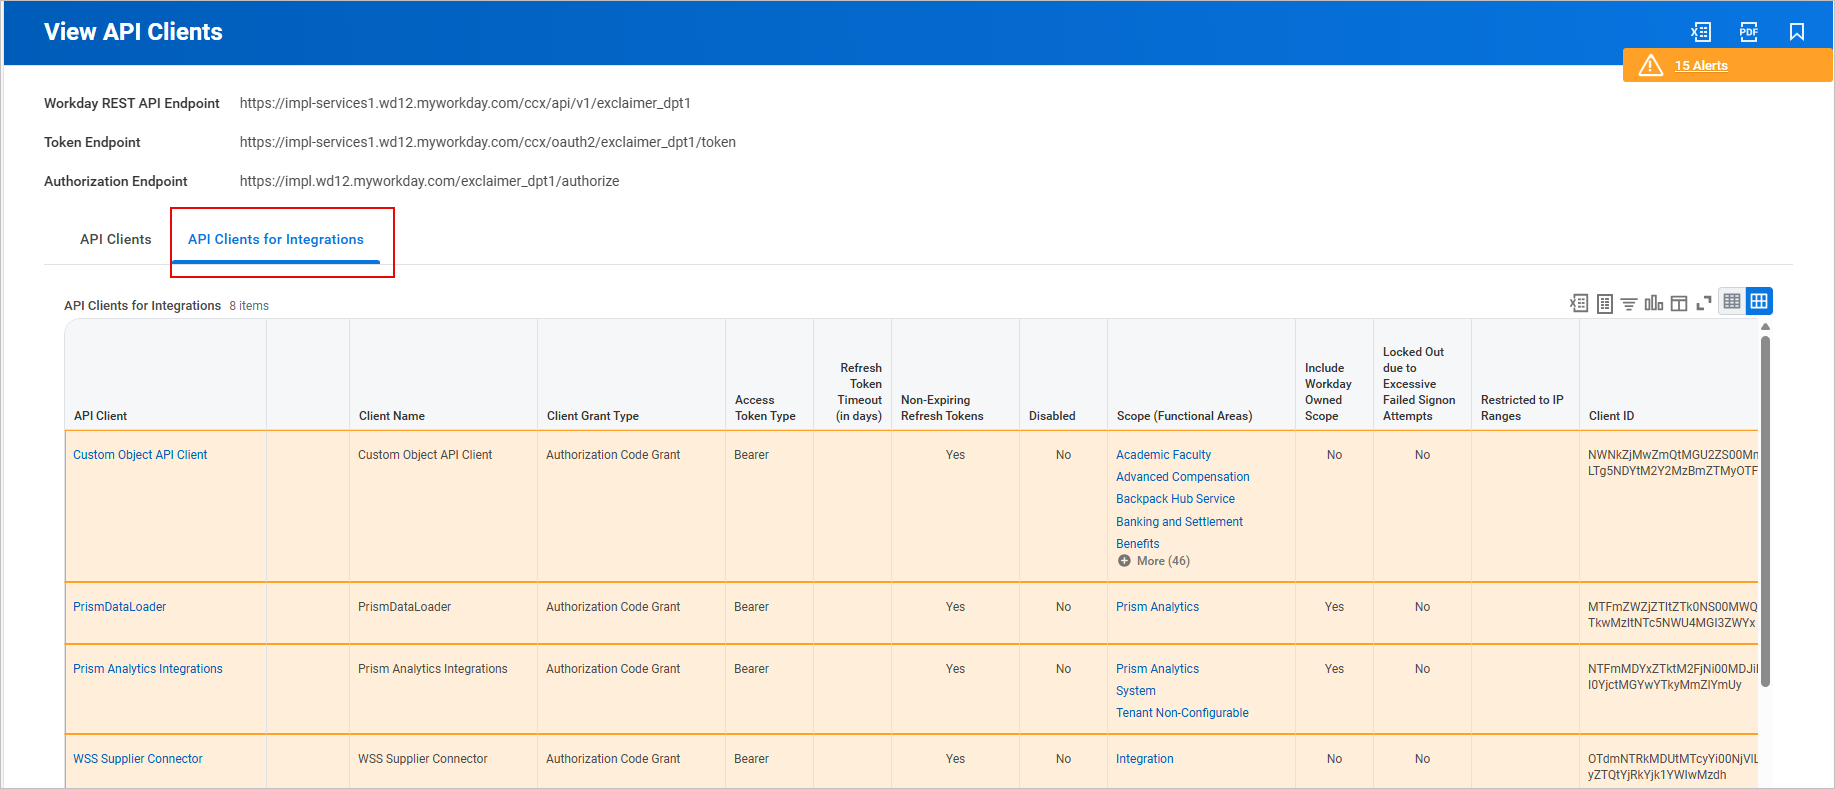
Example image showing the API Clients for Integrations tab.
- Search for your API client.
-
To generate a new Client Secret: Select the three dots next to the name of your API Client. Select API Client, then select Generate New Client Secret.
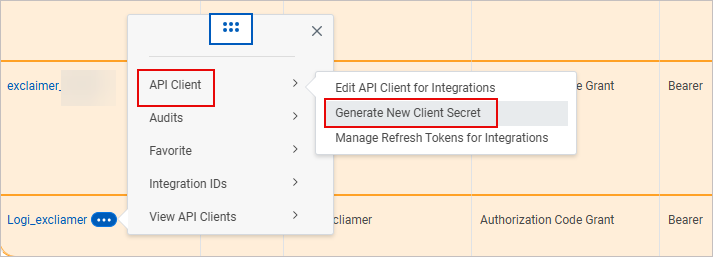
Example image showing the Generate New Client Secret option.
To view the existing Client Secret ID: Select your API Client link. The View API Client screen is displayed. Your existing Client ID is displayed.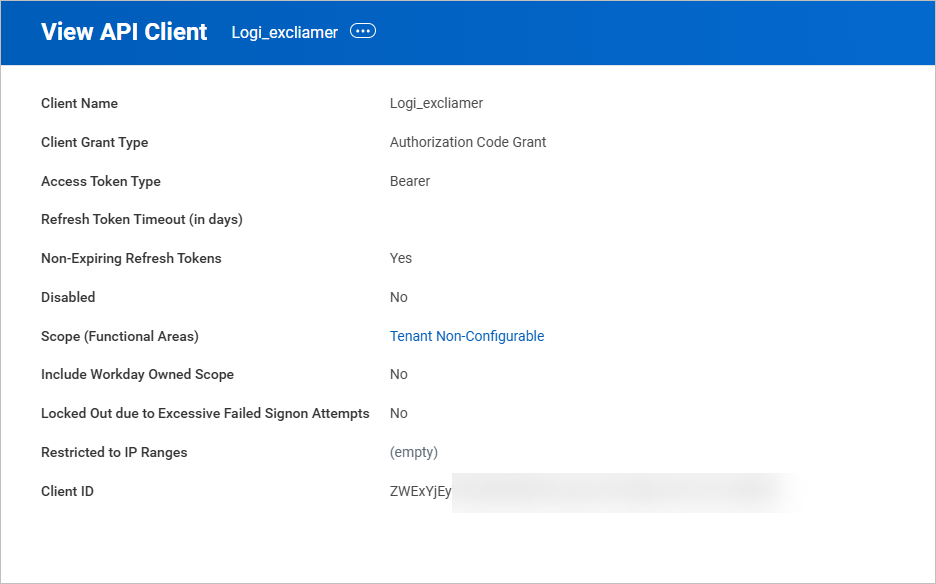
Example image showing the View API Client screen.
TIP! Copy the Client ID and store it securely, as it will be used during Exclaimer integration.
Access the Workday RaaS integration in Exclaimer
To access the Workday RaaS integration:
-
From the header bar, select the cogwheel icon, then select Sender Management.
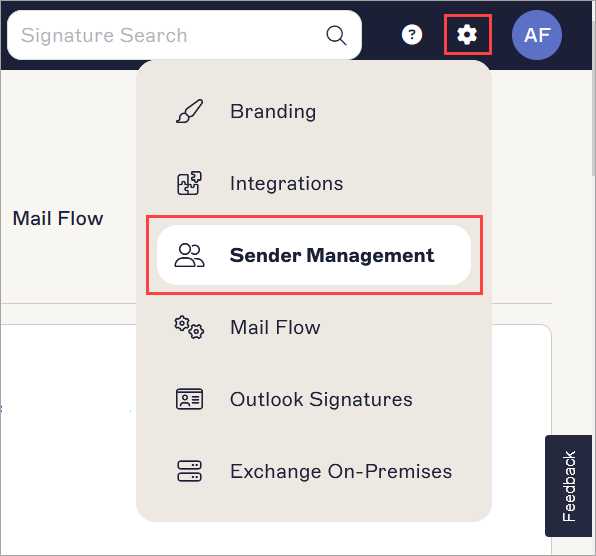
This example image is for a Microsoft 365 subscription and shows the Settings menu.
- Navigate to the Enable HRIS access section.
- From the drop-down, select Workday RaaS.
Connect Exclaimer to Workday RaaS (Exclaimer)
Follow the steps below to connect Exclaimer to Workday RaaS:
Before you connect Exclaimer to Workday RaaS, make sure you:
• Use an Exclaimer Pro subscription
• Allow the required Bindbee domains in your network. These domains must load in the browser for the connection window to work:
• cdn.bindbee.dev
• *.bindbee.dev to cover additional subdomains used during the connection flow (for example, API callbacks and authentication redirects)
• Generate and keep the following ready:
• RaaS Client ID
• RaaS Client Secret
• RaaS Refresh Token
To connect to your HRIS to allow Exclaimer to synchronize user contact details:
- From the drop-down list, select Workday RaaS.
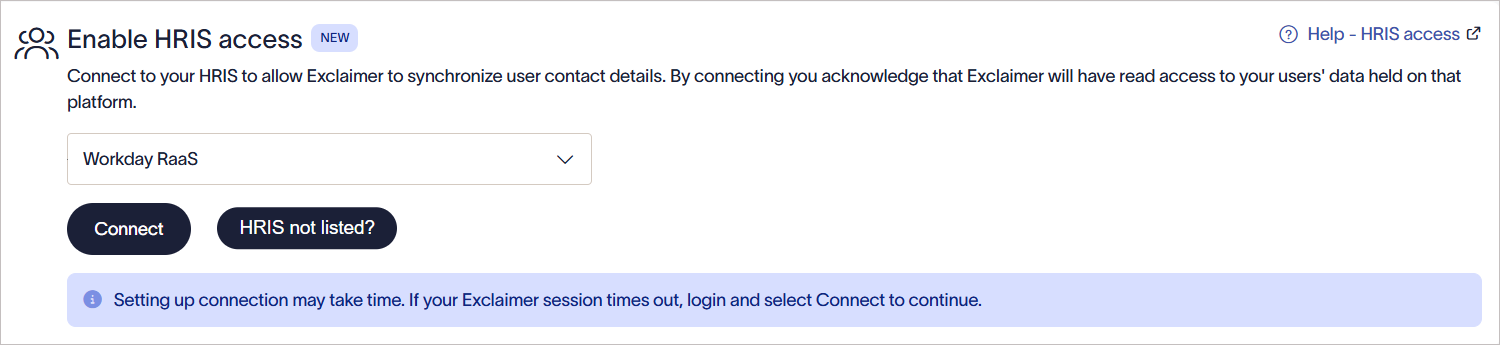
From the drop-down list, select Workday RaaS.
-
Select Connect.
The Workday RaaS window is displayed. Grant read-only access and choose which data models are shared.WARNING! If the Workday RaaS window is not displayed, allowlist cdn.bindbee.dev (and preferably .bindbee.dev) to ensure the Bindbee SDK loads correctly in the browser.NOTE: If you require additional custom fields, our team can configure them manually. This option is not currently available as a self-service feature. Get in touch with our Support team for help in setting up any required custom fields.
-
Enter the Workday Web Services Endpoint URL.
To obtain the URL:
- Within Workday, search for Public Web Services.
The Public Web Services window is displayed.
- Locate Human Resources (Public). Select Web Service, then select View WSDL.
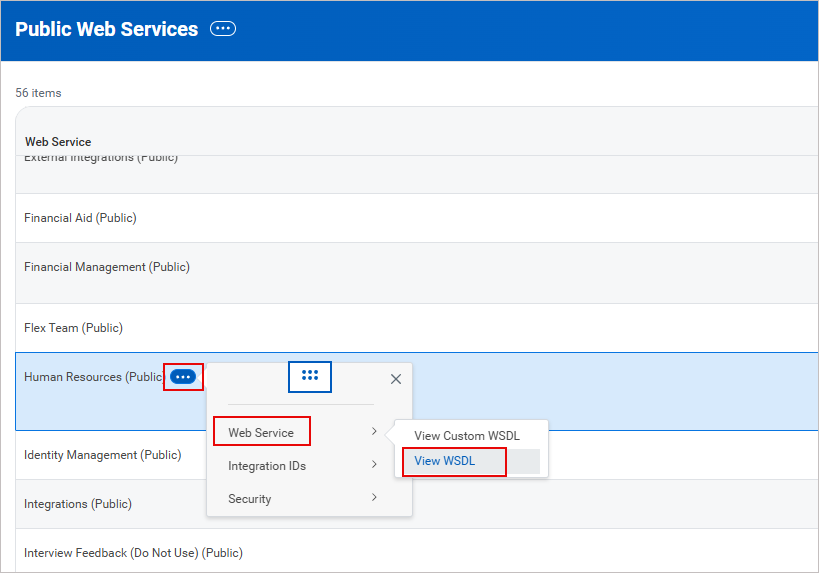
Example image showing how to access the endpoint URL in Workday. In the Public Web Services window, locate Human Resources (Public). Select Web Service, then select View WSDL.
An XML file is displayed. -
Scroll to the bottom of the page. Copy the URL up to (but not including) /service/. This is the Web Services Endpoint URL.
WARNING! Do not include the trailing slash after /ccx.
Example image of the XML file in Workday. Copy the URL up to (but not including) /service/.
- Paste the URL in the space provided.
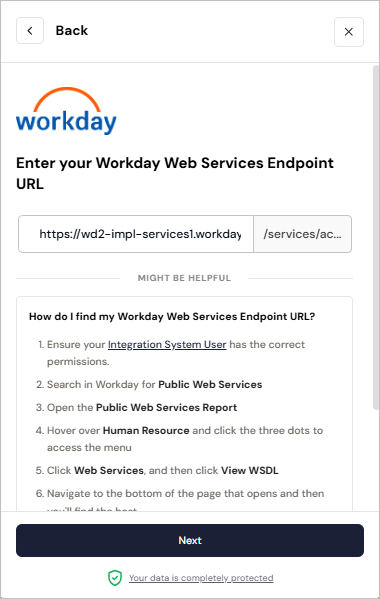
Example image in Exclaimer when trying to connect to the Workday RaaS system.
- Within Workday, search for Public Web Services.
- Select Next.
- Enter your Workday Tenant Name.
To find your Workday Tenant Name:- In the Workday dashboard, check the URL in your browser. Copy the value that appears after workday.com/
This is the tenant name.
Example image of Workday Tenant Name - do not copy this name. Check your dashboard URL to find your Workday Tenant Name.
-
Paste the value as the tenant name.
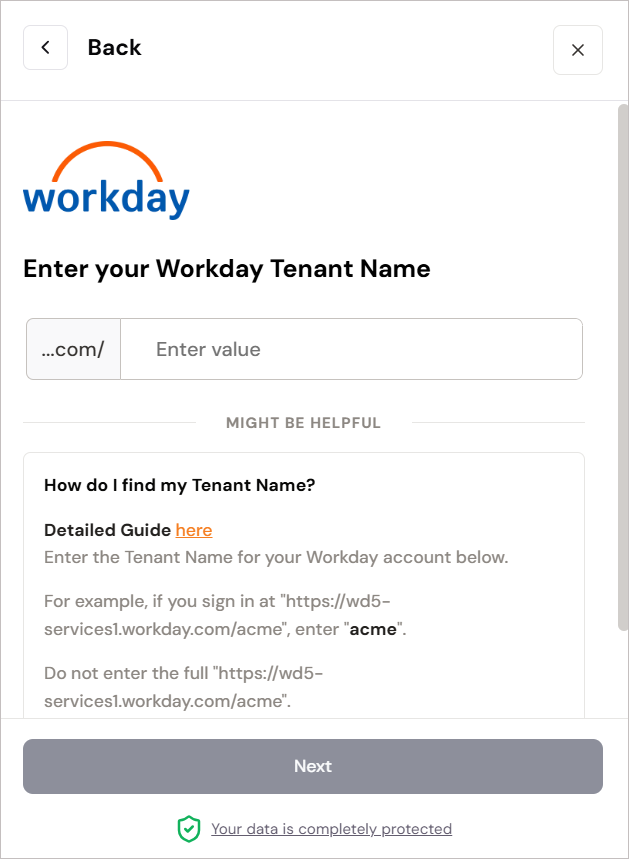
Enter the Workday Tenant Name.
- In the Workday dashboard, check the URL in your browser. Copy the value that appears after workday.com/
- Select Next.
-
Enter your RaaS refresh token, RaaS Client ID and RaaS Client Secret details.
See steps 10 and 11 above for the details.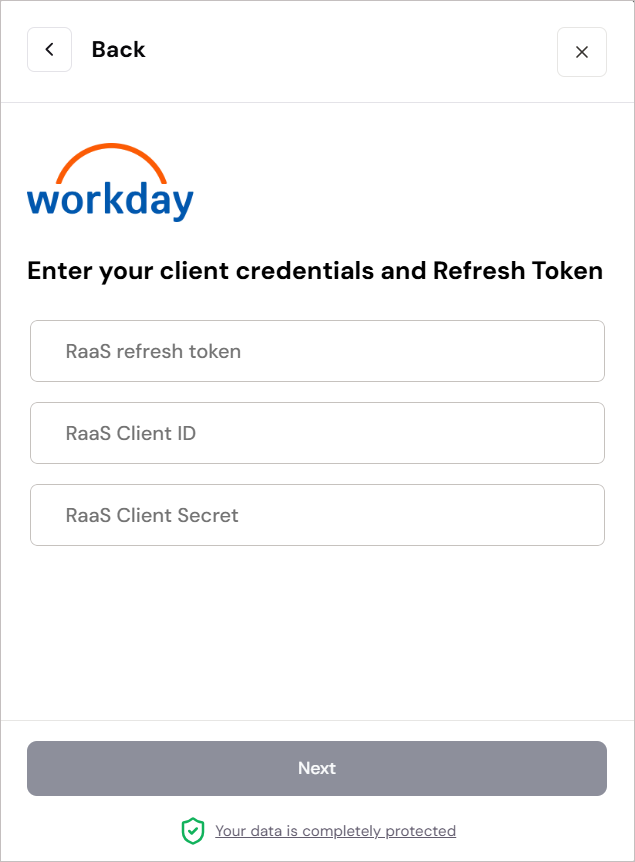
Enter the RaaS refresh token, RaaS Client ID and RaaS Client Secret details. - Select Next.
- Enter the Custom Report URL. See Step 8 above - Verify Custom Report.
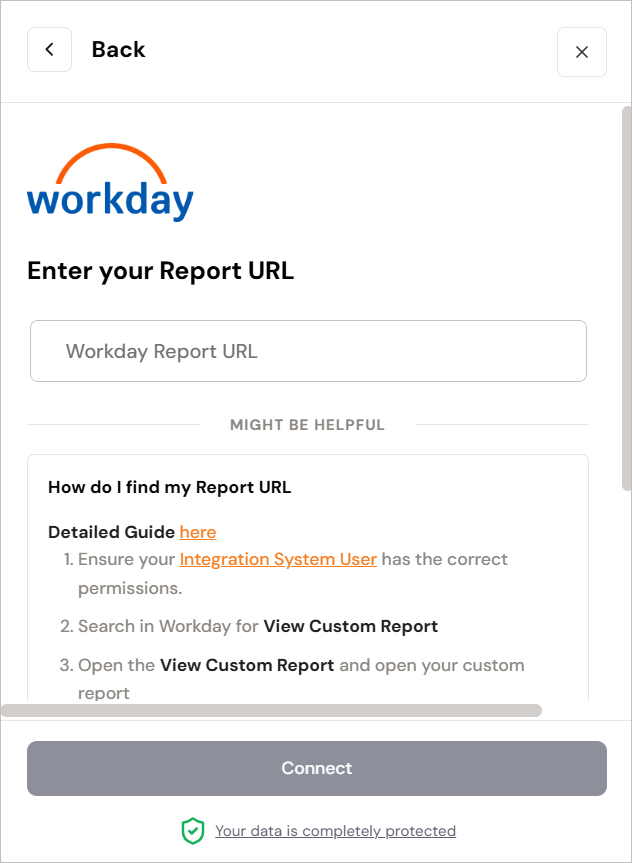
Enter your Report URL.
-
Select Connect.
WARNING! Keep the window open until the connection is complete. If you close it too soon, the connection may not finish setting up, and it may not appear as connected in Exclaimer.
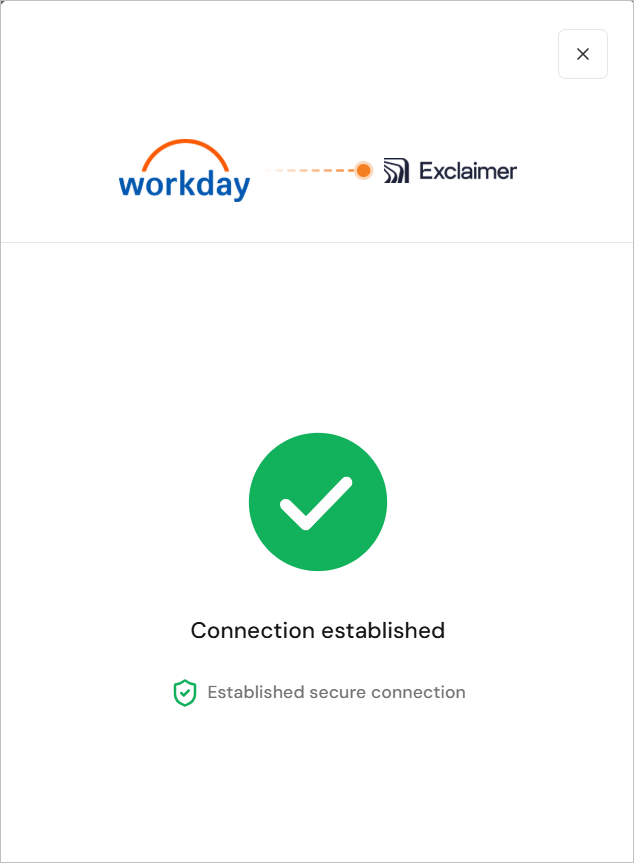
Image showing that the connection has been established.If you try to connect to Workday again, you may see a message saying that the connector already exists. If this happens, raise a support ticket so the team can assist you.
Once a connection is established with the Workday HRIS system, the status displays as Connected in Exclaimer.
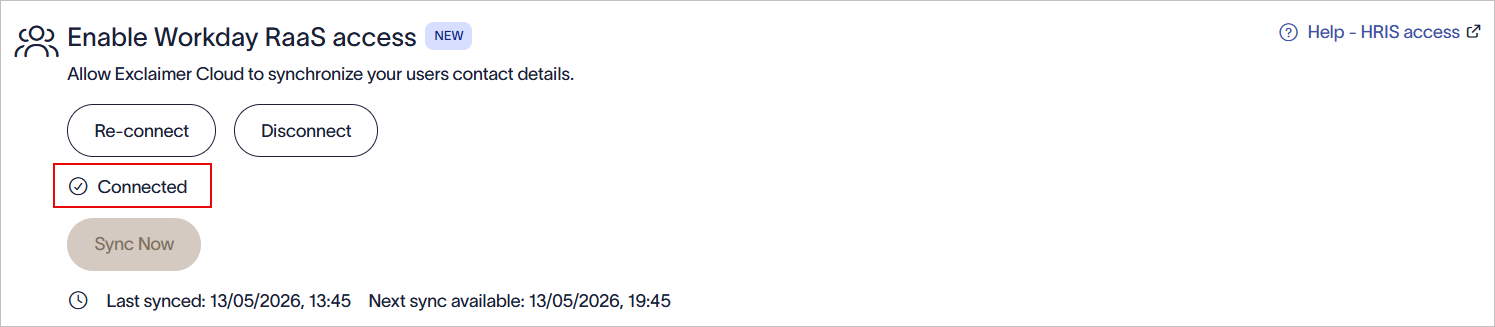
Once a connection is established with the Workday RaaS system, the Connected text is displayed within Exclaimer.
Manage your Workday RaaS connection (Exclaimer)
Follow the options to manage your Workday RaaS connection:
To re-connect to the Workday RaaS system:
- Select Re-connect.
A message is displayed that reconnecting will remove your existing connection to Workday RaaS, and any data will no longer be available, and a new connection flow will start automatically.
Select OK to reconnect to the Workday RaaS system.
- Select OK to continue.
To disconnect from the Workday RaaS system:
- Select Disconnect.
A message is displayed that disconnecting will entirely remove your connection to Workday RaaS, and any data from the system will no longer be available.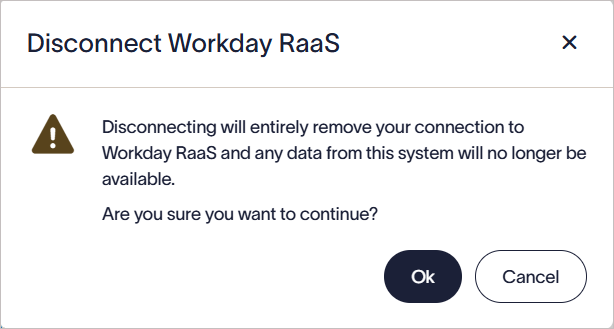
Select OK to disconnect from the Workday RaaS system.
- Select OK to continue.
Workday connectors automatically synchronize data based on a predefined schedule. You can also initiate a manual sync.
To run a manual sync to immediately update employee data in Exclaimer:
-
Select Sync Now.
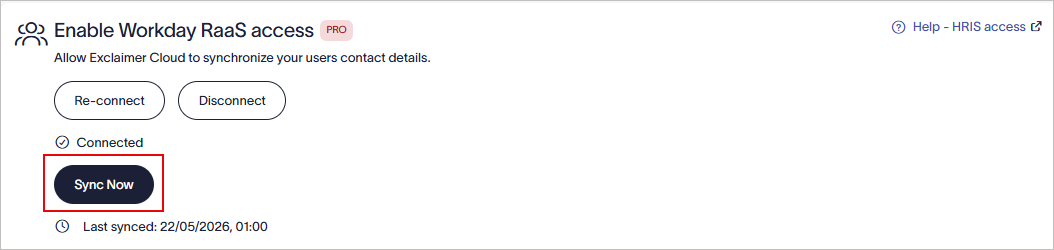
Select Sync Now to start a manual sync.
NOTE: The Sync Now button is enabled only after 6 hours since the last successful sync. If the button is not enabled, the next sync date and time is displayed.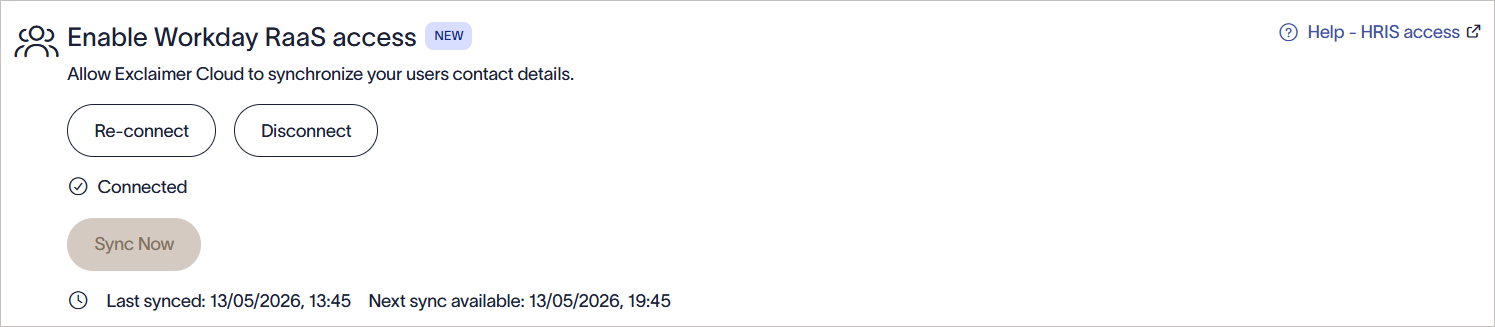
Example image showing that the Sync Now button is not enabled, and the next sync date and time is displayed.
Troubleshooting
Use the following troubleshooting steps to help identify and resolve common issues when configuring or connecting the Workday RaaS integration.
If expected fields are missing from the JSON report output:
- Verify the Integration System User (ISU) has the required domain security permissions.
- Confirm that all pending security policy changes have been activated.
- Verify the fields were added correctly to the custom report Columns tab.
- Ensure the XML aliases are configured correctly.
- Test the JSON output using the ISU credentials, not an administrator account.
The Workday UI uses the permissions of the currently signed-in user. Fields visible in the Workday UI may still be unavailable in the JSON output if the ISU does not have permission to access them.
If the Workday RaaS connection window does not appear in Exclaimer:
- Ensure the following domains are allowlisted in your network or browser security tools:
- cdn.bindbee.dev
- *.bindbee.dev
- Verify that browser extensions or content blockers are not preventing the page from loading.
- Refresh the browser and try again.
If the connection to Workday fails during setup:
Verify that:
- The Workday Tenant Name is correct.
- The Workday Web Services Endpoint URL is entered correctly.
- The RaaS Client ID, Client Secret, and Refresh Token are valid.
- The Integration System User password has not expired.
- The API Client was created successfully in Workday.
- The correct Workday environment (Production or Sandbox/Test) is being used.
If the JSON report URL does not open or returns incomplete data:
- Verify the custom report is enabled as a web service.
- Confirm the report is shared with the authorized Integration System User.
- Verify the Integration System User belongs to the correct security group.
- Confirm the required domain security permissions were assigned.
- Check that pending security policy changes were activated successfully.