
Description
You can use ADP Workforce Now to integrate with Exclaimer through Bindbee. Exclaimer connects to ADP Workforce Now using a client ID, client secret, and certificate that you generate in ADP API Central. Bindbee uses these credentials to retrieve employee contact data and sync it to Exclaimer for use in email signatures. During setup, you may see Bindbee URLs, authentication prompts, or connection windows.
This integration is available for Exclaimer subscriptions using Microsoft 365 and Google Workspace.
Set up ADP Workforce Now for Exclaimer integration (ADP Workforce Now)
Follow the steps below to gather the details required from ADP Workforce Now before connecting it to Exclaimer.
• Admin access to ADP API Central, including permission to create projects and request certificates.
• Admin access to ADP Workforce Now, including permission to manage Access Permissions and Profiles.
• Access to the Exclaimer subscription (Pro plan).
To create a project in API Central:
- Navigate to API Central at https://api-central.adp.com/projects and sign in.
- Select Create a Project.
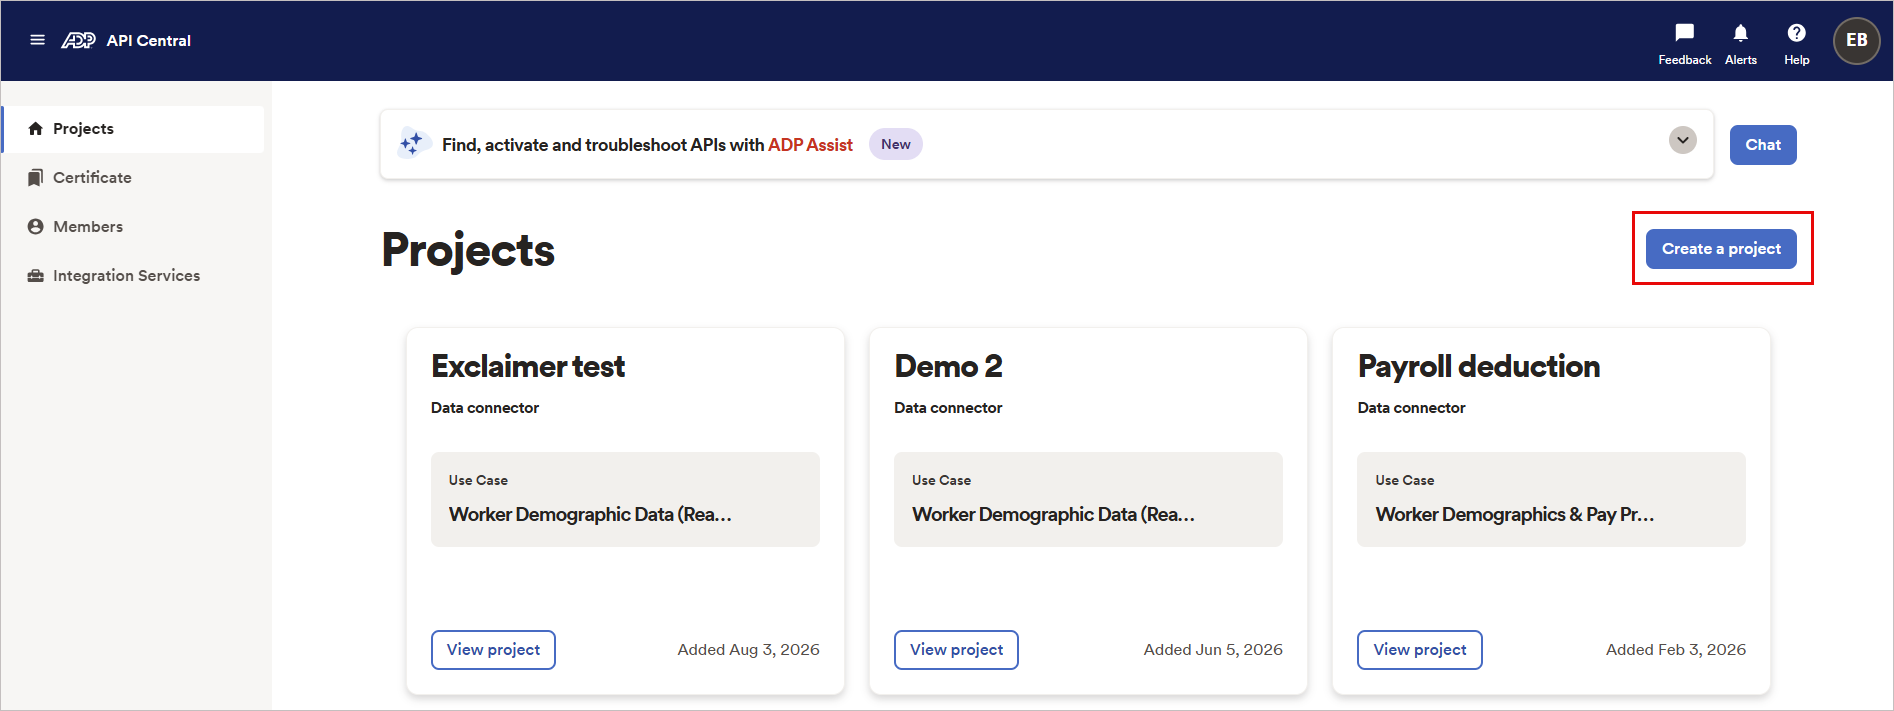
Example image of API Central. Select the Create a project button.
-
Enter an appropriate name and description for the project, then select Next.
TIP! Note down the project name. You'll need it later to locate the matching profile in ADP Workforce Now's Access Permissions.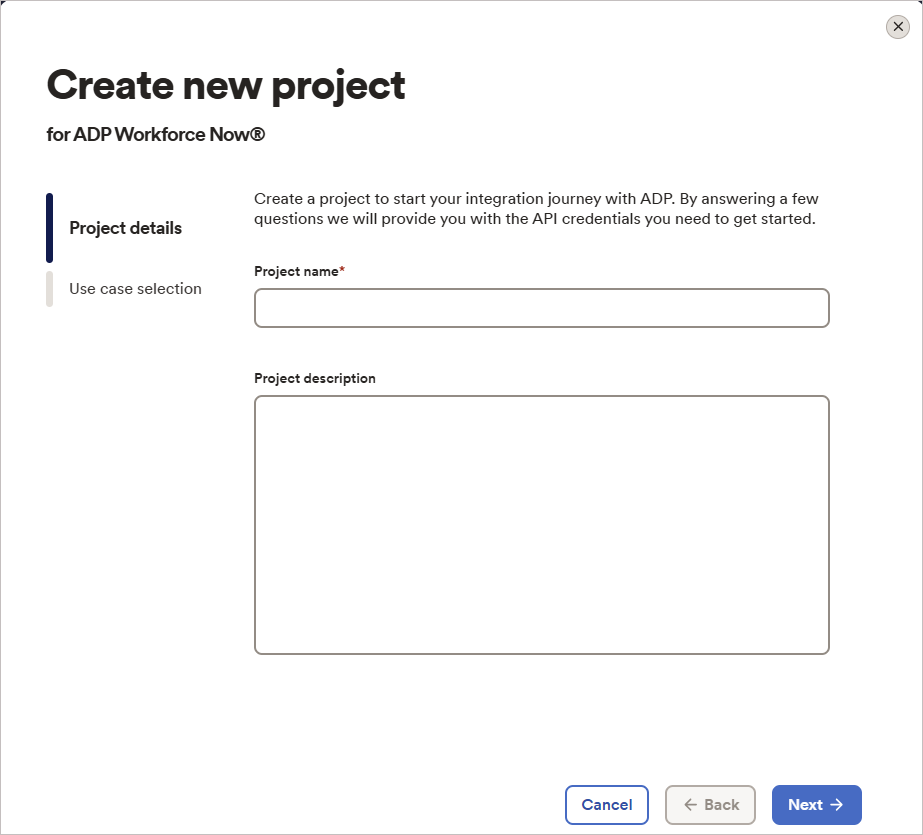
Example image of Create new project. Enter the name and description for the project.
- Select the use case that matches your requirements.
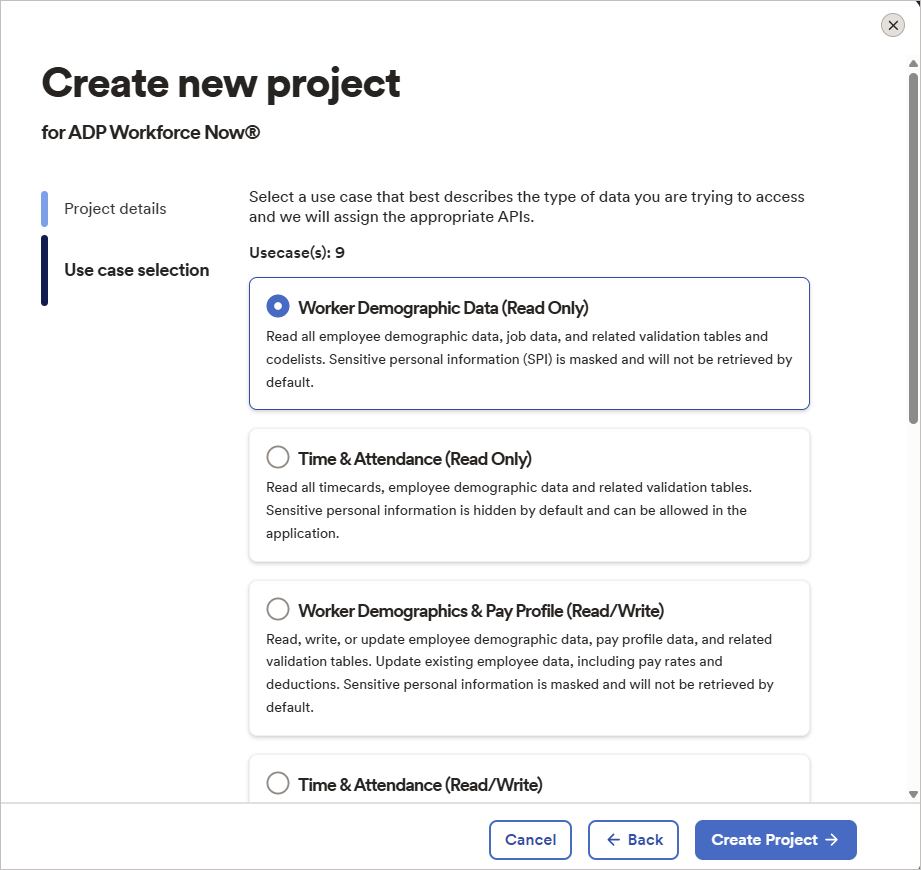
Example image of Create new project. Select a use case.
- Select Create Project.
To add v2/workers to the API list:
- Log in to API Central.
- Select View to open the relevant project.
- Select the APIs tab.
- Select Add APIs or Add More APIs.
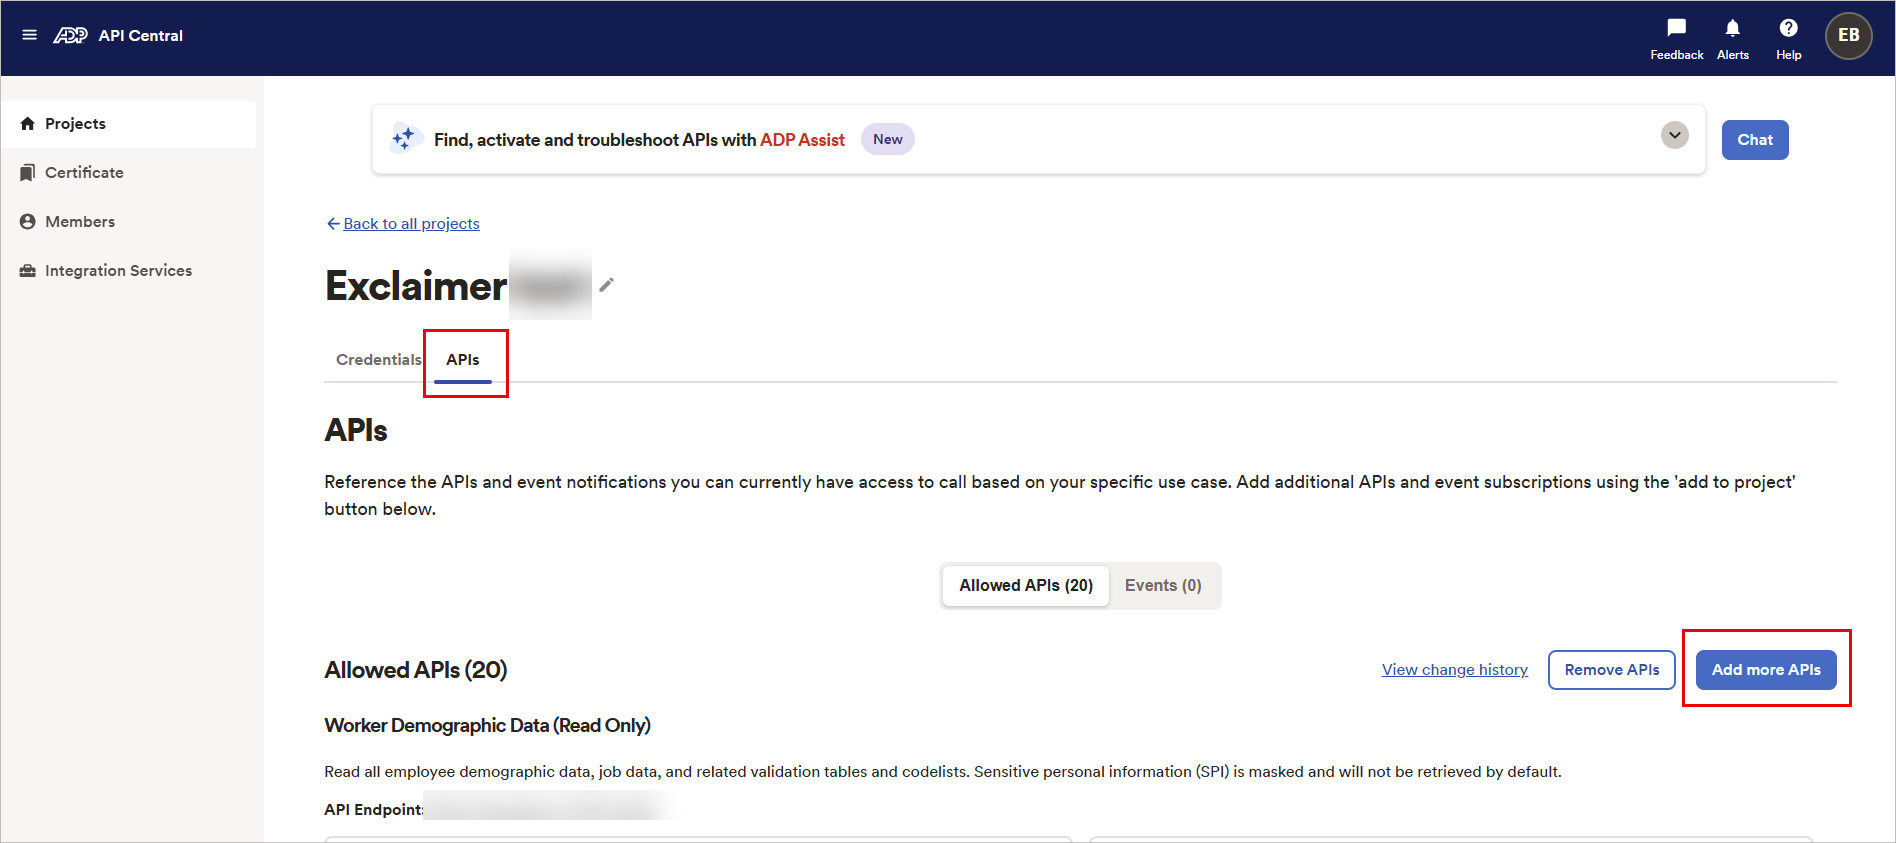
Example image of API Central. Select the APIs tab, then select the Add more APIs button.
- In the Search box, enter v2/workers.
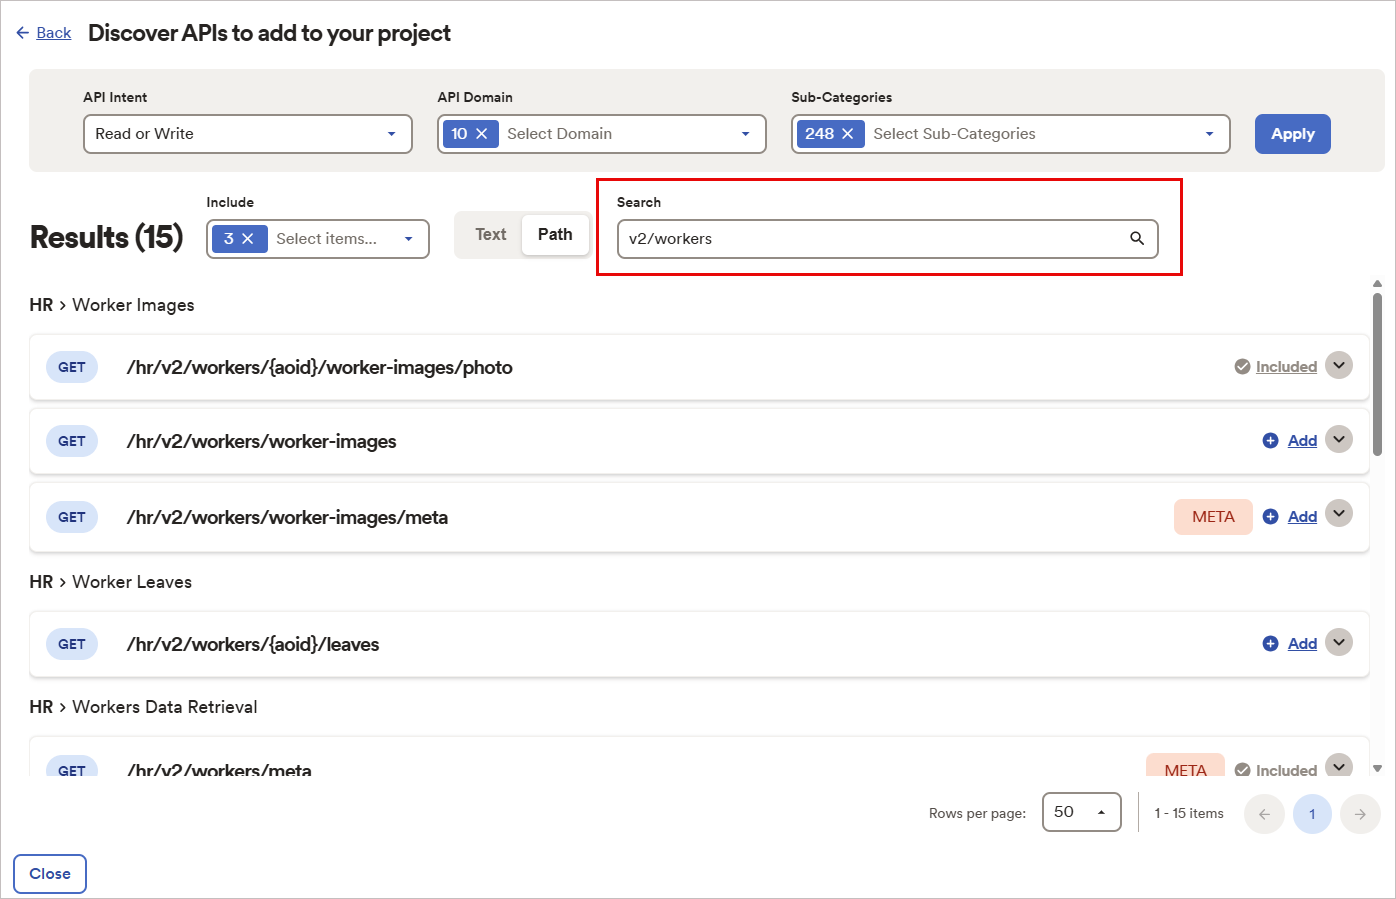
Example image of API Central. In the search box, enter v2/workers.
- Select Add against the required API scopes.
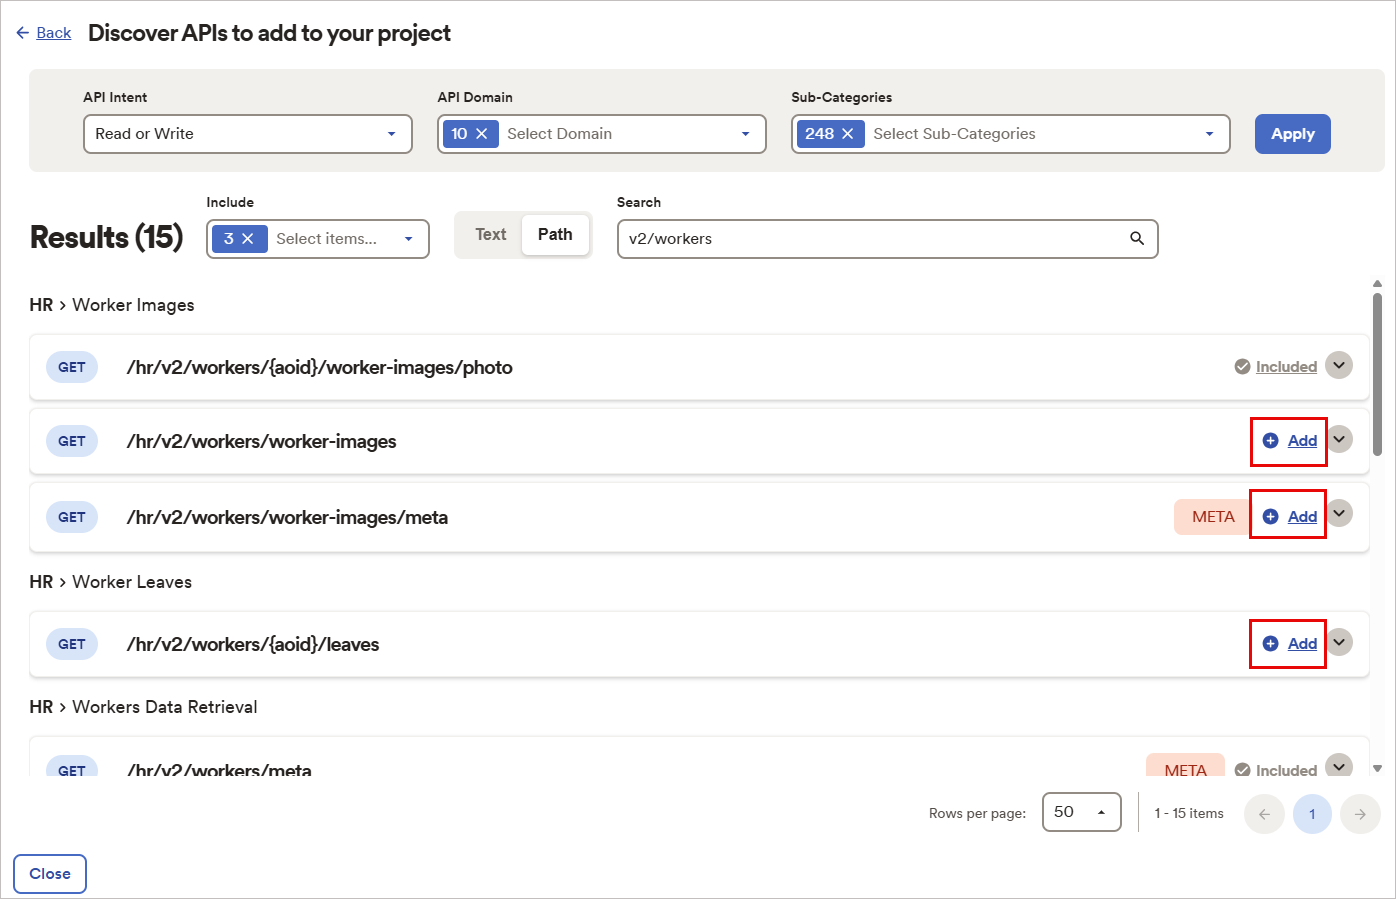
Example image of API Central. Select Add against the API scopes.
- Select Commit to Project to save the changes.
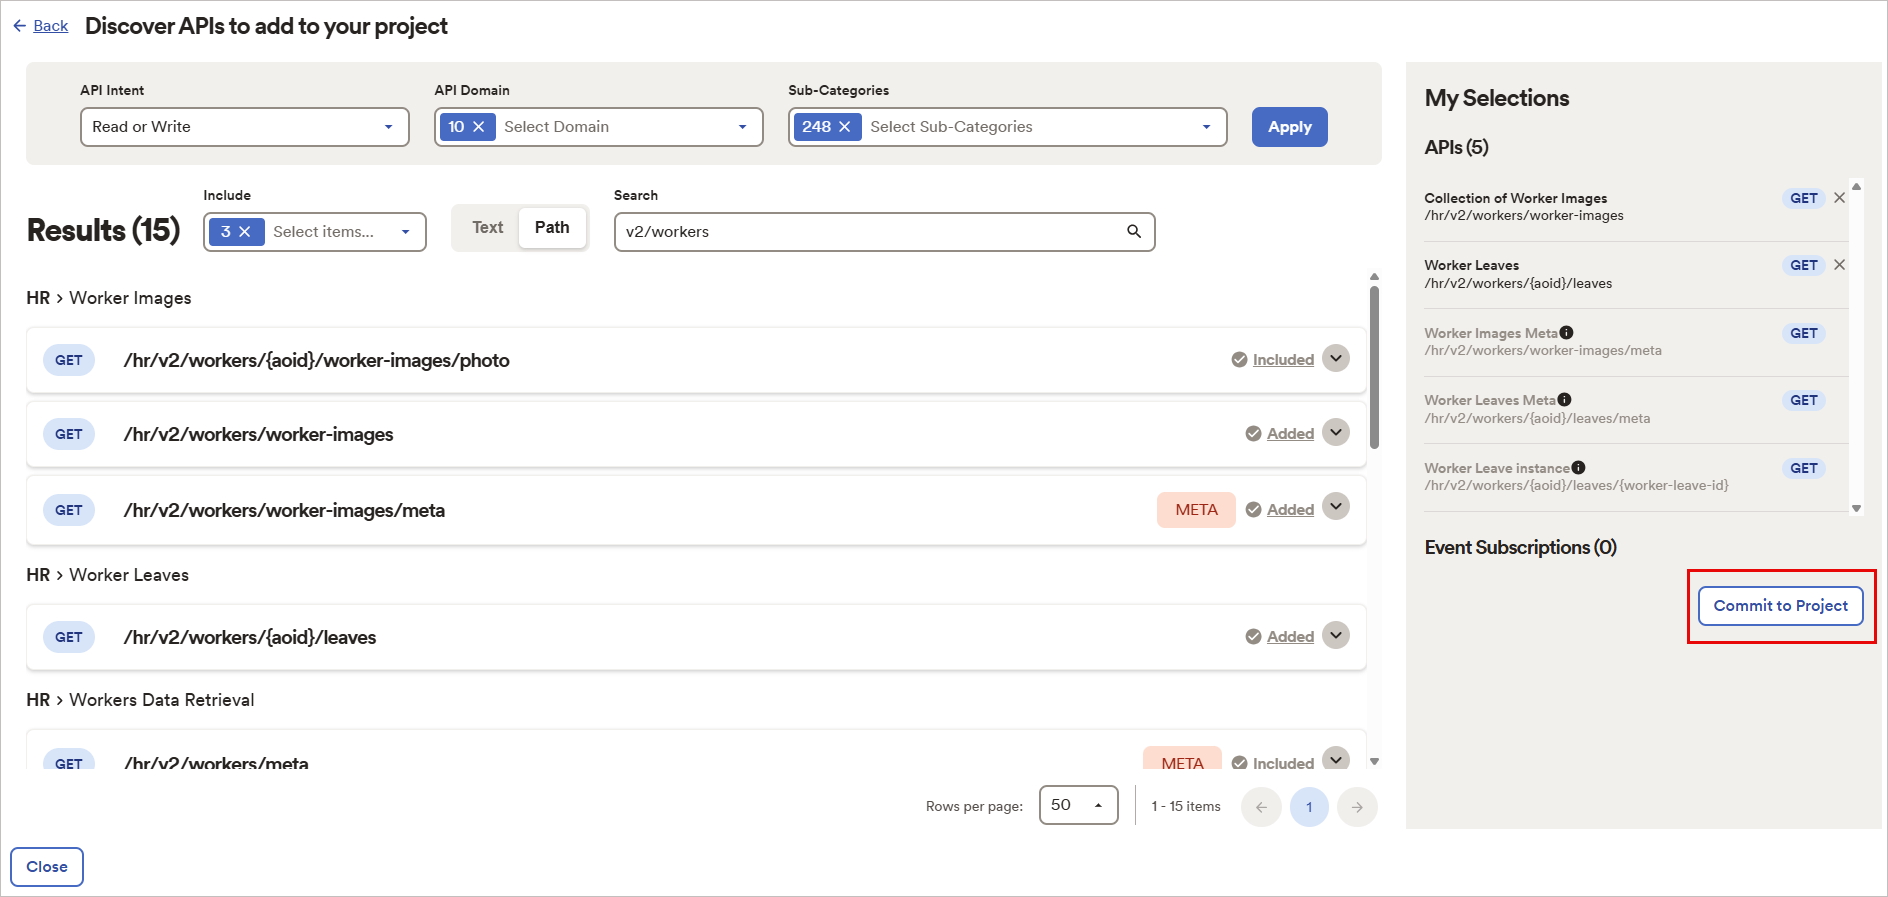
Example image of API Central. Select the Commit to Project button.
- Try connecting again.
To get your Client ID and Secret:
-
Once the project is created, select View Project.
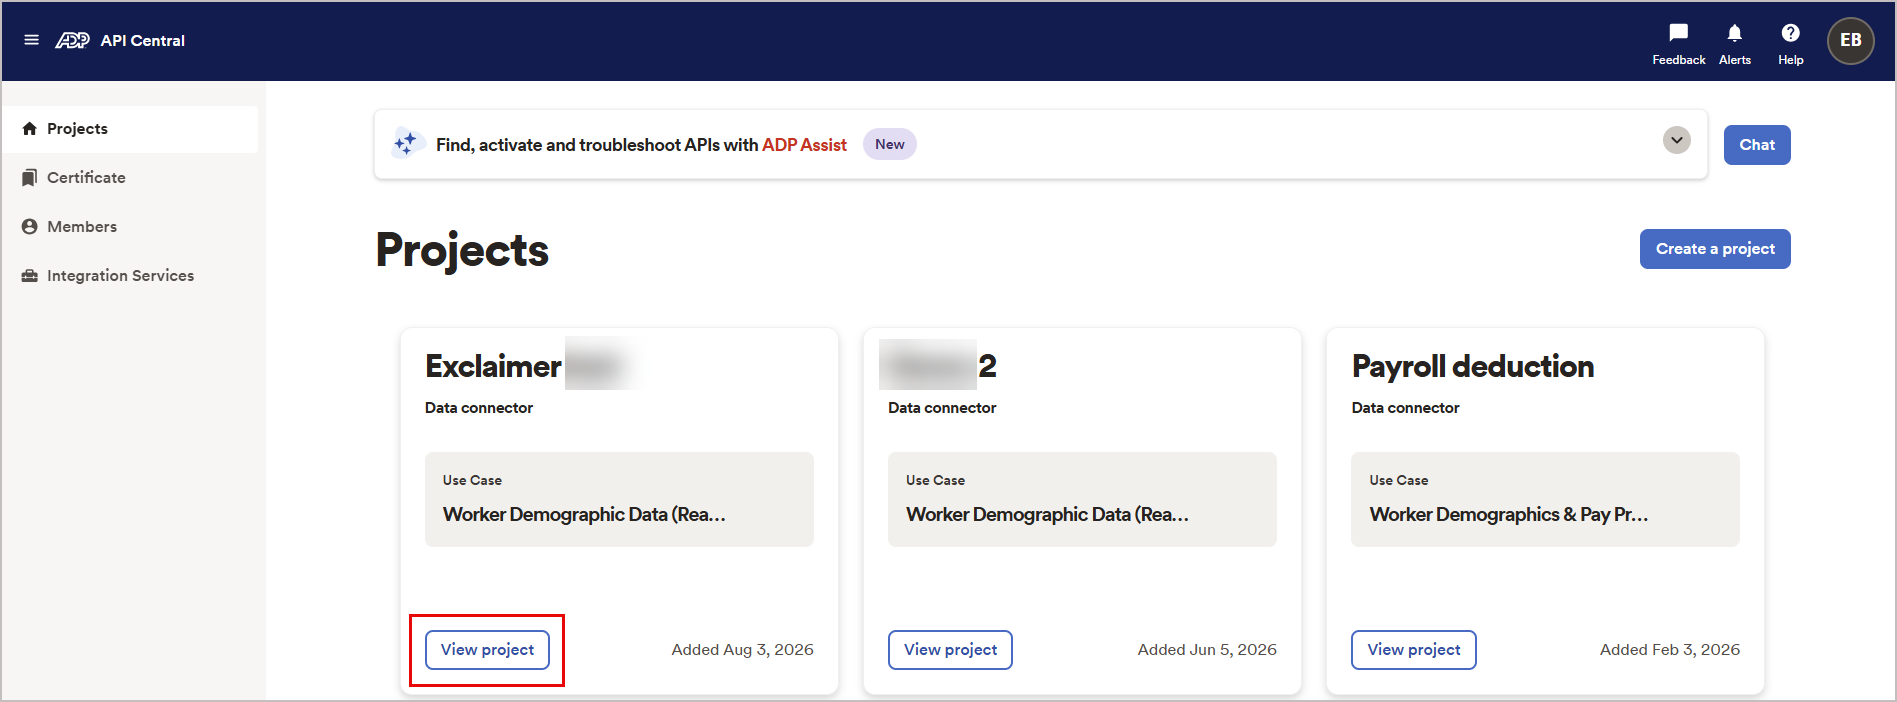
Example image of API Central. Select the View project button.The project details are displayed. By default, the Credentials tab is selected.
-
Scroll down and copy the Client ID.
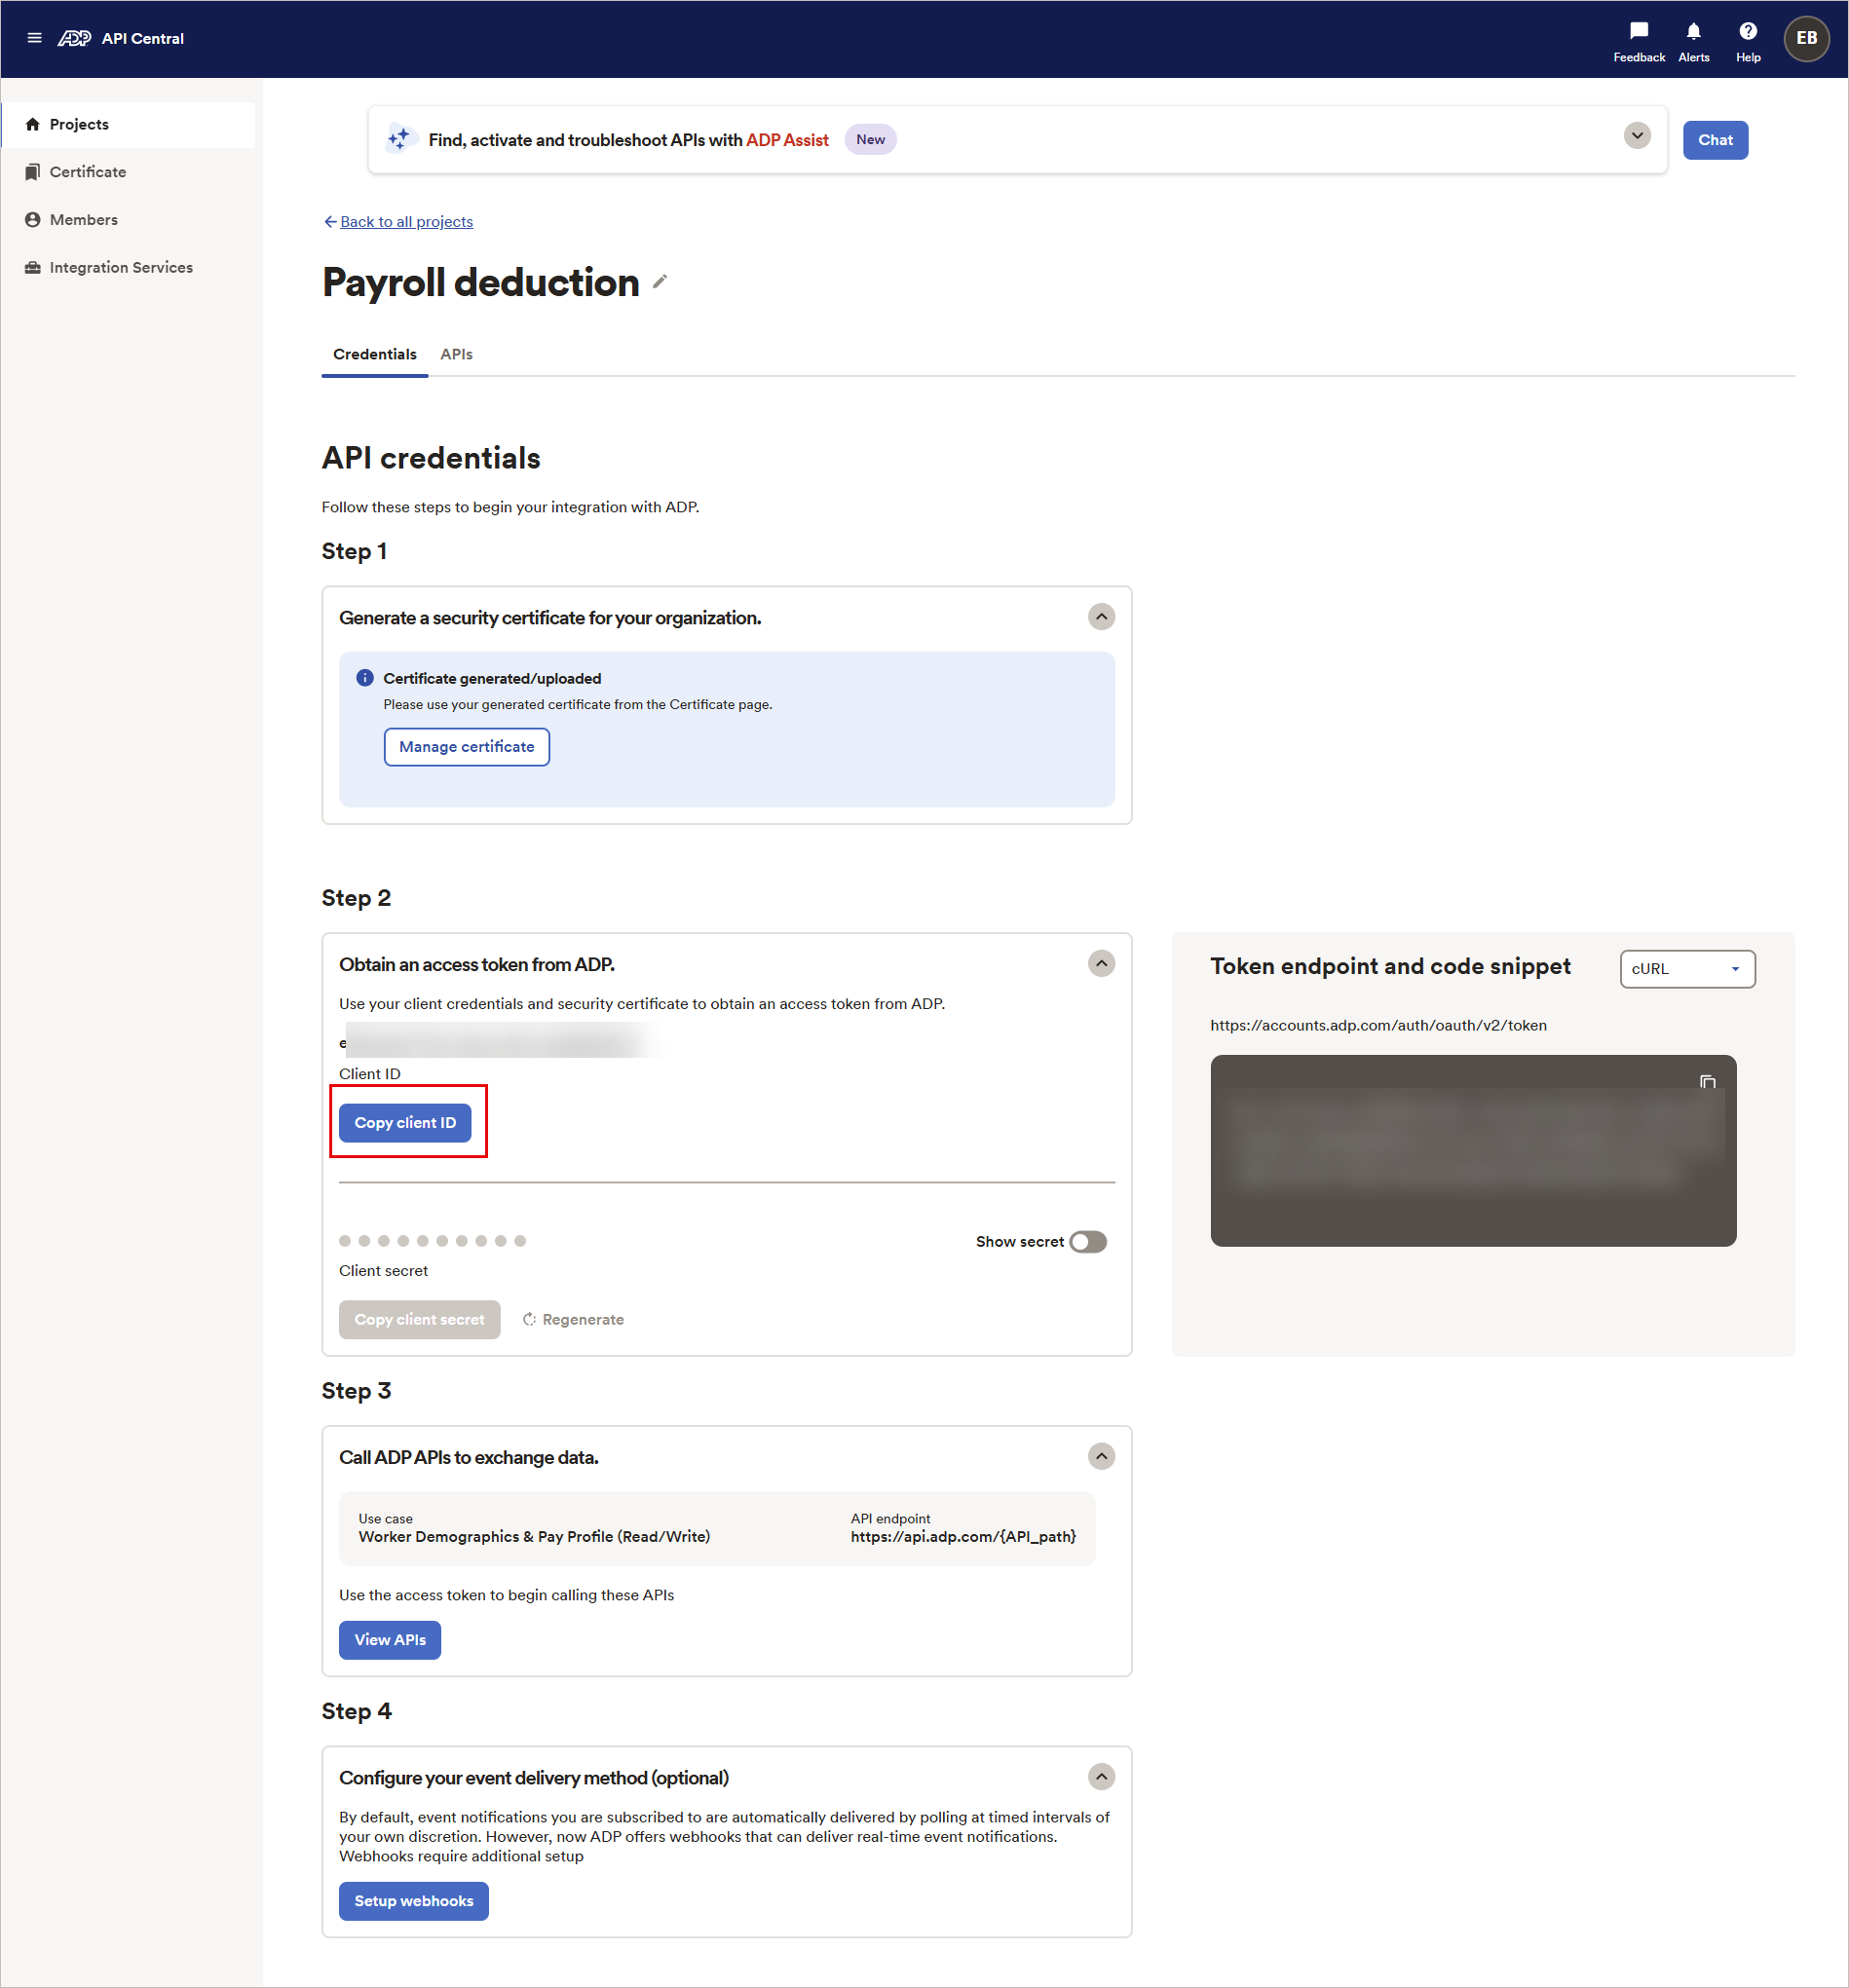
Example image of API Central. Select the Copy client ID button.
NOTE: The Client ID in the screenshot are for example purposes only. Extract your own Client ID. - Enable Show Secret to reveal the client secret.
-
Select Copy client secret.
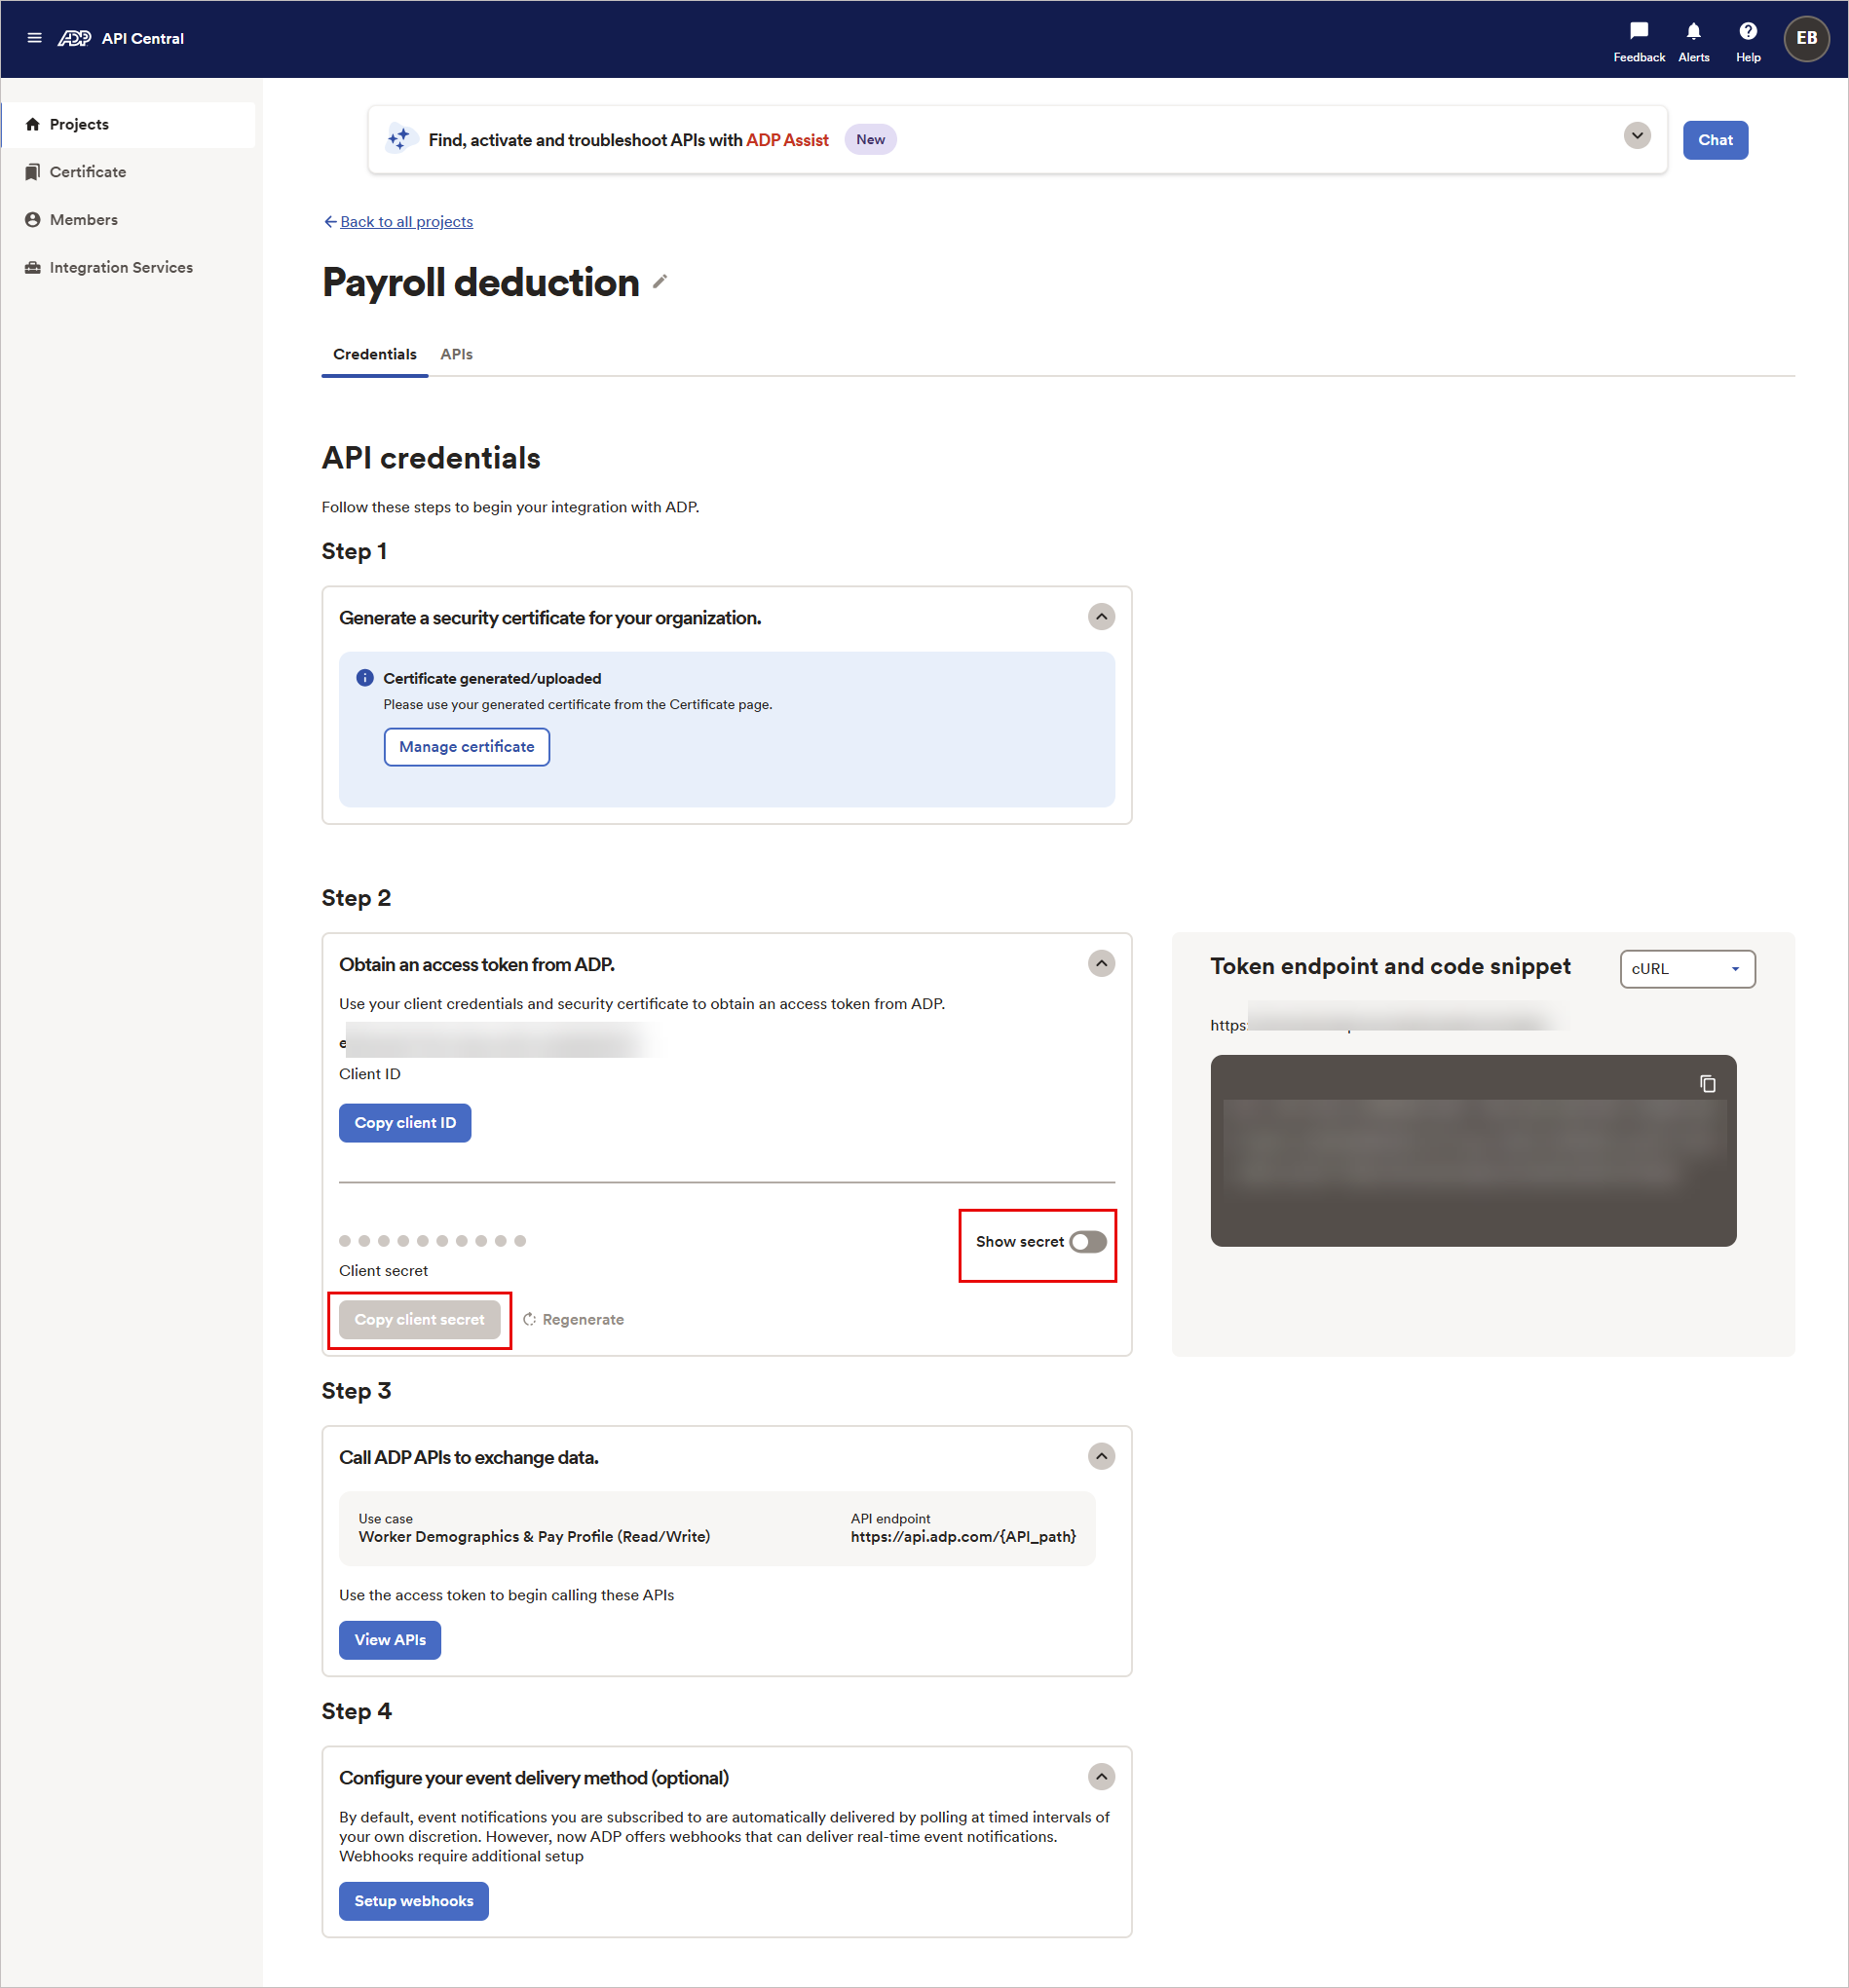
Example image of API Central. Select the Copy client secret button.
NOTE: The Client Secret in the screenshot are for example purposes only. Extract your own Client Secret.TIP! Record the Client ID and Client Secret securely. They are required for the integration.
To request an ADP certificate:
- From the menu sidebar, select Certificate.
- Select Request certificate.
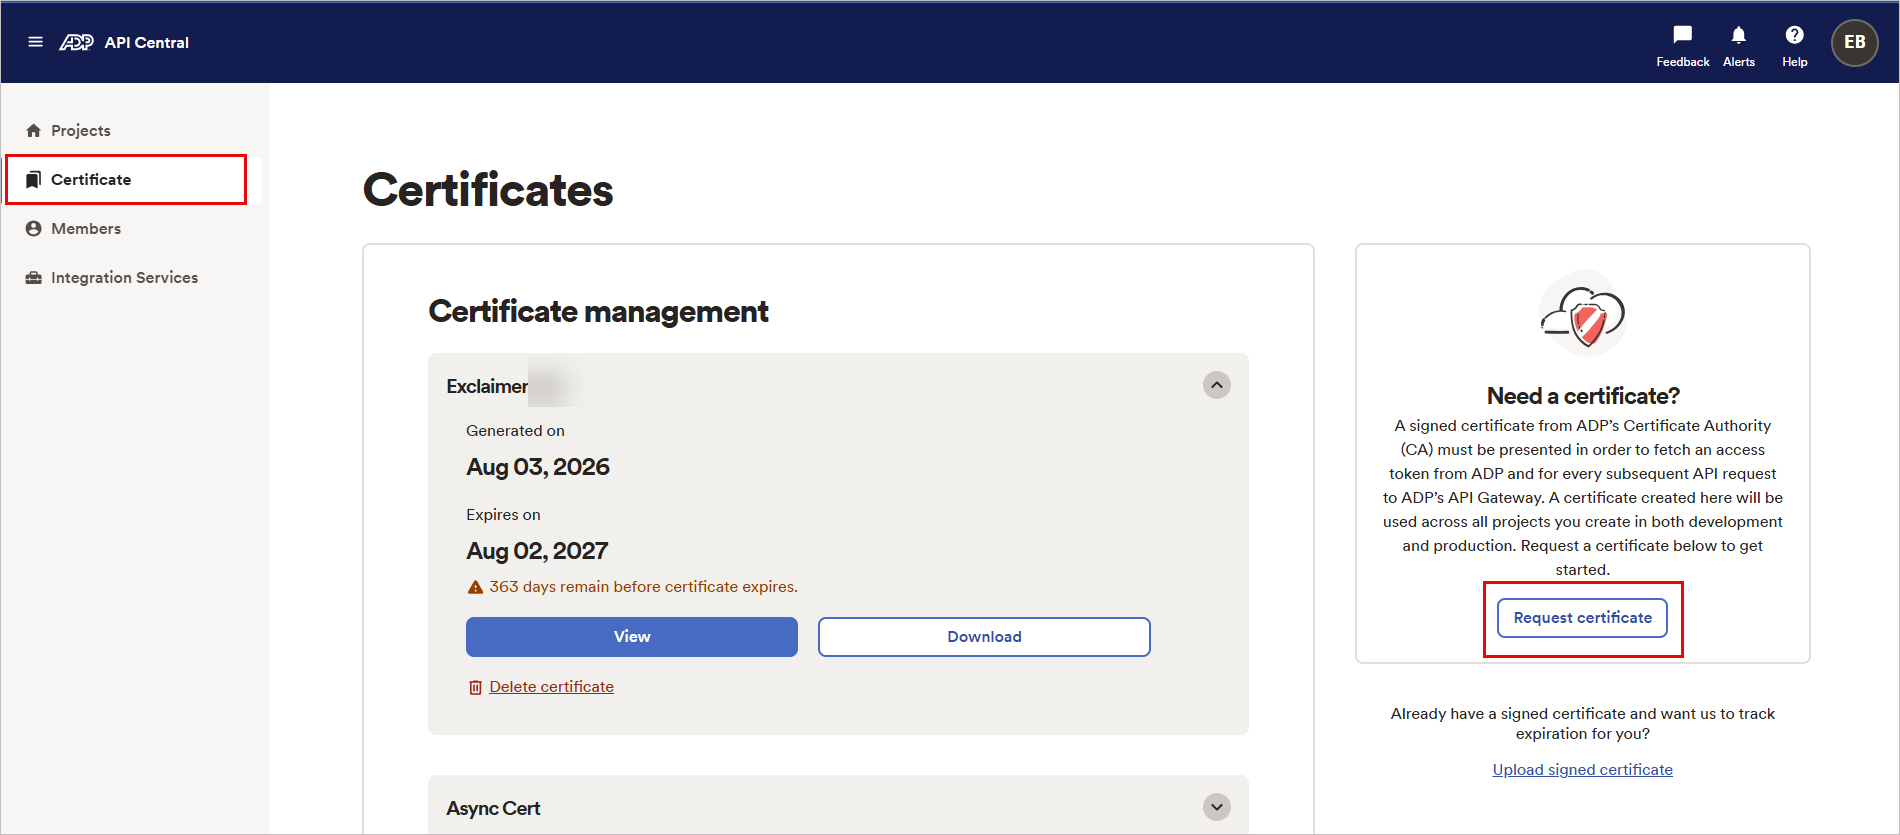
Example image of API Central. Select the Request certificate button.
The Request new security certificate window is displayed.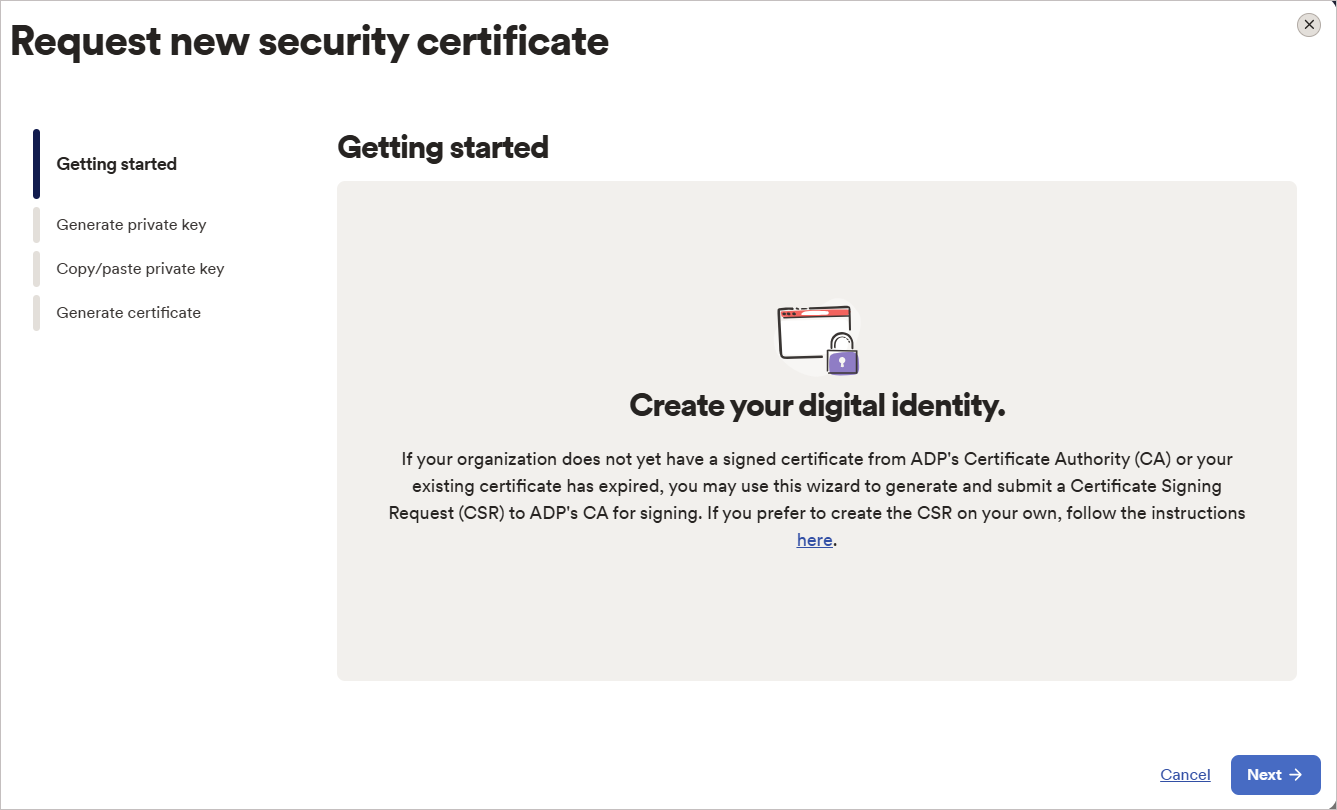
Example image of API Central showing Request new security certificate.
- Select Next.
- Enter the required details.
- Select Next.
-
Copy the Private key, including the Begin Private Key and End Private Key.
WARNING! You must include the -----BEGIN PRIVATE KEY----- and -----END PRIVATE KEY----- lines when copying the private key. Omitting them will prevent the connection from completing.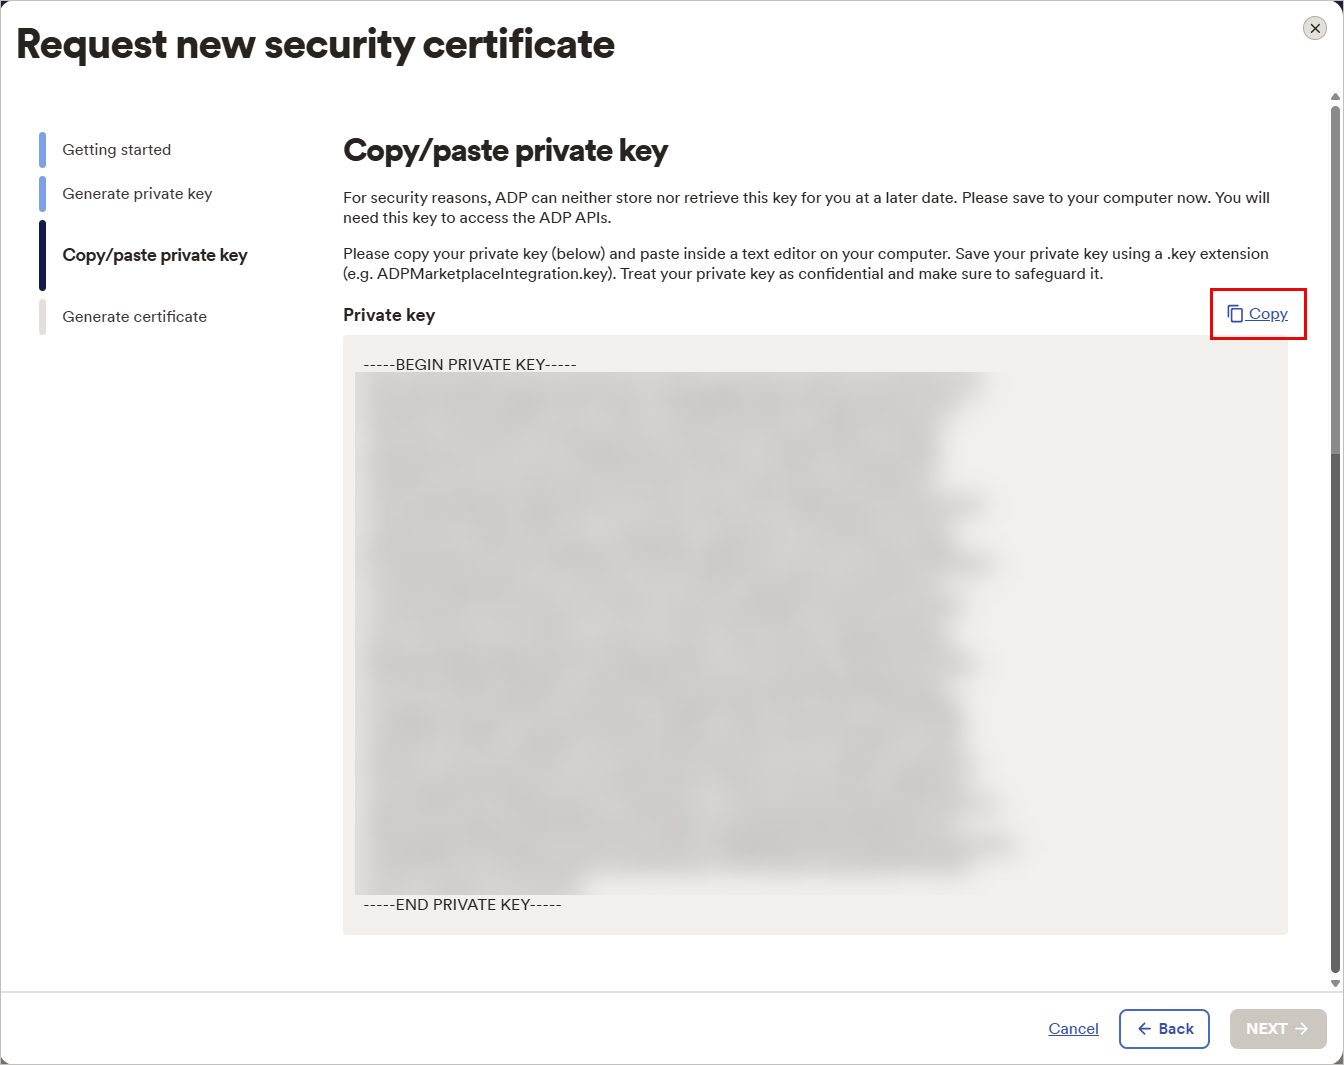
Example image of API Central. Select the Copy button.
NOTE: The Private Key in the screenshot is for example purposes only. Extract your own Private Key.TIP! Copy the Private Key securely. This will be required for the integration. -
Select NEXT.
The NEXT button is enabled only after the Copy button is selected.
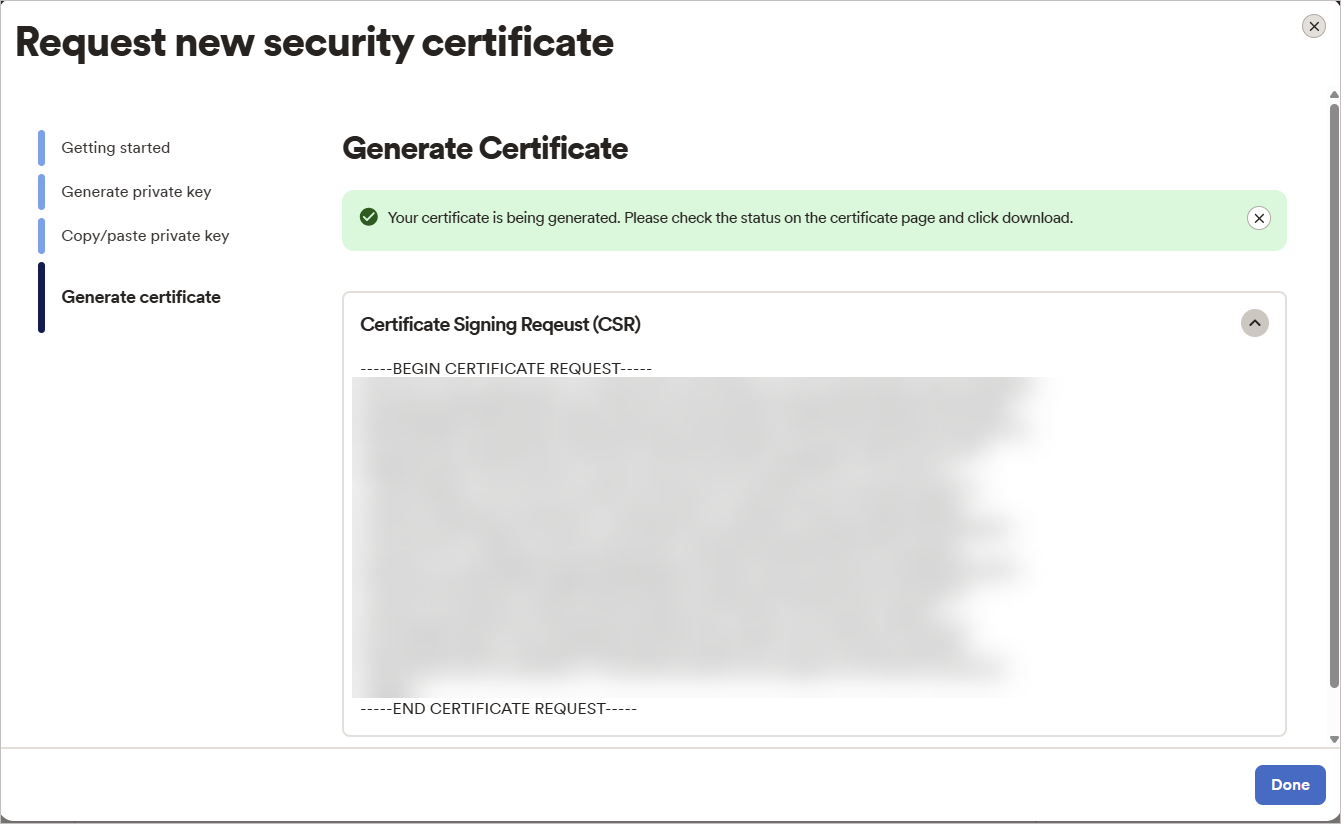
Example image of API Central, the Generate Certificate window.
To retrieve your certificate:
-
Once the certificate starts generating, select Done.
Example image of API Central, the Generate Certificate window.This closes the request wizard and returns you to the Certificates page.
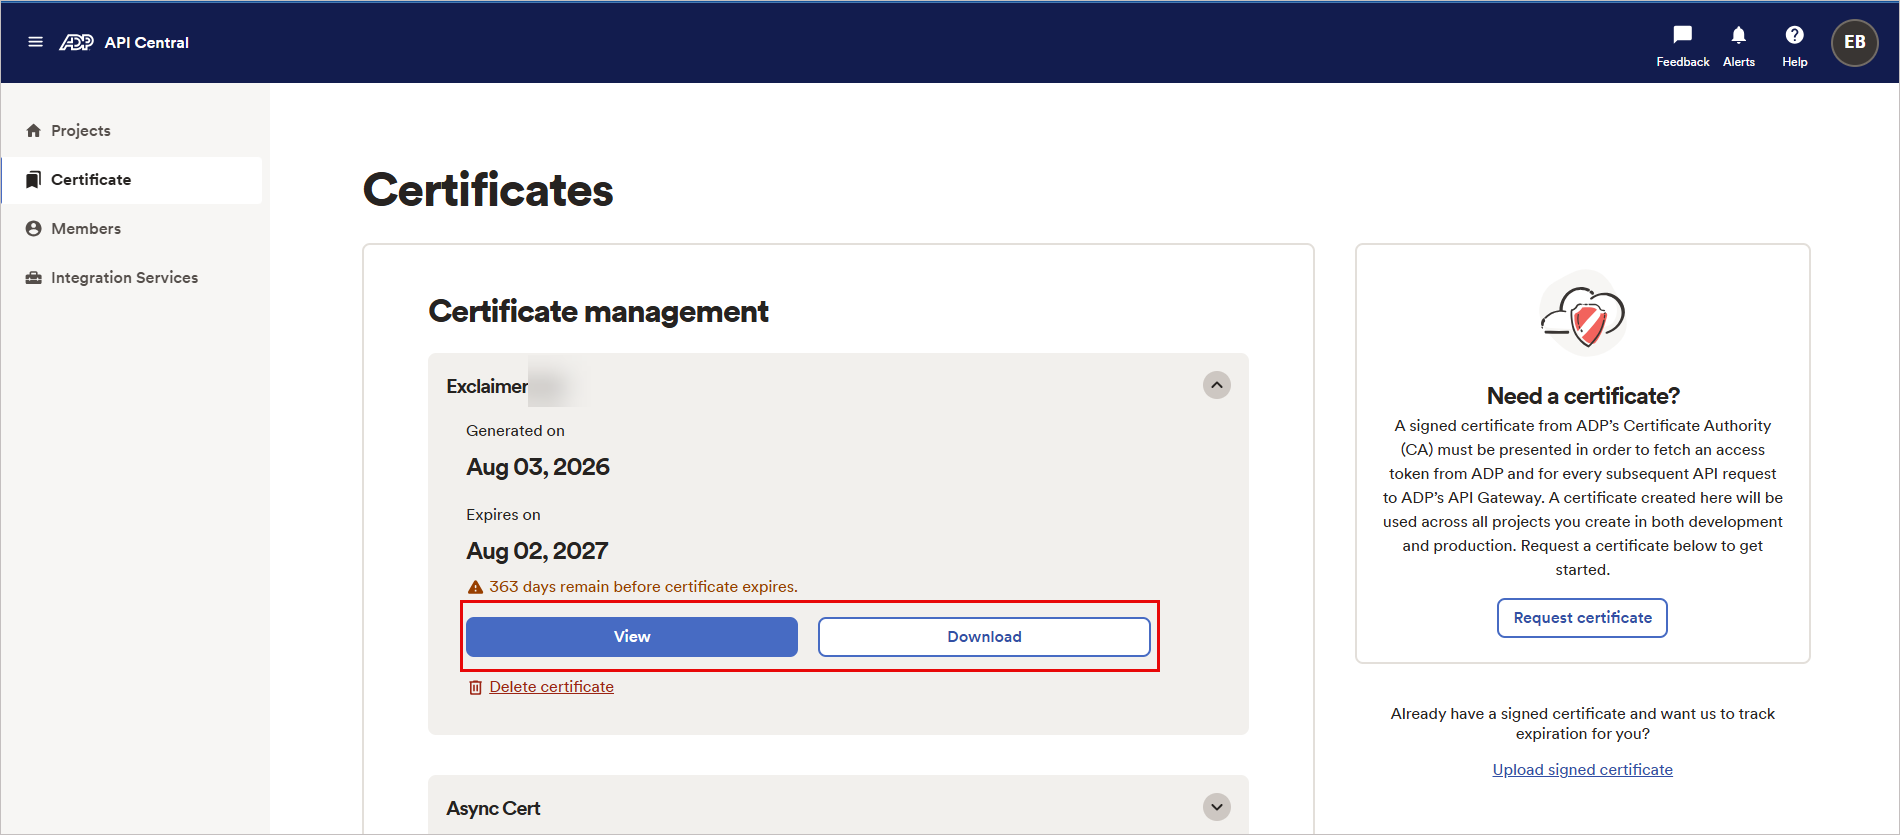
Example image of API Central. Certificates window, select the View or Download buttons.
- Select View to view the certificate. Select Copy to copy the certificate.
-
Select Download to save a local copy for future reference.
TIP! Keep the details securely. This will be required for the integration.
Access the ADP Workforce Now integration in Exclaimer
To access the ADP Workforce Now integration:
-
From the header bar, select the cogwheel icon, then select Sender Management.
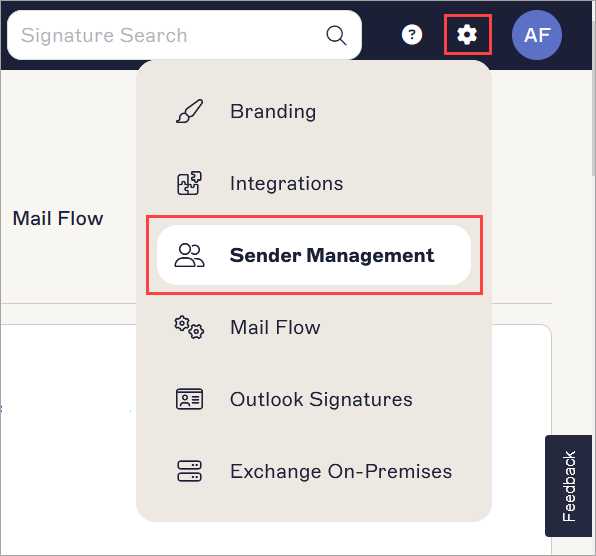
Example image is for a Microsoft 365 subscription and shows the Settings menu.
- Navigate to the Enable HRIS access section.
- From the drop-down, select ADP Workforce Now.
Connect Exclaimer to ADP Workforce Now (Exclaimer)
• Use an Exclaimer Pro subscription.
• Allow the required Bindbee domains in your network. These domains must load in the browser for the connection window to work: cdn.bindbee.dev and *.bindbee.dev to cover additional subdomains used during the connection flow (for example, API callbacks and authentication redirects).
Have the following ADP Workforce Now details ready:
• Client ID
• Client Secret
• Certificate details and private key (including header/footer lines)
To connect to your HRIS to allow Exclaimer to synchronize user contact details:
- From the drop-down list, select ADP Workforce Now.
- Select Connect.
An authorization window is displayed.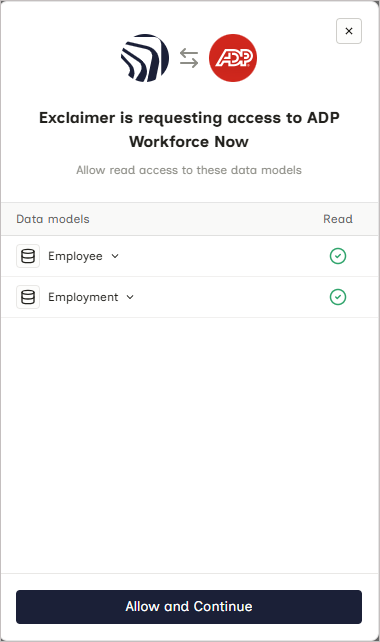
Example image in Exclaimer when trying to connect to the ADP Workforce Now system.
- Select Allow and Continue.
- Enter your Client ID and Client Secret.
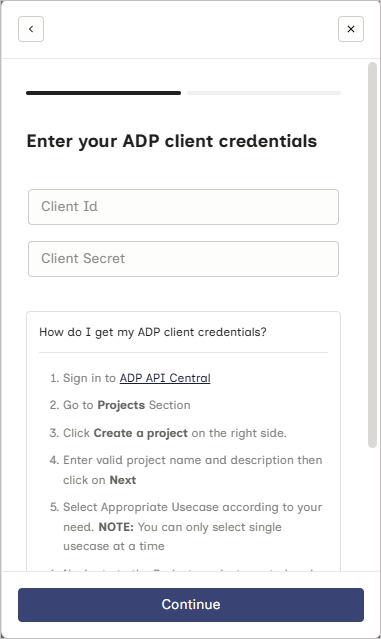
Example image in Exclaimer when trying to connect to the ADP Workforce Now system. Enter your Client ID and Client Secret.
- Select Continue.
-
Enter the Certificate details and Private Key (including the header and footer lines).
WARNING! You must include the -----BEGIN PRIVATE KEY----- and -----END PRIVATE KEY----- lines when copying the private key. Omitting them will prevent the connection from completing.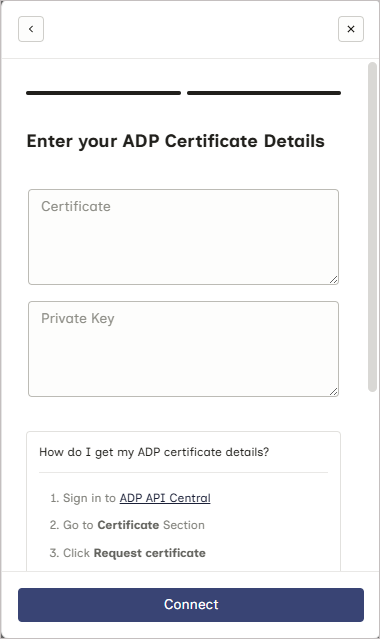
Example image in Exclaimer when trying to connect to the ADP Workforce Now system. Enter your certificate details and Private key.
-
Select Connect to complete the integration between Exclaimer and ADP Workforce Now using Bindbee.
WARNING! Keep the window open until the connection is complete. If you close it too soon, the connection may not finish setting up, and it may not appear as connected in Exclaimer.If you try to connect to the ADP Workforce Now again, you may see a message saying that the connector already exists. If this happens, raise a Support ticket so the team can assist you.
- Once a connection is established, the status displays as Connected in Exclaimer.
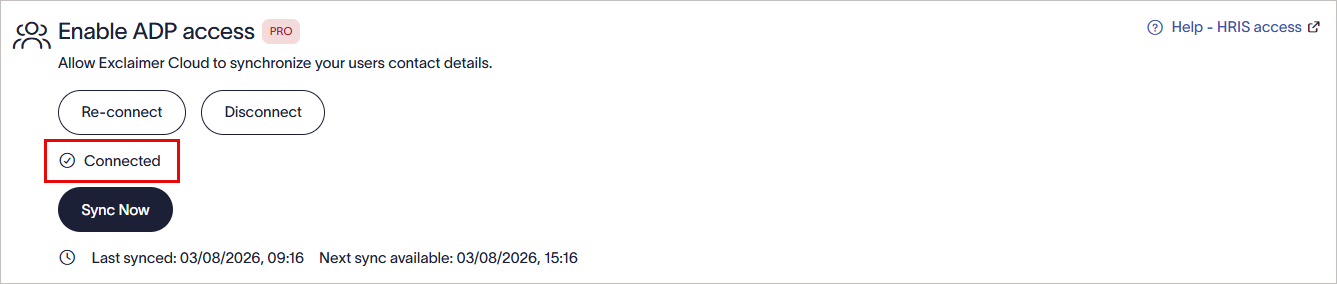
Once a connection is established with the ADP Workforce Now system, the Connected text is displayed within Exclaimer.
Configure permissions in ADP Workforce Now
To configure permissions so employee data can sync:
• Admin access to ADP Workforce Now.
- Log in to ADP Workforce Now.
- Select the Setup menu, then within Security, select Access Permissions.
- Select Manage Profiles.
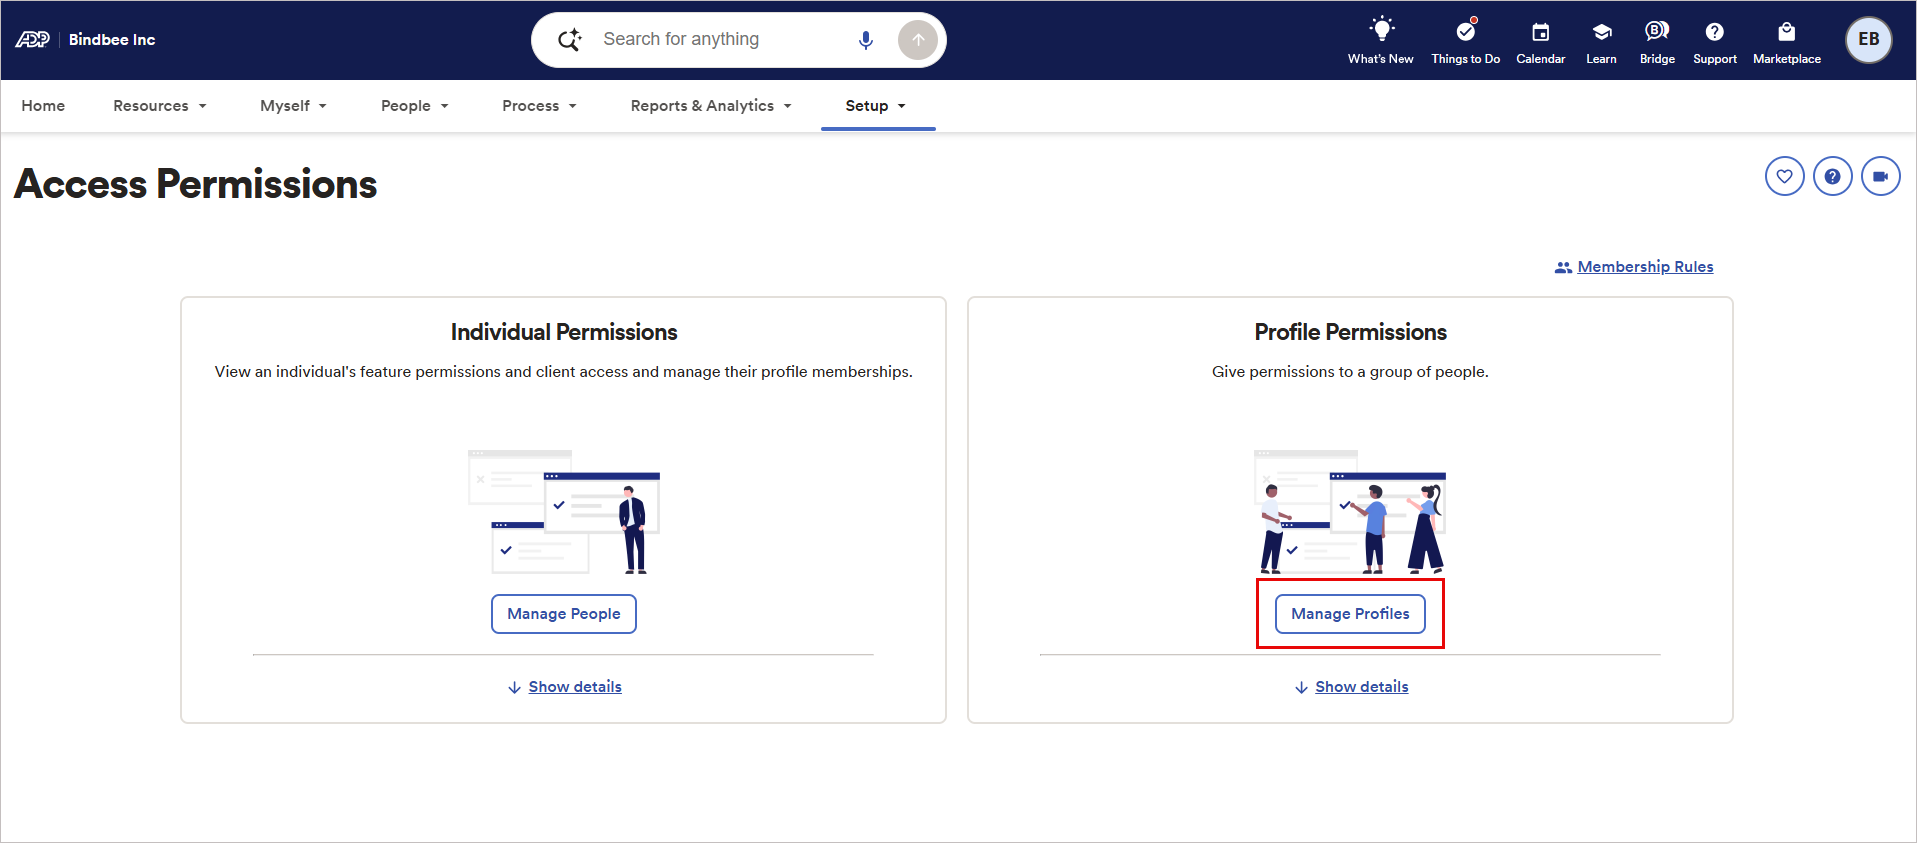
Example image of the Access Permissions screen. Select the Manage Profiles button.
- Find the profile created for your API Central project. You can do a search as well.
- Select the profile.
- Select Menus And Features. Assign the appropriate permissions. Navigate through the tabular feature list and uncheck all fields that are not required.
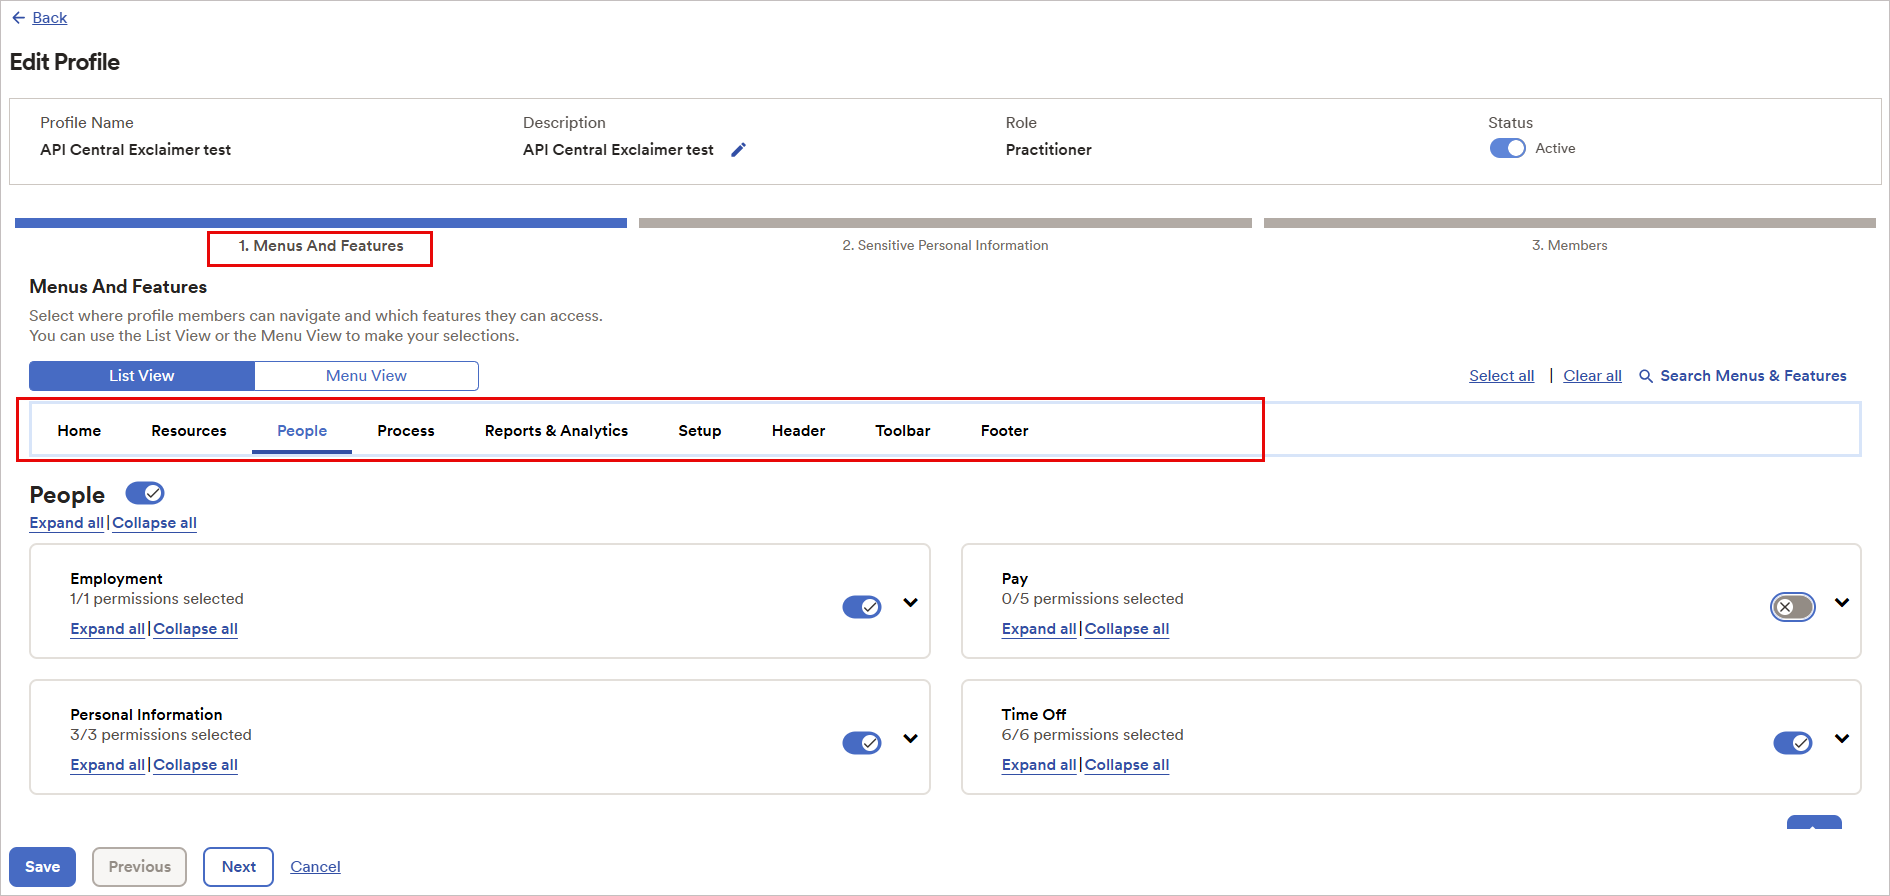
Example image showing the Menus and Features tab.
- Save these settings.
The data should start syncing shortly.
Manage your ADP Workforce Now connection (Exclaimer)
Follow the options to manage your ADP Workforce Now connection:
To re-connect to the ADP Workforce Now system:
-
Select Re-connect.
A message is displayed that reconnecting will remove your existing connection to ADP Workforce Now, and any data will no longer be available, and a new connection flow will start automatically.
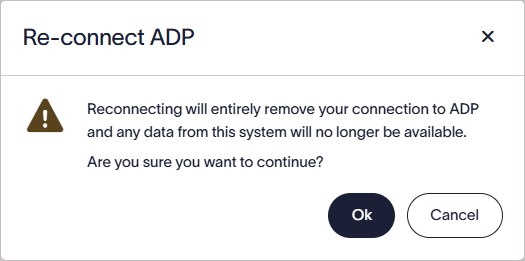
Select OK to reconnect to the ADP Workforce Now system.
- Select OK to continue.
To disconnect from the ADP Workforce Now system:
-
Select Disconnect. This removes your connection and any synced data.
A message is displayed that disconnecting will entirely remove your connection to ADP Workforce Now, and any data from the system will no longer be available.
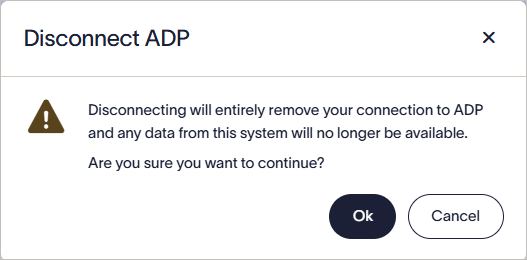
Select OK to disconnect from the ADP Workforce Now system.
- Select OK to continue.
ADP Workforce Now connectors automatically synchronize data on a predefined schedule.
To run a manual sync to immediately update employee data in Exclaimer:
- Select Sync Now.
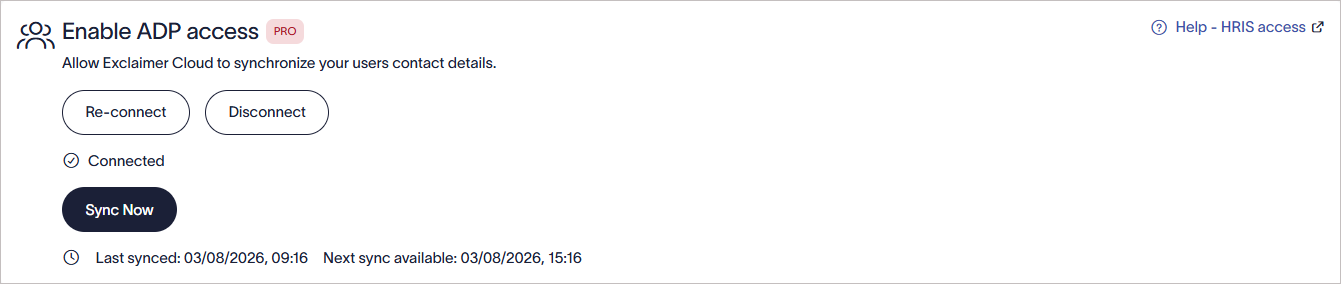
Select Sync Now to start a manual sync.
Troubleshooting
If you receive the following error:
This usually indicates that the required API scope/access has not been enabled for the client application. Complete Step 2: Add v2/workers to the API list, then try connecting again.
If the authorization window does not appear in Exclaimer:
- Ensure the following domains are allowlisted in your network or browser security tools: cdn.bindbee.dev and *.bindbee.dev.
- Verify that browser extensions or content blockers are not preventing the page from loading.
- Refresh the browser and try again.
If you try to connect to ADP Workforce Now again and see a message saying the connector already exists, raise a Support ticket so the team can assist you.
If a scheduled or manual sync does not complete successfully:
- Confirm the connection still shows as Connected in Exclaimer.
- Verify the Client ID, Client Secret, and certificate have not expired or been revoked in API Central.
If the connection to ADP Workforce Now fails during setup, verify that:
- The Client ID and Client Secret are entered correctly.
- The certificate and private key have not expired or been revoked in API Central.
- The private key includes the full header and footer lines (-----BEGIN PRIVATE KEY----- and -----END PRIVATE KEY-----).
- The required v2/workers API scope has been added to the project in API Central.
- The correct use case was selected when the project was created in API Central.
If the connection fails after entering your certificate details, check that the private key was copied in full.
When copying the private key in API Central, you must include the header and footer lines shown below the key value:
-----BEGIN PRIVATE KEY-----
-----END PRIVATE KEY-----
If these lines are missing, return to API Central, copy the private key again in full, and re-enter it in Exclaimer.