
Scenario
You have configured Exclaimer for your Microsoft 365 tenancy. When you send an email, you find that it is not delivered, and you receive a Non-Delivery Report with a similar message:
Reason
When the Server-Side configuration runs in Exclaimer, mail flow settings, including mail flow rules, send and receive connectors, and a secure certificate domain, are created in Exchange Online. Once created, these settings should automatically replicate to every other Microsoft Exchange Online server in the cluster of servers to which your Microsoft 365 tenant belongs.
Usually, this replication occurs within a few minutes, and Microsoft recommends allowing one hour for such changes to replicate fully. Still, occasionally, these settings take a lot longer, or they fail to replicate entirely.
After an email is sent to Exclaimer for a signature to be applied, Exclaimer will route the email back to the same Microsoft 365 tenant using the MX record for the domain. Any Exchange server in the cluster can try to accept the email back from Exclaimer.
If the server that tries to accept the email back from Exclaimer does not have a copy of the mail flow settings configured by Exclaimer - then it cannot accept the message as it does not meet the criteria imposed by Microsoft Exchange Online's default configuration of not allowing the relaying of emails through servers where the recipient doesn't belong to the organization. The server will reject the email with the error 'Relay Access Denied'.
Resolution
Please click on the required options listed below to go through the detailed description:
- Log into the Exclaimer portal (portal.exclaimer.com) and Launch your subscription.
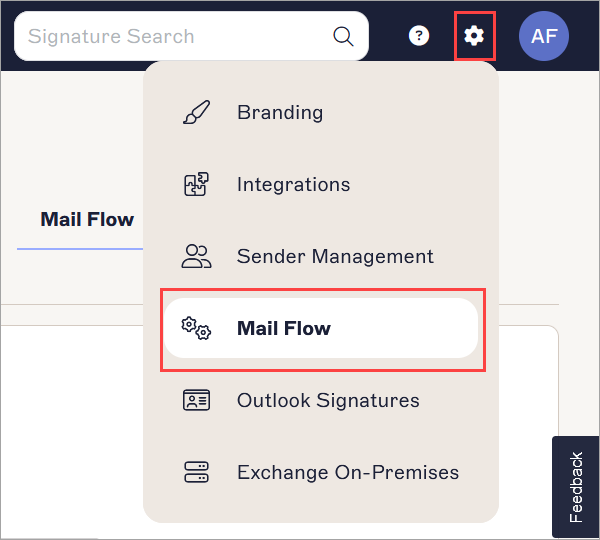
- Open the Settings menu by selecting the cogwheel icon, then select Mail Flow.
- In the right-hand pane, under Mail Routing Domain, are all the relevant options.
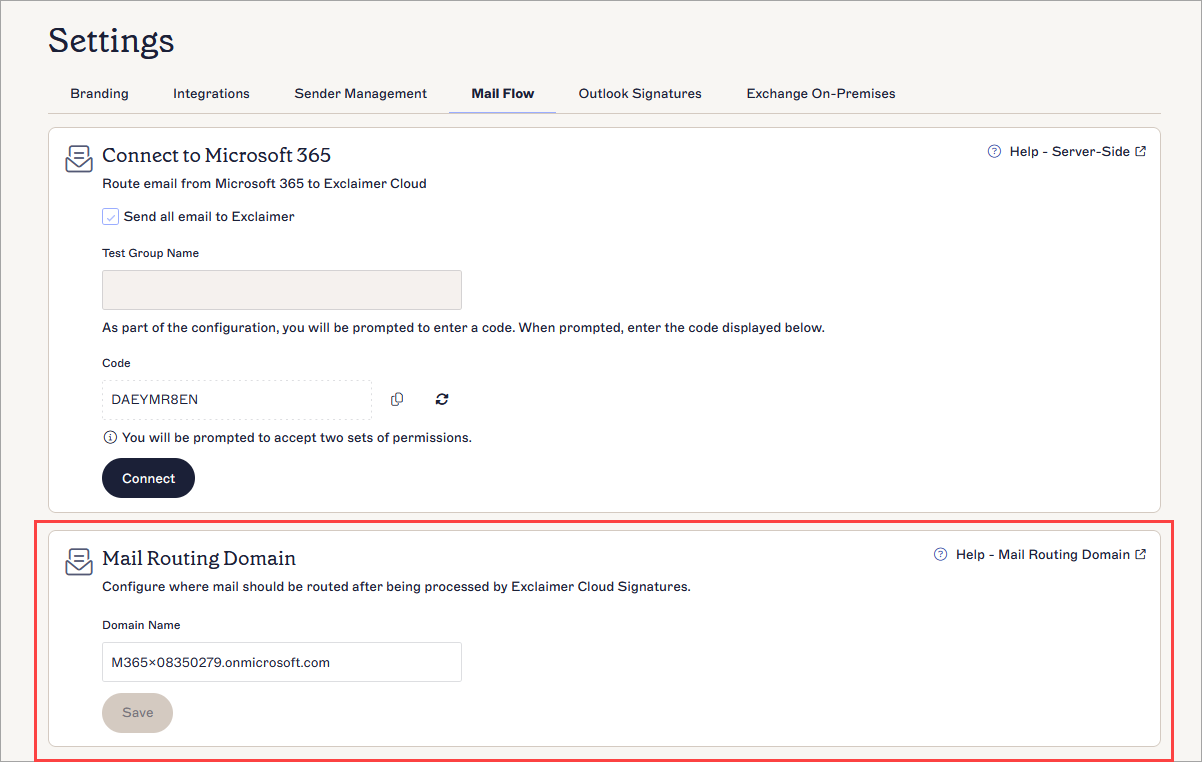
- In Domain Name, enter the domain where the email should be routed after being processed by Exclaimer.
We recommend: Use the .onmicrosoft.com domain which can be located in the Domains list in the Microsoft 365 Admin Center: Microsoft 365 Admin Center. This setting is important, and an incorrect domain can result in mail flow issues.
Example: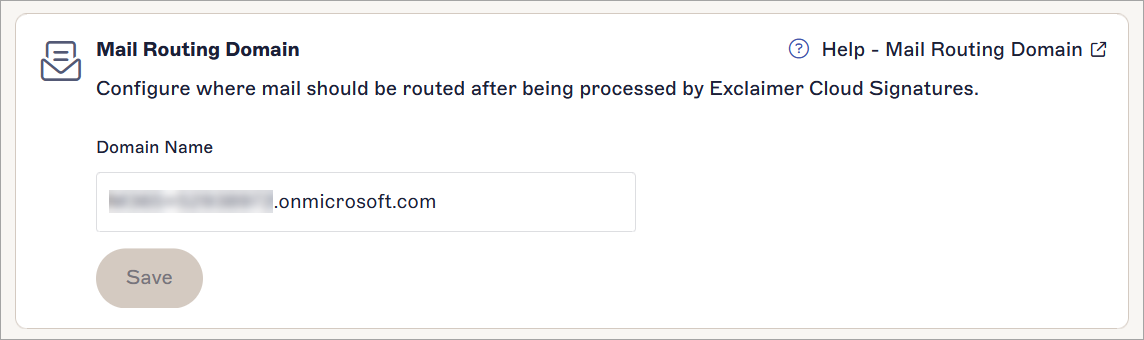
NOTES:
Email is routed back to a mail server identified from the specified domain's MX DNS record.
To ensure that the email is routed successfully after being processed by Exclaimer, it is necessary to specify a domain with an MX record that points towards a Microsoft Exchange Online server for your organization.
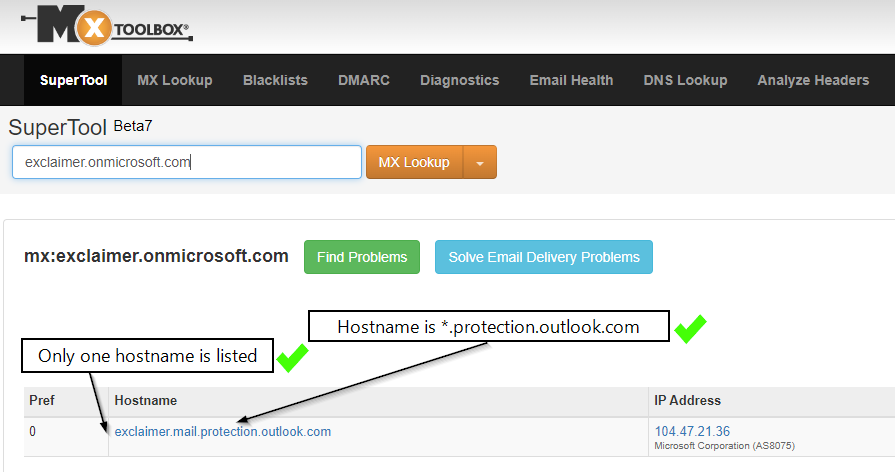
The MX record for the Domain name (in the Mail Routing Domain settings) should specify a single Exchange Online Server for your Microsoft 365 tenancy.
To check the MX record for your own Domain name, use a DNS lookup tool, such as MXToolbox.
Example showing Exclaimer's domain:
- Click SAVE to save your mail routing settings.
To modify the mail flow rule:
- Sign in to the Exchange Online admin portal (https://admin.exchange.microsoft.com) as an Administrator.
The Exchange admin center is displayed.
- From the left-hand navigation menu, select Mail flow, then select Rules.
- In Rules, select the Identify messages to send to Exclaimer Cloud rule.
- Click Edit rule conditions.
- In the Apply this rule if section, click the add button (+).
Example:
- Specify a condition to limit the rule to one or more test users.
For example, The sender is a member of this group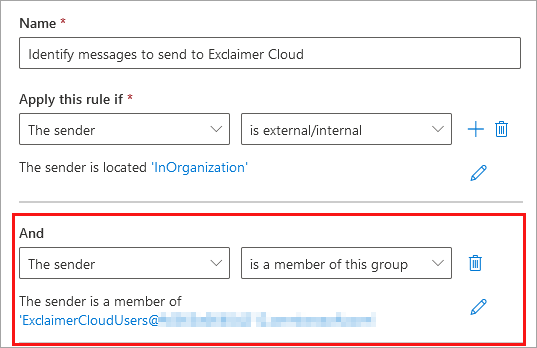
- Click Save.
We recommend attempting Step 4 - Recreate the mail flow settings after at least one hour has passed since last creating the mail flow settings.
- Log in to the Microsoft 365 admin center.
- Navigate to Settings > Domains (https://admin.microsoft.com/Adminportal/Home?source=applauncher#/Domains).
- Locate and select the domain ending smtp.exclaimer.cloud or smtp.excl.cloud.
- Click Remove domain.
- Confirm that you want to remove the domain.
- Log into your Exclaimer subscription.
- From the header bar, select the cogwheel icon to open the Settings menu, then select Mail Flow.
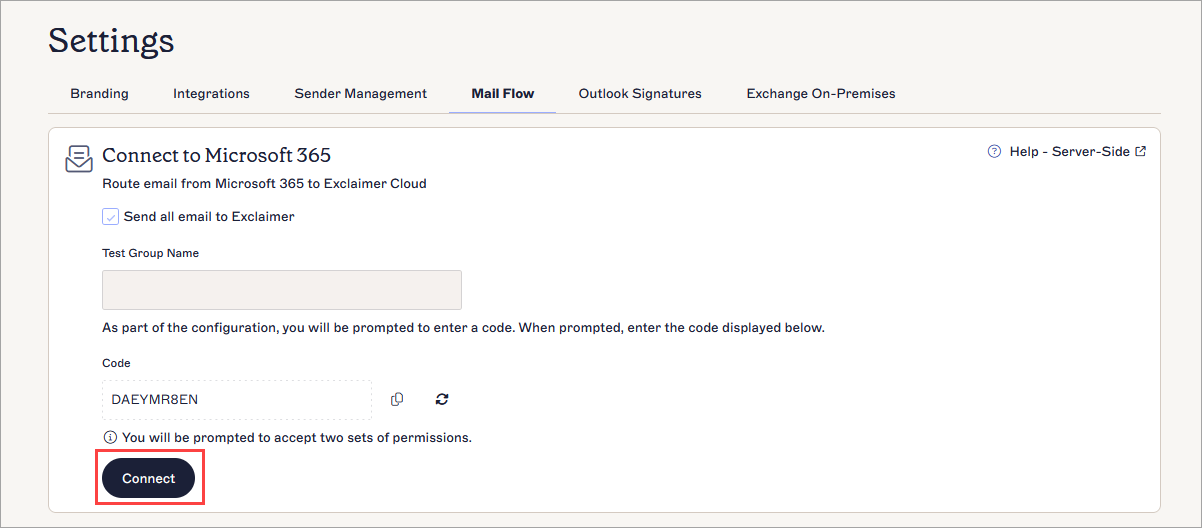
- If you have limited the scope of the Exclaimer Mail flow rule to a group as part of step 2 above, then untick Send all email to Exclaimer, then enter the group name in Test Group Name.

NOTE: If you created a new group for this purpose, you would need to start a manual data synchronization before proceeding with these steps.
- From the right-hand pane, under Connect to Microsoft 365, click Connect.
- Complete the setup as per the instructions here: Apply to email from all devices including mobiles for Microsoft 365 subscription
If you have already attempted to force the replication of mail flow settings by re-running the connection wizard and have waited for several hours for the replication to take place and are still seeing the
We recommend you raise a ticket with Microsoft Support requesting assistance replicating your mail flow settings. Microsoft Support agents previously have been able to force the replication for tenants by running a script on their side.
If you need more help with this issue or need input from Exclaimer for your Microsoft Support ticket, please raise a ticket with Exclaimer Support, and we will be happy to help.