
Scenario
You want to configure Exclaimer for Exchange On-Premises but you do not have an Entra ID or a Microsoft 365 subscription.
Resolution
If you do not have a subscription, you can create a free account and create a tenant. For more information, see Microsoft's documentation on creating a tenant.
Step 1: Create a free Entra ID tenant
To create a free Entra ID tenant:
- Sign in to your organization's Azure portal.
- From the Azure portal menu sidebar, select Microsoft Entra ID.
- Navigate to Entra ID > Overview > Manage tenants.
- Select Create.
- In the Basics tab, select the type of tenant you want to create. You can select one of the two options available: Azure Active Directory or Azure Active Directory (B2C).
- Select Next: Configuration to move on to the Configuration tab.
- In Organization name, enter your organization's name.
-
In Initial domain name, enter your domain name prefix.
NOTE: For more information, see Where can I find my .onmicrosoft.com domain name? - From the Country/Region drop-down list, select your country/region.
- Select Next: Review + create to review the entered information. If it is correct, select Create.
Step 2: Set up Microsoft Entra Connect (formerly Azure AD Connect) to use the tenant
Once you have created your tenant, you must set up Microsoft Entra Connect so your signatures become visible within the Entra portal. The tenant you created is automatically given Global Admin rights.
Follow these steps to set up Microsoft Entra Connect to use the tenant:
- Download Entra Connect.
-
Install Entra Connect.
NOTE: This must be installed on a domain-joined Windows Server 2012 or later.
For the full list of prerequisites, see Prerequisites for Entra Connect. - Connect your Entra Connect to your new tenant.
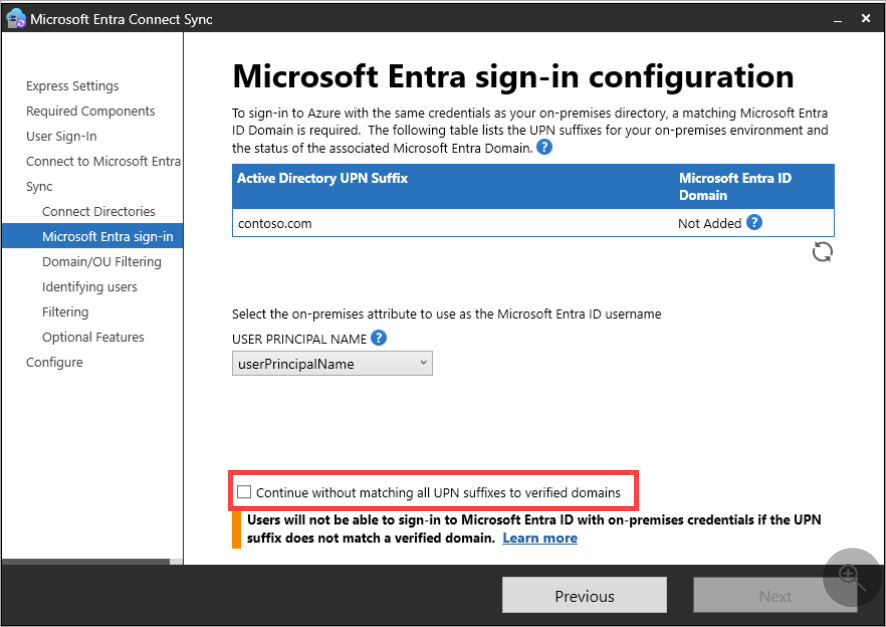
- Select the Continue without matching all UPN suffixes to verified domains checkbox.
- Complete the setup and wait for the data to sync.
- Select Exit to close the wizard.
Your signatures will now be visible within the Entra portal and you are ready to use Exchange On-Premises.
NOTE: If you need more than the Standard attributes (listed here) then enable the Directory Extensions feature in Entra Connect (formerly Azure AD Connect). For more information, see Enable and configure Directory Extensions in Microsoft Entra Connect.